
Related Manuals for IOGear GCMS1922


Summary of Contents for IOGear GCMS1922
- Page 1 User Manual 2-Port 4K Dual View DisplayPort Matrix KVMP with USB3.0 Hub and Audio GCMS1922 PART NO. M1731 www.iogear.com...
- Page 2 Microsoft Corporation. IOGEAR makes no warranty of any kind with regards to the information presented in this document. All information furnished here is for informational purposes only and is subject to change without notice. IOGEAR. assumes no responsibility for any inaccuracies or errors that may...
-
Page 3: Table Of Contents
Table of Contents Safety Instructions Conventions Introduction Package Contents Features Requirements Operating Systems Overview Hardware Setup Basic Operation Hotkey Operation Advance Configuration HSM (Hotkey Settings Mode) Summary Table Keyboard Emulation Firmware Upgrade Utility Troubleshooting Compliance Information Limited Warranty Contact... -
Page 4: Safety Instructions
Safety Instructions • Read all of these instructions. Save them for future reference. • This device is for indoor use only. • Follow all warnings and instructions marked on the device. • Do not place the device on any unstable surface (cart, stand, table, etc.). If the device falls, serious damage will result. -
Page 5: Conventions
• Position system cables and power cables carefully; Be sure that nothing rests on any cable. • Never push objects of any kind into or through cabinet slots. They may touch dangerous voltage points or short out parts resulting in a risk of fire or electrical shock. -
Page 6: Introduction
The GCMS1922 allows users to access two DisplayPort computers from a single USB Keyboard, USB mouse, and dual HDMI monitors. In addition to the front panel pushbutton and hotkeys, IOGEAR’s GCMS1922 offers mouse wheel switching as well as a remote port selector to change ports. -
Page 7: Features
• Support 7.1 HD audio through DisplayPort • Full bass response for high quality 2.1 channel surround sound systems • Power on detection – if a computer is powered OFF, the GCMS1922 will automatically switch to the next powered ON computer •... -
Page 8: Requirements
• Type-A USB Port • Audio Ports (optional) Cables We recommend using the included IOGEAR DisplayPort KVM cable sets, designed specifically to work with the GCMS1922 Note: The quality of the display is affected by the quality and length of the cables. -
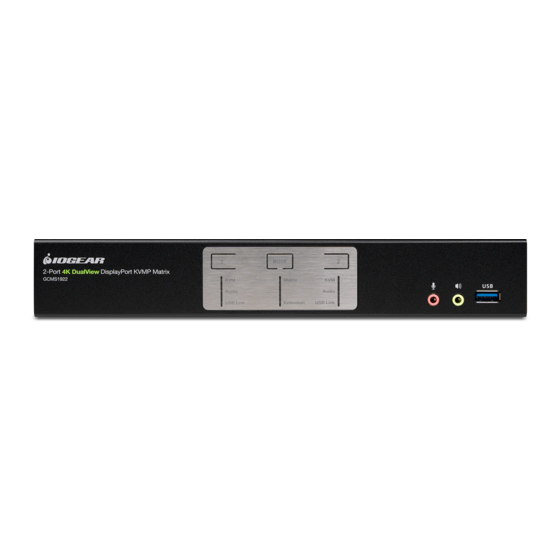
Page 9: Overview
Overview... - Page 10 Audio Ports Microphone and speakers connected into these audio ports have priority over those connected in the rear side panel of the GCMS1922 USB Hub USB peripherals (USB drives, printers, etc.) can be connected into this port. The built-in USB 3.1 Gen 1 ports feature 5 Gbps data transfer rates for compatible USB peripherals...
- Page 11 1 beep • Switching port • Activating Auto Scan Mode • Pausing/resuming Auto Scan 1 long beep • Powering on GCMS1922 • Resetting GCMS1922 2 beeps • Interrupting Auto Scan • Enable Keyboard Emulation OFF Mode • Finishing USB synchronization...
-
Page 12: Hardware Setup
By default, the GCMS1922 switches to the first computer is powered ON. We recommend that the video cable length from computer to the console monitor not to exceed 10ft. (3m) - Page 13 Please follow steps from previous page...
-
Page 14: Basic Operation
Basic Operation Port Switching There are five convenient methods to access the computer: a. Manual – involves pressing the port selection pushbuttons located on GCMS1922 front panel. b. Remote Port Selector – involves pressing port selection pushbutton located on the remote port selector. - Page 15 • To enable Mouse Crossover Switching, please see page 26 • Mouse emulation must be enabled for Mouse Crossover Switching to function Operation Mode Switching The GCMS1922 provides two operation modes – Extension Mode(default) and Matrix Mode. There are three methods to switch between Extension Mode and Matrix Mode.
- Page 16 Powering OFF and Restarting If it becomes necessary to Power OFF the GCMS1922, before switching it back ON, you must follow below steps: 1. Shut down or Power OFF all computers that are attached to the GCMS1922.
- Page 17 Port ID Numbering Each KVM port section on the GCMS1922 is assigned a port number • 1 or 2 for the GCMS1922 • The port numbers are marked on the rear panel of GCMS1922 • The Port ID of a computer is derived from the KVM port number it is connected to. For example, a computer connected to KVM port 2 has a Port ID of 2.
-
Page 18: Hotkey Operation
Hotkey Operation IOGEAR’s GCMS1922 provides an extensive, easy-to-use, hotkey function for convenience in controlling and configuring KVM installation from the keyboard. Hotkeys provide asynchronous (independent) switching of the KVM, USB hub and audio focus. Therefore, the users can give one computer the KVM focus, and another the USB hub focus or the audio focus. - Page 19 ID number. Replace [n] with the 3. Click [Enter]. appropriate Port ID when entering hotkey combinations. For GCMS1922, the Port IDs are 1 and 2. Note: The KVM, USB hub, and Audio focus all go to this port even if they were on different ports to...
- Page 20 5. Click [Enter]. Mouse Crossover Switching For the following hotkeys to work, the GCMS1922 needs to be in Matrix Mode and Mouse Crossover Switching needs to be enabled. See Mouse Crossover Switching at page 26 and Matrix Mode at page 7 and 16.
- Page 21 5. Click [Enter]. Auto Scan Mode Under “Extension Mode”, GCMS1922’s Auto Scan feature allows you to monitor computer activities without switching from port to port manually. This feature automatically cycles the KVM focus through the computer ports at regular intervals. See the table below for details When Auto Scan is in effect, only Auto Scan Mode compliant keystrokes and mouse clicks work.
-
Page 22: Advance Configuration
Advance Configuration Hotkey Setting Mode Hotkey Setting Mode is used to set up your GCS1922 switch configuration. All operations begin with invoking Hotkey Setting Mode (HSM). To invoke HSM (Default) 1. Press and hold down [Num Lock] (use [Clear] on Mac) 2. - Page 23 If the Windows compatible keyboard has been used at console side and you have a Mac or Sun machine attached with GCMS1922, you can change the port’s keyboard operating platform, so the Windows compatible keyboard emulates the Mac or Sun keyboard.
- Page 24 To set the GCMS1922 to Firmware Upgrade Mode: 1. Invoke HSM, see page 22 2. Key in [u][p][g][r][a][d][e] 3. Press [Enter] The front panel LEDs will flash to indicate the Upgrade has started Note: To exit Firmware Upgrade Mode, you must power OFF the GCMS1922...
- Page 25 Restore Default Settings To reset the GCMS1922 to its default hotkey settings: 1. Invoke HSM, see page 22 2. Press [R][Enter] All hotkey settings return to the factory default settings Alternative Manual Port Selection To toggle between the default and the alternative front panel pushbutton manual port...
- Page 26 This procedure is a toggle. Repeat to revert to the original setting Mouse Crossover Switching To enable / Disable the Crossover Switching when GCMS1922 is under the Matrix Mode 1. Invoke HSM, see page 22 2. Press and release [Y] [Enter] Note: This procedure is a toggle.
- Page 27 1, 2. Enter the number in order as it appears in the layout, left-to-right, beginning with Row A. The number represents the computer connected to a port# on the GCMS1922 Scenario 1 To key in a layout, enter “P” followed by “A” and a number for each display. If you have two displays in one row, type PA12[Enter].
- Page 28 2. Press [A][O] [Enter] Note: This procedure is a toggle. Repeat to revert to the original setting. Digital audio mixing is unavailable on GCMS1922. Please use analog audio cable connections for audio mixing. Automatic Audio Mixer With Automatic Audio Mixer enabled, when GCMS1922 is under Matrix Mode, the audio sources are mixed automatically, and audio sources are separated when under Extension Mode.
-
Page 29: Hsm (Hotkey Settings Mode) Summary Table
HSM (Hotkey Settings Mode) Summary Table Function Key Operation [F1] Selects the Extension Mode so that it can work under special operating systems as a standard (104 key) keyboard [F2] Enables Mac keyboard emulation, see page 30 for details. [F3] Enables Sun keyboard emulation, see page 31 for details. -
Page 30: Keyboard Emulation
Keyboard Emulation Mac Keyboard The Windows compatible (101/104 key) keyboard can emulate the functions of Mac Keyboard. The emulation mappings are listed below. PC Keyboard Mac Keyboard [Shift] Shift [Ctrl] Ctrl [Ctrl][1] [Ctrl][2] [Ctrl][3] [Ctrl][4] [Alt] [Print Screen] [Scroll Lock] [Enter] Return [Backspace]... - Page 31 Sun Keyboard Sun Keyboard The Windows compatible (101/104 key) keyboard can emulate the functions of Sun Keyboard. The emulation mappings are listed below PC Keyboard Sun Keyboard [Ctrl] [T] Stop [Ctrl] [F2] Again [Ctrl] [F2] Props [Ctrl][F4] Undo [Ctrl][F5] Front [Ctrl][F6] Copy [Ctrl][F7]...
-
Page 32: Firmware Upgrade Utility
4. Using the included USB/DisplayPort KVM cable, connect USB Type A connector to the computer, which is not part of GCMS1922 installation with unzipped firmware package. 5. From the same cable, connect the USB Type B connector to GCMS1922 Port 1 Type B port. 6. Two ways to invoke Firmware Upgrade Mode: •... - Page 33 Starting Firmware Upgrade Run the downloaded Firmware Upgrade Package file – either by double clicking the file icon, or using a command line to enter the full path. 1. The Firmware Upgrade Utility window appears. 2. Read the License Agreement and click “I Agree” button and click “Next”. 3.
- Page 34 8. After the upgrade has completed, a screen appears to inform you that the procedure was successful. Click “Finish” to close the Firmware Upgrade Utility. 9. After a successful completion, the GCMS1922 will exit the Firmware Upgrade Mode and resets itself.
- Page 35 1. Power off the GCMS1922 by removing the power adapter 2. Invoke Firmware Upgrade Mode by holding down the Mode Selection Button or the Remote Port Selector button and power on the GCMS1922. The LEDs flash together 3. Repeat the upgrade procedure from the beginning (see Before Starting Firmware...
- Page 36 Specifications Chart Computer Connections Port Selection Pushbuttons, Hotkey, Mouse Wheel (mouse wheel port switching only works with 3-key USB mouse wheel in emulation mode), Remote Port selector or Mouse cursor (Under Matrix Mode and Crossover Switching is enabled) Console Connectors Monitor 2 x HDMI Keyboard...
-
Page 37: Troubleshooting
In addition, updating the GCMS1922 firmware may solve problems that have been discovered and resolved since the prior version was released. If your product is not running the latest firmware version, we strongly recommend that you upgrade. -
Page 38: Limited Warranty
Important Product Information Product Model Serial Number Contact WE’RE HERE TO HELP YOU! NEED ASSISTANCE SETTING UP THIS PRODUCT? Make sure you: 1. Visit www.iogear.com for more product information 2. Visit www.iogear.com/support for live help and product support IOGEAR www.iogear.com https://iogear.custhelp.com/ support@iogear.com...
Need help?
Do you have a question about the GCMS1922 and is the answer not in the manual?
Questions and answers