Table of Contents
Advertisement
Available languages
Available languages
Quick Links
Model No. • N° de modelo • Référence de modèle
Read and understand this manual before use. Keep this manual for future reference.
Lea y comprenda este manual antes de usar el producto. Conserve este manual para futura referencia.
Distributed by/ Distribuido por/ Distribue par:
Cleva North America Inc.
601 Regent Park Court, Greenville, SC 29607
Operator's Manual
Manual del usuario
Manuel d'utilisation
14 Gallon / 14 Galones / 53 L
14 Gallon / 14 Galones / 53 L
VJE1412SW 0202
FOR YOUR SAFETY
POR SU SEGURIDAD
POUR GARANTIR VOTRE SÉCURITÉ
vous y référer ultérieurement.
Aspiradora en Mojado/Seco
Aspirateur Sec et Humide
Replacement Filters &
Accessories available at:
Vacmaster.com
Filtros de repuesto y
accesorios disponibles en:
Vacmaster.com
Filtres de rechange et
Accessoires disponibles à l'adresse suivante :
Vacmaster.com
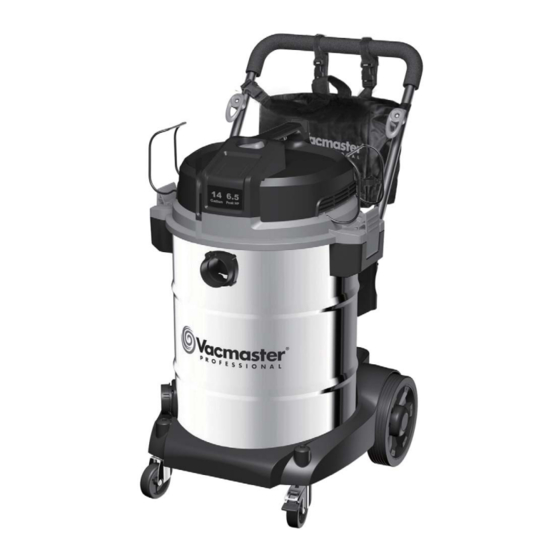
Wet/Dry Vacuum
Advertisement
Chapters
Table of Contents

Related Manuals for Vacmaster VJE1412SW 0202


Summary of Contents for Vacmaster VJE1412SW 0202
- Page 1 14 Gallon / 14 Galones / 53 L 14 Gallon / 14 Galones / 53 L Model No. • N° de modelo • Référence de modèle VJE1412SW 0202 FOR YOUR SAFETY Read and understand this manual before use. Keep this manual for future reference.
-
Page 2: Table Of Contents
Installing & Cleaning Foam Wet Filter………………………...………………….…..….…….... Troubleshooting…………………………………………………………………………………..……. Exploded View…………………………………………………………..…………....... Parts List …………………………………………………………..…………........® Thank you for purchasing this Vacmaster ® Vacmaster you are obtaining a high-quality product engineered for optimal performance. This vacuum is capable of picking up liquids and dry materials. -
Page 3: Warranty
WARRANTY ® We take pride in producing a high-quality, durable product. This Vacmaster product carries a under normal household use. If product is to be used for commercial, industrial, or rental use, a 90-day limited warranty will apply. Please keep your receipt as proof of purchase. This warranty Customer Service at 1-866-384-8432. -
Page 4: Important Safety Instructions
IMPORTANT SAFETY INSTRUCTIONS READ AND UNDERSTAND ALL INSTRUCTIONS BEFORE USING THIS VACUUM. Read and understand this operator’s manual and all labels on the vacuum cleaner before operating. Safety is a combination of common sense, staying alert and knowing how your vacuum works. -
Page 5: Double Insulation Instructions
When using as blower: • Direct air discharge only at work area. • Do not use Wet/Dry Vacuum as a sprayer. • Do not direct air at bystanders. • Keep children away when blowing. • Wear safety goggles. SAVE THESE INSTRUCTIONS For Household Use Only DOUBLE INSULATION INSTRUCTIONS This Wet/Dry Vacuum is double insulated, eliminating the need for a separate grounding system. -
Page 6: Extension Cords
EXTENSION CORDS When using an extension cord with your Wet/Dry Vacuum refer to the following table to determine the required A.W.G. wire size. Before using the cleaner make sure the power cord and extension cord are in good working condition. Make repairs or replacements before using the vacuum cleaner. -
Page 7: Unpacking & Checking Carton Contents
UNPACKING & CHECKING CARTON CONTENTS Remove all contents from the box. Remove the powerhead and take out any contents inside the collection tank. Check each item against the carton contents list. Carton Contents List: Description......... Qty. Vacuum Assembly ......... 1 Hose ............. -
Page 8: General Assembly Instructions
GENERAL ASSEMBLY INSTRUCTIONS A Phillips head screwdriver is required. WARNING: DO NOT PLUG THE POWER CORD INTO A POWER OUTLET. MAKE SURE THE PLUG IS DISCONNECTED BEFORE ASSEMBLING THE WET/DRY VACUUM. TO REDUCE THE RISK OF ELECTRIC SHOCK, DO NOT EXPOSE TO RAIN. UNPACKING YOUR WET/DRY VACUUM &... - Page 9 NOTE: Hose storage rack may come pre-installed on some models. 8. Insert the push/pull handle into the handle socket mounted on the tank body. Push down until 9. Align the two cord wrap hooks with the mounting holes on the push/pull handle, and secure the 10.
-
Page 10: Dry Vacuum Operation
DRY VACUUM OPERATION DRY VACUUMING WARNING: BE SURE TO READ, UNDERSTAND, AND APPLY INFORMATION ENTITLED “IMPORTANT SAFETY INSTRUCTIONS”. DO NOT VACUUM IN AREAS WITH FLAMMABLE GASES, VAPORS, OR EXPLOSIVE DUST IN THE AIR. FLAMMABLE GASES OR VAPORS INCLUDE BUT ARE NOT LIMITED TO: LIGHTER FLUID, SOLVENT TYPE CLEANERS, OIL-BASED PAINTS, GASOLINE, ALCOHOL, OR AEROSOL SPRAYS. -
Page 11: Liquid Vacuum Operation
the power cord from the outlet. O = OFF I = ON DO NOT USE THE CARTRIDGE FILTER FOR LIQUID VACUUMING. DO NOT USE THE DUST BAG FOR LIQUID VACUUMING. LIQUID VACUUM OPERATION LIQUID VACUUMING WARNING: BE SURE TO READ, UNDERSTAND, AND APPLY INFORMATION ENTITLED “IMPORTANT SAFETY INSTRUCTIONS”. -
Page 12: Blower Operation
4. Verify that the on/off switch is in the ‘O’ OFF position before plugging the power cord into the the power cord from the outlet. 7. After use, empty the collection tank by unscrewing the drain cap. Drain liquids into a suitable IMPORTANT! When vacuuming large quantities of liquids, do not immerse the nozzle completely capacity. -
Page 13: Maintenance
5.The included attachments lock together to prevent them from detaching during use. Connect the desired attachment onto the end of the hose or extension wand by aligning the tabs and push 6. Verify that the switch is in the ‘O’ OFF position before plugging the power cord into the power MAINTENANCE EMPTYING THE COLLECTION TANK WARNING:... -
Page 14: Installing & Cleaning Cartridge Filter
STORAGE Before storing your vacuum, the collection tank should be emptied and cleaned. The cord should be wrapped then hung on the hook of the carry handle or wrapped around the cord hooks on the push/pull handle. The hose and accessories should be stored as illustrated so they can be readily REPAIRS only identical replacement parts. -
Page 15: Installing Dust Collection Bag
INSTALLING DUST COLLECTION BAG 2. Remove the powerhead and place in an upside-down position. 5. Place the powerhead back onto the collection tank. INSTALLING & CLEANING FOAM WET FILTER INSTALLING FOAM WET FILTER 2. Remove the powerhead and place in an upside-down position. Follow instructions to remove the 4. -
Page 16: Troubleshooting
TROUBLESHOOTING WARNING: TO REDUCE THE RISK OF ELECTRIC SHOCK, UNPLUG BEFORE TROUBLESHOOTING. PROBLEM POSSIBLE CAUSE SOLUTION Check the power supply, cord, No power supply. breakers, and fuses. Unplug and check the power cord. Faulty power cord. If damaged, have it repaired by a The wet/dry vacuum professional. -
Page 17: Exploded View
EXPLODED VIEW... -
Page 18: Parts List
Locking Floor Brush /Squeegee Nozzle 551736105 Locking Crevice Tool 551641102 Dust Collection Bag 551002118 Foam Wet Filter 551303106 Tool Storage Bag NOTE: An adapter is needed to use Vacmaster locking attachments or extension wands with the 866-384-8432. VJE1412SW 0202 _OM_Rev A... - Page 19 Instalación de la bolsa recolectora de polvo…………………………...………………..……..Resolución de problemas…………………………………………………………………..…..…. Vista expandida…………………………………………..…………..........Lista de partes……………………………………………..............® Gracias por comprar esta aspiradora en mojado/seco Vacmaster . Confíe en que con ® Vacmaster obtendrá un producto de alta calidad diseñado para un rendimiento óptimo.
-
Page 20: Garantía
Nos sentimos orgullosos de ofrecer a usted un producto de alta calidad y durabilidad. Este ® producto de Vacmaster tiene una garantía limitada de cinco (5) años contra defectos de mano limitada de 90 días. Guarde su boleta como prueba de su compra. Esta garantía le concede No cubierto por la garantía:... -
Page 21: Instrucciones De Seguridad Importantes
INSTRUCCIONES DE SEGURIDAD IMPORTANTES ANTES DE USAR ESTA ASPIRADORA, LEA Y COMPRENDA TODAS LAS INSTRUCCIONES. Lea y comprenda este manual del usuario y todas las etiquetas de la aspiradora antes de funciona su aspiradora. Use esta aspiradora solo como se describe en este manual. Para reducir por el fabricante. - Page 22 piezas móviles del producto. • Tenga precaución adicional al limpiar en escaleras. • Utilice el producto solo como se describe en este manual. Utilice solo los accesorios recomendados por el fabricante. Consulte INSTRUCCIONES SOBRE EL AISLAMIENTO DOBLE. PRECAUCIÓN: Para reducir el riesgo de lesiones provocadas por las piezas móviles, desconecte el producto antes de realizarle mantenimiento.
-
Page 23: Instrucciones Sobre El Aislamiento Doble
INSTRUCCIONES SOBRE EL AISLAMIENTO DOBLE aspiradora como se describe en este manual. Observe las siguientes advertencias que aparecen en la carcasa del motor de su aspiradora. AISLAMIENTO DOBLE (NO REQUIERE CONEXIÓN A TIERRA) - AL REPARAR, UTILIZAR SOLO PIEZAS DE REPUESTO IDÉNTICAS. ADVERTENCIA: PARA REDUCIR EL RIESGO DE DESCARGA ELÉCTRICA, NO EXPONGA EL PRODUCTO A LA LLUVIA. -
Page 24: Cables De Extensión
CABLES DE EXTENSIÓN exteriores. Largo del cable de extensión 100 pies 120 V Amperaje A.W.G. Tamaño del cable No recomendado SÍMBOLOS asociados a este producto. SÍMBOLO SEÑAL SIGNIFICADO PELIGRO ADVERTENCIA PRECAUCIÓN (Sin símbolo de alerta de seguridad) Indica una situación AVISO que podría causar daños a la propiedad. -
Page 25: Desempaque Y Revisión Del Contenido De La Caja
DESEMPAQUE Y REVISIÓN DEL CONTENIDO DE LA CAJA Elimine todo el contenido de la caja. Retire el cabezal motriz y extraiga el contenido del tanque recolector. Revise cada artículo en contraste con la lista de contenidos de la caja. Lista de contenidos de la caja: Llave Descripción..……..…..……….….. -
Page 26: Instrucciones Generales De Ensamblaje
INSTRUCCIONES GENERALES DE ENSAMBLAJE Se necesita un destornillador de cabeza. ADVERTENCIA: NO CONECTE EL CABLE DE ALIMENTACIÓN A UNA TOMA DE CORRIENTE. ASEGÚRESE DE QUE EL ENCHUFE ESTÉ DESCONECTADO ANTES DE ENSAMBLAR LA ASPIRADORA EN MOJADO/SECO. PARA REDUCIR EL RIESGO DE DESCARGA ELÉCTRICA, NO EXPONGA EL PRODUCTO A LA LLUVIA. - Page 27 NOTE: El espacio de almacenamiento de la manguera podría venir preinstalado en algunos modelos. 14. Coloque el cabezal motriz nuevamente en el tanque recolector y fíjelo en su lugar usando los seguros (Fig. 14 y 15). 15. Inserte el extremo de bloqueo de la manguera en el puerto de aspirado del tanque recolector 16.
-
Page 28: Operación De Aspirado En Seco
OPERACIÓN DE ASPIRADO EN SECO ASPIRADO EN SECO ADVERTENCIA: ASEGÚRESE DE LEER, COMPRENDER Y APLICAR LA INFORMACIÓN TITULADA “INSTRUCCIONES DE SEGURIDAD IMPORTANTES”. NO ASPIRE EN ZONAS CON GASES, VAPORES O POLVOS INFLAMABLES EN EL AIRE. ENTRE LOS GASES O VAPORES INFLAMABLES SE INCLUYEN, SIN LIMITACIÓN A, LOS SIGUIENTES: FLUIDO DE ENCENDEDOR, LIMPIADORES TIPO SOLVENTES, PINTURAS EN BASE A ÓLEO, BENCINA, ALCOHOL O SPRAYS DE AEROSOLES. -
Page 29: Operación De Aspirado En Mojado
la clavija a la toma de corriente. Conecte el cable de alimentación a la toma de corriente (Fig. 8). 9. Ponga el interruptor en la posición "I" (Encendido) para encender la aspiradora y comenzar a aspirar (Fig. 9). O = APAGADO I = ENCENDIDO NO UTILICE EL FILTRO DE CARTUCHO PARA ASPIRAR LÍQUIDOS. -
Page 30: Operación De Soplado
3. Los accesorios incluidos se bloquean entre sí para evitar que se desprendan durante el uso. Conecte el accesorio deseado en el extremo de la manguera o varilla de extensión alineando de conectar la clavija a la toma de corriente. Conecte el cable de alimentación a la toma de corriente (Fig. -
Page 31: Mantenimiento
4. Inserte el extremo de bloqueo de la manguera en el puerto de soplido de la parte posterior del cabezal motriz y fíjelo en posición (Fig. 2). 5. Los accesorios incluidos se bloquean entre sí para evitar que se desprendan durante el uso. Conecte el accesorio deseado en el extremo de la manguera o varilla de extensión alineando de conectar la clavija a la toma de corriente. - Page 32 ALMACENAMIENTO REPARACIONES INSTALACIÓN Y LIMPIEZA DEL FILTRO DE CARTUCHO INSTALACIÓN DEL FILTRO DE CARTUCHO 2. Quite el cabezal motriz y colóquelo boca abajo. que totalmente cubierto (Fig. 2 y 3). 5. Coloque el cabezal motriz de vuelta en el tanque recolector. EXTRACCIÓN Y LIMPIEZA DEL FILTRO DE CARTUCHO obtener un rendimiento óptimo.
-
Page 33: Instalación De La Bolsa Recolectora De Polvo
INSTALACIÓN DE LA BOLSA RECOLECTORA DE POLVO 2. Saque el cabezal motriz y colóquelo boca abajo. (Fig. 2). 4. Despliegue la bolsa de polvo de manera tal que quede distribuida equitativamente en el interior del tanque (Fig. 3). 5. Coloque el cabezal motriz de vuelta en el tanque recolector. INSTALACIÓN Y LIMPIEZA DEL FILTRO DE ESPUMA PARA ASPIRAR EN MOJADO INSTALACIÓN DE FILTRO DE ESPUMA PARA ASPIRAR EN MOJADO... -
Page 34: Resolución De Problemas
RESOLUCIÓN DE PROBLEMAS ADVERTENCIA: PARA EVITAR EL RIESGO DE SUFRIR DESCARGAS ELÉCTRICAS, DESCONECTE EL APARATO ANTES DE INTENTAR SOLUCIONAR CUALQUIER PROBLEMA. PROBLEMA CAUSA PROBABLE SOLUCIÓN Compruebe el suministro de fusibles. Desconecte y revise el cable de La aspiradora en Cable de alimentación defectuoso. el producto a reparación con un profesional. -
Page 35: Vista Expandida
VISTA EXPANDIDA... -
Page 36: Lista De Partes
551736107 Boquilla de servicio con bloqueo 551736106 551736105 551641102 Bolsa recolectora de polvo 551002118 Filtro de esponja 551303106 Bolsa para accesorios NOTA: Se necesita un adaptador para usar los accesorios de bloqueo Vacmaster o varillas de VJE1412SW 0202 _OM_Rev A... -
Page 37: Vacmaster
Nous vous remercions pour l'acquisition de cet aspirateur d’atelier sec et humide ® r® Vacmaster . Soyez assuré(e) qu'avec Vacmaste , vous obtenez un produit de qualité supérieure conçu pour vous offrir des performances optimales. Cet aspirateur est doté de la capacité... -
Page 38: Garantie
GARANTIE Non Couverts par la Garantie : incorrects; intempéries;... -
Page 39: Consignes Importantes De Sécurité
CONSIGNES IMPORTANTES DE SÉCURITÉ VEILLEZ À LIRE ET ASSIMILER TOUTES LES CONSIGNES AVANT TOUTE UTILISATION DU PRÉSENT ASPIRATEUR. accessoires recommandés par le fabricant. VEUILLEZ CONSERVER LE PRÉSENT MANUEL AFIN DE POUVOIR VOUS Y RÉFÉRER ULTÉRIEUREMENT. L’utilisation d’un aspirateur exige le respect de certaines mesures de sécurité élémentaires, notamment les suivantes. - Page 40 ATTENTION: AVERTISSEMENT: • Ne pas utiliser l’Aspirateur D’Atelier Sec Et Humide en guise de pulvérisateur. • Ne pas orienter le rejet d’air vers les personnes se trouvant à proximité. VEUILLEZ CONSERVER LES PRÉSENTES CONSIGNES...
-
Page 41: Instructions Relatives À La Double Isolation
INSTRUCTIONS RELATIVES À LA DOUBLE ISOLATION aspirateur. DOUBLE ISOLATION : MISE À LA TERRE NON NÉCESSAIRE : LORS DE L'ENTRETIEN OU DE LA RÉPARATION DU PRODUIT, UTILISEZ EXCLUSIVEMENT DES PIÈCES DE RECHANGE IDENTIQUES AUX PIÈCES D’ORIGINE. AVERTISSEMENT: AFIN DE RÉDUIRE TOUS RISQUES D’ÉLECTROCUTION : NE PAS EXPOSER CE PRODUIT À... -
Page 42: Cordons Prolongateurs
CORDONS PROLONGATEURS l’extérieur. Longueur du cordon prolongateur 100 pieds 120 V Ampérage Plus de Pas plus de Déconseillé SYMBOLES SYMBOLE SIGNAL SIGNIFICATION DANGER AVERTISSEMENT ATTENTION REMARQUE... - Page 43 DÉBALLAGE ET VÉRIFICATION DU CONTENU DU CARTON Retirez tout le contenu de la boîte. Retirez le bloc moteur, puis enlevez tout le contenu du réservoir collecteur. Assurez-vous que tous les la boîte en carton sont bien présents. Clé Description..........Qté Ensemble Aspirateur ......1 Tuyau .............
-
Page 44: Instructions Relatives Au Montage Général
INSTRUCTIONS RELATIVES AU MONTAGE GÉNÉRAL AVERTISSEMENT: NE PAS BRANCHER LE CORDON D'ALIMENTATION À UNE PRISE DE COURANT. ASSUREZ-VOUS QUE LA FICHE EST DÉBRANCHÉE AVANT DE MONTER L'ASPIRATEUR D’ATELIER SEC ET HUMIDE. AFIN DE RÉDUIRE TOUS RISQUES D’ÉLECTROCUTION, NE PAS EXPOSER CE PRODUIT À LA PLUIE. DÉBALLAGE DE VOTRE ASPIRATEUR D’ATELIER SEC ET HUMIDE ET MONTAGE GÉNÉRAL... - Page 45 accumulation en offrant un passage de résistance moindre au courant électrique vers le sol. DIFFUSEUR DE BRUIT FICHE POLARISÉE...
-
Page 46: Utilisation De L'aspirateur D'atelier Sec
PAS RETENUES PAR LE FILTRE, CE QUI POURRAIT ENTRAÎNER DES DOMMAGES DU MOTEUR. POUR ASPIRER DES POUSSIÈRES FINES, UTILISEZ UN FILTRE À POUSSIÈRES FINES (INCLUS). POUR ACHETER DES FILTRES POUR POUSSIÈRES FINES SUPPLÉMENTAIRES, VEUILLEZ COMPOSER LE NUMÉRO : 1-866-384-8432 ® OU PROCUREZ-VOUS-LES CHEZ VOTRE REVENDEUR VACMASTER LOCAL OU EN LIGNE. -
Page 47: Aspiration De Liquides
INSTRUCTIONS D’UTILISATION : ASPIRATION DE POUSSIÈRES O = OFF (Arrêt) I = ON (Marche) NE PAS UTILISER LE FILTRE À CARTOUCHE POUR L’ASPIRATION DE LIQUIDES. NE PAS UTILISER LE SAC COLLECTEUR POUR L’ASPIRATION DE LIQUIDES. ASPIRATION DE LIQUIDES ASPIRATION DE LIQUIDES AVERTISSEMENT: VEILLEZ À... - Page 48 NE PAS UTILISER LE FILTRE À CARTOUCHE OU LE SAC DE RÉCUPÉRATION DE POUSSIÈRES POUR L’ASPIRATION DE LIQUIDES. IINSTRUCTIONS D’UTILISATION : ASPIRATION DE LIQUIDES IMPORTANT! ranger l’aspirateur. NE PAS OUBLIER! nouveau à l’aspiration de poussières. UTILISATION DU SOUFFLEUR...
-
Page 49: Entretien
AVERTISSEMENT: TOUJOURS PORTER DES LUNETTES DE PROTECTION CONFORMES À LA NORME ANSI Z87.1 (OU AU CANADA, CSAZ94.3) AVANT D’UTILISER LE SOUFFLEUR. ATTENTION: VEILLEZ À CE QUE LES DÉBRIS NE SOIENT PAS SOUFFLÉS VERS LES PERSONNES SE TROUVANT À PROXIMITÉ. AVERTISSEMENT: PORTEZ UN MASQUE ANTI-POUSSIÈRES SI LE SOUFFLAGE CRÉE DES POUSSIÈRES SUSCEPTIBLES D'ÊTRE INHALÉES. - Page 50 IMPORTANT! des performances optimales. UTILISEZ TOUJOURS LE FILTRE À CARTOUCHE POUR EFFECTUER TOUTE ASPIRATION DE POUSSIÈRES. REMARQUE! immédiatement. RANGEMENT RÉPARATIONS...
- Page 51 INSTALLATION ET NETTOYAGE DU FILTRE À CARTOUCHE INSTALLATION DU FILTRE À CARTOUCHE RETRAIT ET NETTOYAGE DU FILTRE À CARTOUCHE...
-
Page 52: Installation Du Sac Collecteur De Poussières
INSTALLATION DU SAC COLLECTEUR DE POUSSIÈRES INSTALLATION ET NETTOYAGE DU FILTRE EN MOUSSE POUR MATÉRIAUX HUMIDES INSTALLATION DU FILTRE EN MOUSSE POUR MATÉRIAUX HUMIDES NETTOYAGE DU FILTRE EN MOUSSE POUR MATÉRIAUX HUMIDES... -
Page 53: Dépannage
DÉPANNAGE AVERTISSEMENT: AFIN DE RÉDUIRE TOUS RISQUES D’ÉLECTROCUTION, DÉBRANCHEZ L’APPAREIL AVANT DE PROCÉDER À SON DÉPANNAGE. PROBLÈME CAUSE POSSIBLE SOLUTION Impossible de faire du cordon d’alimentation. S’il est Cordon d’alimentation défectueux. professionnel. Le réservoir collecteur est plein. correctement positionné. De la poussière L’aspirateur a été... -
Page 54: Vue Éclatée
VUE ÉCLATÉE... -
Page 55: Liste Des Pièces
Ensemble Poignée De Poussée/Traction Tuyau raclette Suceur Plat verrouillable Sac Collecteur De Poussières REMARQUE : Un adaptateur est nécessaire pour utiliser les accessoires verrouillables ou les rallonges Vacmaster avec le tuyau à embout à friction. La référence de cet adaptateur est...
Need help?
Do you have a question about the VJE1412SW 0202 and is the answer not in the manual?
Questions and answers