Advertisement
Quick Links
Advertisement

Related Manuals for Amate Audio XCELLENCE X102FD


Summary of Contents for Amate Audio XCELLENCE X102FD
- Page 1 User’s manual X102FD July 2023...
- Page 2 D. The equipment has been exposed to the rain; or E. The chassis is damaged 9. Disconnect the device in the case of electric storms or during long periods of disuse. 10. Never hang the equipment by its handle. 11. Only use manufacturer recommended accessories. Amate Audio...
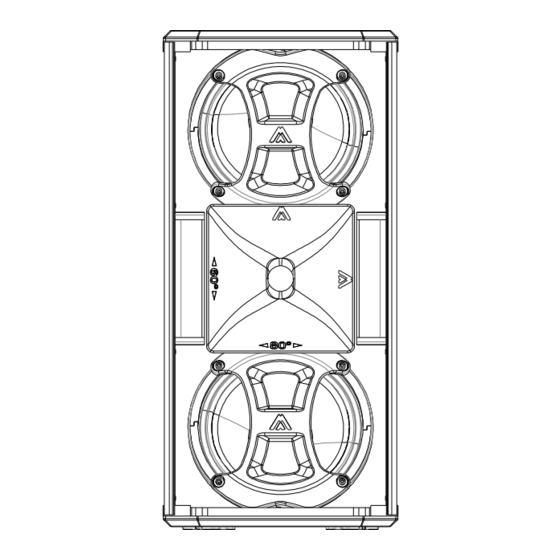
- Page 3 1. INTRODUCTION 1.1. General product information Amate Audio thanks you for the trust placed in our Xcellence loudspeaker systems. The Xcellence series combines the convenience of a self-powered system and the flexibility of the DSP (digital system processing) for cabinet control. More than 45 years’...
- Page 4 The DSP system can also store up to 25 other presets, depending on user requirements. PRESET 1: FR Flat Single enclosure without subwoofer, full range, flat response [FR Flat] Fig. 2. Preset [FR Flat] configuration Amate Audio...
- Page 5 HPF90 Hz. If you need to use the upper cabinet as Longhthrow cabinet please choose [LPF90 X102FD] [HPF90 Longthrow] preset. [HPF90 For the lower cabinet you Longthrow] may use [HPF90 Flat] preset. [HPF90 Flat] Fig. 5. Preset [HPF90 Longthrow] configuration Amate Audio...
- Page 6 The system is pre-aligned from the factory. Do not forget to add the geometric delay depending on the configuration used. 4. CONTROL AND CONNECTION PANEL The X102FD control panel contains the following elements: Fig. 6. X102FD control and connection panel Amate Audio...
- Page 7 • Grey connector to feed other units in parallel. Linking up to four units is possible, provided that a quality cable of a minimum section of 3x2.5mm used. Connecting more than four units in parallel may lead to a voltage drop in the cable that will reduce the equipment performance. Amate Audio...
- Page 8 For the mains connection in parallel use the cable with grey Neutrik PowerCon NAC3FCB at one end and the blue Neutrik PowerCon NAC3FCA at the other end. Fig. 7. Parallel connection for the X102FD (signal) Fig. 8. Parallel connection for the X102FD (mains). You can link up to four units Amate Audio...
- Page 9 Dante networking, or more when not using it. 5.2. Parallel connection with subwoofer You can connect the X102FD in parallel with the X218WFD subwoofers. Please, follow the same parameters as explained in figures 7, 8 and 9. Amate Audio...
- Page 10 July 2023 Fig. 10. Parallel connection for the X102FD and X218WFD (signal) Fig. 11. Parallel connection the X102FD and X218WFD (mains). Do not connect more than four units of X102FD or two units X218WFD using Mains link connector. Amate Audio...
-
Page 11: Overvoltage Protection
Flying an X102FD system is easy, fast and secure. To perform any operations related to flying the system, read the present document, and act on the warnings and advice given. Only experienced installers with adequate knowledge of the system and local safety regulations should fly speaker cabinets. Amate Audio... - Page 12 Do not fly systems from unsafe structures. All flying accessories that are not supplied by Amate Audio are the user's responsibility. Use at your own risk. Remember that no risks should be taken with regards to public safety.
- Page 13 • Remove the screws placed on both sides of the cabinet. Then carefully remove the grille or • Insert your hand through the hole in the lower handle (1), press up (2) and the grille will come out by itself. Amate Audio...
- Page 14 “1” and “2” to make the process easy (edge of the horn) “1” “2” • Push the horn • Put the front grille. You can do it in two different ways: • Place the grille on the front side and screw the screws on both sides or Amate Audio...
-
Page 15: Mounting Accessories
The X102FD provides several M8 flying points. Their correct use will permit the flying in horizontal or vertical position. Horizontal flying 4&5 or 8&9 (front rigging points) 6&7 or 10&11 (back tilt points) Vertical flying 1&2 (front rigging points) 3 (back tilt point) Fig. 17. X102FD horizontal and vertical flying points Amate Audio... - Page 16 Fig. 18. X102FD vertical flying Fig. 19. X102FD horizontal flying 8.2. HR-L102 The HR-L102 is an optional accessory for flying two X102FD, one below the other. (see “HR-L102 user’s manual” for more information). Fig. 20. Flying of two units X102FD with HR-L102 Amate Audio...
-
Page 17: Troubleshooting
If yes, the overvoltage circuit may be damaged. Contact support. Red (>250V). Voltage arriving to the PowerCon socket is above 250VAC. Check the mains voltage is in the rated limits (230VAC +/-10%). If mains voltage is OK, the overvoltage circuit may be damaged. Contact support. Amate Audio... - Page 18 • Should you have changed the PIN and forgotten it, follow these steps: Turn the system off. Turn the system on. When the display shows the word "Initializing", press anywhere on the touch screen during at least 5 seconds. The PIN will be restored to its default value "1234". Amate Audio...
-
Page 19: Technical Features
Connectors 2 x AC PowerCon (input, link) 2 x XLR (input, link) 2x Ethercon RJ45 for Ethernet/DANTE (connection/link) Material Multilayer birch plywood, steel front grille with acoustic grey cloth Finish Hi-resistance black Polyurea coating and protective rubber profiles Amate Audio... - Page 20 16.7 Millions of colours I.1. Main screen Just after turning on the loudspeaker unit, a first screen shows the: Amate Audio’s logo, firmware version and the processing version. Once the system is initialized, a welcome screen shows a picture of the system and the serial number.
- Page 21 Limiter is applying for trying to protect the loudspeaker from clipping. I.2. Settings screen For accessing to the settings menu just push anywhere in main screen AUDIO PRESET SETUP INFO BACK Each sub-menu contains the following settings: Amate Audio...
- Page 22 These filters are applied on the top of the chosen base preset. An Ethernet communication with DSP Studio is mandatory in order to enable each filter. For the enabled filters a bypass button is available for controlling each one directly from the loudspeaker unit. Amate Audio...
- Page 23 DSP. There is a shortcut for internal memory, so we can save a preset straight from this sub-menu. I.5. IP submenu IP Address 192 168 000 009 Subnet Mask 255 255 255 Amate Audio...
- Page 24 Standby: The energy saving mode is disabled Auto: The energy saving mode will be enabled automatically after three minutes without input signal C. SWEEP: Diagnosis mode. The loudspeaker will emit frequency sweep. D. Backlight: Three backlight intensities: MAX (Maximum), MED (Medium), MIN (Minimum) Amate Audio...
- Page 25 To deactivate the noise gate, press this button (Word OFF will be displayed) I.7. INFO submenu Here we can find advanced information about the unit, as well as the most relevant configurations parameters. Amate Audio...
-
Page 26: Declaration Of Conformity
DECLARATION OF CONFORMITY In accordance with EN 45014:1998 Manufacturer’s Name: “AMATE AUDIO S.L.” Manufacturer’s Address: C/ Perpinyà 25, Polígon Industrial Nord 08226 Terrassa, (Barcelona), SPAIN Brand: “AMATE AUDIO” We declare under our own responsibility that: Product: Active speaker systems with DSP. Audio apparatus for professional use... - Page 27 Perpinyà, 25 · Polígon Industrial Nord · 08226 Terrassa T. +34 93 735 65 65 – F. +34 93 735 60 48 – info@amateaudio.com R&D and FACTORY: Violinista Vellsolà, 18 · 08222 Terrassa Barcelona – SPAIN www.amateaudio.com © Copyright 2023 by Amate Audio S.L. Amate Audio...
Need help?
Do you have a question about the XCELLENCE X102FD and is the answer not in the manual?
Questions and answers