Table of Contents
Advertisement
Available languages
Available languages
Quick Links
Advertisement
Chapters
Table of Contents

Related Manuals for Blocks ZERO


Summary of Contents for Blocks ZERO
- Page 1 ZERO USER GUIDE MANUAL DE UTILIZADOR...
- Page 2 English 05-24 Português 28-48...
- Page 3 The “Blocks zero” product consists of a 3D printer assembly kit. For assembling the kit, the user must follow the assembly manual strictly. This electro-mechanical equipment is in- tended for the creation of digitally shaped parts or models through the deposition of mol- ten thermoplastics.
-
Page 4: Table Of Contents
Security Introduction Installation Installation Unpacking Installation and configuration Slicer Software Slicer Installation Operation Plate leveling Doing a print Change filament Setting up the printer directly on the screen Maintenance Rod Lubrication Belt tensioning Cleaning and main tenance of the extruder Nozzle clearing Troubleshooting... -
Page 5: Security
3. This machine have moving components that can cause injury if handled while the printer is operating. 4. The nozzle in Blocks Zero operates at high temperatures, so it should never be touched in the heating and cooling processes or while the machine is printing. -
Page 6: Introduction
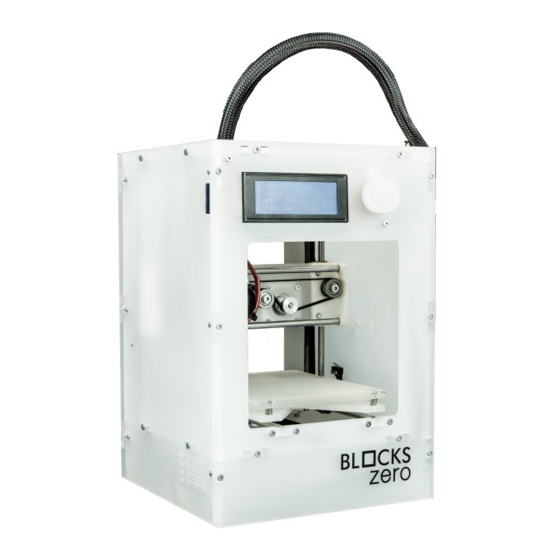
Hot End (printing head) Print Blower nozzle exit. Build platform Set of components that includes the plate that serves as the platform for the prints. User Guide BLOCKS ZERO USER GUIDE MANUAL DE UTILIZAÇÃO ZERO... - Page 7 Component that transmits the motor rotation and imposes linear motion Note: the pinion teeth must be perfectly aligned with the holes where the (To learn more about how to align the pinion teeth, see page 65 of the TIPS section of the Blocks Zero assembly guide.) Hinge insertion.
- Page 8 Replaceable component with a reduced diameter that allows accurate deposition of the melted plastic. Note: the tightening tension should always be between the nozzle and the heatbreaker and not between the nozzle and the heating block. User Guide BLOCKS ZERO USER GUIDE MANUAL DE UTILIZAÇÃO ZERO...
- Page 9 15 - 30 °C, 10 - 90% Software Printer storage conditions 5 - 35 °C Firmware Recommended slicer Cura Supported Operating System Windows, Mac, Linux File types for slicer STL, OBJ User Guide BLOCKS ZERO ZERO USER GUIDE MANUAL DE UTILIZAÇÃO...
-
Page 10: Installation
Installation 03.1 Installation When receiving the Blocks Zero printer you must make sure that you open the carton box nents of the kit are accessible in the correct order, thus avoiding mixing the various compo- nents. 03.2 Unpacking 2. Open the carton box by the correct side marked with a sticker. - Page 11 Install ultimaker cura 5.3.1 on your PC. To do so, just go to the Ultimaker Cura website (https://ultimaker.com/software/ultimaker-cura) and click on "Download for free". After clicking on download, just choose your operating system, in this case it will be Wind ows When the download is complete, you can open the setup file. User Guide BLOCKS ZERO...
-
Page 12: Slicer Software
Slicer Software 3. We recommend that you leave the configuratios defaults, just click “Next” in all the steps. Manual do Utilizador BLOCKS RD50 User Guide BLOCKS ZERO... -
Page 13: Operation
Illustrated steps in the next page Note: Extra: Blocks Zero – Load Filament: https://youtu.be/Aa7Mt6X2byY User Guide BLOCKS ZERO USER GUIDE MANUAL DE UTILIZAÇÃO ZERO... - Page 14 Operation Main Screen User Guide BLOCKS ZERO ZERO USER GUIDE MANUAL DE UTILIZAÇÃO...
-
Page 15: Plate Leveling
Illustrated steps in the next page Note: some location, the user must re-level the plate. Extra: To see the plate leveling process in video format go to the Blocks channel on YouTube or follow the direct link below. Blocks Zero – Level Plate: https://youtu.be/u2eWSihBE6w... - Page 16 Operation Main Screen User Guide BLOCKS ZERO ZERO USER GUIDE MANUAL DE UTILIZAÇÃO...
-
Page 17: Doing A Print
Make sure that the print characteristics are correct for the material to be used and the print quality you want. Also check that the machine that is selected is the Blocks Zero. 2. Press the on-screen button once, rotate until you select Print from SD and press it again. - Page 18 Different materials have different printing characteristics, which can cause poor adhesion between the layers in the change zone or in some cases a nozzle clogging if they are combined in the same print. User Guide BLOCKS ZERO ZERO USER GUIDE MANUAL DE UTILIZAÇÃO...
-
Page 19: Setting Up The Printer Directly On The Screen
04.5 Setting up the printer directly on the screen The Blocks Zero printer gives the user the option of controlling various parameters directly on the machine, either in standby mode or during printing. 1. Auto home - Serves to reposition the print head at the origin of the spatial coordinates. -
Page 20: Maintenance
05.1 Removing objects and cleaning the build plate The roughness of the build plate on the Blocks Zero provides optimum adhesion. It is not necessary to add glues, lacquers or other similar products, just ensure that the plate is lev- eled and at an ideal distance from the nozzle. -
Page 21: Rod Lubrication
When re-assembling, ensure that the (To learn more about how to align the pinion teeth, see page 65 of the TIPS section of the Blocks Zero assembly guide.) Pay attention to the compression distance of the springs, it will be important when they are replaced since the tension must be approximately the same. -
Page 22: Nozzle Clearing
(To learn more about disconnecting the PTFE tube, see page 66 of the TIPS section of the Blocks Zero assembly guide.) and at the same time relieving the tension of the extruder hinge. 7. Take a piece of PLA with at least 30 cm and repeat step 4 until the plastic exit through the nozzle is normalized. - Page 23 Plastic strings on the object Print blower Ensure that this part is working during printing Extrusion problems Perform a maintenance procedure on the extruder Nozzle Clogging Unclog the nozzle mended by Blocks User Guide BLOCKS ZERO ZERO USER GUIDE MANUAL DE UTILIZAÇÃO...
- Page 24 English 05-24 Português 28-48...
- Page 25 Por favor leia o manual de utilizador e restante documentação que acompanha o produ- preende todos os conteúdos descritos no manual de utilizador. O produto “Blocks zero” consiste num kit de montagem de uma impressora 3D. Para a assemblagem do kit, o utilizador deve seguir o manual de montagem rigorosamente. Este equipamento electro-mecânico destina-se à...
- Page 26 Segurança Introdução Instalação Desempacotamento Instalação e configuração Slicer Software Instalação Slicer Funcionamento Carregar Filamento Nivelar prato Fazer uma Impressão Mudar de Filamento Configuração da impressora directamente no ecrã Manutenção Remoção de objectos e limpeza do prato de impressão Limpeza do nozzle Actualização firmware Lubrificaçao de varões Tensão das Correias...
-
Page 27: Segurança
Segurança Segurança 1. A Blocks Zero deve ser sempre utilizada com a fonte de alimentação fornecida com a impressora. 3. A Blocks Zero tem componentes móveis que podem causar ferimentos se forem manu- seados enquanto a impressora estiver em funcionamento. -
Page 28: Introdução
Hot End (Cabeça de impressão) Blower da Impressão saída do nozzle. Plataforma de Conjunto de componentes onde se inclui o prato que serve de base às Impressão impressões. Manual de Utilizador BLOCKS ZERO USER GUIDE MANUAL DE UTILIZAÇÃO ZERO... - Page 29 Nota: Os dentes do pinhão devem estar perfeitamente alinhados com (Para saber mais sobre como alinhar os dentes do pinhão consulte a página 65 da secção TIPS do manual de montagem Blocks Zero.) Patilha inserção. Manual de Utilizador BLOCKS ZERO ZERO USER GUIDE MANUAL DE UTILIZAÇÃO...
- Page 30 Componente substituível com um diâmetro reduzido que permite a de- posição exacta do material fundido. Nota: a tensão de aperto será sempre entre o nozzle e o heatbreaker e não entre o nozzle e o bloco de aquecimento. Manual de Utilizador BLOCKS ZERO USER GUIDE MANUAL DE UTILIZAÇÃO ZERO...
- Page 31 15 - 30 °C, 10 - 90% Programas Condições armazenamento 5 - 35 °C Firmware Firmware baseado em Marlin Slicer recomendado Cura Sistemas Operativos Windows, Mac, Linux STL, OBJ Manual de Utilizador BLOCKS ZERO ZERO USER GUIDE MANUAL DE UTILIZAÇÃO...
-
Page 32: Instalação
03.3 Neste tutorial vais aprender como instalar o Ultimaker Cura 4.9.0 e como conectar o soft- ware de impressão à tua impressora 3D da Blocks. 03.3.1 UltimakerCura Slicer 1. Instala o Ultimaker Cura 5.3.1 no teu computador. Para isso, basta entrar no site do Ulti - maker Cura (https://ultimaker.com/software/ultimaker-cura) e clicar em “Download for free”. -
Page 33: Instalação Slicer
Depois de clicar em descarregar, basta escolher o seu sistema operativo, neste caso, será o Windows. Quando o download estiver concluído, abra o arquivo de configuração. © Blocks LDA, All rights reserved - Todos os direitos reservados Manual de Utilizador BLOCKS ZERO www.blockstec.com... - Page 34 Instalação 3. Recomendamos que deixe os padrões de configuração e, para isso, basta clicar em “Avançar” em todas as etapas. © Blocks LDA, All rights reserved - Todos os direitos reservados Manual de Utilizador BLOCKS ZERO www.blockstec.com...
-
Page 35: Funcionamento
Passos ilustrados na próxima página Nota: deixe fazer este último passo até a máquina o terminar. Extra: Tube ou siga o link directo abaixo. Blocks Zero – Load Filament: https://youtu.be/Aa7Mt6X2byY Manual de Utilizador BLOCKS ZERO USER GUIDE MANUAL DE UTILIZAÇÃO ZERO... - Page 36 Funcionamento Ecrã Inicial Manual de Utilizador BLOCKS ZERO ZERO USER GUIDE MANUAL DE UTILIZAÇÃO...
- Page 37 Nota: caso verique que o atrito do cartão a deslizar entre o nozzle e o prato é diferente nalguma localização, o utilizador deve fazer um novo nivelamento do prato de impressão. Extra: Para ver o processo de nivelamento do prato em formato video dirija-se ao canal Blocks no YouTube ou siga o link directo abaixo.
- Page 38 Funcionamento Ecrã Inicial Manual de Utilizador BLOCKS ZERO ZERO USER GUIDE MANUAL DE UTILIZAÇÃO...
-
Page 39: Fazer Uma Impressão
Nota 1: aguarde enquanto o Hot End atinge a temperatura escolhida para o material a imprimir e distância entre nozzle e prato excessiva) nem deve apresentar excesso de material que provoca irregu- Manual de Utilizador BLOCKS ZERO USER GUIDE MANUAL DE UTILIZAÇÃO... - Page 40 Materiais diferentes as camadas na zona de mudança ou em certos casos um entupimento do nozzle se forem combinados na mesma impressão. Passos ilustrados na próxima página Manual de Utilizador BLOCKS ZERO ZERO USER GUIDE MANUAL DE UTILIZAÇÃO...
- Page 41 Funcionamento Manual de Utilizador BLOCKS ZERO USER GUIDE MANUAL DE UTILIZAÇÃO ZERO...
- Page 42 04.5 no ecrã A impressora Blocks Zero oferece ao utilizador a opção de controlar diversos parâmetros directamente no equipamento, seja em modo stand by, seja durante a impressão. 1. Auto home - serve para efectuar o reposicionamento da cabeça de impressão na origem das coordenadas espaciais.
-
Page 43: Manutenção
Remoção de objectos e limpeza do prato de impressão O rugosidade do prato de impressão na Blocks Zero proporciona uma óptima adesão. Não prato se encontra nivelado e a uma distância ideal do nozzle. Para remover os objectos im- 05.2 Limpeza do Nozzle nozzle a 220ºC. -
Page 44: Tensão Das Correias
O operador deve também garantir que estas estão alinhadas entre os pi- nhões e as polias. (Para saber mais sobre como tensionar as correias consulte a página 65 da secção TIPS do manual de montagem Blocks Zero.) 05.6 Limpeza e manutenção do extrusor para garantir uma óptima tracção do pinhão. - Page 45 PTFE na direcção oposta. (Para saber mais sobre como desconectar o tubo de PTFE consulte a página 66 da secção TIPS do manual de montagem Blocks Zero.) tempo aliviando a tensão da patilha do extrusor. 7. Pegue num pedaço de PLA com pelo menos 30 cm e repita o passo 4 até que a saída do Caso não tenha tido sucesso volte a repetir todos os passos.
- Page 46 Ajustar a tensão das molas Limpar o pinhão Blower da impressão durante a impressão Problemas de extrusão Efectuar a manutenção do extrusor Entupimento do nozzle Desentupir o nozzle de qualidade recomendado pela Blocks Manual de Utilizador BLOCKS ZERO USER GUIDE MANUAL DE UTILIZAÇÃO ZERO...
Need help?
Do you have a question about the ZERO and is the answer not in the manual?
Questions and answers