X-Sense XP04/XP05/XP06 - Monoxide Alarm with Battery Backup Manual
- User manual (15 pages)
Advertisement
lntroduction
This user manual contains important information about your alarm installation and operation. Please read this manual carefully and save it for future reference.
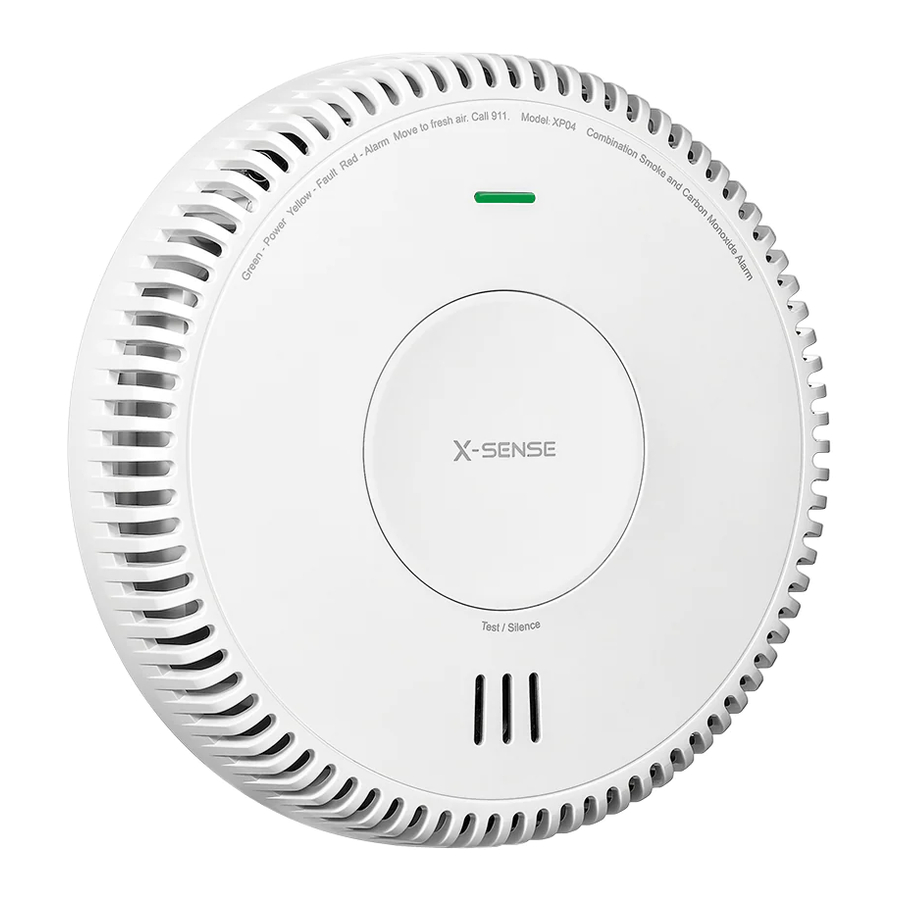
This X-Sense hardwired combination smoke and carbon monoxide alarm is intended for detecting both smoke and carbon monoxide in а residential environment. lt has а photoelectric sensor to detect large particles produced by smoldering fires, and an electrochemical sensor to detect dangerous levels of carbon monoxide, protecting your family from two deadly household threats in one unit.
This device is powered via your home's electrical system and is also equipped with а backup battery in case the electricity fails. lt complies with regulatory requirements, including UL 217 and UL 2034 Standards, and should be installed by а qualified technician. AII installed wiring should conform to articles 21О, and 300.3В of the National Electrical Code ANSI/ NFPA 70, NFPA 72, and/or applicable codes in your local jurisdiction.
This device сап work either as а single unit or be interconnected with other X-Sense АС and AC/DC alarms. Under АС power, all devices will alarm when any single device senses smoke or СО. lf the electricity fails, only the AC/DC devices will continue to send and receive signals within the interconnected alarm network, while AC-only devices will cease to operate. Note that АС hardwired interconnection only works for X-Sense ХРО4, XP0S, ХРОб, XP04-S, XP0S-S, and ХРОб-S devices.
Product View


LED lndicator
The LED indicator flashes to indicate device status, which includes powering on, standby mode, smoke alarm, СО alarm, alarm exit, device test, silence function, low battery, malfunction, and end-of-life signal.
Test/Silence Button
The Test/Silence button is used to check if your alarm is still properly functioning and to temporarily silence an alarm.
Buzzer
The buzzer will beер in sync with the LED indicator to indicate device status, which includes powering on, smoke/CO alarm, device test, low battery, malfunction, and end-of-life signal.
Battery Backup
During power outages, the backup battery will activate to ensure continuous power supply. Note that this battery is replaceable.
Power Connector
The power connector is used to plug into the device's power receptacle on the device and supplies the device with АС power. The blасk line is "hot'; the white line is "neutral'; and the red line is used for interconnection.
Mounting Bracket
The mounting bracket is supplied for device installation. Twist counterclockwise to remove from the device before mounting.
Location and Placement
All connections should be made by a professional technician, and all wiring should comply with articles 210 and 300.3 (B) of the U.S. National Electrical Code ANSI/NFPA 70, NFPA 72, and/or any other codes having jurisdiction in your area.
Location in Your Home
In accordance with NFPA recommendations, it is recommended to install an X-Sense smoke and carbon monoxide alarm:
- On every level of your home, including finished attics and basements.
- Inside every bedroom or adjacent hallway to every sleeping area. If a room or hallway is longer than 40 feet (12 m), install a device at each end.
- In every room containing a fuel-burning appliance.
- In all rooms, hallways, and storage areas where the temperature is usually between 40-100°F (4.4-37.8°C).

 | FIRE EXTINGUISHERS |
 | SMOKE ALARMS |
 | CARBON MONOXIDE ALARMS |
 | SMOKE & CO ALARMS |
Placement on a Wall or Ceiling
It is recommended that you install an alarm on the ceiling so that it can detect the first traces of smoke when smoke rises. However, regardless of where you install it, ensure that nothing can prevent smoke or CO from reaching the alarm. If you install the device on the ceiling, center it in the room, as smoke spreads horizontally after rising to the ceiling. Make sure it is at least 20 inches (50 cm) away from the wall. If an alarm is installed onto a wall, keep 4-12 inches (10-30 cm) below the ceiling.
If you install the alarm on a sloped ceiling, place it between 4 inches (10 cm) and 35 inches (90 cm) from the peak. Keep the device at least 5 feet (1.5 m) from potential smoke or fume sources such as stoves, furnaces, water heaters, and space heaters.

Mobile Home Installation
In mobile homes or older houses, extreme heat and cold can spread from the outside to the inside due to poorly insulated walls and roofing. This may create a thermal barrier that can prevent smoke from reaching the alarm. In this situation, install the device on an inside wall with the top edge of the device at a minimum of 4 inches (10 cm) and a maximum of 12 inches (30 cm) below the ceiling. If you are unsure about the insulation quality of your home, install the alarm on an inside wall near the bedrooms. Test the alarm before each trip and at least once a week during use.
Locations to Avoid
Improper location can have a negative impact on device performance and may cause false alarms. To promote accurate detection and full protection of your home, do not install this combination smoke and carbon monoxide alarm:
- In a garage or any area that is dusty, dirty, or greasy.
- In bathrooms, kitchens, garages, attics, in unheated areas, or near recessed ceiling areas, ceiling fans, furnaces, or furnace vents. Keep the alarm at least 3 feet (0.9 m) away horizontally from bathroom doors.
- Within 5 feet (1.5 m) of smoke sources, such as a stove.
- In extremely humid environments. Keep the unit at least 10 feet (3 m) away from baths, saunas, humidifiers, vaporizers, dishwashers, laundry rooms, or other sources of extreme humidity.
- In turbulent air, such as near ceiling fans, heat vents, air conditioner vents, or open windows, as excessive airflow may prevent CO from reaching the sensors.
- Under direct sunlight.
- In dead air spaces that may prevent smoke from reaching the device.
- Near cooking appliances, dusty areas, showers, or any areas where the temperature drops below 40°F (4.4°C) or rises above 100°F (37.8°C).
Installation
This combination smoke and carbon monoxide alarm should be installed by a qualified technician, and all wiring should be in accordance with The National Fire Protection Association's Standard 72 and relevant regulations or applicable codes in your local jurisdiction. Specific requirements for this alarm vary by state and region. Check with your local Fire Department for current requirements in your area.
- Get to Know Your Alarm

Before Installation:

- This device should be installed on a standard 4-inch (10-cm) wiring junction box, or on any ceiling or wall allowed by local codes.
- An appropriate power source is 120 V AC Single Phase, supplied from a non-switchable circuit, which is not protected by a ground fault interrupter.
- If you want this unit to function as a standalone unit, keep the insulating cap on the red line to ensure that it does not connect to other units.
- If you want to create an interconnected alarm system, ensure all interconnected devices are powered by a single circuit. In accordance with NFPA restrictions, up to 24 devices can be added in a single circuit, including 18 alarms and six range extenders. A maximum of 12 smoke alarms is allowed in the 18 alarms.
- In an interconnected system, the maximum wiring distance between the first and last device should be no more than 1000 feet (305 m).
- Interconnect devices within a single-family residence only. Interconnected devices will only work if they are wired to compatible devices and all requirements are met. Note that AC hardwired interconnection only works for X-Sense XP04, XPOS, XP06, XP04-S, XPO5-S, and XP06-S devices.


- Turn Off Power
Before installation, turn off power to the area where this device will be installed at the circuit breaker or fuse box. Otherwise, it can result in serious electrical shock, personal injury, or even death. Do not restore power until all devices are completely installed.
![]()
![]()
Electrical Shock Hazard Failure to turn off power may result in serious electrical shock, injury, and even death.

- Remove the Old Device
If an existing alarm is not installed on the ceiling or wall, skip this step. Disconnect all cables from the old alarm, then twist and remove carefully to avoid damage to the wall or ceiling. Then, remove the old base by unscrewing the mounting plate from the electrical box. - Connect the Cables
The set of cables that come with the alarm contains three colors: black for "hot,' white for "neutral, for "interconnection. Hold the end of the white wire together with the end of a white wire in the electrical box, cap them with a wire nut, then twist clockwise until secure. Do the same for the black and red wires.
- Install the Mounting Bracket
Screw the mounting bracket to the electrical box using the provided screws.
Note: The side marked "WALL SIDE" should face the wall.
- Insert the Battery
Open the device's battery cover and take out the temporary foam insert. Then install the provided battery inside the battery compartment. Once installed properly, the alarm will activate, and the LED indicator will flash yellow, green, and red in sequence eight times.


- Connect the Power Connector to the Device
Plug the power connector into the back of the device, then stuff any excess wiring into the electrical box. Make sure the power connector is aligned with the back of the unit.
Note: Improper wiring of the power connector may damage the unit.
![]()
- Mount the Device
Align the mounting bracket with the unit, then twist clockwise until you feel resistance. If you want the LED indicator and buzzer to be aligned with other already installed units, you may need to twist up to three times to horizontally align the unit with the wall.

- Turn On Power
If you need to install more than one device, repeat the steps above. Turn on the power after installation. When the unit receives power, the LED indicator will light up green, indicating that it is functioning properly. - Test the Device
Test the device when you turn on the unit for the first time, or when the group configuration has changed. Note that this will only test the device circuits, rather than test the smoke and CO sensors. If your device fails to emit an audible test alert, please refer to the troubleshooting section.


To test an individual device:
Press the Test/Silence button. The device should emit two sets of three long beeps, followed by two sets of four beeps. The LED indicator should flash red. After testing, the device will automatically return to standby mode.
To test all interconnected devices:
Press and hold the Test/Silence button on any device until you hear beeps. The initiating device should keep beeping with its LED indicator flashing red. Other interconnected devices should emit two sets of three long beeps with the LED indicator flashing red and green in sequence, then emit two sets of four beeps with the LED indicator flashing red.
The test will finish within three minutes, at which point all devices will return to standby mode.

Do not tamper with this device, as this may result in electrical shock or device malfunction.
Operating Instructions
If something goes wrong with your alarm, it will notify you of what's going on through the colored LED indicator and beeping pattern.
What to Do When an Alarm Sounds
If an alarm is triggered, all other interconnected alarms will sound simultaneously with the initiating alarm. If the smoke alarm and CO alarm are both triggered at the same time, the smoke alarm will take priority over the CO alarm in terms of signaling. When an alarm sounds, the first thing to do is identify the type of alarm.
Ifa smoke alarm is triggered, you will hear and see:
| Initating Device | Other Interconnected Devices | |
| Buzzer | Three beeps every four seconds | |
| LED Indicator | Flashes red three times every four seconds | Flash red and green in sequence every four seconds |
How to respond to a smoke alarm:
- Locate the source of fire. If a fire is present, exit the house immediately.
- Do not panic. Stay calm and follow your escape plan.
- Touch doors before you open them. If the door is not hot to the touch, open it slowly. If hot, avoid it. Keep doors and windows closed unless you must escape through them.
- Cover your nose and mouth with a cloth (preferably damp). Take short, shallow breaths.
- Once outside, call the Fire Department as soon as possible.
- Never re-enter a burning building for any reason.
If a CO alarm is triggered, you will hear and see:
| Initating Device | Other Interconnected Devices | |
| Buzzer | Four beeps every 5.8 seconds | |
| LED Indicator | Flashes red four times every 5.8 seconds | Flash red four times and green once every 5.8 seconds |
How to respond to a CO alarm:
- Call emergency services as soon as possible.
- Move outside immediately for fresh air. Make sure everyone in the house has evacuated the area. Do not re-enter the house until the air in the house has had time to recirculate and your alarms return to normal working condition. If it is impossible to move outside, stay close to an open door/window until emergency personnel arrives.
- After following steps 1-2, if your alarm alerts again within a 24-hour period, repeat steps 1-2 and call a qualified technician to investigate sources of CO from fuel-burning equipment and appliances to ensure proper operation of this equipment.
- If problems are identified during this inspection, have the device serviced immediately. For combustion devices that have not been inspected by a technician, consult the manufacturer's instructions, or contact the manufacturer directly for more information about CO safety and this equipment. Make sure that motor vehicles are not and have not been operating in an attached garage or adjacent to the residence.
Using the Silence Function
The silence function is only intended for temporarily silencing an alarm, not for correcting any problems. Note that you cannot silence an alarm by removing the battery from the device or disconnecting from power. Doing so will disable the unit and remove your protection.
To silence a smoke or CO alarm:
You can temporarily silence false alarms by pressing the Test/Silence button on any device.
| Smoke Alarm | CO Alarm |
| The silence duration for a smoke alarm is nine minutes. After that, if the smoke concentration level reaches the alarm level again, the device will alarm again. | The silence duration for a CO alarm is nine minutes, then it will exit the silence mode. However, if after six minutes, the CO concentration is still at the alarm level, the device will alarm again. If the CO concentration is at a very dangerous level higher than 300 ppm, the device cannot be silenced. |
Note:
- Tosilence any interconnected smoke or CO alarm, press the Test/Silence button on the source alarm. To locate the source alarm, press the Test/Silence button on any device; if all devices are silenced except for one device, then the alarm still sounding is the initiating device. You can also locate it using the colored LED indicator with a beeping pattern. The source alarm flashes red with three long beeps every four seconds if a smoke alarm is triggered. If a CO alarm is triggered, it will flash red with four beeps every 5.8 seconds.
- When you temporarily silence one device by pressing the Test/Silence button, other interconnected devices are not silenced and will sound an alarm together if they detect smoke or CO.
To silence the low-battery warning:
If the battery level is low, the LED indicator will flash yellow once every 60 seconds, and the buzzer will beep every 60 seconds. To silence this alarm, press the Test/Silence button on the device. The device will be temporarily mute for 10 hours.
To silence the end-of-life signal:
When the battery is weak, the LED indicator will flash yellow three times with three beeps every 60 seconds. Press the Test/Silence button to stop the end-of-life signal for 22 hours. Note that this function will only work within 30 days of the expiration date.
Smoke/CO Alarm Reminder
The device will remind you of any smoke and CO alarm you may have missed. If a smoke alarm was triggered and then returned to standby mode after the smoke concentration decreased below the alarm level, the LED indicator will flash red and yellow sequentially once every five seconds. If a CO alarm was triggered and then returned to standby mode after the CO concentration decreased below the alarm level, the LED indicator will flash red and yellow sequentially once every 30 seconds. To erase these alarm reminders, press the Test/Silence button. Note that the smoke/CO alarm reminder will not work if the device is battery-powered.
Device Status Checklist
| Status | LED Indicator | Buzzer | Response | |
| Power On | Flashes yellow, green, and red in sequence eight times. | One quick beep. | / | |
| Standby Mode | AC Power: the LED indicator is solid green. | / | / | |
| DC Power: the LED indicator flashes green once every 60 seconds. | / | |||
| Smoke Alarm | Initiating Device | Flashes red three times every four seconds. | Three long beeps every four seconds. | / |
| Other Interconnected Devices | Flash red and green in sequence every four seconds. | |||
| CO Alarm | Initiating Device | Flashes red four times every 5.8 seconds. | Four quick beeps every 5.8 seconds. | / |
| Other Interconnected Devices | Flash red four times and green once every 5.8 seconds. | |||
| Device Test | Test a single device | Flashes red | Two sets of three long beeps, then two sets of four quick beeps. | To test a single device, press the Test/Silence button. |
| Test all interconnected | red. Other devices | Initiating device flashes interconnected devices flash red and green in sequence, then flash red. | To test all interconnected devices, hold down the Test/Silence button on any device. The buzzer keeps beeping until you release the Test/Silence button. | ||
| Silence Function | Silence a smoke] alarm | Flashes red three times | / every four seconds. | / | The silence duration is set for nine minutes. After that, the device will alarm again if smoke concentration reaches the alarm level. |
| Silence a CO alarm | Flashes red four times every 5.8 seconds. | / | The silence duration is set for nine minutes, but the device will alarm when the CO concentration reaches the alarm level after six minutes. | |
| Silence a low-battery warning | Flashes yellow once every 60 seconds. | / | The silence duration is set for 10 hours, at which point the device will exit silence function. | |
| Silence an end-of-life signal | Flashes yellow three times every 60 seconds. | / | The silence duration is set for 22 hours, at which point the device will exit silence function. | |
| Exit the silence function | Flashes green three times. | / | / | |
| Low Battery Warning | Flashes yellow once every 60 seconds. | Beeps once every 60 seconds. | Replace the battery immediately. | |
| Malfunction | Flashes yellow twice every 60 seconds. | Beeps twice every 60 seconds. | Clean your device. If the device still does not function properly, replace the device immediately. | |
| End of Life | Flashes yellow three times every 60 seconds. | Beeps three times every 60 seconds. | Replace the entire device immediately. | |
Technical Specifications
| Power Supply | 120V AC (60 Hz, 45 mA max, and 9 V Alkaline battery backup) |
| Sensor Type | Smoke: Photoelectric |
| CO: Electrochemical | |
| Product Lifespan | 10 years |
| Safety Standards | UL 217 and UL 2034 |
| Smoke Sensitivity | 1.3-3.0% obs/ft |
| CO Sensitivity | 70 ppm for 60-240 minutes |
| 150 ppm for 10-50 minutes | |
| 400 ppm for 4-15 minutes | |
| Operating Temperature | 40-100°F (4.4-37.8°C ) |
| Operating Relative Humidity | 10%-85% RH (non-condensing) |
| Alarm Noise Level | = 85 dB at 10 feet (3 m) @ 3.2 + 0.3 kHz pulsing alarm |
| Silence Duration | <9 minutes |
Maintenance
This device has been designed to require little work or maintenance. However, to ensure optimum long-term performance, please follow the steps listed below:
- Clean your alarm with a soft, damp cloth once a month. Do not disassemble the device or clean the interior. Doing so will void your warranty.
- Do not clean with detergents or solvents, or spray air fresheners or hair spray near the device, as these may lead to a malfunction.
- Do not paint the device, as it will seal the vents and reduce the sensitivity of the smoke sensors.
- Do not tamper with this device, as this may lead to electrical shock or malfunction.
Weekly Test
Test the device once a week by pressing the Test/Silence button to check if the device is functioning properly. Note that this only tests the electronics in your alarm rather than the smoke and CO sensors.
Battery Replacement
If the backup battery is depleted, the LED indicator will flash yellow with one beep every 60 seconds. Follow the steps below to replace the battery immediately. Note that this alarm requires a standard 9 V lithium battery.
- Open the battery compartment and remove the old battery.
- Insert a new battery, making sure it is aligned properly. Match the terminals on the end of the batteries with the terminals of the device.
- Close the battery compartment, then test the device by pressing the Test/Silence button.

Disconnect AC power before changing the battery, Shock hazard exists if AC power is miswired.
Troubleshooting
| Description | Problem | Solution |
| The device does not alarm during a test. | Improper wire connection or operation |
|
| False alarms are triggered intermittently while cooking or showering. | Improper installation location | Avoid installing alarms near cooking appliances, dusty areas, showers, or any area where the temperature drops below 40°F (4.4°C) or rises above 100°F (37.8°C). |
| The LED indicator flashes yellow once every 60 seconds with one beep. | Low battery warning | Replace the battery immediately. If an immediate replacement is not possible, you may press the Test/Silence button to silence the alarm for 10 hours. |
| The LED indicator flashes yellow twice every 60 seconds with two beeps. | Malfunction | Clean your alarm. If the problem persists, replace the device. |
| The LED indicator flashes yellow three times every 60 seconds with three beeps. | End-of-life signal | Replace the battery immediately. If an immediate replacement is not possible, you may press the Test/Silence button to silence the alarm for 22 hours. |
| The LED indicator flashes red and yellow sequentially every 5 seconds and there is no alarm sound. | Smoke reminder | Dangerous smoke was detected and smoke concentration decreased below the alarm level. Please check the surroundings immediately. To erase the reminder, press the test/silence button and the alarm will return to normal working mode. |
| The LED indicator flashes red and | CO reminder yellow sequentially every 30 seconds and there is no alarm sound. | CO reminder | Dangerous CO levels were detected and CO concentration decreased below the alarm level. Please check the surroundings immediately. To erase the reminder, press the test/silence button and the alarm will return to normal working mode. |

Documents / ResourcesDownload manual
Here you can download full pdf version of manual, it may contain additional safety instructions, warranty information, FCC rules, etc.
Download X-Sense XP04/XP05/XP06 - Monoxide Alarm with Battery Backup Manual
Advertisement


Need help?
Do you have a question about the XP04 and is the answer not in the manual?
Questions and answers