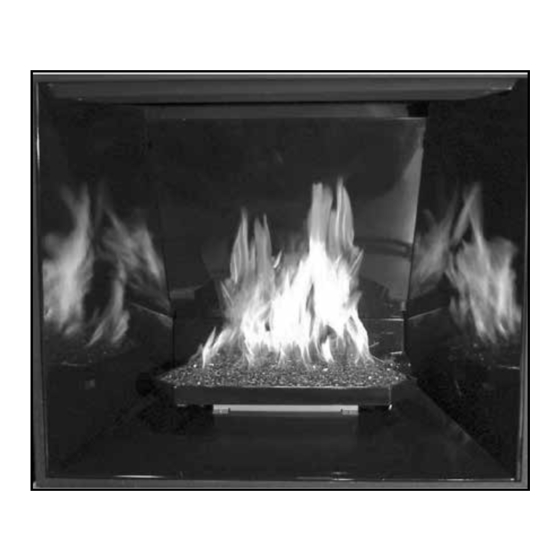
Town & Country Fireplaces TC42 Series Installation Instructions Manual
Black diamond burner kit
Hide thumbs
Also See for TC42 Series:
- Installation and operator's manual (48 pages) ,
- Installation and operating instructions manual (48 pages) ,
- Operating instruction (40 pages)
Table of Contents
Advertisement
Quick Links
INSTALLER: Leave this manual with the appliance.
CONSUMER: Retain this manual for future reference.
These instructions are supplementary to the Installation and
Operating Instructions supplied with the fireplace and should be
kept together. Refer to the Installation and Operating Instructions
for proper gas supply, safety requirements and operating
instructions
Visit www. townandcountryfireplaces.net for the most recent version of this manual
160223-16
TC42
BLACK DIAMOND
BURNER KIT
INSTALLATION
INSTRUCTIONS
SKU# 22150035
For TC42 Series D
Fireplaces
SKU# 22150035
100000383
Advertisement
Table of Contents

Summary of Contents for Town & Country Fireplaces TC42 Series
- Page 1 Refer to the Installation and Operating Instructions for proper gas supply, safety requirements and operating instructions TC42 BLACK DIAMOND BURNER KIT INSTALLATION INSTRUCTIONS SKU# 22150035 For TC42 Series D Fireplaces Visit www. townandcountryfireplaces.net for the most recent version of this manual 160223-16 SKU# 22150035 100000383...
-
Page 2: Contents Of Package
Contents of Package • BURNER • BURNER TRAY ASSEMBLY • TUMBLED GLASS • BURNER SHIELD • MANIFOLD ASSEMBLY (including supply tube) • PILOT SHIELD (including pilot and pilot supply tube) • HARDWARE PACKAGE • MEDIA SPACER, rear • MEDIA SPACER, front Figure 1: Contents of kit. - Page 3 2. Attach the manifold and pilot supply tubes to the bulk head fitting and tighten (Figure 3). Ensure that all connections are gas tight. Figure 3: Gas and pilot supply tubes. 3. Feed the ignition and sensor wires through the bulkhead plate (Figure 3) to the interface Ignition and sensor wires Bulkhead plate...
- Page 4 Flame sensor wire (white) Ignition wire (red) 4. Attach the ignition and sensor wires to the module (Figure 5). Interface module 5. Panel clips must be installed on the bottom of both side panels (notch facing inside) Figure 5: Interface module. (Figure 6).
- Page 5 7. Install burner shield by tip- ping the shield into the firebox, catching the folded edges in the panel clips (Figure 7). Burner shield Figure 7: Installing burner shield. 8. Position clip nuts, included in hardware package, onto burner shield (Figure 8). Figure 8: Positioning clip nuts.
- Page 6 9. Attach the burner tray to the burner shield using two screws at the back of the tray (Figure 9) Figure 9: Installing burner tray. 10. Attach pilot shield to burner tray with two screws. (Figure 10) Figure 10: Installing pilot sheild. SKU# 22150035_160223-16 100000383...
- Page 7 11. Install front & rear media spac- ers (Figure 11 and Figure 12). Rear media spacer Figure 11: Rear media spacer. 12. Set the burner air shutter to fully open for propane or fully closed for natural gas. Front media spacer Figure 12: Front media spacer.
- Page 8 13. Install burner by tilting burner inlet through tray. Ensure that the orifice has entered the inlet tube (Figure 13 and Figure 14) . Figure 13: Installing burner. Figure 14: Burner installed. SKU# 22150035_160223-16 100000383...
- Page 9 14. Install the center media spacer and secure spacer to the tray with the two long screws pro- vided. (Figure 15). Center media spacer Figure 15: Center media spacer. 15. Apply just enough glass media to cover the burner assembly. (Figure 16) NOTE: Too much glass media over the burner will cause...
-
Page 10: Propane Conversion
Propane Conversion WARNING This conversion kit shall be installed by a qualified service agency in accordance with the manufac- turer's instructions and all applicable codes and requirements of the authority having jurisdiction. If the information in these instructions is not followed exactly, a fire, explosion or production of car- bon monoxide may result causing property damage, personal injury or loss of life. - Page 11 Figure 19: Removing pilot shield. Figure 20: Loosening pilot head. 7. Remove access panel to gain access to the gas valve for propane conversion. 8. Complete the gas valve conversion from natural gas to propane gas according to the instructions included in the SIT propane gas conversion kit.
-
Page 12: Burner Flame Adjustment
Burner Flame Adjustment The air shutter on the burner inlet tube controls the primary combustion air to the gas burner and is pre-set to the closed position at the factory for natural gas fuel. Some adjustment may be necessary to obtain desired flame and to eliminate carbon deposits. -
Page 13: Replacement Parts
Replacement Parts ITEM / DESCRIPTION PART NO. BURNER ................TC42.5011832 MANIFOLD ASSEMBLY .............TC42.9640 MEDIA SPACER, REAR ..............9645 PILOT SHIELD ..............TC36.9626PBK MEDIA SPACER, CENTRE ............9647.001 MEDIA SPACER, FRONT ..............9646 BURNER SHIELD ..............TC42.9642 BURNER TRAY ..............TC42.9641PBK PILOT ASSEMBLY, CONVERTIBLE........TCRP.5005025 10 1/4”... - Page 14 SKU# 22150035_160223-16 100000383...
- Page 15 SKU# 22150035_160223-16 100000383...
- Page 16 © 2016 Copyright Pacific Energy Fireplace Products LTD. Reproduction, adaptation, or translation without prior written permission is prohibited except as allowed under the copyright laws. For technical support, please contact your retailer www.townandcountryfireplaces.net 2975 Allenby Rd., Duncan, BC V9L 6V8 Printed in Canada...


Need help?
Do you have a question about the TC42 Series and is the answer not in the manual?
Questions and answers