Table of Contents
Advertisement
Quick Links
Advertisement
Table of Contents

Related Manuals for Luma Surveillance LUM-310-PTZ


Summary of Contents for Luma Surveillance LUM-310-PTZ
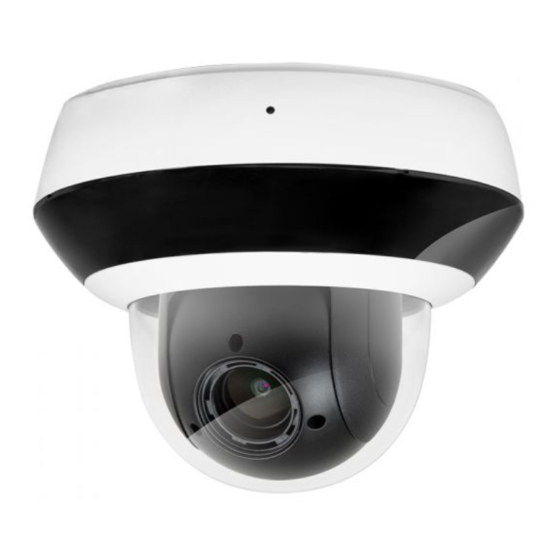
- Page 1 LUM-310-PTZ IP Surveillance Camera Installation and Quick Start Guide...
-
Page 2: Safety Tips
OvrC, a powerful remote maintenance tool. See OvrC.com for details. In addition, your client can use the Luma Surveillance mobile app to check on the camera from anywhere. For installation using this guide, you must be able to access this camera through a personal computer. -
Page 3: Box Contents
Aside from the contents of this box, you must provide Standard slot-head screwdriver A network connection (and an NVR, if desired) Admin rights to a computer that can access the network Mobile device with Luma Surveillance app (recommended) or CCTV tester Power source: PoE or 12V DC Phillips screwdriver... -
Page 4: Additional Resources
310 Series IP PTZ Camera Preparation Ensure that your recorder has the very latest firmware. Use OvrC to update the firmware, or consult your NVR manual. Keep all equipment powered off during physical installation. Ensure the mounting surface is strong enough to withstand three times the weight of the camera and the mount. - Page 5 310 Series IP PTZ Camera Weatherproofing the Network Cable We recommend weatherproofing your cable for all outdoor installations, no matter how shielded your camera may be from the elements. Use the weatherproofing kit provided with the camera, and an unterminated network cable. 1.
-
Page 6: Installation: On-Ceiling
310 Series IP PTZ Camera Installation: On-Ceiling The cables can be routed either from the top of the extension mount and into the ceiling, or out the side of the extension mount to run across the ceiling. Requirements The ceiling must be strong enough to hold four times the weight of the PTZ camera (and mount). - Page 7 310 Series IP PTZ Camera 5. Flip the base plate over and attach it to the ceiling as shown. 6. Route the cables through the cable hole or conduit and connect them to the camera tails. 7. Align the PTZ camera with the base plate.
-
Page 8: Activate The Camera
Connect the camera to your networked PC. Run the Luma Utility. It searches for attached Luma Surveillance devices. If your camera does not appear, check the connection, ensure the camera has power, then click Refresh. -
Page 9: Edit The Network Settings
310 Series IP PTZ Camera Edit the Network Settings Suggested Best Practices: Ensure the Enable DHCP box is activated. In your router, reserve an IP address and assign it to the camera’s MAC address (found on its box). See your router’s documentation for details. - Page 10 310 Series IP PTZ Camera Start the Web Interface Open your browser and navigate to the camera’s IP address. Below the login area, you may see: “Please click here to download and install the plug-in. Close the browser when installing the plug- in.
-
Page 11: Zoom And Focus
310 Series IP PTZ Camera Zoom and Focus This camera has a motorized varifocal lens. To adjust the focus, return to the live screen (see previous page) and click the PTZ icon . This opens up the PTZ menu on your screen. In the PTZ menu, the buttons circled control the lens. -
Page 12: Set Up Presets
310 Series IP PTZ Camera Set Up Presets To set up presets and patrols, go to the live page and click the PTZ icon . This opens up the PTZ menu on your screen. Set Up Presets You can set up to 300 different presets. To set a preset, click the flag button on the PTZ menu to open the preset tab. -
Page 13: Set Up Dynamic Dns
310 Series IP PTZ Camera Set Up Dynamic DNS DDNS allows you to connect to your surveillance system from anywhere, via the Internet, using a web address that’s easy to remember. Click on the Settings Menu icon (page 12) and navigate to Basic Network Settings >... -
Page 14: Final Steps
310 Series IP PTZ Camera Final Steps Add Additional Users Click on User Management. Click the Add button. Enter the new account’s user name and password. Account names can be up to 32 characters long. If you are using an NVR, to ensure compatibility with the NVR’s local interface, user names should contain numbers and letters only. -
Page 15: Year Limited Warranty
(RA) number. Contact technical support for an RA number. Copyright ©2019 by SnapAV. All rights reserved. SnapAV, Luma Surveillance, and all related marks and images are trademarks or registered trademarks of SnapAV. - Page 16 310 Series IP PTZ Camera...
Need help?
Do you have a question about the LUM-310-PTZ and is the answer not in the manual?
Questions and answers