
Subscribe to Our Youtube Channel
Related Manuals for DeLonghi PrimaDonna S Evo ECAM51 55 Series


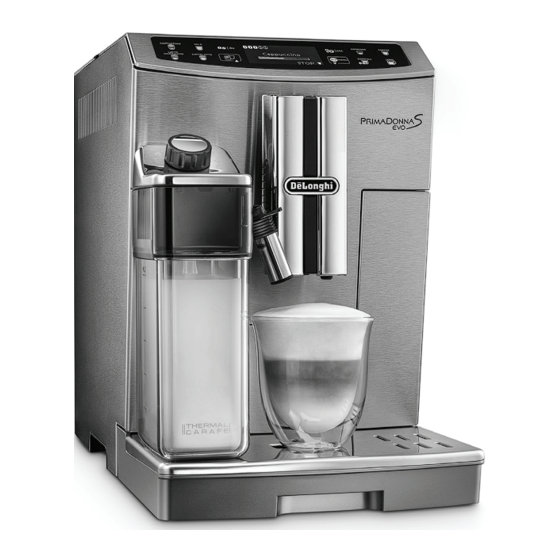
Summary of Contents for DeLonghi PrimaDonna S Evo ECAM51 55 Series
- Page 1 ECAM51X.55 전자동 에스프레소 / 카푸치노 머신 사용 설명서 BEAN TO CUP ESPRESSO AND CAPPUCCINO MACHINE Instruction for Use 사용 설명 동영상: http://ecam51055.delonghi.com...
- Page 2 2페이지...
- Page 3 3페이지...
- Page 4 4페이지...
- Page 5 CLEAN 5페이지...
-
Page 6: Table Of Contents
청소 ..............19 목차 14.1 기기 청소 ................19 기본 안전 경고 ............. 7 14.2 기기의 내부 수로 청소 ............19 안전 경고 ............8 14.3 커피 찌꺼기 컨테이너 청소 ..........19 이 설명서에 사용되는 기호 ..........8 14.4 드립 받침대 및 응축액 받침대 청소 ......19 지정된... -
Page 7: 기본 안전 경고
1. 기본 안전 경고 • 신체 및 감각 기능에 장애가 있거나 지적 장애가 있는 사람, 경험과 지식이 부족한 사람(어린이 포함)은 그들의 안전을 책임지는 사람이 기기 사용을 감독하거나 지침을 내릴 때만 이 기기를 이용할 수 있습니다. • 어린이가 기기로 장난을 치지 않도록 잘 살펴봐야 합니다. •... -
Page 8: 안전 경고
• 신체 및 감각 기능에 장애가 있거나 지적 장애가 있는 사람, 경험과 지식이 부족한 사람은 관리 감독하에서나 안전한 기기 사용에 관한 지침을 숙지하고 관련 위험 요소를 이해하고 있을 때만 이 기기를 이용할 수 있습니다. • 어린이가 기기로 장난을 치지 않도록 하십시오. •... -
Page 9: 문제 해결 및 수리
새로운 음료를 3개까지 생성하여 기기에 저장할 수도 제외): Ristretto(리스트레토), Espresso 있습니다. Lungo(에스프레소 룽고), 2 Espresso(더블 참고: 에스프레소), Flat white(플랫 화이트), 호환되는 장치는 “ compatibledevices.delonghi.com ” 에서 Espresso Macchiato(에스프레소 마키아토), 확인할 수 있습니다. Cappuccino+(카푸치노+), Cappuccino Mix(카푸치노 믹스), Hot water(온수), 4. 설명... -
Page 10: 액세서리 설명
4.3 액세서리 설명 전원 콘센트가 기기의 플러그와 일치하지 않을 경우에는 (2페이지 - C) 자격을 갖춘 전문가를 통해 적합한 유형의 콘센트로 C1. 지시약 용지(한국어 사용 설명서에 첨부되어 있음) 교체하십시오. C2. 분쇄 커피 계량 스푼 5.4 기기 설정 C3. 석회 제거제 C4. 연수 필터(특정 모델에만 있음) 참고: C5. -
Page 11: 기기 전원 끄기
- 필터 설치 - 물 경도 참고: - (필터가 설치된 경우): - 자동 끄기 기기를 작동하기 전에 기기 뒤쪽의 전원 스위치(A7)가 켜져 - 에너지 절약 모드 필터 교체 있는지 확인하십시오(그림 2). - (필터가 설치된 경우): - 경고음 기기의 전원을 켤 때마다 자동 예열 및 세척 사이클이 - 컵... -
Page 12: 유지 관리
8.3 유지 관리 16. “ Emptying complete press ok to turn o˜ (비운 후에 OK를 눌러 끄기) ” : 여기서는 시간이 경과함에 따라 기기에 필요한 모든 유지 를 누릅니다. 관리 작업을 찾을 수 있습니다. 기기가 꺼집니다. • 석회질 제거: 석회질 제거 방법은 “ 15. 석회질 제거 ” 부분을 참고! 참조하십시오. -
Page 13: 내 음료 프로그래밍
(또는 “ Parameters not saved(매개변수가 저장되지 “ 에너지 절약 모드 ” 를 해제하거나 설정하려면 다음 단계를 않았습니다) ” ). 기기는 다시 사용 준비 상태가 됩니다. 따르십시오. 또는 를 누르면 언제든지 추출이 중단됩니다. 를 누릅니다. 디스플레이(B1)는 현재 상태 ( “ Enabled(설정됨) ” 또는 “ Disable(해제됨) ” )를 참고! ( “... -
Page 14: 블루투스
를 눌러 해당 기능을 해제하거나 설정합니다. 를 눌러 작업을 확인합니다. 디스플레이는 이전 • 기본 음료 화면으로 돌아갑니다. 이 기능을 사용하여 모든 음료 또는 이전에 프로그래밍된 8.8 통계 개별 음료의 기본값을 재설정하십시오. 기기와 관련된 통계를 표시합니다. 통계를 표시하려면 다음 (B3)를 누릅니다. 디스플레이(B1)에서는 단계를... -
Page 15: 분쇄 커피를 사용해 커피 만들기
추출구를 최대한 컵 가까이로 내립니다. 이렇게 하면 참고: 크레마가 풍부한 커피가 만들어집니다(그림 10). • 기기를 사용하는 동안에 다양한 경보 메시지가 표시될 그런 다음, 원하는 커피를 선택합니다. 수 있습니다(Fill tank(물통 채우기), Empty grounds 직접 선택한 음료 container(찌꺼기 컨테이너 비우기) 등). 각각의 의미는 “... -
Page 16: 커피 그라인더 조절
• 설정 메뉴에서 “ Rinsing(세척) ” 기능을 선택해 세척 참고: 사이클을 실행합니다( “ 8.1 세척 ” 부분 참조). 추출이 끝날 때쯤에 컵의 커피 양을 늘리고 싶다면 • 온수 기능을 사용하여 온수로 컵을 따뜻하게 만듭니다 “ ▲ EXTRA(추가) ” - 버튼(B4)을 (3초 이내에) 길게 ( “... -
Page 17: 카푸치노와 우유 베이스 커피 자동 추출
• 우유 컨테이너(D)의 내부 관을 청소할 때 우유 LATTEMACCHIATO(라테 거품 양 최소 추출구(D5)에서 소량의 온수와 증기가 새어 나옵니다. 마키아토)/ FLAT WHITE(플랫 물이 튀어 피부에 닿지 않도록 주의하십시오. 화이트) 우유 기능을 사용할 때마다 디스플레이(B1)의 “ Set dial to CAPPUCCINO(카푸치노) / 거품 양 최대 CLEAN, ESC to cancel(청소로... -
Page 18: 온수 추출
확인하면 음료 추출이 시작되며 디스플레이에는 우유 기기에서 온수 추출이 완료되면 추출 동작은 자동으로 추출량을 나타내는 진행 표시줄과 함께 “ Program 중지됩니다. 온수 추출을 수동으로 중지하려면 milk(우유 프로그래밍) ” 가 표시됩니다. (B3)를 누르십시오. 또는 원하는 양만큼 추출이 완료되면 또는 를 참고: 누릅니다. -
Page 19: 기기 청소
14.3 커피 찌꺼기 컨테이너 청소 온수/스팀 추출구 밑에 용기를 놓고 소량의 물을 추출합니다( “ 12. 온수 추출 ” 참조). 디스플레이(B1)에 “ Empty grounds container(커피 찌꺼기 (B5) (B3)를 눌러 온수 그런 다음, 또는 컨테이너 비우기) ” 가 표시되면 컨테이너를 비우고 청소해야 추출을... -
Page 20: 커피 머신 내부 청소
14.5 커피 머신 내부 청소 세제나 식기 세척기는 사용하지 마십시오. 추출기를 청소할 때에는 고장을 일으킬 수 있으므로 감전 위험! 세제를 사용하지 마십시오. 내부 부품을 청소하기 전에 기기 전원을 끄고( “ 7. 기기 전원 브러시(C5)를 사용해 추출기 뚜껑을 통해 보이는 추출기 끄기... -
Page 21: 석회질 제거
15. 석회질 제거 “ Empty drip tray(드립 받침대 비우기) ” : 드립 받침대(A24)와 찌꺼기 컨테이너(A20)를 꺼내 비운 후, 중요! 다시 끼웁니다. 를 누릅니다. • 사용하기 전에 지침과 석회 제거제 팩의 라벨을 읽어 “ Place 2L container empty under spouts(빈 2L 용기를... -
Page 22: 물 경도 설정
23. “ Fill tank(물통 채우기) ” : 세척수를 받을 때 사용한 현재 선택이 디스플레이(B1)에 표시되며 새 선택이 용기를 비우고 물통을 꺼내 MAX(최대 수위) 선까지 물을 깜박입니다. 원하는 새 선택이 표시될 때까지 선택 채운 다음, 기기에 다시 넣습니다. 화살표를 누르십시오. 를 눌러 선택을 확인합니다. 석회질... -
Page 23: 필터 교체
“ Conÿrm?(맞습니까?) ” : (B5) 또는 를 눌러 확인합니다. “ Hot water, Conÿrm?(온수로 하시겠습니까?) ” : 온수 추출구(C6) 아래에 용기(최소 용량: 500 ml)를 놓은 다음, 를 눌러 추출을 시작합니다(그림 5). 또는 기기에서 온수 배출이 시작되고 “ Please wait(기다려 주십시오) ” 메시지가 표시됩니다. 온수의... -
Page 24: 기기 폐기 처분
19. 기기 폐기 처분 기기를 생활 폐기물과 함께 버려서는 안 되며, 허가를 받은 폐기물 분리 및 재활용 센터로 가져가야 합니다. 20. 표시 메시지 표시 메시지 가능한 원인 조치 방법 Fill tank(물통 채우기) 물통(A18)에 물이 부족합니다. 물통에 물을 넣거나 꼭 맞아 소리가 날 때까지... - Page 25 표시 메시지 가능한 원인 조치 방법 Ground too ÿne(너무 곱게 커피가 너무 곱게 분쇄되어 너무 느리게 커피 그라인더가 작동하는 동안 분쇄 조절 다이얼(A3, 그림 7)을 “ 7 ” 을 향해 시계 분쇄됨) 추출되거나 아예 추출되지 않습니다. Adjust mill(그라인더를 방향으로 한칸 돌리면서 커피 추출을 반복하십시오.
-
Page 26: 문제 해결
표시 메시지 가능한 원인 조치 방법 General alarm(일반 경보) “ 14. 청소 ” 부분의 설명대로 기기 내부를 기기의 내부가 매우 지저분합니다. 꼼꼼히 청소하십시오. 청소 후에도 메시지가 계속 표시되면 고객 서비스 센터에 문의하십시오. 거품 조절 다이얼(D1)을 CLEAN(청소)으로 우유 컨테이너(D) 안쪽에 있는 튜브를 돌립니다(그림... - Page 27 문제 가능한 원인 조치 방법 커피가 너무 느리게 커피를 너무 곱게 분쇄했습니다. 커피 그라인더가 작동하는 동안 분쇄 조절 다이얼(A3)을 7을 향해 반시계 방향으로 추출되거나 한 방울씩 한 칸 돌리십시오(그림 7). 추출된 커피에 추출됩니다. 만족할 때까지 한 번에 한 칸씩 계속 돌리십시오.
- Page 28 - 당사에서 지정하지 않은 수리서비스 업체 또는 기사 등이 수리하여 고장 또는 사고 발생 시 3. 그 밖의 경우 - 천재지변 (낙뢰, 화재, 염해, 침수 등)에 의한 고장 발생 시 - 소모성 부품이 수명이 다한 경우 고객상담 및 서비스 드롱기코리아 (주) 080-848-8800 www.delonghi.com/ko-kr...
- Page 29 CONTENTS 14. CLEANING..........42 1. FUNDAMENTAL SAFETY WARNINGS ..30 6.1 Cleaning the machine .........42 6.2 Cleaning the machine's internal circuit ..42 2. SAFETY WARNINGS ........31 14.1 Cleaning the coffee grounds container ..42 2.1 Symbols used in this Instruction for Use ..31 6.3 Cleaning the drip tray and condensate tray .42 2.2 Designated use ..........31 14.2 Cleaning the inside of the coffee machine ...43...
-
Page 30: Fundamental Safety Warnings
1. FUNDAMENTAL SAFETY WARNINGS • The appliance is not intended for use by persons (including children) with reduced phys- ical, sensory or mental capabilities, or lack of experience and knowledge, unless they have been given supervision or instruction concerning use of the appliance by a person responsible for their safety. -
Page 31: Safety Warnings
instruction concerning use of the appliance in a safe way and if they understand the hazards involved. • Children shall not play with the appliance. • Always unplug the appliance when left unattended and before assembly, taking apart or cleaning. Surfaces marked with this symbol become hot during use (the symbol is present in certain models only). -
Page 32: Troubleshooting And Repairs
“8.5 Program My Please note: beverages”, the beverage is programmed directly the Check compatible devices at “compatibledevices.delonghi.com “. first time you use the appliance (press to scroll down) Directly selected milk based beverages: 4. DESCRIPTION... -
Page 33: Description Of The Milk Container
Spout release button Power cord 5.4 Setting up the appliance Please note: 4.3 Description of the milk container • Coffee has been used to factory test the appliance and it (page 2 - D ) is therefore completely normal for there to be traces of Froth adjustment and CLEAN dial coffee in the mill. -
Page 34: Turning The Appliance On
6. TURNING THE APPLIANCE ON - Install filter, - Water hardness, - (if a filter has been in- - Auto-off, Please note: stalled): Replace filter, - Energy saving, Before turning the appliance on, make sure the main switch - (if a filter has been in- - Beep, (A7) on the back of the appliance is pressed (fig. -
Page 35: Maintenance
6. The appliance goes back to the “Settings” menu; Please note! 7. Then press to exit the menu. The next time you turn the appliance on, the circuit will need to be filled: follow the instructions in point 3 of section “5.4 Set- 8.3 Maintenance ting up the appliance”. -
Page 36: Program My Beverages
4. Press . The display (B1) shows the current sta- Please note! tus (“Enabled” or “Disabled”), and the operation to be The display shows “OK “ - (B5) when the length performed when confirming with (“Disable?” or reaches the minimum programmable quantity. “Enable?”);... -
Page 37: Bluetooth
5. Select “All” to reset the aroma and quantity settings to the 3. Press (B3): the display (B1) shows the statistics on default values, or select the required beverage, then press the appliance: use the selection arrows to scroll through (B3) or (B5);... -
Page 38: Making Coffee Using Pre-Ground Coffee
Directly selected beverages Please note: Recipe Quantity Program- Default • Various alarm messages could be displayed while using the mable aroma appliance (Fill tank, Empty grounds container, etc.). Their meaning is explained in section “21. Troubleshooting”. quantity • For hotter coffee, see section “5.2 Tips for a hotter coffee”. ≃... -
Page 39: Adjusting The Coffee Mill
• warm the cups with hot water using the hot water function Please note: (see section “12. Delivering hot water”); At the end of delivery, to increase the quantity of coffee in the • increase the coffee temperature in the “Settings” menu cup, just press and hold (within 3 seconds) the “... -
Page 40: Making Cappuccino And Milk-Based Coffees Automatically
“Set dial to CLEAN, ESC to cancel” flashes on the display (B1) Min. froth LATTE MACCHIATO / each time you use a milk function. Clean as described to elimi- FLAT WHITE nate all milk residues (or press (B2) to clean later): 1. -
Page 41: Delivering Hot Water
ered: once the desired quantity has been delivered, press • The quantity of water delivered can be customised (see section “8.4 Program beverages”). The appliance then prepares the coffee: press 13. STEAM DELIVERY to stop delivery when the desired quantity of cof- fee has been delivered. -
Page 42: Cleaning
14.1 Cleaning the coffee grounds container 3. Also remove the steam connection nozzle by pulling it downwards (fig. 22). When “Empty grounds container” appears on the display (B1), 4. Check the hole in the connection nozzle is not blocked. If the grounds container must be emptied and cleaned. -
Page 43: Cleaning The Inside Of The Coffee Machine
14.2 Cleaning the inside of the coffee machine 5. Soak the infuser in water for about 5 minutes, then rinse under the tap; Danger of electric shock! Important! Before cleaning internal parts, the machine must be turned off Rinse with water only (see section “7. -
Page 44: Cleaning The Hot Water Nozzle
14.7 Cleaning the hot water nozzle 8. “Empty drip tray”: Remove, empty and replace the drip Each time you prepare milk, clean the connection nozzle (A15) tray (A24) and grounds container (A20). Press with a sponge to remove milk residues from the gaskets (fig. 9. -
Page 45: Setting Water Hardness
23. “Fill tank”: empty the container used to collect the rinse 3. Press the selection arrows until “Water hardness” is dis- water, remove the water tank and fill with fresh water up played: press to the MAX level, then put back in the appliance. 4. -
Page 46: Replacing The Filter
5. Insert the filter in the water tank and immerse it completely 5. Press the selection arrows until “Replace filter” is displayed, then press for about ten seconds, sloping it and pressing it lightly to ena- 6. “Confirm?”: press (B5) or to confirm;... -
Page 47: Disposing Of The Appliance
19. DISPOSING OF THE APPLIANCE The appliance must not be disposed of with house- hold waste, but taken to an authorised waste separa- tion and recycling centre. 20. DISPLAYED MESSAGES DISPLAYED MESSAGE POSSIBLE CAUSE REMEDY Fill tank Insufficient water in the tank (A18). Fill the tank with water and/or insert it correct- ly, pushing it as far as it will go until it clicks into place (fig. - Page 48 DISPLAYED MESSAGE POSSIBLE CAUSE REMEDY Less coffee Too much coffee has been used. Select a lighter taste by pressing (B3) ESC to cancel or reduce the quantity of pre-ground coffee. Insert water spout The hot water spout (C6) is not inserted or is Fully insert the hot water spout (fig.
-
Page 49: Troubleshooting
21. TROUBLESHOOTING Below is a list of some of the possible malfunctions. If the problem cannot be resolved as described, contact Customer Services. PROBLEM POSSIBLE CAUSE REMEDY The coffee is not hot. The cups were not preheated. Warm the cups by rinsing them with hot water (Please note: you can use the hot water function). - Page 50 PROBLEM POSSIBLE CAUSE REMEDY At the end of descaling, the During the two rinse cycles, the water tank Follow the instructions displayed by the appli- appliance requests a third (A18) has not been filled to the MAX level. ance, but first empty the drip tray (A24) to avoid rinse the water overflowing.
-
Page 51: Electrical Requirements
22. ELECTRICAL REQUIREMENTS Before using this appliance ensure that the voltage indicated on the product corresponds with the main voltage in your home, if you are in any doubt about your supply contact your local electricity company. The flexible mains lead is supplied connected to a B.S. 1363 fused plug having a fuse of 13 amp capacity. Should this plug not fit the socket outlets in your home, it should be cut off and replaced with a suitable plug, following the proce- dure outlined below. - Page 52 De’Longhi Appliances via Seitz, 47 31100 Treviso Italia 수입판매원 드롱기켄우드코리아 629 BNF 서울시 서초구 강남대로 타워 : 080-848-8800 제품 서비스 및 문의...
Need help?
Do you have a question about the PrimaDonna S Evo ECAM51 55 Series and is the answer not in the manual?
Questions and answers