Table of Contents
Advertisement
Quick Links
Technical Support and E-Warranty Certificate www.vevor.com/support
ELECTRIC MEAT GRINDER
USER MANUAL
MODEL: MG5008KA-GS MG5008K-UL
We continue to be committed to provide you tools with competitive price.
"Save Half", "Half Price" or any other similar expressions used by us only represents an
estimate of savings you might benefit from buying certain tools with us compared to the major
top brands and doses not necessarily mean to cover all categories of tools offered by us. You
are kindly reminded to verify carefully when you are placing an order with us if you are
actually saving half in comparison with the top major brands.
Advertisement
Table of Contents

Subscribe to Our Youtube Channel
Related Manuals for VEVOR MG5008KA-GS

Summary of Contents for VEVOR MG5008KA-GS
- Page 1 Technical Support and E-Warranty Certificate www.vevor.com/support ELECTRIC MEAT GRINDER USER MANUAL MODEL: MG5008KA-GS MG5008K-UL We continue to be committed to provide you tools with competitive price. "Save Half", "Half Price" or any other similar expressions used by us only represents an estimate of savings you might benefit from buying certain tools with us compared to the major top brands and doses not necessarily mean to cover all categories of tools offered by us.
- Page 2 CustomerService@vevor.com This is the original instruction, please read all manual instructions carefully before operating. VEVOR reserves a clear interpretation of our user manual. The appearance of the product shall be subject to the product you received. Please forgive us that we won't inform you again if there are any technology or software updates on our product.
-
Page 3: Important Safeguards
HOUSEHOLD USE ONLY SAVE THESE INSTRUCTIONS Note: Before beginning assembly of product, make sure all parts are present. Compare parts with package content list and hardware contents. Do not attempt to assemble the unit if any parts are missing or damaged. Contact customer service for replacement parts. - Page 4 14. Never run the appliance empty after assembling the blade and blade disk. Otherwise the blade and blade disk will be abraded seriously, and accelerate the unit aging. 15. Appliances can be used by persons with reduced physical, sensory or mental capabilities or lack of experience and knowledge if they have been given supervision or instruction concerning use of the appliance in a safe way and if they understand the hazards involved.
-
Page 5: Technical Parameter
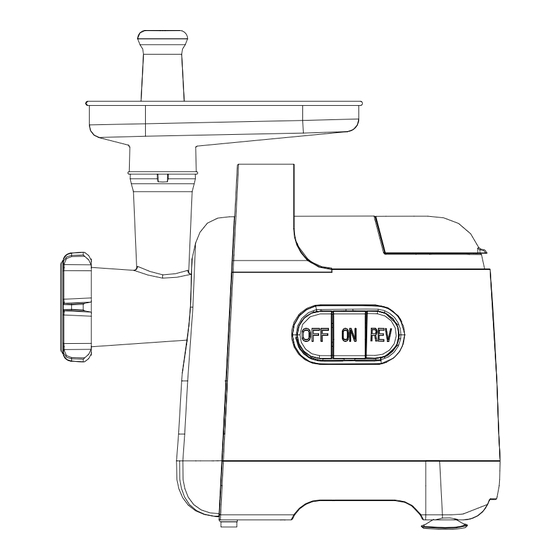
Stuffing Plate Stuffing Tube 3pcs Brush TECHNICAL PARAMETER Continuous MODEL SPECIFICATION RATINGS Capacity working time MG5008KA-G 220-240V 800W 50/60Hz ≥3KG/min ≤15min MG5008K-UL 120V/60Hz 550W OPERATION MANUAL Before the first use, please clean all the detachable parts such as Fasten the screw nut , Cutter, Blade,Crusher bar,Sticky tube,Pressure bar,Filler,. - Page 6 thumb one hand (see arrow 1 of fig.1), and hold the ream meat tube with the other hand, insert it into the hole of the main machine and turn it anti-clockwise until it cannot move any longer (see arrow 2 of fig.1). Release the release button, the ream meat tube is fixed on the main machine.
- Page 7 3. Put the funnel on the ream meat tube. 4.Ensure that the rocker switch is set at “O” position, then plug in power supply. 5. Press the rocker switch to “ON”position (the ream meat rod and the blade turns anti-clockwise), when the appliance operates normally, put the meat piece into funnel, then press the food pusher to the lowest position.
- Page 8 Making sausage 1.Assemble the ream meat rod, kibble cone, sausage pole, lock nut into the ream meat tube as illustrated as figure (see fig.4 and fig.5). Fig.4 Fig.5 sausage pole 2. Assemble the ream meat tube asm into the main machine. Press the Release button with thumb one hand (see arrow fig.6), and hold the ream meat tube with the other hand, insert it into the hole of the main machine and turn it anti-clockwise until it cannot move any longer .
- Page 9 Note: Never assemble blade and blade disk when use for making sausage, and do not assemble sausage pole and kibble cone when blending meat. 3. Set clean small intestine to sausage pole as the figure 7, then place blended meat powder into funnel.
-
Page 10: Reverse Function
Fig 9 7.Press the rocker switch“ON”position, the appliance turns anti-clockwise and the meat powder enters the small intestine,then you can make any shape of meat plate. 8. The max operation time per time shall not exceed 7 minutes and minimum 10 minutes rest time must be maintained between two consecutive cycles. -
Page 11: Environmental Protection
ENVIRONMENTAL PROTECTION This product is subject to the provision of European Directive 2012/19/EC. The symbol showing a wheelie bin crossed through indicates that the product requires separate refuse collection in the European Union. This applies to the product and all accessories marked with this symbol. Products marked with this symbol cannot be discarded with normal household waste but must be taken to an electrical and electronic equipment collection point for recycling. - Page 12 TechnicalSupport and E-Warranty Certificate https://www.vevor.com/support...
Need help?
Do you have a question about the MG5008KA-GS and is the answer not in the manual?
Questions and answers