Mocka Sadie Assembly Instructions Manual
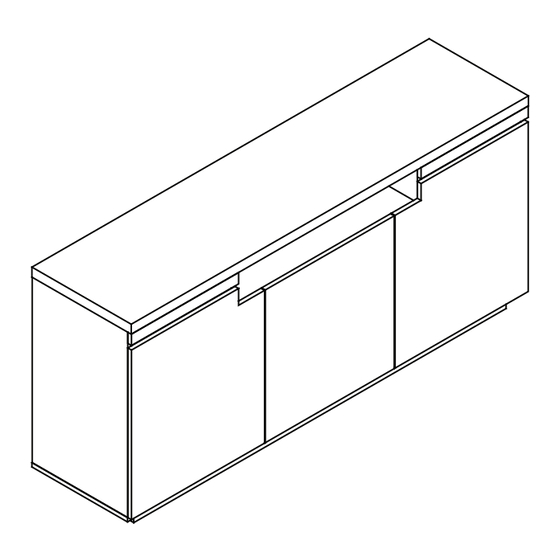
Buffet three door
Hide thumbs
Also See for Sadie:
- Assembly instructions manual (18 pages) ,
- Manual (18 pages) ,
- Assembly instructions (5 pages)
Advertisement
Quick Links
Sadie
Buffet Three Door
Thank you for your purchase.
Please follow the instructions below for correct assembly
B
C
A
dowel
screw
bolt
x24
x12
x48
G
H
I
wedge
hinge
screw
x8
x8
x4
Hardware Supplied
WARNING: Any furniture that is not anchored to a wall has the potential to tip over in certain
circumstances, i.e. if a child attempts to climb up on the furniture or in the event of an earth-
quake. Accordingly, we recommend that all furniture is anchored to a wall. We supply a free safety
wall anchor with all furniture sold and we recommend these are used to prevent your product
tipping. The fixing device provided should fit most wall types, but please note that different wall
materials may require different fixing devices from those supplied.
.
mocka.co.nz I mocka.com.au I PO BOX 18, Pinkenba QLD 4008
D
E
locking
screw
nut x48
x36
K
J
hinge
plastic
glide x10
x2
Phillips & Flathead screwdrivers
and hammer required
For quicker assembly, we recommend the
use of a power drill on a low-speed setting.
F
safety
strap x2
shelf plug
x12
V
W
X
Y
screw
wall
wall
x6
anchor
screw
x2
x2
Wall Strap
Z
washer
x4
Advertisement

Summary of Contents for Mocka Sadie
- Page 1 fixing devices from those supplied. Phillips & Flathead screwdrivers and hammer required For quicker assembly, we recommend the use of a power drill on a low-speed setting. mocka.co.nz I mocka.com.au I PO BOX 18, Pinkenba QLD 4008...
-
Page 2: Panel Layout
Sadie Buffet Three Door Panel layout Insert 4x bolts (C) into panels [3] and panel [4]. Tighten with a screwdriver. mocka.co.nz I mocka.com.au I PO BOX 18, Pinkenba QLD 4008... - Page 3 Insert 4x bolts (C) into panel [12]. Insert 4x bolts (C) into panels [7] and [8]. Insert 16x bolts (C) into panel [2]. Tighten with a screwdriver. Tighten with a screwdriver. mocka.co.nz I mocka.com.au I PO BOX 18, Pinkenba QLD 4008...
- Page 4 Attach panels [3] and [7] to panel [10] secure with 4x locking nuts (D) locking nuts (D). Tighten with a screwdriver. Attach panels [4] and [8] to panel [10] secure with 4x locking nuts (D) Tighten with a screwdriver. mocka.co.nz I mocka.com.au I PO BOX 18, Pinkenba QLD 4008...
- Page 5 Attach panels [3], [4], [7] and [8] to panel [1] using 8x dowels (A) and secure with 4x screws (B). Tighten with a screwdriver. secure with 8x locking nuts (D). Tighten with a screwdriver. mocka.co.nz I mocka.com.au I PO BOX 18, Pinkenba QLD 4008...
- Page 6 Attach panels [5] together with connect sticks [6]. Slide panels [5] secure with 4x locking nuts (D). Tighten with a screwdriver. down along the grooves between the panels [3] and [4]. mocka.co.nz I mocka.com.au I PO BOX 18, Pinkenba QLD 4008...
- Page 7 Attach panel [2] to panels [3], [4], [13] and [14] using 8x dowels (A) Attach panels [5] to panels [13] and [14] secure with 4x screws (w), and secure with 8x screws (B), Tighten with a screwdriver. Tighten with a screwdriver. mocka.co.nz I mocka.com.au I PO BOX 18, Pinkenba QLD 4008...
- Page 8 Attach panels [15] and [16] to panel [2] using 16x locking nuts (D). using 8x locking nuts (D). Tighten with a screwdriver. Tighten with a screwdriver. Attach 10x plastic glides (K) to the panels [15] and [16] using a hammer as shown. mocka.co.nz I mocka.com.au I PO BOX 18, Pinkenba QLD 4008...
- Page 9 Insert 12x shelf plugs (F) into the unit at the desired height for the shelves . rest the shelf panel [11] onto them. Ensure the shelves are balanced and stable. mocka.co.nz I mocka.com.au I PO BOX 18, Pinkenba QLD 4008...
- Page 10 Attach hinges on panels [3], [4] and [14] to the unit using 24x screws (E). Attach 2x hinges (J) to panel [18] using 4x screws (E). Tighten with a screwdriver. Ensure the doors open and close easily. Tighten with a screwdriver. mocka.co.nz I mocka.com.au I PO BOX 18, Pinkenba QLD 4008...
- Page 11 2x washers (Z), 2x wall anchors (X) and 2x wall screws (Y). Ensure unit and 2x screws (W). Tighten with a screwdriver. is balanced and steady before use. You’re done, enjoy! mocka.co.nz I mocka.com.au I PO BOX 18, Pinkenba QLD 4008...
- Page 12 MOVE DOOR BACK OR holes loosen 2 screws in oval holes. Screw in 2 screws in Loosen this screw a bit. Re-tighten this screw. FORTH holes a bit. round holes mocka.co.nz I mocka.com.au I PO BOX 18, Pinkenba QLD 4008...


Need help?
Do you have a question about the Sadie and is the answer not in the manual?
Questions and answers