Table of Contents
Advertisement
Quick Links
Advertisement
Table of Contents

Subscribe to Our Youtube Channel
Related Manuals for Empisal EEM350


Summary of Contents for Empisal EEM350
- Page 1 Instruction Manual EEM350...
- Page 2 IMPORTANT SAFETY INSTRUCTIONS When using an electrical appliance, basic safety precautions should always be followed, including the following: This sewing machine is designed and manufactured for household use only. Read all instructions before using this sewing machine. DANGER — To reduce the risk of electric shock: 1.
-
Page 3: Table Of Contents
TABLE OF CONTENTS KNOW YOUR MACHINE ....................2-4 Names of Parts ........................2 Standard Accessories ......................3 Detachable Extension Table ....................4 GETTING READY TO SEW ..................5-18 Connecting the Power Supply .................... 5 Start/Stop Button ........................ 5 AutoThread Cutter Button ....................5 Winding the Bobbin ...................... -
Page 4: Know Your Machine
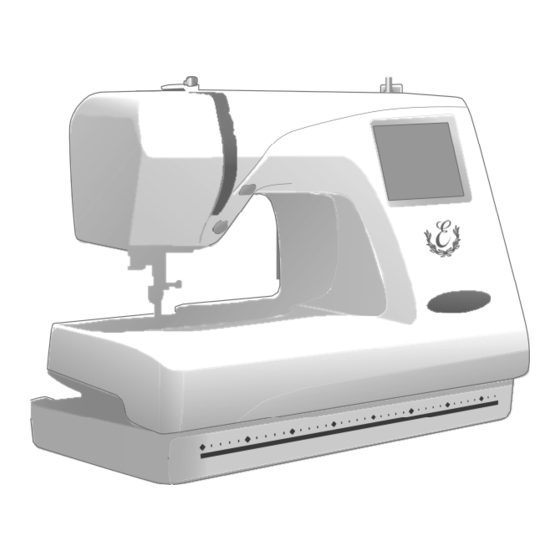
KNOW YOUR MACHINE Names of Parts q Visual touch screen w Bobbin winder spindle e Bobbin thread cutter r Spool holder (large) t Spool pin y Bobbin winding thread guide u Thread guide plate i Thread take-up lever o Thread tension dial !0 Face plate !1 Thread cutter &... -
Page 5: Standard Accessories
Standard Accessories q Bobbins w Lint Brush e Additional Spool Pin r Spool Pin Felt t Spool Stand y Spool Holder (Large) u Spool Holder (Small) i Scissors o Screwdriver !0 Screwdriver !1 Set of Needles !2 Embroidery hoop B (with template) !3 Embroidery hoop A (with template) !4 Power Supply Cord !5 Instruction Book... -
Page 6: Detachable Extension Table
Detachable Extension Table Detach the extension table when you use the optional Free arm hoop C. To remove, lift the extension table toward you as illustrated. To attach, position the tabs on the base tab holes and push down gently. q Extension table w Tabs e Base tab holes... -
Page 7: Getting Ready To Sew
NOTE: The EEM350 is equipped with an automatic shutdown safety feature to prevent overheating when the machine is running overloaded. Follow safety instructions that appear on the visual touch screen if... -
Page 8: Winding The Bobbin
Winding the Bobbin Removing the bobbin Slide the hook cover plate release button to the right, and remove the hook cover plate. Lift out the bobbin from the bobbin holder. q Hook cover plate release button w Hook cover plate e Bobbin Setting the spool of thread Place the spool of thread on the spool pin with the... -
Page 9: Winding The Bobbin
Winding the bobbin Guide the thread around the bobbin winder thread guide while holding the thread at the spool. q Bobbin winder thread guide Thread through the hole in the bobbin from the inside to the outside. Put the bobbin on the bobbin winder spindle. -
Page 10: Inserting The Bobbin
Inserting the bobbin z Place the Bobbin in the Bobbin Holder with the thread running off in a counterclockwise direction. q Thread w Bobbin holder x Guide the thread into front notch on the front of the bobbin holder. Draw the thread to the left, sliding it between the tension spring blades. -
Page 11: Raising The Presser Foot
Raising the Presser Foot The presser foot lifter raises and lowers the presser foot. You can raise the presser foot about 6 mm (1/4") higher than the normal up position by exerting more pressure when lifting the presser foot lifter. Threading the Machine Raise the presser foot lifter. - Page 12 Slip the thread through the slit and down into the eye of the take-up lever as shown. Draw the thread down through the left channel. r Slit t Eye of the take-up lever Slip the thread behind the lower thread guide from the right.
-
Page 13: Needle Threader
Needle Threader Lower the presser foot. Depress the needle threader knob as far as it will go. The hook comes out through the needle eye from behind. Needle threader knob Hook Draw the thread down around the threader guide and under the hook. Threader guide Release the threader knob slowly while holding the thread end with your hand. -
Page 14: Drawing Up The Bobbin Thread
Drawing up the Bobbin Thread z Raise the presser foot lifter. Hold the needle thread with your finger. q Needle thread w Bobbin thread x Turn the handwheel one complete turn toward you. Draw the needle thread to bring up a loop of the bobbin thread. -
Page 15: Adjusting The Thread Tension
Adjusting the Thread Tension Balanced thread tension: Small amount of the needle thread shows on the wrong side of the fabric. When the needle thread tension is too tight: The bobbin thread shows on the right side of the fabric. Reduce the tension by turning the tension dial to a lower number. -
Page 16: Changing Needle
Changing Needle Turn off the power switch. Raise the needle by turning the handwheel and lower the presser foot. Loosen the needle clamp screw by turning it counterclockwise. Remove the needle from the clamp. Insert a new needle into the needle clamp with the flat side of the needle to the rear. -
Page 17: Embroidery Hoops
Place the inner hoop and template over the fabric and adjust the fabric placement. q Starting point for built-in and PC Design Card designs (EEM350 does not support Memory Card No.102) w Starting point for monogramming in horizontal placement... -
Page 18: Stabilizers
Stabilizers To obtain the best quality embroidery, it is important to use stabilizers. Types of stabilizer Tear-away Stabilizer is made from a fiber that will tear easily. Use tear-away stabilizers for stable woven fabrics. After stitching, tear away the stabilizer so that the small portion left in the back of the stitching will not affect the wear. -
Page 19: Setting The Fabric In An Embroidery Hoop
Setting the Fabric in an Embroidery Hoop Mark the centerlines on the right side of the fabric with tailor’s chalk. q Fabric w Centerlines Loosen the hoop tightening screw of the outer hoop and lay the fabric and the inner hoop over the outer hoop. -
Page 20: Attaching The Embroidery Hoop To The Machine
Attaching the Embroidery Hoop to the Machine Turn the attaching knob so it is parallel with the hoop, and set it on the carriage. Attach the hoop by fitting the pins into the carriage holes. q Attaching knob w Carriage holes e Pins Turn the attaching knob clockwise. -
Page 21: Key Operations
KEY OPERATIONS Built-in Designs 1/14 Pattern Selection Window Hoop Size A(F): 126 1 10 mm When the machine is turned on, the pattern selection window of the built-in design appears on the visual touch screen. NOTE: After turning on the power, it takes approximately six seconds for the pattern selection window to be displayed on the visual touch screen. -
Page 22: Mode Setting
Mode Setting Built-in Designs 1/14 Hoop Size A(F): 126 1 10 mm Press the Mode key and the mode selection dialog box will open. Press one of the following keys to select the desired operation. q q q q q SET key Press this key to open the machine setting window. -
Page 23: Machine Settings
Machine Settings Pressing the SET key will open the machine setting dialog box. q q q q q SET tab Press the SET tab to customize the machine settings. w w w w w Flag tab (Language selection tab) Screen Contrast Press the Flag tab to select the language for the screen display. - Page 24 i i i i i Key position adjustment If you think the touch panel keys are out of alignment, you can correct it in the key position adjustment window. When you press the Yes key, the window (A) will be shown.
- Page 25 !2 Thread selection Thread selection There are four brands of embroidery threads to Robison- choose from. Press the corresponding key of the Janome Mettler Madeira Anton thread you wish to use. The color code of the selected brand will be shown in the embroidery Format screen.
-
Page 26: Language Selection
Language Selection You can select one of the following 11 languages by pressing the corresponding key. q English w French e Spanish r Italian t Dutch y German u Portuguese i Swedish o Russian !0 Finnish !1 Japanese !2 Polish Press the register key to confirm your selection. -
Page 27: Selecting Built-In Designs
screen. Selecting Built-in Designs Built-in Designs 1/14 The pattern selection window for the built-in designs will Hoop Size A(F): 126 1 10 mm appear when the machine is turned on. There are 100 ready-to-sew designs available in this category. You can also open design files saved in the internal memory. - Page 28 y Ready to Sew screen Ready to Sew screen (continued) w w w w w q q q q q A stitch image of the selected design and function keys as well as information of the selected design are Ready to Sew indicated in the Ready to Sew screen.
- Page 29 i i i i i Trace key You can check the size of the sewing area by pressing Ready to Sew this key. The carriage traces the outline of the selected embroidery pattern without stitching. The carriage will return to the starting position after tracing and the screen will return to the previous display.
-
Page 30: Embroidery Sewing
to return the carriage to its stored position. EMBROIDERY SEWING Starting to Sew Embroidery Ready to Sew z Select the desired pattern. Mode x Lower the presser foot, press the Start/Stop START STOP button and sew 5 to 6 stitches. Press the Start/Stop button again to stop the machine. -
Page 31: Monogramming
MONOGRAMMING Monogram Selection Window Gothic In the monogram selection window, you can program A(F) lettering by pressing the alphabet keys directly. After you press an alphabet key, the letter is memorized and the cursor is moved to the right side. Font Mode Selecting the fonts... - Page 32 q q q q q Number/Symbol key w w w w w q q q q q e e e e e When you press this key, the number and symbols will appear. To select the number or symbol, press the correspondent key.
-
Page 33: Monogram Embroidery
Monogram Embroidery Example: “Bear” in Gothic style z Press the font key and select the Gothic style Gothic letters. Select “B”. A(F) Font Mode x Press the Letter case key to select lower case letters. Gothic A(F) Font Mode c Select “e”, “a” and “r”. Press the OK key. Gothic NOTE: A(F) - Page 34 b Use the Jog keys to adjust the position of the hoop to match the centerlines. Ready to Sew q Jog keys w Centerlines Bear NOTE: A(F):126 x 110mm You can select one of the 3 placements of the monogramming, left justified, center justified or right justified, by pressing the Justification key.
-
Page 35: 2-Letters Monogram
2- Letters Monogram Gothic Example: 2-Letters with a crest A(F) z Press the Font key. Select 2-Letters. Font Mode x Select the crest. Letters A(F) Font Mode c Select letters “A” and “B”. Press the OK key. Letters A(F) Font Edit Mode v The screen will change to the Ready to Sew... -
Page 36: Correcting The Monogram
Correcting the Monogram Gothic Deleting a letter BEAT A(F) Example: To delete “E” from “BEAT” z Press the key to shift the cursor under the letter to delete. Font Mode Gothic BEAT A(F) x Press the Delete key. Font Mode c The letter “E”... -
Page 37: Optional Items
OPTIONAL ITEMS PC Cards (optional item) Inserting and ejecting a PC card Insert the PC card into the slot with the front side facing toward you. Push the card in until it clicks, the eject button will pop out. q PC card w Eject button NOTE: When the card is properly set, the red bar on the eject... -
Page 38: Usb Memory
The USB memory is available at camera shops, PC supplies stores etc. in various sizes and forms. Open the small door under the card slot. Insert the USB memory into the USB socket on the EEM350. q Small door w USB memory (optional item) -
Page 39: Cd-Rom Drive
Insert the USB connector into the USB port on the EEM350. The CD-ROM drive does not need external power since it is supplied from the EEM350 via the USB cable. Turn on the EEM350 and insert a CD-ROM into the CD- ROM drive. -
Page 40: Editing Mode
EDITING MODE The editing function allows you to modify and combine embroidery patterns to create your own original designs. Editing Screen Built-in Designs 1/14 Hoop Size A(F): 126 1 10 mm Press the Edit tab to open the Editing window. Mode The Hoop selection dialog box opens to allow you to select the hoop you wish to use. -
Page 41: Editing The Embroidery Designs
Importing the designs in the Editing window. Press the Built-in design, PC card or USB memory Edit tab in the editing window. Size Mode Cancel B: 140x200mm Press the desired Pattern selection key or enter Built-in Designs 1/14 characters for monogramming. 1/14 Hoop Size A(F): 126 1 10 mm... - Page 42 Moving the selected pattern (continued) Edit You can move the selected pattern also by pressing the Layout keys Size Press the Layout keys to move the pattern to the desired position in the Editing window. The carriage will not move when you are pressing the layout keys since pattern position will move relatively to the hoop, not to the machine.
- Page 43 Edit Resizing the selected pattern When you press the Size key, the size adjusting dialog Size box will open. You can change the size of the embroidery patterns from 90% to 120% of the original pattern size. q Size key The size will change 1% each time you press the plus or minus keys.
- Page 44 Deleting the pattern Edit When you press the Delete key, the selected pattern will be deleted. Size q Delete key Mode Cancel A(F): 126x110mm Magnifying the pattern image Press the Magnifier key to show a magnified image of the selected pattern. Press the Return key to return to the previous screen.
-
Page 45: Saving A File
SAVING A FILE Edit When you press the Save file key, the Save file dialog Size box will open. q Save file key Mode Cancel A(F): 126x110mm You can select a memory location from Built-in memory, ATA PC card or USB memory. Save File (Built-in) Press one of the following keys to select the desired location to where you wish to save the file. -
Page 46: Creating A New Folder
Creating a new folder Save File You can create your own folder and assign the desired name to it. Press the New folder key and the keyboard window will open. q New folder key Enter the folder name and press the OK key. -
Page 47: Deleting The File
Deleting the file When the memory is full, a warning message will Short of memory space, appear. Press the OK key and go to the open file the file cannot be saved. window then delete the file that you do not need. Press the Built-in design, PC card or USB memory USB Memory Stick tab to select the location of the file to delete. -
Page 48: Creating An Original Design
CREATING AN ORIGINAL DESIGN Designs Example: To combine the built-in design #23 and a word “Apple” z Select design #23 from the built-in designs. Mode x Press the Edit tab. Ready to Sew The screen changes to the Editing window with the selected pattern image. - Page 49 n Select “p”, “p”, “l” and “e”. Gothic Press the OK key. Apple Font Mode m Lay the patterns out by dragging or dragging or Edit using the Layout keys. Size Apple Mode Cancel A(F): 126x110mm , Press the OK key and the display will change to the Ready to Sew Ready to Sew screen.
-
Page 50: Care And Maintenance
CARE AND MAINTENANCE Cleaning the Hook Race WARNING: Turn the power switch off and unplug the machine before cleaning. NOTE: Do not dismantle the machine in any way other than what is explained in this section. Clean the outside of the machine with a soft cloth and mild soap. -
Page 51: Replacing The Light Bulb
Replacing the Light Bulb WARNINGS: Turn off the power before replacing the light bulb. The bulb could be HOT, wait until it has cooled down before touching it. To remove: Remove the cap and setscrew. Remove the faceplate. Pull out the bulb from the socket. To replace: Insert a new bulb into the opening of the socket. -
Page 52: Troubleshooting
Troubleshooting Problem: Cause: Reference: The machine is noisy 1 Threads have been caught in the hook mechanism. See page 48. The needle thread breaks. 1 The needle thread is not threaded properly. See pages 9, 10. 2 The needle thread tension is too tight. See page 13. - Page 55 PLEASE AFFIX YOUR PROOF OF PURCHASE/RECEIPT HERE IN THE EVENT OF A CLAIM UNDER WARRANTY THIS RECEIPT MUST BE PRODUCED W A R R A N T Y Home of Living Brands (Pty) Ltd (“Home of Living Brands”) warrants to the original purchaser of this product (“the customer”) that this product will be free of defects in quality and workmanship which under normal personal, family or household use and purpose may manifest within a period of 1 (one) year from the date of purchase (“warranty period”).
- Page 56 852-880-449 (E) Printed in Japan...
Need help?
Do you have a question about the EEM350 and is the answer not in the manual?
Questions and answers