Table of Contents
Advertisement
Advertisement
Table of Contents

Related Manuals for Empisal EES10


Summary of Contents for Empisal EES10
-
Page 1: Instruction Manual
Instruction Manual Empisal Electronic Sewing EES10... - Page 2 Important safety instructions When using an electrical appliance, basic safety should always be followed, including the following: Read all instructions before using this sewing machine. DANGER -To reduce the risk of electric shock: 1. An appliance should never be left unattended when plugged in. 2.
- Page 3 Important safety instructions 19. Contact your local government authority for information regarding the collection systems available. 20. If electrical appliances are disposed of in landfills or dumps, hazardous substances can leak into the groundwater and get into the food chain, damaging your health and well-being.
-
Page 4: Table Of Contents
Contents PRINCIPAL PARTS OF THE MACHINE ......................1 ACCESSORIES ..............................2 CONNECTING THE MACHINE TO THE POWER SOURCE ..............3 Connecting the machine .............................3 STARTING SEWING ............................4 Foot control.................................4 CHANGING THE NEEDLE STOP POSITION ....................4 CHANGING THE PRESSER FOOT ........................5 TYPE OF PRESSER FOOT CHART ........................5 REPLACING THE NEEDLE .......................... -
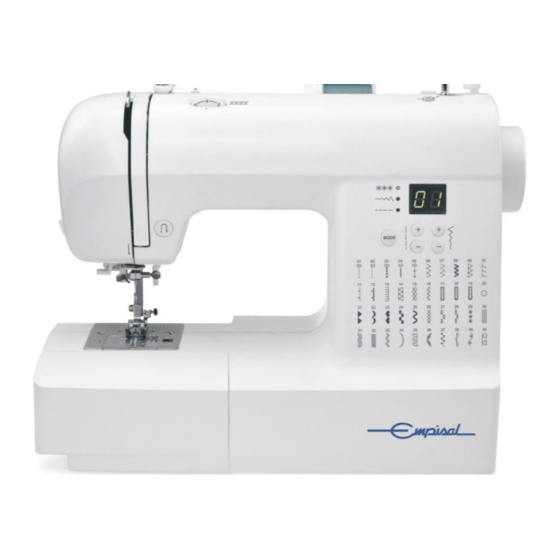
Page 5: Principal Parts Of The Machine
Principal parts of the machine Tension dial Bobbin winder spindle Reverse/ Auto-stop button Digital display screen Stitch width Thread cutter adjustment buttons Buttonhole lever Stitch length Auto needle threader adjustment buttons Bobbin cover plate Mode selection button Sewing table and accessory box Bobbin thread guide Bobbin winder stopper... -
Page 6: Accessories
Accessories Standard 1. All purpose foot (T) 2. Zipper foot (I) 3. Buttonhole foot (D) 006186008 006905008 006H1A0004 4. Blind hem foot (F) 5. Satin stitch foot (A) 6. Bobbin (3x) 7. Spool holder (Large) 8. Spool holder (Small) 006904008 006172008 006084009 R12373209... -
Page 7: Connecting The Machine To The Power Source
Connecting the machine to the power source Caution: Always make sure that the machine is unplugged from power source and the main switch is on ("O"), when the machine is not in use and before inserting or removing parts. Connecting t h e machine Before connecting the power supply, make sure that the voltage and frequency shown on the machine is conforming to your electrical power. -
Page 8: Starting Sewing
Starting sewing Foot control With the sewing machine turned OFF, insert the foot control plug into its connector on the sewing machine. Turn on the sewing machine, and then slowly depress the foot control to start sewing. Release the foot control to stop the sewing machine. Attention: Consult a qualified electrician if in doubt as to how to connect the machine to the power source. -
Page 9: Changing The Presser Foot
Changing the presser foot Attention: Turn power switch to OFF ("O") when carrying out any of the below operations! Attaching the presser foot holder Raise the presser foot bar (a). Attach the presser foot holder (b) as illustrated. Attaching the presser foot Lower the presser foot holder (b) until the cut-out (c) is directly above the pin (d). -
Page 10: Replacing The Needle
Replacing the needle Attention: Turn power switch to OFF ("O") when carrying out any of the above operations! Change the needle regularly, especially if it is showing signs of wear and tear causing problems. Insert the needle following the illustrated instructions. -
Page 11: Winding The Bobbin
Winding the bobbin Bobbin winding 1. Place the thread and spool holder onto the spool pin. For smaller spools of thread, place spool holder with the small side next to the spool or use the small spool holder. 2. Snap the thread into the thread guide. 3. -
Page 12: Inserting The Bobbin
Inserting the bobbin Attention: Turn power switch to OFF ("O") before inserting or removing the bobbin. When inserting or removing the bobbin, the needle must be fully raised. Insert the bobbin in the bobbin case with the thread running in a counterclockwise direction (arrow). -
Page 13: Threading The Upper Thread
Threading the upper thread Please Note: It is important to carry out the threading correctly as by not doing so several sewing problems could result. Start by raising the needle to its highest point, and also raise the presser foot to release the tension discs. -
Page 14: Using The Needle Threader
Using the needle threader Attention: Turn p o w e r s w i t c h to t h e O F F position ("O"). Raise t h e n e e d l e t o i t s highest position and lower the presser foot. -
Page 15: Thread Tension
Thread tension - Basic thread tension setting: "4" - To increase the tension, turn the dial to the next number up. To reduce the tension, turn the dial to the next number down. - Proper setting of tension is important to good sewing. - For all decorative sewing you will always obtain a nicer stitch and less fabric puckering when the upper thread appears on the bottom side of your fabric. -
Page 16: Raising Up The Lower Thread
Raising up the lower thread 1. Hold the upper thread with the left hand. Turn the hand wheel towards you (counterclockwise) lowering, then raising the needle. 2. Gently pull on the upper thread to bring the bobbin thread up through the needle plate hole. The bobbin thread will come up in a loop. -
Page 17: Two-Step Presser Foot Lifter
Two-step presser foot lifter The presser foot lifter raises and lowers your presser foot. When sewing several layers or thick fabrics, the presser foot can be raised a second stage for easy positioning of the work To raise or drop the feed dogs Sliding the lever to the "... -
Page 18: Buttons Of Machine
Buttons of machine Reverse/ Auto-stop button (1) When the patterns 01-06 are selected, the machine will sew reverse stitch at a low speed if the reverse button is pressed. The machine will sew forward after the button is released. When the patterns 07-16, 21-40 are selected, the machine will immediately sew 3 locking stitches when the reverse button is pressed, then automatically stop. -
Page 19: Stitch Length Adjustment Button (3)
Buttons of machine Stitch length adjustment button (3) When you select a stitch the machine will automatically set the recommended stitch length. If the pre-set stitch length need adjusting once the pattern is selected, push mode button " " to move to the stitch length position. -
Page 20: Pattern Chart
Pattern chart Width (mm) Length (mm) Functions Stitch Pattern Presser Foot Auto Manual Auto Manual Reverse Auto-stop 0.0�7.0 0.0�4.5 0.0�7.0 0.0�4.5 0.0�7.0 1.0�3.0 1.0�6.0 1.0�3.0 0.0�7.0 1.5�3.0 0.0�7.0 0.3�4.5 2.0�7.0 0.3�4.5 2.5�7.0 1.0�3.0 Utility stitches 3.5�7.0 1.0�3.0 2.5�7.0 1.0�3.0 2.5�7.0 0.5�4.5 2.5�7.0 0.5�4.5... -
Page 21: Useful Skills
Useful skills Sewing corners 1. Stop the sewing machine when you reach a corner. 2. Lower the needle into the fabric manually or by pressing the needle up/ down button once. 3. Raise the presser foot. 4. Use the needle as a pivot and turn the fabric. 5. -
Page 22: Sewing On The Heavy Fabric
Useful skills Sewing on the heavy fabric The black button on the right side of the presser foot will lock the presser foot in a horizontal position if you push it in before lowering the presser foot. This ensures even feeding at the beginning of a seam and helps when sewing multiple layers of fabric such as sewing over seams when hemming jeans. -
Page 23: Straight Stitches And Needle Position
Straight stitches and needle position Changing the needle position These setting apply only to patterns 01-05. The pre-set position is "3.5", center position. When you press the "–" stitch width adjustment button, the needle position will move to the left. When you press the "+"... -
Page 24: Stretch Stitch
Stretch stitch Straight stretch stitch It assures you of a stitch that is strong and flexible and will give with the fabric without breaking. Good for easy-to-ravel fabrics and knitted fabrics. It is good for joining durable fabric such as denims. These stitches can also be used as a decorative top stitch. -
Page 25: Overcasting Stitches
Overcasting stitches 5.0~7.0 2.0~3.0 Zig-zag stitch Zig-zag is primarily used for a decorative top- stitch. It is ideal for edging neck-bands, armholes, sleeves and hems. When manually adjusted to a very narrow width it also can be used for seaming in areas of great stress. -
Page 26: Blind Hem/ Lingerie Stitch
Blind hem/ Lingerie stitch 11: Blind hem/lingerie for firm fabrics 12: Blind hem for stretch fabrics 2.5~4.0 1.0~2.0 Please Note: It takes practice to sew blind hems. Always make a sewing test first. Fold the fabric as illustrated with the wrong side uppermost. -
Page 27: Button Sewing
[Type text] Button sewing 2.5~4.5 Move the drop feed control to " " to lower the feed dogs. Position the work under the foot. Place the button in the desired position, lower the foot. Select zig zag pattern. Adjust the stitch width to "2.5-4.5"... -
Page 28: Buttonhole Stitching
Buttonhole stitching 17: For thin or medium fabric 18: For horizontal holes on blouses or shirts 2.5~7.0 0.3~1.0 made from thin or medium fabric 19: For suits or overcoats 2.5~5.5 0.3~1.0 5.5~7.0 0.3~1.0 Please Note: Before sewing a buttonhole on your project, practice on a scrap piece of the same type of fabric. - Page 29 Buttonhole stitching Pull the buttonhole lever all the way down and position it behind the bracket on the buttonhole foot. While lightly holding the end of upper thread and start sewing. Please Note: Gently feed the fabric by hand. Before stopping, the machine will automatically sew a reinforcement stitch after the buttonhole is sewn.
- Page 30 Buttonhole stitching Buttonholes are sewn from the front of the presser foot to the back, as shown. Raise the presser foot and cut thread. When raise the presser foot, the needle will return to original position in order to sew over same buttonhole. After sewing the buttonhole stitch, raise the buttonhole lever until it stops.
-
Page 31: Zipper Insertion
Zipper insertion Attention: Zipper foot should be used for sewing width center needle position straight stitch only. It is possible that needle could 1.5~3.0 hit the presser foot and break when sewing other patterns. Inserting a centered zipper - Baste the zipper opening on the garment. - Press open the seam allowance. -
Page 32: Inserting A Side Zipper
Zipper insertion Inserting a side zipper - Baste the zipper opening on the garment. - Fold back to the left seam allowance. Turn under the right seam allowance to form 3mm (1/8 inch) fold. - Attach the zipper foot. Attach the right side of the presser foot pin to the holder when sewing the left side of the zipper. -
Page 33: Satin Stitch Sewing
Satin stitch sewing 3.5~7.0 0.5~1.0 Use the satin stitch foot for satin stitching and sewing decorative stitches. This foot has a full indentation on the underside to allowed easy sewing over the thickness of the stitches form by closely spaced zig zag stitches, and even feeding of the fabric. -
Page 34: Smocking
Smocking Use the all purpose foot to sew straight lines 1cm (3/8 inch) apart, across the area to be smocked. Knot the threads along one edge. Pull the bobbin threads and distribute the gathers evenly. Secure the threads at the other end. Reduce the tension, if necessary and sew decorative pattern stitches between the straight seams. -
Page 35: Fagoting
Fagoting - Separate the folded edges of the fabric pieces with a gap of 4mm (1/8 inch) and baste them onto a piece of thin paper or water-soluble stabilizer sheet. Thin paper Basting - Align the center of the presser foot with the center of the two pieces of fabric and begin sewing. -
Page 36: Twin Needle
Twin needle * The twin needle is optional. It is not include with the accessories. 2.0~5.0 Insert the twin needle. Attention: When using twin needles, use the all purpose foot (T) regardless of what kind of sewing foot will be carried out. Use only twin needle assemblies with max. -
Page 37: Warning Functions
Warning functions Warning beeping sound - When operating correctly: 1 beep - When operating incorrectly: 3-short beeps - When the sewing machine is in trouble and can't sew: 1 long beep It means that the thread is twisted or jammed and the hand wheel axle can't move. Please look through the "Trouble shooting guide"... -
Page 38: Maintenance
Maintenance Attention: Disconnect the power cord from the wall socket before cleaning the sewing machine surface, otherwise injury or electrical shock may result. Cleaning the sewing machine surface If the surface of the sewing machine is dirty, lightly soak a cloth in mild detergent, squeeze it out firmly and then wipe the surface. -
Page 39: Trouble Shooting Guide
Trouble shooting guide Before calling for service, check the following items. If the problem still persists, contact the place of purchase or your nearest authorized dealer. Problem Cause Correction Reference Upper thread 1. The machine is not threaded correctly. 1. Rethread the machine. Page 9 breaks 2. - Page 40 Trouble shooting guide Problem Cause Correction Reference Seam 1. The needle thread tension is too tight. 1. Loosen the thread tension. Page 11 puckering 2. The needle thread is not threaded correctly. 2. Rethread the machine. Page 9 3. Choose a needle to suit the thread and fabric. Page 6 3.
- Page 41 STORING AND SERVICING OF MACHINE STORING THE MACHINE Store the machine in its box or in a clean dry place Never wrap the power cord around the machine SERVICING THE MACHINE If the unit is not operating correctly, please check the following You have followed the instructions correctly.
- Page 42 PLEASE AFFIX YOUR PROOF OF PURCHASE/RECEIPT HERE IN THE EVENT OF A CLAIM UNDER WARRANTY THIS RECEIPT MUST BE PRODUCED W A R R A N T Y Home of Living Brands (Pty) Ltd (“Home of Living Brands”) warrants to the original purchaser of this product (“the customer”) that this product will be free of defects in quality and workmanship which under normal personal, family or household use and purpose may manifest within a period of 1 (one) year from the date of purchase (“warranty period”).
- Page 43 not dispose of electrical appliances as 1msorted m1micipal waste, use separate collection facilities. Contact your local government for infOrmation regarding the collection systems available. If electrical appliances are disposed of in landfills or dumps, hazardous substances can leak into the grmmdwater and get into the food chain, damaging your health and well-being.
- Page 44 EES10(EN)
Need help?
Do you have a question about the EES10 and is the answer not in the manual?
Questions and answers
The upper thread doesn't connect with the lower thread