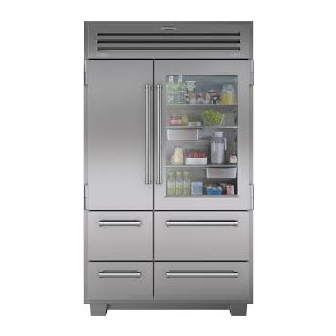
Sub-Zero Pro Series Installation Information
Hide thumbs
Also See for Pro Series:
- Use and care manual (60 pages) ,
- Service manual (23 pages) ,
- Use and care manual (44 pages)
Advertisement
Quick Links
Installation Information
RECOMMENDED TOOLS AND MATERIALS
Below is a list of tools and materials that should be
used during the installation of a Pro Series Unit.
• Phillips screwdriver set
• Slotted screwdriver set
• Copper tubing cutter
• 4' (1219 mm) of 1/4" (6 mm) copper tubing and
water line saddle valve.
• Saddle valve for the water line (Part #4200880)
• Level 2' (610 mm) and 4' (1219 mm) are recom-
mended.
• Appliance Dolly - able to support 1,000 lbs (454kg)
with proper manpower to handle weight.
• Various sized pliers
• Wrench set
• Allen wrench set
• 1/2" (13 mm) drive socket set, with 10" (254 mm)
socket extension.
• Crescent wrenches
• Cordless drill and assorted drill bits
• Masonite, plywood, 1/8" pressed fiberboard or card-
board or some other suitable material for floor pro-
tection.
• Moving blankets for protection of product and home.
• 6-Lobe ( Torx) drive bits, or 6-Lobe screwdrivers
(Sizes: T-10, T-15, T-20, T-25)
#3758440 - Revision B - November, 2006
Pro-Series (
Pro-Series (
2-2
648PRO)
648PRO)
Figure 2-1.
Advertisement

Summary of Contents for Sub-Zero Pro Series
- Page 1 648PRO) 648PRO) RECOMMENDED TOOLS AND MATERIALS Below is a list of tools and materials that should be used during the installation of a Pro Series Unit. • Phillips screwdriver set • Slotted screwdriver set • Copper tubing cutter • 4’ (1219 mm) of 1/4” (6 mm) copper tubing and water line saddle valve.
- Page 2 Pro-Series ( Pro-Series ( 648PRO) Installation Information 648PRO) UNIT DIMENSIONAL INFORMATION 84" " (2134 mm) (606 mm) " 48" (657 mm) (1219 mm) " (766 mm) " (1207 mm) " " (606 mm) (657 mm) BEHIND TO FRONT FACE OF FACE FRAME FRAME "...
- Page 3 Do not use self-piercing valves. A saddle valve kit (part #4200880) is avail- LOCATE ELECTRICAL WITHIN SHADED AREA able from a Sub-Zero dealer. It is not recommended that the appliance be con- ROUGH OPENING WIDTH nected to a softened water supply. Chemicals, such "...
-
Page 4: Moving The Appliance
Protect any finished flooring before moving the unit in place. This Sub-Zero product is equipped with rollers, When using appliance dolly, make sure the strapping is so it can be easily moved into place. If for any reason... -
Page 5: Installation Considerations
Pro-Series ( Pro-Series ( Installation Information 648PRO) 648PRO) INSTALLATION CONSIDERATIONS This section covers common installation issues seen by Service Technicians. Improper installation, though not a valid service issue, has the potential to lead to a call for service. NOTE: If additional information is needed, refer to the complete Installation Guide. •... - Page 6 Pro-Series ( Pro-Series ( 648PRO) Installation Information 648PRO) Anti-Tip Components Installation (See Figures 2-5, 2-6 and 2-7) NOTE: The anti-tip bracket is included and fastened to crate base at the front of the unit. NOTE: Use the center line reference point on the anti- tip bracket to assure proper alignment and engagement of the product to the anti-tip bracket.
- Page 7 Pro-Series ( Pro-Series ( Installation Information 648PRO) 648PRO) Unit Leveling (All Models) NOTE: The rear levelers must be in their lowest posi- tion before unit is installed. Unit must be installed before final leveling. If unit is anchored to cabinets, remove anchor screws before leveling, reinstall after leveling.
- Page 8 Pro-Series ( Pro-Series ( 648PRO) Installation Information 648PRO) Door Adjustment NOTE: Unit must be level before adjusting doors. When adjusting hinges it is important to keep hinges parallel to the face of the door and side of Hinge Pin the cabinet. Excessive misalignment will result in door switch malfunction.
- Page 9 Pro-Series ( Pro-Series ( Installation Information 648PRO) 648PRO) Drawer Adjustments Vertical Drawer Adjustment: NOTE: Before attempting drawer adjustment, remove drawer assembly. Pull drawer assembly out, then lift at front and pull forward until drawer is free from unit. (See Figure 2-14) 1.
- Page 10 Pro-Series ( Pro-Series ( 648PRO) Installation Information 648PRO) Water Filter Bypass If choosing not to use the water filtration system, the UPPER GRILLE SCREW system can be bypassed by removing the water filter LOW-VOLTAGE cartridge. If done, the water supplied to the ice maker DISPLAY CABLE will not be filtered and the electronically controlled water filter monitor will be deactivated.


Need help?
Do you have a question about the Pro Series and is the answer not in the manual?
Questions and answers