Table of Contents
Advertisement
Advertisement
Table of Contents

Related Manuals for ThermTec CYCLOPS Series


Summary of Contents for ThermTec CYCLOPS Series
- Page 1 User Manual Thermal Imaging Monocular CYCLOPS SERIES...
-
Page 3: Table Of Contents
Table of Contents About This Manual 3.3.3.2 Pseudo Color Switch Regulatory Information 3.3.3.3 Target Outline Mode 1. Introduction 3.3.3.4 AI Ranging 3.3.4 Capture/Record 1.1 Device Description 1.2 Features 3.3.5 FOV Selection and Shifting (for Cyclops-D) 1.3 Detection Range 3.4 Settings 1.4 Application Scenarios 3.4.1 Image Setting 1.5 Cautions... -
Page 4: About This Manual
COPYRIGHT © 2023 ThermTec Technology Co., Ltd. ALL RIGHTS RESERVED. Any and all information, including, among others, wordings, pictures, graphs are the properties of ThermTec Technology Co., Ltd. or its subsidiaries (hereinafter referred to be “ThermTec”). This user manual (hereinafter referred to be “the Manual”) cannot be reproduced, changed, translated, or distributed, partially or wholly, by any means, without the prior written permission of ThermTec. -
Page 5: Regulatory Information
Regulatory Information This product and, if applicable, the supplied accessories are marked with “CE” and comply therefore with the applicable harmonized European standards listed under the Radio Equipment Directive 2014/53/EU, the EMC Directive 2014/30/EU, the RoHS Directive 2011/65/EU. 2012/19/EU (WEEE directive): Products marked with this symbol cannot be disposed of as unsorted municipal waste in the European Union. -
Page 6: Introduction
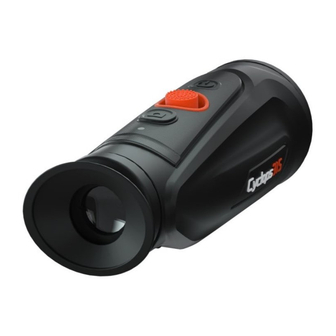
Introduction 1.1 Device Description ThermTec Cyclops Series Thermal Imaging Monocular, the new generation intelligent thermal imaging monocular, is designed with a 12μm uncooled infrared detector and can be equipped with various types of objective lens and 1024x768 OLED high-definition display. With... -
Page 7: Features
1.2 Features 6. Photo and Video Playback 1. Mechanical Joystick Design Integrated pictures and video recording makes It balances the central of gravity, providing an sharing the thermal action quick and easy, with the easier and outstanding handheld experience. functions of playback and APP sharing. 2. -
Page 8: Detection Range
1.3 Detection Range 1.4 Application Scenarios The illustration below shows the comparative range • Animal Observation performance of the monocular with different lens • Outdoor Adventure configurations. The data is based on detecting a car of 4m, • Security Law Enforcement a man of 1.8m tall, a wild boar of 0.7m tall, a wolf of 0.5m •... -
Page 9: Packing List
Packing List Operation Guide Monocular 3.1 Battery Charging Lanyard USB cable The battery should be fully charged prior to use. Video output cable Note: The battery is not user replaceable. Carry bag User manual Follow the below steps to charge the battery: 1. -
Page 10: Power On/Off
Notes: When the charging indicator on the device becomes red, it means you need to charge the device immediately. The indicator turns to red when it is charging and turns to green when it finishes charging. After it turns to green, stop charging. -
Page 11: Lens Adjustment
3.3.2 Lens Adjustment Diopter Adjustment Looking through the eyepiece, adjust the position of diopter level to optimize the image sharpness on the OLED display. Cyclops Cyclops-D 3.3.3 Joystick Operation 3.3.3.1 Zoom Objective Lens Focusing Manually adjust the objective lens focus when necessary. -
Page 12: Pseudo Color Switch
3.3.3.2 Pseudo Color Switch Color Palettes Use joystick towards right to switch pseudo color. White Black There are six color palettes by default. You can choose the pseudo color you want by customizing. Unwanted colors can be turned off in the system setting. Green Golden Violet... -
Page 13: Target Outline Mode
Use the joystick towards left to enable or 3.3.3.3 Target Outline Function disable AI ranging function (before this function is enabled, please make sure the Long press the joystick towards right to activate the device is in AI ranging mode. Otherwise, refer Target Outline Mode. - Page 14 3.3.3.4.1 Turning on AI Ranging Function Double click the joystick to enter the main menu, and check whether the AI ranging function is enabled (this function is enabled by default). If not, press to enter the System Setting menu, and press Ranging and AI to turn on this function. Short press the joystick to left to turn on AI Ranging function, and the corresponding icon will turn to blue at the upper right corner.
-
Page 15: Capture/Record
3.4 Settings 3.3.4 Capture/Record Double-click the joystick to enter Setting menu. Press to take photos. Then the photo icon in the upper left corner will flash once. Note: Select by moving the joystick, and short- press the joystick to confirm the selection. Press and hold to take videos. -
Page 16: System Setting
System Setting Image Setting Electronic Image Stabilization. Can Especially enhance target’s detail. Object be turned on/off in the system It’s recommended to be used in bad mode setting. Mode weather conditions. AI distance measurement Gain both background and target’s Ranging MIL distance measurement mode detail with wide dynamic algorithm. -
Page 17: Date & Time Setting
EIS function: Turn on the EIS function to reduce the impact of body shaking on the image and keep the image stable when observing distant targets. Notes: EIS function is applicable to Cyclops 6 series, Cyclops Pro series and Cyclops D series. 3.4.3 Date &... - Page 18 3.4.4.1 APP Download Search "Smart Thermal" in APP store, or scan the below QR code to download the APP. 3.4.4.2 Connect via Wi-Fi 3.4.4.2 ① 3.4.4.2 ② ① Open smart device’s personal hotspot. ② Short-press the joystick to enter the sub- menus of Network Connection, and select WIFI for configuration.
-
Page 19: App Push Notification
3.4.4.3 Connect via Hotspot ① Short-press the joystick to enter the sub-menus of Network Connection, and select WIFI for configuration. ② Access the Hotspot sub-menu, and the monocular will release a hotspot network. Set the hotspot name and password and confirm them through the joystick. ③... -
Page 20: File Management
(1) Turn on AI and ranging function on the device. (2) Connect the APP with the device (follow Section 3.4.3). Select “Alarm”and “ Open” to turn on the push notification. 3.4.6 File Management Short-press to enter the File Management menu. Select the image and video sub-menus to view the images and videos and play the videos. -
Page 21: External Video & Data Reading
Power on the device before using a type-C to AV video cable to output analog video. When external display is connected, the OLED of the device automatically turns off the display. Power on the device, use a type-C to USB cable to connect with the computer to read the video and image data in the memory. -
Page 22: Technical Data
② Access the Setup menu and select Upgrade. Technical Data ③ The system will prompt that upgrading is in progress. When the upgrade succeeds, the device will restart automatically. 4.1 Dimensions 1. Before you update, make a backup of your photos and videos. 2. - Page 23 Cyclops-D...
-
Page 24: Specifications
4.2 Specifications - Cyclops Function Model CP315 CP319 CP325 CP335 CP350 CP635 CP650 Photo/video playback Microbolometer Language Multiple-languages Resolution 384x288 640x512 Reticle 7, adjustment coordinates Pixel pitch 12µm 12µm Built-in memory 16GB NETD ≤40mk@300k ≤35mk@300k Spectral range 8-14µm AI/MIL distance Frame rate 50Hz measurement... - Page 25 Specifications - Cyclops Pro Function CP315 CP319 CP325 CP335 CP350 CP635 CP650 Model Photo/video playback Language Multiple-languages Microbolometer Reticle 7, adjustment coordinates Resolution 384x288 640x512 Built-in memory 16GB Pixel pitch 12µm 12µm NETD ≤25mk@300k AI/MIL distance Spectral range 8-14µm measurement Heat track Frame rate 50Hz...
- Page 26 Specifications - Cyclops-D Function Model CP340D CP350D CP640D CP650D Photo/video Microbolometer playback Resolution 384x288 640x512 Language Multiple-languages Pixel pitch 12µm Reticle 7, adjustment coordinates NETD 25mk@300k Built-in memory 32GB Spectral range 8-14µm AI/MIL distance Frame rate 50HZ measurement Optics Heat track 20/40 F1.0 25/50 F1.0 20/40 F1.0...
Need help?
Do you have a question about the CYCLOPS Series and is the answer not in the manual?
Questions and answers