Table of Contents
Advertisement
Quick Links
Advertisement
Table of Contents

Related Manuals for AstroNova QuickLabel QL-E100


Summary of Contents for AstroNova QuickLabel QL-E100
- Page 2 QL-E100 User Guide Part Number 22834710-EN-E Revision 1.1 7/2023 AstroNova, Inc.® 600 East Greenwich Ave., West Warwick, RI 02893 Tel: (877) 757-7978 Fax: (401) 822-2430 info@astronovaproductid.com www.AstroNovaProductID.com...
- Page 3 AstroNova. Trademarks QL-E100® and CQL Pro® are registered trademarks of AstroNova, Inc. Adobe®, Photoshop®, and Illustrator® are registered trademarks of Adobe Systems, Inc. Corel® is a registered trademark of Corel Corporation.
- Page 4 Place of issue: West Warwick, RI European Contact: Your local AstroNova, Inc. Sales and Service Office. FRANCE - Parc Euclide, ZA la Clef de St Pierre, 10A Rue Blaise Pascal 78990 Elancourt, Tel: (+33) 1 34 82 09 00, Fax: (+33) 1 34 82 05 71 GERMANY - Waldstraße 70, D-63128 Dietzenbach, Tel.
-
Page 5: Table Of Contents
Contents Contents Chapter 1: Getting Started ............7 Quick Setup Guide . - Page 6 Contents Chapter 5: QuickPrint Printing from USB or Printer Memory ......50 About QuickPrint Printing ..........50 QuickPrint Requirements .
-
Page 7: Getting Started
Getting Started Chapter 1: Getting Started Quick Setup Guide This QL-E100 User Guide provides detailed information about setting up and using the printer. A related publication, the QL-E100 Quick Setup Guide, is also available to help you set up the printer. -
Page 8: Installation And Setup Overview
Getting Started Installation and Setup Overview This section provides a summary of all installation and setup steps. Refer to this information as you prepare the printer for use. Each step in the overview has a link to more details later in this user guide. -
Page 9: Choosing An Installation Location
Getting Started Choosing an Installation Location Select an installation location that meets the requirements described below. These requirements will help ensure safe operation and optimal printing results. • The printer power cable must be able to connect to an appropriate power outlet. This power outlet must be easily accessible. -
Page 10: Unpacking And Inspection
Getting Started Unpacking and Inspection The printer is secured using cushioning materials to protect it against vibration and shock during transportation. Use the following instructions to unpack and inspect the printer. Note: Keep the packaging materials for future transportation. 1. Open the top of the shipping carton. Remove the accessory box. Open the accessory box and verify the following parts are included. -
Page 11: Installing The Printer
Getting Started Installing the Printer This section describes the tasks required to install the printer. Connecting the Power Cable Use the included power adapter to supply power to the printer. 1. Connect the power cable to the power adapter. Plug the adapter’s power cord into the printer’s power inlet. - Page 12 Getting Started 2. Lift the empty roll holder out of the printer. The roll holder is made from two flanges connected by a spindle. The wide flange is not removable. The narrow flange can be removed to allow for loading a media roll. 3.
-
Page 13: Installing The Initial Ink Cartridge And Powering On
Getting Started Installing the Initial Ink Cartridge and Powering On The printer uses one ink cartridge that contains cyan, magenta, and yellow (CMY) ink. An ink cartridge is included with the printer to help you get started. The printer is shipped without the ink cartridge installed. -
Page 14: Installing The Printer Driver
Important: Do not connect the printer to your PC with the USB cable at this time. The USB cable will be connected later in this procedure when prompted. 2. Download the QL-E100 printer driver from the AstroNova Product Identification website. See AstroNovaProductID.com/QL-E100support. Save the file to your desktop for convenience. - Page 15 Getting Started 3. Double-click the installer file. The installation process will begin. 4. The first screen shows the printer model and software version number. Choose the Next button. 5. The next screen shows the license agreement. To proceed with the installation, accept the terms and choose the I Agree button. QL-E100 User Guide...
- Page 16 Getting Started 6. The next screen shows the components that will be installed. Make sure the QL-E100 Printer option is selected. Then choose the Next button. 7. The next screen shows where the printer software will be installed. If necessary, select an installation location for the software. The default location should be used in most cases.
- Page 17 Getting Started 8. The software installation will start. You will be prompted to connect the printer to the computer. 9. Use the supplied USB cable to connect the printer’s USB-C port to an available USB port on your computer. 10. Press the power button for two seconds and then release it. The power button will light green and you will hear the printer initializing.
- Page 18 Getting Started 12. Return to the printer driver software installation screen. Choose the Next button. 13. The next screen shows the USB port that will be used. The USB ports will automatically be scanned and the printer will appear in the port list. •...
- Page 19 Getting Started 14. The installation process will continue. A Windows Security prompt may appear. If this prompt appears, choose the Install button. 15. The next screen shows that the printer driver has been successfully installed on your computer. Choose the Finish button. The installer software will close. QL-E100 User Guide...
-
Page 20: Identifying Printer Parts
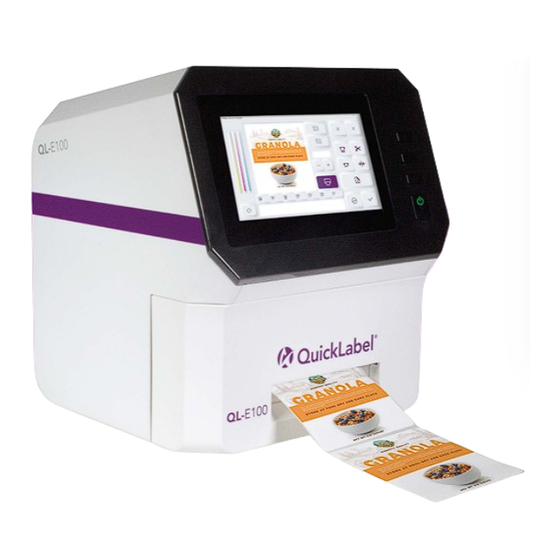
Getting Started Identifying Printer Parts This section provides a visual overview of the printer. Parts are identified and described using illustrations and tables. Printer Overview Name Description Touchscreen The seven-inch touchscreen provides access to all printer menus. It also displays information about the status of the printer. -
Page 21: Operation Panel
Getting Started Operation Panel Name Description Press this key to change the ink cartridge. “Replacing the Ink Cartridge” on page 25. Press this key to perform a print carriage check followed by a printhead cleaning. Press this key to unload the media. Media will be fed backward out of the media entry slot. -
Page 22: Rear Panel Connectors
Getting Started Rear Panel Connectors Name Description USB Type A Ports Two USB A ports are available for connecting USB flash drives. USB Type C Port The USB C port is used for connecting a PC to the printer. Power Inlet The power adapter cord plugs into the power inlet. -
Page 23: Media And Ink Cartridges
Media and Ink Cartridges Chapter 2: Media and Ink Cartridges Purchasing Media and Ink Visit GetLabels.com or contact one of our Customer Support Specialists from your location. Location Telephone E-mail Americas +1 877 757 7978 or info@getlabels.com +1 401 828 4000 Canada +1 800 565 2216 infoCA@getlabels.com... -
Page 24: Ink Cartridges
The service life of ink cartridges will vary based on your printing quantities and label colors. Use the following information when ordering replacement ink cartridges. Item Description AstroNova Part Number QL-E100 COLOR INK CARTRIDGE, 2-PK 14580102 QL-E100 COLOR INK CARTRIDGE, 5-PK 14580105 Caution: Ink cartridges are not refillable. -
Page 25: Replacing The Ink Cartridge
Media and Ink Cartridges Replacing the Ink Cartridge The ink level is displayed on the left side of the touchscreen. When the ink cartridge is empty, an out of ink message will be displayed. Use the following instructions to remove the empty ink cartridge and install a new one. - Page 26 Media and Ink Cartridges 5. Remove the new ink cartridge from its packaging. Carefully remove the plastic tape covering the ink nozzles. Caution: Do not touch the ink cartridge ink nozzles or copper contacts. Touching these parts will result in clogs, ink failure, and bad electrical connections. Do not remove the copper strips. They are required electrical contacts.
-
Page 27: Recycling Empty Ink Cartridges
Media and Ink Cartridges 8. Check the ink level area on the left side of the touchscreen. The ink level will be displayed using visual CMY bars. The ink level is also displayed as a percentage under the bars. After installing the new ink cartridge, the ink level will be shown as full (100%). -
Page 28: Media Rolls
Media and Ink Cartridges Media Rolls Supported Media Types and Sensing This section describes the types of label media you can use with the printer. Reflective Mark Media Reflective mark media has black cue marks printed on the back of the label liner. These marks are read by a sensor on the printer to determine the starting point of new labels. - Page 29 Media and Ink Cartridges Continuous Media Continuous media does not have reflective marks. It also does not have die cuts, and therefore contains no gaps. It is a continuous sheet of label material affixed to a liner. It may also be a roll of continuous paper tag stock.
-
Page 30: Installing The Media Roll
Media and Ink Cartridges Installing the Media Roll Use the following instructions to install the media roll and feed media into the printer. 1. Make sure that the printer is powered on. If the printer is off, press the power button for two seconds and then release it. -
Page 31: Replacing A Media Roll
Media and Ink Cartridges Replacing a Media Roll Use the following instructions to remove a media roll or empty cardboard core. Then install a replacement media roll and feed media into the printer. If media runs out during a print job, the print job will resume after the replacement roll is installed. Any remaining labels in the job will be printed. - Page 32 Media and Ink Cartridges 6. Prepare to load a new roll of labels. If you are replacing an empty label roll during a print job, you must use the same material type and label size. Orient the label roll as shown. Then install it on the roll holder. Make sure the side of the roll is pressed flush against the wide flange.
- Page 33 Media and Ink Cartridges 8. Locate the adjustable media guide on the right side of the media entry slot. Loosen the screw and slide the guide to the right. Unroll a small amount of labels. Then feed the first label of the roll into the media entry slot. Make sure the edge of the media is against the left side of the slot.
-
Page 34: Installing And Setting Up The Printer Driver
The power button will light red and the printer will shut down. 2. Disconnect the USB cable from the printer. 3. Download the updated QL-E100 printer driver from the AstroNova Product Identification website. See AstroNovaProductID.com/QL-E100support. Save the file to your desktop for convenience. - Page 35 Installing and Setting Up the Printer Driver 6. The next screen shows the license agreement. To proceed with the installation, accept the terms and choose the I Agree button. 7. The next screen shows the components that will be installed. Make sure the QL-E100 Printer option is selected.
- Page 36 Installing and Setting Up the Printer Driver 8. The next screen shows where the printer software will be installed. If necessary, select an installation location for the software. The default location should be used in most cases. Then choose the Install button. 9.
- Page 37 Installing and Setting Up the Printer Driver 11. Use the supplied USB cable to connect the printer’s USB-C port to an available USB port on your computer. 12. Press the power button for two seconds and then release it. The power button will light green and you will hear the printer initializing.
- Page 38 Installing and Setting Up the Printer Driver 14. The next screen shows the USB port that will be used. The USB ports will automatically be scanned and the printer will appear in the port list. • If your printer was found, it will be shown in the port list. •...
-
Page 39: Installing Multiple Printers
Printing Preferences window will open. Note: You can also access the driver preferences via the application’s print dialog. From the Print window in your software, select QuickLabel QL-E100 from the printer list and choose Properties or Setup (varies based on program). - Page 40 Installing and Setting Up the Printer Driver 2. Choose the Label tab. 3. Select whether to display sizes in millimeters or inches. 4. Select a label size from the Size list. If necessary, you can set up a custom label size to meet your needs. See “Setting up Custom Label Sizes”...
-
Page 41: Setting Up Custom Label Sizes
Printing Preferences window will open. Note: You can also access the driver preferences via the application’s print dialog. From the Print window in your software, select QuickLabel QL-E100 from the printer list and choose Properties or Setup (varies based on program). -
Page 42: Setting Up Appearance Options
Printing Preferences window will open. Note: You can also access the driver preferences via the application’s print dialog. From the Print window in your software, select QuickLabel QL-E100 from the printer list and choose Properties or Setup (varies based on program). - Page 43 Installing and Setting Up the Printer Driver 2. Choose the Appearance tab. 3. Select a print quality. • Best - If you select this option, labels will be printed with the best possible quality. Labels will be printed with a resolution of 1200 x 600 dots per inch. In this mode, the printhead will pass over the same area multiple times while printing.
-
Page 44: Setting Up Layout Options
Printing Preferences window will open. Note: You can also access the driver preferences via the application’s print dialog. From the Print window in your software, select QuickLabel QL-E100 from the printer list and choose Properties or Setup (varies based on program). -
Page 45: Viewing Status Information
Printing Preferences window will open. Note: You can also access the driver preferences via the application’s print dialog. From the Print window in your software, select QuickLabel QL-E100 from the printer list and choose Properties or Setup (varies based on program). -
Page 46: Viewing Printer Driver Information
Printing Preferences window will open. Note: You can also access the driver preferences via the application’s print dialog. From the Print window in your software, select QuickLabel QL-E100 from the printer list and choose Properties or Setup (varies based on program). - Page 47 Installing and Setting Up the Printer Driver 2. Choose the About tab. Information about the printer driver is displayed in this tab. QL-E100 User Guide...
-
Page 48: Printing From A Pc
Printing from a PC Chapter 4: Printing from a PC Preparing Label Artwork This section describes factors you should consider when preparing your label artwork. Choosing Design Software You can print using any design software with printing functionality. There are many graphic design software applications available, and the programs you choose will depend on your desired workflow and design requirements. -
Page 49: Printing From Adobe Or Other Third-Party Software
Printing from a PC Printing from Adobe or other Third-Party Software Use the following instructions to print labels with Adobe or other third-party software. 1. Make sure that your label media has been installed. See “Installing the Media Roll” on page 30. -
Page 50: Quickprint Printing From Usb Or Printer Memory
QuickPrint Printing from USB or Printer Memory Chapter 5: QuickPrint Printing from USB or Printer Memory About QuickPrint Printing QuickPrint is an alternative way of printing that allows you to print labels stored on the printer’s internal memory or a USB flash drive. This feature allows on-demand standalone printing without the need for a computer. - Page 51 QuickPrint Printing from USB or Printer Memory 3. Tap the QuickPrint icon. The QuickPrint tab will open. 4. Tap the QuickPrint Load Image icon. The QuickPrint File Browser screen will open. QL-E100 User Guide...
- Page 52 QuickPrint Printing from USB or Printer Memory 5. Tap the drive field in the upper-left corner of the screen. Select the drive that will be displayed. • Tap Printer to view the printer’s internal storage. • Tap USB to view the selected USB flash drive. 6.
-
Page 53: Printing From Quickprint
QuickPrint Printing from USB or Printer Memory Printing from QuickPrint Use the following instructions to select and print a file using QuickPrint printing. 1. Make sure that the media for your label has been installed. See “Installing the Media Roll” on page 30. - Page 54 QuickPrint Printing from USB or Printer Memory 5. Tap the QuickPrint Load Image icon. The QuickPrint File Browser screen will open. 6. Tap the drive field in the upper-left corner of the screen. Select the drive that will be displayed. Tap Printer to view the printer’s internal storage.
- Page 55 QuickPrint Printing from USB or Printer Memory 9. Select a file from the center list. Then tap the OPEN icon. A preview image of the label will be shown in the QuickPrint tab. 10. Tap the number field or -/+ icons to select a print quantity for the job. 11.
-
Page 56: Touchscreen Controls And Functions
Touchscreen Controls and Functions Chapter 6: Touchscreen Controls and Functions Main Screen Orientation Name Description Ink Level and Ink Change The ink level is displayed in this area. An icon is Controls available for replacing the ink cartridge. See “Ink Level and Ink Change Controls”... -
Page 57: Ink Level And Ink Change Controls
Touchscreen Controls and Functions Name Description Maintenance Controls These icons perform functions such as cleaning the printhead and checking the print mechanism. “Maintenance Controls” on page 59. Printer and Media Status Printer and media status messages are displayed in this area. See “Printer and Media Status”... -
Page 58: Media Controls
Touchscreen Controls and Functions Media Controls Media controls are located on the right side of the touchscreen. You can use these controls to perform functions such as loading, cutting, and unloading media. Icon Description Feed Media - Tap this icon to feed media. Cut Media - Tap this icon to cut the media. -
Page 59: Maintenance Controls
Touchscreen Controls and Functions Maintenance Controls Maintenance controls are located in the lower-right corner of the touchscreen. You can use these controls to clean the printhead and check the print mechanism movement. Icon Description Clean Printhead - Tap this icon to perform a printhead cleaning. -
Page 60: Main Area Tabs
Touchscreen Controls and Functions Main Area Tabs The tab icons on the bottom of the main area change what is displayed. You will use these tabs to view information and configure various settings. This section describes the tabs and their associated options. -
Page 61: Quickprint Tab
Touchscreen Controls and Functions Total Printed This area shows the total number of labels printed since the printer was powered on. This number resets when you turn the printer power off. You can tap the Reset Total Label Count icon to reset this count to zero. QuickPrint Tab Tap the QuickPrint icon. -
Page 62: Offsets Tab
Touchscreen Controls and Functions Offsets Tab Tap the Offsets icon. The Offsets tab will open. The Offsets tab shows a sample label and settings for adjusting horizontal and vertical offsets. • Horizontal Offset adjusts the horizontal position of the printed label on the media. •... - Page 63 Touchscreen Controls and Functions Vertical Offset The Vertical Offset is zero by default, resulting in no vertical adjustment. You can tap the Vertical Offset field to change the offset. Enter an offset from zero to 200 (in tenths of a millimeter). Increasing the vertical offset moves the printed image away from the indicated edge.
-
Page 64: Media Settings Tab (Quickprint Functions)
Touchscreen Controls and Functions Media Settings Tab (QuickPrint Functions) Tap the Media Settings icon. The Media Settings tab will open. The Media Settings tab shows label and print settings that are used for QuickPrint printing. Detailed QuickPrint instructions are provided in a dedicated chapter. See “QuickPrint Printing from USB or Printer Memory”... - Page 65 Touchscreen Controls and Functions Unidirectional The printhead carriage moves horizontally across the media during printing. By default, the printhead will print while moving in both directions. If you enable the Unidirectional option, the printhead will print only when moving from right to left. Sensor Select a sensor type.
-
Page 66: Alignment Tab
Touchscreen Controls and Functions TOF Calibration The top-of-form (TOF) sensor was calibrated when you installed a media roll. See “Installing the Media Roll” on page 30. The message “TOF Calibration successful” is shown in this tab. If there is an issue with TOF calibration, a notification message will be displayed in this tab. You can tap the Calibration icon to perform TOF calibration on the media currently installed in the printer. - Page 67 Touchscreen Controls and Functions Print Pattern The Print Pattern icon prints a nozzle alignment pattern. Left and right offsets are used to align the color bars. These are factory settings that should not be changed unless specifically instructed. Alignment Adjustments Enter any alignment adjustments if required.
-
Page 68: System Settings Tab
Touchscreen Controls and Functions System Settings Tab Tap the System Settings icon. The System Settings tab will open. The System Settings tab shows information about firmware, power saving, and language features. Printer Firmware Information The installed firmware version is shown in this screen. You can upgrade the firmware as new versions are released. -
Page 69: Help Tab
Touchscreen Controls and Functions Restore Defaults You can tap the Defaults icon to restore the original settings in the System Settings tab. Help Tab Tap the Help icon. The Help tab will open. The Help tab provides access to additional help resources for the printer. Scan a QR code with your mobile device to access this information. -
Page 70: Maintenance
Maintenance Chapter 7: Maintenance General Cleaning Dust and ink smudges may eventually appear on the printer exterior. Use the following instructions to clean the printer as needed. 1. Make sure that the printer is powered off. If the printer is on, press the power button for two seconds and then release it. -
Page 71: Cleaning Ink Cartridge Electrical Contacts
Maintenance Cleaning Ink Cartridge Electrical Contacts If the printer is used in a dusty environment, a small amount of debris may accumulate on the ink cartridge contacts. You can clean the contacts with distilled water and lint-free cotton swabs. Caution: Do not use tap water to clean the ink cartridge electrical contacts. Tap water may contain contaminants that can damage the ink cartridge. - Page 72 Maintenance 5. Lightly moisten a swab with distilled water. Then squeeze any excess water from the swab. Wipe the ink cartridge copper contacts with the swab. Wipe the contacts until no ink residue or dust appears on a clean swab. Caution: Do not touch the ink cartridge nozzles.
-
Page 73: Upgrading The Printer Firmware
Use the following instructions to install a firmware update. 1. Obtain the firmware upgrade file from AstroNova. Firmware upgrade files have a “.mim” file extension. Copy this file to the root directory of a USB flash drive. -
Page 74: Troubleshooting
Troubleshooting Chapter 8: Troubleshooting Printing Issues and Solutions This section describes issues you may encounter and their solutions. Incorrect Label Positioning If your printed image is not positioned correctly on the label media, use the following checklist to correct this problem. Note: After each step, reprint your labels. -
Page 75: Label Media Tracking Issues
Check the USB cable connections to ensure they are connected properly. 3. Ensure you are printing to the QuickLabel QL-E100 printer. Check your label design application to ensure you are printing to the QuickLabel QL-E100. 4. Check the printer driver settings. -
Page 76: Print Quality Issues
Troubleshooting Print Quality Issues If your labels contain missing lines or dots, or other quality issues, use the following checklist to correct the problem. Note: After each step, reprint your labels. If the problem continues, proceed to the next step. 1. - Page 77 Troubleshooting 2. Remove the excess media. If there is media extending out of the front of the printer, tap the Cut Media icon. Then open the upper lid. Use scissors to cut the media feeding into the media entry slot. Remove the roll.
-
Page 78: Resolving Printer Driver Issues
Printer Driver Preferences” on page 39. 2. Ensure you are printing to the QuickLabel QL-E100 printer. Check your label design application to ensure you are printing to the QuickLabel QL-E100. 3. Upgrade the printer driver. Ensure you are using the latest version of the printer driver. Upgrade your printer driver if necessary. -
Page 79: Status And Error Messages
Troubleshooting Status and Error Messages Status and error messages are shown on the touchscreen. These messages provide information about the media and printer. Media Status and Error Messages Messages about the media status will be shown on the touchscreen. These messages will show the current state of the label media. - Page 80 Troubleshooting Message Description Printing The printer is currently printing. Wait for the print job to finish. Error An error occurred. Refer to the error details. Remove Labels from Printer It is necessary to remove media from the printer. Unload the media roll. Checking Labels The printer is checking the media status.
-
Page 81: Printer Error Messages
Troubleshooting Printer Error Messages Messages about printer errors will be shown on the touchscreen. These messages will help you diagnose and correct problems. Message Description (01) Cover Open The front lid is open. Close the front lid. (02) Motor Error A label jam has occurred. -
Page 82: Additional Product Support
Troubleshooting Additional Product Support AstroNova is committed to your satisfaction and delivering the best possible in-house color label printing experience. If you are experiencing any difficulties in setup or operation, we have resources to help you: Resource Description Support Videos, Software, and AstroNovaProductID.com/QL-E100support... -
Page 83: Safety
Safety Chapter 9: Safety Before using this printer, please read this section thoroughly. Warnings to heed and important matters are described here to prevent damage to the user and other persons. Do not attempt to operate this printer in any way other than those mentioned in the User Guide. General Warnings •... -
Page 84: Location
Safety Location Make sure there is sufficient space around the printer. Warnings • Never place items on the printer. If such items were to fall on the printer, this could cause a fire, electrical shock, or damage to the printer. •... -
Page 85: Power Supply And Power Cord
Safety Power Supply and Power Cord Warnings • To avoid causing a fire or serious electrical shock, always use the power cord provided with this printer. To avoid a fire or electrical shock, do not use an extension cord. • To avoid a fire or serious electrical shock, connect the printer power cord to an independent power source that is not shared by other equipment or appliances. -
Page 86: Technical Specifications
Technical Specifications Chapter 10: Technical Specifications Operation Print Technology Thermal Inkjet Print Resolution Up to 1,200 dpi (Best): 1,200 x 600 dpi, multi-pass (Normal): 1200 x 600 dpi (Economy): 600 x 600 dpi (Draft): 300 x 300 dpi Label Size/Print Area Width: 2.0”... - Page 87 Technical Specifications Environmental & Physical Printer 59º F to 86º F (15º C to 30º C), 20% to 80% Relative Humidity (non-condensing) -40º F to 140º F (-40º C to 60º C), 20% to 80% Relative Humidity (non-condensing) Power Requirements Input: 100 - 240 VAC 50/60Hz 1.7A max Output: 24V / 2.5A 60W Duty Cycle...
- Page 88 Index Index Alignment Tab ............66 Ink Cartridge Contacts Anti-aliasing .............48 Cleaning ............71 Auto Rotation ............65 Ink Cartridges .............23 Handling ............24 Initial Installation ..........24 Cancel Print Job ..........49 Purchasing ............23 Check Media Sensing ..........58 Recycling ............27 Clean Printhead ............59 Replacement .............25 Cleaning ..............70 Inspection ..............10 Continuous Media ............29...
- Page 89 Index Part Identification .............20 Rear Panel Connectors ..........22 Pause Printing ............49 Reflective Mark Media ..........28 Power Cable ............11 Resume Printing ............49 Power Inlet ...............22 Rotation ..............40 Power Key ..............21 Printer Check ............59 Printer Driver ............34 Safety ...............83 Appearance Options ..........42 Scale ................41 Custom Label Sizes ...........41 Sensor Type ............40...
Need help?
Do you have a question about the QuickLabel QL-E100 and is the answer not in the manual?
Questions and answers