Table of Contents
Advertisement
Advertisement
Table of Contents

Related Manuals for AstroNova QuickLabel Kiaro! QL-120


Summary of Contents for AstroNova QuickLabel Kiaro! QL-120
- Page 1 U S E R G U I D E...
- Page 2 QL-120 User Guide Part Number 22834682-EN-E Revision 1.5 10/2019 ® QuickLabel, An AstroNova Division World Headquarters 600 East Greenwich Ave., West Warwick, RI 02893 Tel: (877) 757-7978 Fax: (401) 822-2430 E-mail: info@QuickLabel.com www.QuickLabel.com Technical Support Tel: (877) 757-7310 E-mail: support@QuickLabel.com...
- Page 3 AstroNova. Trademarks QL-120® and Custom QuickLabel Omni® are registered trademarks of AstroNova, Inc. Adobe®, Photoshop®, and Illustrator® are registered trademarks of Adobe Systems, Inc. Corel® is a registered trademark of Corel Corporation.
- Page 4 Obtaining Service To obtain warranted service, please contact QuickLabel Technical Support through one of the Factory Sales and Service Centers. Contact Information World Headquarters 600 East Greenwich Ave. West Warwick, RI 02893 USA Toll-Free: 877-757-7978 | Tel: +1 401-828-4000 quicklabel.com European Headquarters Waldstrasse 70 63128 Dietzenbach | Germany...
- Page 5 China 1F, Bldg2#, 458 North Fu Te Road, Shanghai Waigaoqiao F.T.Z., 200131 Tel: +86 21 5868 2809 quicklabel.cn Ownership Information Congratulations and thank you for your business. Your purchase of a QuickLabel digital label printer is an investment in production flexibility and packaging efficiency. Please record the model number and serial number of your product.
- Page 6 WEEE Directive European Union (and EEA) only. These symbols indicate that this product is not to be disposed of with your household waste, according to the WEEE Directive (2002/96/EC), the Battery Directive (2006/66/EC) and/or your national laws implementing those Directives. If a chemical symbol is printed beneath the symbol shown above, in accordance with the Battery Directive, this indicates that a heavy metal (Hg = Mercury, Cd = Cadmium, Pb = Lead) is present in this battery or accumulator at a concentration above an applicable threshold...
- Page 7 Battery - For CA, USA only Included battery contains Perchlorate Material ---- special handling may apply. See http://www.dtsc.ca.gov/hazardouswaste/perchlorate for detail. European Union (and EEA) only Contains a preservative to control microbial deterioration. Contains 1,2-benzisothiazol-3(2H)-one. May produce an allergic reaction. Contains less than 30% of components with unknown hazards to the aquatic environment. Safety data sheet available on request.
- Page 8 CE Label First Affixed Date: 18 Place of issue: West Warwick, RI European Contact: Your local AstroNova, Inc. Sales and Service Office. FRANCE - Parc Euclide, ZA la Clef de St Pierre, 10A Rue Blaise Pascal 78990 Elancourt Tel: (+33) 1 34 82 09 00, Fax: (+33) 1 34 82 05 71 GERMANY - Waldstraße 70, D-63128 Dietzenbach...
-
Page 9: Table Of Contents
Contents Chapter 1: Getting Started ........11 QL-120 Series Printers . -
Page 10: Table Of Contents
Contents Printer Not Operating Correctly ......122 Print Results are Unsatisfactory ......124 Print Samples and Solutions . -
Page 11: Chapter 1: Getting Started
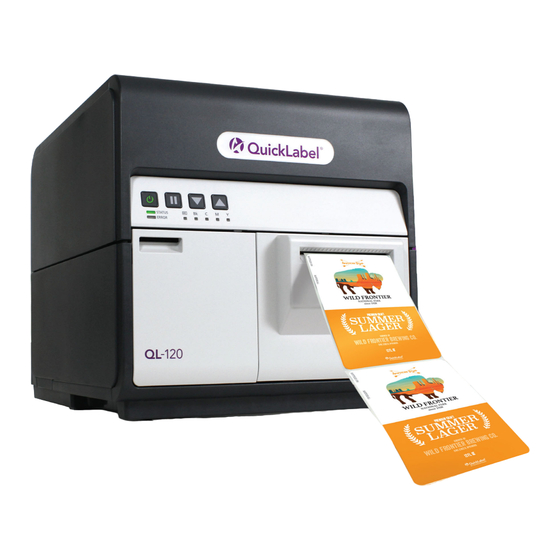
Getting Started QL-120 Series Printers This user guide applies to the following QL-120 series printers. • QL-120 - The QL-120 is a fast color label printer, featuring industry-leading print quality, reliability, performance, and connectivity. • QL-120X - The QL-120X is built on the QL-120 platform and features new second-gener- ation printhead technology and extended printhead life. -
Page 12: Before Installing The Printer
Getting Started Before Installing the Printer Before installing the printer, select an appropriate location, review the installation precautions, and make sure that the system requirements are met. Choosing an Installation Location The installation environment must be as described in this section. •... - Page 13 Getting Started Installation Precautions When installing the printer, observe the following precautions. • Imaging faults can result from dew condensation that occurs when the printer is moved from a cold place to a warm place. Leave the unpacked printer as is for at least two hours before installing it.
-
Page 14: Unpacking The Printer
Getting Started Unpacking the Printer The printer is secured using packing tape and cushioning materials to protect it against vibrations and shock during transportation. Use the following procedure to unpack the printer. Keep the packing materials for future transportation. Remove the four grips from the packing carton, and then remove the outer casing. Remove the accessory box, and then remove the upper pads. - Page 15 Getting Started Unwrap the plastic bag from top to bottom. Holding the handles at the bottom of the printer, lift the printer to take it out from the package base. Lift from the illustrated points. Do not hold the front side of the printer. Note: The printer weighs about 53 pounds (24 kilograms).
- Page 16 Getting Started Open the roll cover. Remove all pieces of tape securing the roll holder. Push down the upper unit release lever, and then open the upper unit. Remove all pieces of tape, cushioning material, and red tags from inside the printer. QL-120 User Guide...
- Page 17 Getting Started Turn the pinch roller release lever, and then remove the protective sheet. Checking the Included Parts Check to make sure the following items are included with the printer. • Printhead unit • Starter ink cartridges (one for each color) •...
-
Page 18: Installing The Printer
Getting Started Installing the Printer The printer installation process requires installing the printhead, installing ink cartridges, and filling the system with ink. Installing the Printhead Use the following instructions to install the printhead. Caution: The printhead is a sensitive electronic component. Use extreme caution when installing it. - Page 19 Getting Started Remove the two thumbscrews to remove the main maintenance cover from the upper unit. Close the upper unit. QL-120 User Guide...
- Page 20 Getting Started Remove the print module cover. Then open the upper printhead release lever and lower printhead release lever. Remove the blade cleaner. QL-120 User Guide...
- Page 21 Getting Started Remove the printhead from the package. Caution: Do not touch the printhead face. An ink injection problem can occur. Hold the printhead only by the end tab. Remove the cover protecting the terminals of the printhead PC boards. Remove the protective guides from the ends of the printhead.
- Page 22 Getting Started Remove the caps from the printhead ink supply ports. Remove the printhead from the head protector. QL-120 User Guide...
- Page 23 Getting Started Mount the printhead in the printer. Ensure the metal alignment pins on the printhead insert into the corresponding alignment slots in the printer. Push the printhead in until it stops moving. If printhead is insufficiently inserted, the lower printhead release lever cannot be closed. To confirm printhead is in the correct position, see if the end of printhead grip and the edge of the inner metal plate are in the same plane as shown in the figure.
- Page 24 Getting Started Close the lower printhead release lever and upper printhead release lever. Check that numbers (1), (2), and (3) indicated on Print Module are visible. If any numbers (1), (2), or (3) are invisible, the printhead release lever (1, 2) has not been closed or the blade cleaner (3) has not been mounted.
- Page 25 Getting Started Push down the upper unit release lever and then open the upper unit. Install the main maintenance cover on the upper unit with the two thumbscrews. Close the upper unit and then close the roll cover. QL-120 User Guide...
- Page 26 Getting Started Loading Ink Cartridges Open the ink cartridge door. Open the ink cartridge lever for each color while pushing it downward. Take out the starter ink cartridges from the package. Then remove the packing materials. Do not touch the ink outlet and terminal to prevent soiling of the surrounding work area, damage to the ink cartridge, and poor printing.
- Page 27 Getting Started Slowly insert the ink cartridge as far as it will go, and then close the ink cartridge lever. Repeat this step for each color. Caution: There are sharp pins in the ink cartridge slot. Never put your fingers in this area.
- Page 28 Getting Started Initial Ink Filling Caution: Do not turn the power off or open covers and doors such as the Roll Cover during ink loading. Caution: If the power is turned off or covers and doors are opened during ink loading, the printer stops ink loading.
-
Page 29: Loading Media
Getting Started Loading Media Loading Media on the Roll Holder Open the roll cover. Remove the roll holder. QL-120 User Guide... - Page 30 Getting Started Release the holder stopper screw, and remove the holder stopper from the roll holder. Load roll media on the roll holder with it oriented as shown such that the bottom of the roll touches the roll holder surface with no clearance. Insert the holder stopper until it stops, and tighten the holder stopper screw.
- Page 31 Getting Started Setting the Media in the Printer Make sure that the Power LED stays lit. If the Power LED does not stay lit or it is not blinking, press the power key to put the printer in the power-on state. Open the roll cover.
- Page 32 Getting Started Open the transport guide (right), and slide it rightward until it stops. Mount the roll holder in the printer. The flanges and corresponding installation points in the printer are color coded. Orient the roll holder so the black flange matches the black installation point, and the gray flange matches the gray installation point.
- Page 33 Getting Started If you are using gap or reflective mark media, cut the media edge that will be fed into the printer. If you are using continuous media, skip this step. • Gap media has spaces between each label resulting from the removal of the matrix during the die cutting process.
- Page 34 Getting Started Insert media along the left-side guide under the transport guide (left) until it stops at the roller in the feeder slot. Media at the roller in the feeder slot is automatically pulled in slightly. Slide the transport guide (right) in accordance with the width of the media. Note: Do not press the transport guide (right) strongly against the media edge.
- Page 35 Getting Started Slowly push the paper guide down until it clicks (locks). When it locks, media is transported automatically. Close the roll cover. QL-120 User Guide...
-
Page 36: Installing The Printer Driver (Usb)
Getting Started Installing the Printer Driver (USB) Use the following instructions to install the printer via USB 2.0. Note: This procedure requires administrator rights in Windows. Note: When the Windows publisher verification or digital signing warning messages appear, choose to continue the installation. The driver has been tested thoroughly by QuickLabel, and will not cause any of the problems listed in these messages. - Page 37 Getting Started Open the installer folder, and then open the Drivers sub-folder. Double-click the setup.exe file. The QuickLabel QL-120 Installation Wizard window will open. The first page shows the printer model and software version number. Select the Next button. QL-120 User Guide...
- Page 38 Getting Started The next page shows connection options for the printer. Select USB, and then select the Next button. QL-120 User Guide...
- Page 39 Getting Started The next page indicates that the driver is being installed. When the installation has completed, the next page indicates a successful installation. Select the Finish button. Connect the smaller end of the USB cable to the printer USB type B port. This port is located on the back of the printer.
-
Page 40: Installing The Printer Driver (Network)
Getting Started Connect the larger end of the USB cable to an available USB 2.0 port on your computer. Once the USB connection has been made, Windows will automatically install the device driver software. Alert messages will inform you of the progress and successful installa- tion. - Page 41 Getting Started Select the Extract button. A new folder will be created on the desktop. This folder has the same name as the original installer file you downloaded. Open the installer folder, and then open the Drivers sub-folder. Double-click the setup.exe file.
- Page 42 Getting Started The next page shows connection options for the printer. Select Ethernet, and then select the Next button. The next page shows options for locating the printer on your network. • Enter an IP address - Select this option if you know the IP address of the QL-120 series printer and you would like to enter it manually.
- Page 43 Getting Started If you selected the Enter an IP address option, follow this step. Otherwise, proceed to the next step. Enter the IP address of the printer. You can also provide a printer name and select whether to make it the default printer. Select the Next button.
- Page 44 Getting Started If you selected the Search network for printers option, follow this step. Otherwise, proceed to the next step. Select a printer from the list of QL-120 series printers found on the network. If needed, you can search the network again by selecting the Refresh button.
- Page 45 Getting Started You can also provide a printer name and select whether to make it the default printer. Select the Next button. QL-120 User Guide...
- Page 46 Getting Started The next page indicates that the driver is being installed. When the installation has completed, the next page indicates a successful installation. Select the Finish button. QL-120 User Guide...
-
Page 47: Advanced Installation Topics
Getting Started Advanced Installation Topics Viewing and Configuring IP Address Settings Before Network Installation Knowing the IP address settings of the printer can be helpful when installing the printer via a network connection. Before installing the printer via a network connection, you can first install it using a USB connection. - Page 48 Getting Started Advanced Network Installation The driver installation wizard provides the ability to install the printer via a network connection. Using the driver installation wizard is the easiest way to install the printer for most users. Advanced users and system administrators may prefer to install the driver using standard Windows processes from the Devices and Printers window.
- Page 49 Getting Started Select the Add a Printer option. The Add Printer window will open. Select the Add a network, wireless, or Bluetooth printer option. Then select the Next button. Follow the instructions in the prompts to select the QL-120 series printer. During the installation process, you will be prompted for additional port information.
- Page 50 Getting Started Select the Custom option, and then select the Settings button. The Configure Standard TCP/IP Port Monitor window will open. Enter a Port Name Printer Name or IP Address. Enter “50000” in the Port Number field. Then select the button.
- Page 51 Getting Started Select the Have Disk button. The Install from Disk window will open. Select the Browse button. Browse to the installer folder, and then open the Drivers sub-folder. Select the QuickLabel-QL-120.inf file. QL-120 User Guide...
- Page 52 Getting Started Select the Open button. Then select the button in the Install from Disk window. The QuickLabel QL-120 series printer will appear in the printer list. Select the QuickLabel QL-120 series printer from the list. Then select the Next button in the Add Printer window.
- Page 53 Getting Started Enter a printer name. Then select the Next button in the Add Printer window. The printer driver installation will continue. After several moments, you will be prompted for printer sharing preferences. Define your printer sharing preferences. Then select the Next button in the Add Printer window.
- Page 54 Getting Started Sharing the Printer Over a Network After installing the QL-120 printer driver on a PC with a network connection, you can make the printer available to other PCs on the same network. Use the following instructions to prepare the PC for sharing the printer over the network. After completing this procedure, you will be able to find the printer from other PCs on the same network.
- Page 55 Getting Started Enable the Share this printer option. Make sure the Render print jobs on client computers option is also enabled. Then choose OK. From the Windows Control Panel, choose Network and Internet > Network and Sharing Center > Change advanced sharing settings.
-
Page 56: Chapter 2: Printer Overview
Printer Overview Printer Part Names and Functions Front View Part Description Upper Unit Open this unit when loading media, removing media jams in the feed path, or cleaning inside the machine. This unit includes print modules, circuit boards, and other internal components. Operation Panel Keys necessary for operation and LEDs to indicate the state of the printer are provided... - Page 57 Printer Overview Part Description Maintenance Cartridge Open this door when replacing the Door maintenance cartridge. Media Delivery Slot Media is ejected through this slot. Back View Part Description Rear Feeder Slot This slot is used to feed fanfold paper. Rating Plate A serial number for identifying the printer is shown on this plate.
- Page 58 Printer Overview Part Description Power Socket Connect the power cord here. Inside the Printer Part Description Transport Guide (Left) This is a fixed guide for transporting media straight. Upper Unit Release Lever Push this lever up to release the upper unit. Pinch Roller Release Lever Pull down this lever when media is jammed.
- Page 59 Printer Overview Roll Holder Part Description Holder Stopper This stopper prevents media from being removed. Holder Stopper Screw This screw is used to release the holder stopper. Release this screw when attaching or detaching the holder stopper. Operation Panel STATUS ERROR Part Description...
-
Page 60: Switching The Printer On And Off
Printer Overview Part Description BACK FEED Key Pressing this key feeds media one page backward. Pressing and holding this key feeds media backward continuously. • On - No ink or ink cartridge missing. Ink Warning LEDs • Blinking - Low ink. •... -
Page 61: Ql-120 Status Monitor
Printer Overview Switching the Printer Off Press the power key for at least one second. The Power LED blinks at long intervals, and then the printer is turned off. When the printer is not used for a long period of time: •... -
Page 62: Ql-120 Maintenance Utility
Printer Overview QL-120 Maintenance Utility The QL-120 Maintenance Utility software is installed when you install the printer driver. The utility allows you to view printer information and perform a variety of maintenance functions. You can access the QL-120 Maintenance Utility by choosing Start >... -
Page 63: Chapter 3: Designing And Printing Labels
Designing and Printing Labels Designing Labels This section describes several factors you should consider before you start designing labels. Label Media Type Overview This section describes the types of label media you can use with the QL-120 series printer. Reflective Mark Media Reflective mark media has black cue marks printed on the back of the label liner. - Page 64 Designing and Printing Labels Gap Media Gap media has spaces between each label resulting from the removal of the matrix during the die cutting process. When the matrix material is removed and the liner exposed, the die cut labels are separated by gaps. These gaps are read by a sensor on the printer to determine the starting point of new labels.
- Page 65 Designing and Printing Labels Choosing Design Software You can print using any design software with printing functionality. There are many graphic design software applications available, and the programs you choose will depend on your desired workflow and design requirements. Design software is available from QuickLabel and other software vendors. •...
-
Page 66: Setting Up The Label Design Software
Designing and Printing Labels surfaces, including hands and other printed labels. As a guideline, no more than 0.02” (0.5 mm) of ink should be printed onto the liner. • Design elements that will run to the edge of the label are the parts of the design that will “bleed”... -
Page 67: Printing Labels
Designing and Printing Labels • If the application supports color management, enable it - Professional design appli- cations support color management. This option is typically found in the application’s print window. Ensure the Color Adjustment in the QL-120 printer driver is set to “Application Managed”. Color management should be enabled in either the design application or printer driver, but not both. -
Page 68: Managing Media Out With Ql-120 Series Printers
Designing and Printing Labels Receive the printed labels. Note: Do not pull the printed labels in any direction as they exit the printer. Pulling the labels may result in a media jam. Managing Media Out with QL-120 Series Printers On media out, the printer will reprint labels to ensure all labels have been printed. This action produces duplicate labels and the user will need a manual procedure to remove the duplicates, especially if the labels contain information such as barcodes, serial numbers, etc. - Page 69 Designing and Printing Labels Push the lever of the paper guide to open the guide. Open the transport guide (right), and slide it rightward until it stops. While pressing the pinch roller release lever, pull out the media. QL-120 User Guide...
- Page 70 Designing and Printing Labels Remove the roll holder. Release the holder stopper screw, and remove the holder stopper from the roll holder. Remove the media roll from the roll holder. QL-120 User Guide...
- Page 71 Designing and Printing Labels Removing an Empty Media Roll When the media has been used up, a message will be displayed on the Status Monitor and the printer will stop. Open the roll cover. Locate the tape adhered at the trailing edge of the media. QL-120 User Guide...
- Page 72 Designing and Printing Labels Push the lever of the paper guide to open the guide. Remove the tape. While pushing the pinch roller release lever, pull out media through the delivery slot. Remove the empty roll holder. Remove the empty roll core from the roll holder. QL-120 User Guide...
- Page 73 Designing and Printing Labels Loading Media on the Roll Holder Release the holder stopper screw, and remove the holder stopper from the roll holder. Load roll media on the roll holder with it oriented as shown such that the bottom of the roll touches the roll holder surface with no clearance.
- Page 74 Designing and Printing Labels Setting the Media in the Printer Make sure that the Power LED stays lit. If the Power LED does not stay lit or it is not blinking, press the power key to put the printer in the power-on state. Open the roll cover.
- Page 75 Designing and Printing Labels Open the transport guide (right), and slide it rightward until it stops. Mount the roll holder in the printer. The flanges and corresponding installation points in the printer are color coded. Orient the roll holder so the black flange matches the black installation point, and the gray flange matches the gray installation point.
- Page 76 Designing and Printing Labels If you are using gap or reflective mark media, cut the media edge that will be fed into the printer. If you are using continuous media, skip this step. • Gap media has spaces between each label resulting from the removal of the matrix during the die cutting process.
- Page 77 Designing and Printing Labels Insert media along the left-side guide under the transport guide (left) until it stops at the roller in the feeder slot. Media at the roller in the feeder slot is automatically pulled in slightly. Slide the transport guide (right) in accordance with the width of the media. Note: Do not press the transport guide (right) strongly against the media edge.
- Page 78 Designing and Printing Labels Slowly push the paper guide down until it clicks (locks). When it locks, media is transported automatically. Close the roll cover. QL-120 User Guide...
-
Page 79: Chapter 4: Printer Maintenance
Printer Maintenance Replacing Ink Cartridges When the remaining ink level becomes low, a low ink message will be displayed on the Status Monitor to notify you that the corresponding ink cartridge will soon be out of ink. When an ink cartridge is out of ink, an out of ink message will be displayed and printing will stop. - Page 80 Printer Maintenance Open the ink cartridge lever while pushing it downward. Remove the empty ink cartridge. Take out the ink cartridges from the package. Then remove the packing materials. Do not touch the ink outlet and terminal to prevent soiling of the surrounding work area, damage to the ink cartridge, and poor printing.
-
Page 81: Replacing The Maintenance Cartridge
Printer Maintenance Slowly insert the ink cartridge as far as it will go, and then close the ink cartridge lever. Caution: There are sharp pins in the ink cartridge slot. Never put your fingers in this area. Note: The printer is designed so that ink cartridges cannot be inserted in wrong ink cartridge slots. - Page 82 Printer Maintenance • Ink adheres to the top of the maintenance cartridge after it has been used. Handle the maintenance cartridge carefully during replacement. The ink may stain clothing. Open the maintenance cartridge door. Draw out the maintenance cartridge slowly. When removing the maintenance cartridge full of ink, take care not to incline or drop it.
-
Page 83: Printhead And Purge Unit Cleaning
Printer Maintenance Printhead and Purge Unit Cleaning Cleaning the Printhead Face If a void appears on the label and persists after multiple heavy cleanings, or if debris/adhesive has attached to the printheads, use the following procedure to clean the printhead face. Note: Ensure the printer power remains on during this procedure. - Page 84 Printer Maintenance Find the void on the printed label and take note of where and which printheads are affected by non-discharging nozzles. Touch the tip of cleaning stick on nozzles that have non discharge, and then hold for five seconds to absorb ink. Caution: Do not touch cut section of cleaning stick on face of Printhead.
- Page 85 Printer Maintenance Confirm ink is absorbed in tip of cleaning stick, and then wipe Printhead from front side to rear side two or three times. Wiping direction is opposite direction of paper feeding. Front Side Front Rear Side Side Wipe Direction Caution: Touch cleaning stick to the face of Printhead so tip of cleaning stick bends lightly.
- Page 86 Printer Maintenance Use the tip of the cleaning stick to clean the inside edge of the printhead as indicated. Wipe the edge in the upward direction only. Do not wipe in the downward direction. Do not wipe in the left/right direction. Close the upper unit.
- Page 87 Printer Maintenance Refer to the illustration during the cleaning process. Use a new cleaning stick to wipe the top surface of the blade (A, B, C, and D) in the directions indicated by the arrows. Do not clean After wiping the top surface, wipe the face surface of the blade (A, B, C, and D). Then wipe the back surface of this blade.
-
Page 88: Chapter 5: Troubleshooting
Troubleshooting Error Codes Error Code Overview Error codes are classified into 3 groups. Code Type Description Fatal Error If Printer fails, Operation Panel See “Fatal Error” on page 88. [ERROR] Lamp flashes to signal the error state. Further, an error code consisting of 4 alphanumeric characters appears in Printer Driver Status Monitor or in QL-120... - Page 89 Troubleshooting Code & Detail Code Item Description 0102 Title SDRAM failure Remedy Contact Technical Support. 0103 Title VRAM failure Remedy Contact Technical Support. 0104 Title AD failure Remedy Contact Technical Support. 0105 Title Sensor 3.3V was not turned OFF correctly. Remedy Contact Technical Support.
- Page 90 Troubleshooting Code & Detail Code Item Description 0211 Title Printer Controller PCB 3.3V was not turned ON correctly. Remedy Contact Technical Support. 0212 Title Printer Controller PCB 5.0V was not turned ON correctly. Remedy Contact Technical Support. 0213 Title Motor 24V was not turned ON correctly. Remedy Contact Technical Support.
- Page 91 Troubleshooting Code & Detail Code Item Description 052F Title Printhead position error 0530 Remedy Contact Technical Support. 053D Title Printhead position error Remedy Contact Technical Support. 053E Title Printhead position error Remedy Contact Technical Support. 0540 Title Printhead position error Remedy Contact Technical Support.
- Page 92 Troubleshooting Code & Detail Code Item Description 055E Title Printhead position error Remedy Contact Technical Support. 0562 Title Printhead position error Remedy Contact Technical Support. 0563 Title Printhead position error Remedy Contact Technical Support. 0565 Title Printhead position error Remedy Contact Technical Support.
- Page 93 Troubleshooting Code & Detail Code Item Description 0640 Title Purge Unit was not installed correctly. Remedy Contact Technical Support. 0641 Title Purge Unit position error Remedy Contact Technical Support. 0643 Title Purge Unit position error Remedy Contact Technical Support. 0644 Title Purge Unit position error 0645...
- Page 94 Troubleshooting Code & Detail Code Item Description 0724 Title Supply Valve error Remedy Contact Technical Support. 0725 Title Supply Valve error Remedy Contact Technical Support. 0726 Title Supply Valve error Remedy Contact Technical Support. 0727 Title Supply Valve error Remedy Contact Technical Support.
- Page 95 Troubleshooting Code & Detail Code Item Description 0773 Title Supply Valve error Remedy Contact Technical Support. 0774 Title Supply Valve error Remedy Contact Technical Support. 0775 Title Supply Valve error Remedy Contact Technical Support. 0776 Title Supply Valve error Remedy Contact Technical Support.
- Page 96 Troubleshooting Code & Detail Code Item Description 0827 Title Bubble Removing Valve error Remedy Contact Technical Support. 0828 Title Bubble Removing Valve error Remedy Contact Technical Support. 0831 Title Bubble Removing Valve error Remedy Contact Technical Support. 0833 Title Bubble Removing Valve error Remedy Contact Technical Support.
- Page 97 Troubleshooting Code & Detail Code Item Description 0877 Title Bubble Removing Valve error Remedy Contact Technical Support. 0878 Title Bubble Removing Valve error Remedy Contact Technical Support. 09: Suction Pump Error 0912 Title Ink Level Sensor does not detect ink. 0913 0914 Remedy...
- Page 98 Troubleshooting Code & Detail Code Item Description 0936 Title Pressure becomes higher too fast. 0937 0938 Remedy Contact Technical Support. 0939 0941 Title Supply Valve status error when driving Pump 0942 (dragging) 0943 0944 Remedy Contact Technical Support. 0945 0946 0947 0948 0949...
- Page 99 Troubleshooting Code & Detail Code Item Description 0971 Title Bubble Removing Valve status error when 0972 driving Pump (dragging) 0973 0974 Remedy Contact Technical Support. 0975 0976 0977 0978 0979 097A 097B Remarks *1: The low-order 4 bits are 2: BK, 3: C, 4: M, 5:Y. *2: The low-order 4 bits are 6: BK, 7: C, 8: M, 9:Y.
- Page 100 Troubleshooting Code & Detail Code Item Description 1001 Title Ink Upper Limit Sensor detected while Ink Lower 1002 Limit Sensor did not. 1003 1004 Remedy Contact Technical Support. 1005 1006 1007 1008 1009 100A 100B 100C 100D 100E 100F 11: Printhead Subheater Error 1101 Title Specified temperature is not reached even...
- Page 101 Troubleshooting Code & Detail Code Item Description 1201 Title Printhead connection error 1202 1203 Remedy Contact Technical Support. 1204 1205 1206 1207 1208 1209 120A 120B 120C 120D 120E 120F 13: Printhead Data Error 1301 Title Printhead EEPROM data error 1302 1303 Remedy...
- Page 102 Troubleshooting Code & Detail Code Item Description 1401 Title Correct Printhead is not installed. 1402 1403 Remedy Contact Technical Support. 1404 1405 1406 1407 1408 1409 140A 140B 140C 140D 140E 140F 15: Ink Leakage 1501 Title Ink is leaking. Remedy Contact Technical Support.
- Page 103 Troubleshooting Code & Detail Code Item Description 1901 Title Printhead Temperature Sensor is damaged. 1902 1903 Remedy Contact Technical Support. 1904 1905 1906 1907 1908 1909 190A 190B 190C 190D 190E 190F 1B: Printhead Flexible Cable Connection Error 1B01 Title Printhead Flexible Cable is not connected 1B02 correctly.
- Page 104 Troubleshooting Code & Detail Code Item Description 1E01 Title Correct Printhead is not installed. 1E02 1E03 Remedy Contact Technical Support. 1E04 1E05 1E06 1E07 1E08 1E09 1E0A 1E0B 1E0C 1E0D 1E0E 1E0F 24: Climate Sensor not Connected 2401 Title Climate Sensor is not connected. Remedy Contact Technical Support.
- Page 105 Troubleshooting Code & Detail Code Item Description 2801 Title Type (dye/pigment) of ink in Printhead is 2802 different. 2803 2804 Remedy Replace Printhead. 2805 2806 2807 2808 2809 280A 280B 280C 280D 280E 280F 29: Wipe Valve Error 2920 Title Wipe Valve position error Remedy Contact Technical Support.
- Page 106 Troubleshooting Code & Detail Code Item Description 2C01 Title Printhead of the fuse to be blown 2C02 2C03 Remedy Contact Technical Support. 2C04 2C05 2C06 2C07 2C08 2C09 2C0A 2C0B 2C0C 2C0D 2C0E 2C0F 2F: Cutter 2F01 Title Cutter unit malfunction Remedy Contact Technical Support.
- Page 107 Troubleshooting *4: For example, error code 2C03 means black and cyan Printhead of the fuse to be blown. See the following list. 01: Bk 02: C 03: Bk,C 04: M 05: Bk,M 06: C,M 07: Bk,C,M 08: Y 09: Bk,Y 0A: C,Y 0B: Bk,C,Y 0C: M,Y...
- Page 108 Troubleshooting Code & Detail Code Item Description 0501 Title Paper Guide is not set on the paper. Remedy Set Paper Guide properly on the paper. 09: Roll Cover Open 0901 Title Roll Cover is opened. Remedy Close Roll Cover. 10: Paper out Error 1001 Title Paper out...
- Page 109 Troubleshooting Code & Detail Code Item Description 13: Paper Jam Error 1301 Title TOF Sensor could not detect the next TOF mark or label gap 1 Remove jammed paper around TOF Sensor. Remedy 2 Load paper with correct size. 3 Close Paper Guide (error cleared). 1302 Title TOF Sensor could not detect the next TOF mark...
- Page 110 Troubleshooting Code & Detail Code Item Description 130C Title Paper is ready for printing too early. 1 Clean Transport Belt. Remedy 2 Close Paper Guides (error cleared). 13E1 Title Encoder signal is not received correctly. Remedy Remove jammed paper from transport area. 13E2 Title Encoder signal is not received correctly.
- Page 111 Troubleshooting Code & Detail Code Item Description 1905 Title Automatic adjustment of Cutter TOF Sensor cannot be performed because paper does not reach Cutter TOF Sensor. Remedy Remove jammed paper from transport area. 1B: Cutter Error 1B01 Title Condition Detected Remedy In the case paper is jammed around cutter unit, remove jammed paper.
- Page 112 Troubleshooting Code & Detail Code Item Description 2001 Title Ink Cartridge is empty. 2002 1 Replace with a new Ink Cartridge. 2003 Remedy 2004 2 Close Ink Door (error cleared). 2005 2006 2007 2008 2009 200A 200B 200C 200D 200E 200F 21: Ink Cartridge Installation Error 2101...
- Page 113 Troubleshooting Code & Detail Code Item Description 2201 Title Ink Cartridge data error 2202 1 Install a new Ink Cartridge. 2203 Remedy 2204 2 Close all doors (error cleared). 2205 2206 2207 2208 2209 220A 220B 220C 220D 220E 220F 23: Maintenance Cartridge Full 2301 Title...
- Page 114 Troubleshooting Code & Detail Code Item Description 2601 Title Correct Ink Cartridge is not installed. 2602 1 Replace with a correct Ink Cartridge. 2603 Remedy 2604 2 Close all doors (error cleared). 2605 2606 2607 2608 2609 260A 260B 260C 260D 260E 260F...
- Page 115 Troubleshooting Code & Detail Code Item Description 2D01 Title Correct Ink Cartridge is not installed. 2D02 1 Replace with a correct Ink Cartridge. 2D03 Remedy 2D04 2 Close all doors (error cleared). 2D05 2D06 2D07 2D08 2D09 2D0A 2D0B 2D0C 2D0D 2D0E 2D0F...
- Page 116 Troubleshooting Code & Detail Code Item Description 3002 Title Firmware update failure. Remedy Send proper update file. 3003 Title Updater started upon detecting the firmware error. Remedy Retry the firmware update. 3004 Title Media parameter version not updated to the latest.
- Page 117 Troubleshooting Code & Detail Code Item Description 37 Remaining Ink Detection Error 3701 Title Proper Ink Cartridge is not installed. 3702 1 Set proper Ink Cartridge. 3703 Remedy 3704 2 Close all doors (error cleared). 3705 3706 3707 3708 3709 370A 370B 370C...
- Page 118 Troubleshooting Warnings Code & Detail Code Item Description 01: Remaining Ink Warning 0101 Title Ink running out soon. 0102 1 Replace with a new Ink Cartridge. 0103 Remedy 0104 2 Close all doors (warning cleared). 0105 0106 0107 0108 0109 010A 010B 010C...
- Page 119 Troubleshooting Code & Detail Code Item Description 0601 Title Lifetime of Purge Unit has expired. 1 Replace Purge Unit. Remedy 2 Restart Printer after replacing Purge Unit (warning cleared). Remarks “Purge Unit Replacement” is issued in advance, if “Purge Unit Replacement”...
-
Page 120: Removing A Paper Jam
Troubleshooting Removing a Paper Jam If a paper jam occurs during printing, an error message will be displayed and printing will be suspended. Power off the printer. Open the roll cover. Press down the upper unit open lever (at the back of the feeder) to open the upper unit. QL-120 User Guide... - Page 121 Troubleshooting While pushing the pinch roller release lever, pull out paper in the direction opposite to the transport direction. Close the upper unit and then close the roll cover. Note: When closing the upper unit, take care not to touch the interface at the back with your finger.
-
Page 122: Printer Not Operating Correctly
Troubleshooting Printer Not Operating Correctly Power Off Check Point Solution Main power switch is at the off position. Press main power switch to the on position. Printer power cord unplugged. Make sure that the power cord is plugged in completely. Power supply not providing power. - Page 123 Troubleshooting Check Point Solution The print destination port setting is wrong. Open the printer driver Properties and make sure that the port setting is correct. If the port setting is not correct, shut down Windows, switch off the computer, then reconnect to the selected port.
-
Page 124: Print Results Are Unsatisfactory
Troubleshooting Check Point Solution Check whether the label is likely to come off Never use media having labels which are due to deteriorated adhesive. likely to come off. Printer failures can result. Check whether the paper guide is set in Set the transport guide in accordance with accordance with the media width. - Page 125 Troubleshooting Check Point Solution Check whether a test pattern is printed. Try printing a test pattern from the Test Print Note that 4” x 5” label stock is required. tab in the Maintenance Utility. If the test pattern is printed, check the application software settings, operation method, and print data content.
- Page 126 Troubleshooting Printed Colors Appear Incorrect Check Point Solution Wrong colors are printed. Check the image in your design application. If necessary, make adjustments in the Advanced Color Settings window. Open the Control Panel of your computer, and then check whether the settings in the Display Properties and Screen Properties are correct.
-
Page 127: Print Samples And Solutions
Troubleshooting Print Samples and Solutions Spur Gear Mark Description Spur gears are located in several locations throughout the transport assembly. They help keep the media flat to avoid jamming during printing and ensure the media receives the ink correctly. Causes As media passes through the transport assembly, these gears come into contact with the surface of the label material. - Page 128 Troubleshooting Background Pattern Description Often called “Keep Alive Dots”, this ink is sprayed in the background to prevent nozzles from clogging when not in constant use. Cause As media passes through the transport assembly, nozzles that are not firing based on the position and the label content being printed will fire the smallest amount of ink possible based on a built-in algorithm.
- Page 129 Troubleshooting Printhead Not in Correct Position Description Printed output does not resemble specified label content, but rather abstract patterns of ink with varying ink dispersion. Cause The print module is obstructed and did not fully lower into a printing position. The distance between the media and the printheads will produce abstract printed output.
- Page 130 Troubleshooting Media Contacting Printheads Description Streaks of CMYK appear down-web, bleeding at various points, indicating a smearing. Cause Media is physically coming into contact with the printhead surfaces as it passes through the transport assembly. Possible Solutions Reload the media, ensuring it is perfectly centered and the media guides are not causing wrinkling.
- Page 131 Troubleshooting Poor Print Quality Description Severe mottled look across the printable web. Ink unable to be absorbed further. Ink may exhibit signs of cracking across the top of the media. Cause Using unapproved media type or using wrong media profile. Possible Solutions Use approved media or the correct media profile.
- Page 132 Troubleshooting Media Surface Contamination Description Fingerprints or other marks related to handling the media before printing are visible after the label has been printed. Cause Contaminants on the label surface can cause undesirable defects or anomalies because it interferes with the absorption of ink into the media. Possible Solutions Handle the media with care.
- Page 133 Troubleshooting Scuffing of Surface Material Description Light reflecting off the surface of the printed labels highlights the various scuff marks, scratches, dull and/or mottled area of the label material. Cause Inherent flaws in the surface of a media can become more visible after printing solid color fills. Possible Solutions Try using a rewinder with a dancer-arm, as this helps ensure the media is as flat and moves as smoothly as possible.
- Page 134 Troubleshooting Non-Functioning Nozzle Description A very thin vertical line in the printed output appears in the print direction, but is only lighter overall than it is supposed to be, not completely absent of color. Cause A nozzle is no longer functioning in the printhead. This is fundamentally different from a nozzle that could work but doesn’t.
- Page 135 Troubleshooting Clogged Nozzle Description A thin vertical line appears in the print direction as a complete absence of color. Cause A nozzle in the printhead is clogged by debris, dried ink, or an air bubble. Possible Solutions Running a printhead cleaning routine from the maintenance utility will attempt to resolve the clog.
- Page 136 Troubleshooting Debris on Printhead Description A thicker vertical line appears through the printed output in the print direction as a complete absence of color. Cause Multiple contiguous nozzles in the printhead are clogged by debris. Possible Solutions Running a heavy printhead cleaning routine from the maintenance utility will attempt to resolve the clog.
- Page 137 Troubleshooting Wide Voids in Print Description Wide areas across one or more printheads are not printing. Cause The printheads are not correctly seated in the print module and data is being lost as a result. Possible Solutions Please contact Technical Support. QL-120 User Guide...
- Page 138 Troubleshooting Changes in Density Due to Torque Description Horizontal lines of density change across the web. Cause Too much torque is causing the label roll to get pulled during printing. Possible Solutions Lower rewinder torque. Move the rewinder closer/further from the label exit. Ensure the rewinder is at the proper elevation.
- Page 139 Troubleshooting Physical Smearing of Wet Ink Description Smear marks on media surface after printing. Cause Media is physically coming into contact with surfaces before ink is dried. Possible Solutions Handle media with care post-printing. Ensure media is loaded correctly and is flat while passing through the transport assembly. QL-120 User Guide...
- Page 140 Troubleshooting Media Being Pulled at Label Exit Description Overlapping label content/shifting label content. Cause As the ink is being sprayed in the printer, the media moves faster or slower than intended and a print defect results. Possible Solutions If a rewinder is in use, ensure the rewinder is perfectly centered with the exiting media. Ensure the label exit is uninhibited.
- Page 141 Troubleshooting Printhead Contamination Description Color-smearing occurring even in pure CMYK printed output after performing a physical cleaning. Cause Introduction of ink from one printhead into a different printhead with use of a cleaning stick has contaminated the printhead in question. Possible Solutions Perform a printhead priming and then immediately one or more heavy cleanings via the maintenance utility to flush the ink out.
-
Page 142: Manually Uninstalling The Printer Driver
Troubleshooting Manually Uninstalling the Printer Driver You can use the installer wizard to uninstall the printer driver. However, in some situations, the wizard may not remove all driver components. As an alternative, use the following instructions to uninstall the printer driver manually. Note: This procedure requires administrator rights in Windows. - Page 143 Troubleshooting Choose Change Driver Settings. The drivers will become available for removal. QL-120 User Guide...
- Page 144 Troubleshooting Select a QL-120 driver. Then choose Remove. You will be prompted to select the removal method. Select Remove driver and driver package. Then choose OK. A confirmation message will appear. Choose to continue. The Remove Driver Package window will open. Choose Delete.
- Page 145 Troubleshooting Type regedit at the prompt. Press Enter. The Registry Editor window will open. In the Registry Editor window, browse to the following location: HKEY_LOCAL_MACHINE\SYSTEM\CurrentControlSet\Control\Print\Monitors\ QL-120 User Guide...
- Page 146 Troubleshooting Right-click the key named QuickLabel QL-120 Language Monitor, and then choose Delete. A confirmation message will appear. Choose to continue. The selected registry key will be deleted. Return to the command prompt window. Type net stop spooler at the prompt. Press Enter.
-
Page 147: Resolving Windows 7/8/10 Usb Installation Issues
Troubleshooting Return to the command prompt window. Type net start spooler at the prompt. Press Enter. The print spooler will be started. Restart the PC. Resolving Windows 7/8/10 USB Installation Issues When you install the printer driver via USB, you first run the installation wizard and then connect the printer to your PC via the USB cable. - Page 148 Right-click the QuickLabel QL-120 in the Unspecified list. Then choose Properties. The QuickLabel QL-120 Properties window will open. Choose the Hardware tab. Select AstroNova IncQuickLabel QL-120 and choose Properties. The Properties window will open. Choose the General tab. QL-120 User Guide...
- Page 149 Troubleshooting Choose Change Settings. Then choose the Driver tab. Choose Update Driver. When you are prompted, select the Search automatically for updated driver software option. Windows will locate the driver on your system and create a printer item. QL-120 User Guide...
-
Page 150: Chapter 6: Rw-5.1 Rewinder
RW-5.1 Rewinder Before Installing the Rewinder Before installing the rewinder, observe the following precautions. • No rewinder feet should float. The rewinder must be held level constantly. • The rewinder must be installed on the same plane as the printer. •... - Page 151 RW-5.1 Rewinder Fasten the R-U bracket to the R bracket using the supplied thumb nuts. Ensure the threaded pin is centered in the adjustment slot. Note: These thumb nuts may need to be loosened at a later time when aligning labels during rewinding.
- Page 152 RW-5.1 Rewinder Ensure the printer sits level on the alignment brackets as illustrated below. Plug the power jack into the power slot on the rewinder. Insert the power plug into an AC power receptacle. QL-120 User Guide...
-
Page 153: Rewinding Labels
RW-5.1 Rewinder Rewinding Labels The rewinder automatically winds printed media exiting the printer onto rolls. The setup process for rewinding labels requires an empty label core and tape. Note: Do not turn the rewinder mandrel by hand to rewind the media. Turning the mandrel by hand can result in rewinder damage. - Page 154 RW-5.1 Rewinder Feed the media under the rewinder dancer arm [5] and up around the empty label core. The inside edge of the media should be aligned squarely with the inner flange [1]. If the media is not squarely aligned with the inner flange, adjust the position of the rewinder as needed.
-
Page 155: Chapter 7: Uw-5.1 Unwinder
UW-5.1 Unwinder Before Installing the Unwinder Before installing the unwinder, observe the following precautions. • No unwinder feet should float. The unwinder must be held level constantly. • The unwinder must be installed on the same plane as the printer. •... - Page 156 UW-5.1 Unwinder Fasten the UW-5.1 unwinder to the R-U bracket using the supplied thumb screws. Note: These thumb screws may need to be loosened at a later time when aligning labels during unwinding. Launch the QL-120 Maintenance Utility. From the Windows Start Menu, choose Start >...
- Page 157 UW-5.1 Unwinder Ensure the printer sits level on the alignment brackets as illustrated below. Plug the power jack into the power slot on the unwinder. Insert the power plug into an AC power receptacle. QL-120 User Guide...
-
Page 158: Unwinding Labels
UW-5.1 Unwinder Unwinding Labels The unwinder automatically unwinds media into the printer for printing. This allows for larger diameter rolls to be used as an alternative to the standard roll holder. Note: Do not turn the unwinder mandrel by hand to unwind the media. Turning the mandrel by hand can result in unwinder damage. - Page 159 UW-5.1 Unwinder Open the roll cover. Remove the roll holder from the printer. The roll holder is unnecessary when using the unwinder. Push the lever of the paper guide to open the guide. QL-120 User Guide...
- Page 160 UW-5.1 Unwinder Open the transport guide (right), and slide it rightward until it stops. QL-120 User Guide...
- Page 161 UW-5.1 Unwinder If you are using gap or reflective mark media, cut the media edge that will be fed into the printer. If you are using continuous media, skip this step. • If you are using gap media, cut the media between labels as illustrated by the dashed red line below.
- Page 162 UW-5.1 Unwinder Feed the media under the dancer arm and up into the entry slot on the rear of the printer. The media path is illustrated below. As the dancer arm is lifted, the mandrel will unwind and feed media as needed. Do not turn the unwinder mandrel by hand to advance the media.
- Page 163 UW-5.1 Unwinder Slide the transport guide (right) in accordance with the width of the media. Note: Do not press the transport guide (right) strongly against the media edge. A paper jam can result. Slowly close the transport guide (right) to lock it. Slowly push the paper guide down until it clicks (locks).
-
Page 164: Chapter 8: Safety Warnings And Precautions
Safety Warnings and Precautions Before using this printer, please read this section thoroughly. Warnings to heed and important matters are described here to prevent damage to the user and other persons. Do not attempt to operate this printer in any way other than those mentioned in the User Guide. Location Make sure there is sufficient space around the printer. - Page 165 Safety Warnings and Precautions Power Supply and Power Cord Warning • To avoid causing a fire or serious electrical shock, always use the power cord provided with this printer. To avoid a fire or electrical shock, do not use an extension cord. •...
- Page 166 Safety Warnings and Precautions General Safety Warning • If you find a large ink leak, switch the printer off immediately, disconnect the power plug from the power source, and call for service. If you continue to use the printer, this could cause a fire or serious electrical shock.
- Page 167 Safety Warnings and Precautions performed properly, resulting in a machine failure or ink leakage which can soil your clothes and the surrounding area. • Do not apply excessive force or strong shock to the upper unit. Doing so can result in a machine failure or impair printer quality.
- Page 168 Safety Warnings and Precautions Important • To prevent machine failures, do not relocate or transport this printer with the upper unit open. Ink Cartridge and the Maintenance Cartridge Caution • Always store these items out of the reach of small children. This prevents accidents. If a child accidentally swallows ink, seek medical attention immediately.
-
Page 169: Chapter 9: Specifications
Specifications Printer Printing method Inkjet Print colors Full color Output resolution 1200 x 1200 dpi 1200 x 600 dpi 600 x 600 dpi Printing speed 300/200/160/120/100/90/80/70/60/50 mm/s Auto Maximum Printable area Width: 19mm to 105.9mm Length: 6mm to 762mm Minimum Margin Top/Bottom: 1.5mm Left/Right: 2.7mm (Including Liner) Printhead... - Page 170 Specifications Printer Installation environment (humidity) 10% to 80% relative humidity (no condensation) Power supply AC100-240V 50/60Hz Maximum power consumption 233W (Printer) / (Reference value: 268W with cutter unit) Average power consumption When printer is switched ON:22Wh When printer is in sleep mode:8.5Wh When the software switch is turned OFF: 0.4Wh Dimensions...
- Page 171 Specifications RW-5.1 Rewinder & UW-5.1 Unwinder Maximum Wind Diameter 11.81" (30cm) Minimum Label Width 1.0" (25mm) Maximum Label Width 4.72" (120mm) Core Size 3" ID (76mm) Rewind Direction Fixed with backfeeding function Torque Self-regulating for QL-120 Power Universal, 100 - 240V, 1.8A, 50-60Hz Accessories Includes adjustable printer and winder alignment plates...
-
Page 172: Index
Index BACK FEED Key ......60 Holder Stopper ......59 Holder Stopper Screw . - Page 173 Index Media Roll Removal ..... 68 Roll Cover Handle ......56 Roll Holder .
Need help?
Do you have a question about the QuickLabel Kiaro! QL-120 and is the answer not in the manual?
Questions and answers