Table of Contents
Advertisement
Advertisement
Table of Contents

Related Manuals for AstroNova Trojanlabel Trojan T2-C


Summary of Contents for AstroNova Trojanlabel Trojan T2-C
- Page 1 User Guide Version 3.8...
- Page 2 Copyright statement © 2018 Trojanlabel, This document, attachments and information contained herein are the confidential and proprietary property of Trojanlabel and their suppliers. As such, this document, attached files and information contained herein are subject to all nondisclosure and proprietary information agreements currently in effect with your organization.
-
Page 3: Table Of Contents
Contents Certificate of compliance and Safety information ..................5 Introduction ............................. 6 General information ......................... 6 Overview and application ......................... 7 Setting up the T2-C press ........................10 Physical setup ..........................10 Cabling (network and power supply) ..................... 11 Power On ............................... 12 Visible safety check ........................ - Page 4 11.2 General Settings (HOME tab) ......................50 11.2.1 Overview menu ........................50 11.2.2 Settings menu ......................... 51 11.2.3 Statistics menu ........................58 11.2.4 Shutdown ..........................60 11.2.5 Exporting statistics data to a CSV file/ viewing statistics from a browser ......60 11.3 T2-C press handling menus (TrojanTwo tab) ..................
- Page 5 16.1 Error States ........................... 101 16.2 Error messages on screen ......................104 Appendix ............................106 TrojanTwo-Compact User Guide v3.8 Page | 4...
-
Page 6: Certificate Of Compliance And Safety Information
1 Certificate of compliance and Safety information TrojanTwo-Compact User Guide v3.8 Page | 5... -
Page 7: Introduction
1.1 Introduction Original instructions These instructions are Trojanlabel’s original instructions for the Trojanlabel press (henceforth called the machine or TrojanTwo-Compact press or T2-C press). Purpose The purpose of these instructions is to ensure correct installation, use, handling and maintenance of the machine. Accessibility The instructions are to be kept in a location known to the staff and must be easily accessible for the operators and maintenance personnel. -
Page 8: Overview And Application
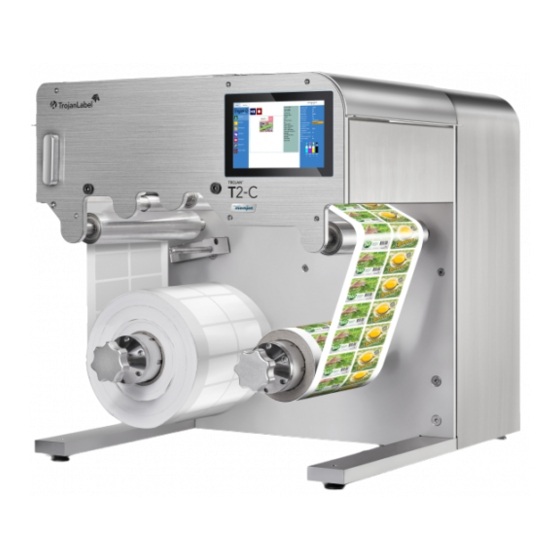
1.3 Overview and application General description The machine consists of an unwinder/rewinder, label edge sensor, label gap and blackmark sensor, NIP roller, slitter and 4 ink tanks. If any changes or alterations are made to the machine, these changes or alterations must be reflected in these instructions as necessary. - Page 9 Temperature Recommend operational temperatures • Operation: 20° to 30° Celsius at RH 22-80% (non-condensing) • Storage: -5° to 50° Celsius at RH up to 85%, non-condensing at 65° If transferring the machine from different temperature conditions, ensure that the machine has time to acclimatize Operating Environment It is important that the machine is placed in a clean environment as possible, with sufficient air conditioning/cleaning.
- Page 10 Overview 1: NIP clamp, 2: 7” touch screen display, 3: Lid to access aerosol filter and slitter knifes, 4: Built-in slitter knifes, 5: Unwinder, 6: Rewinder 1: Lid for easy access to gap/blackmark sensor and maintenance, 2: Sensor for gap/blackmark detection, 3: Label edge sensor, 4: Waste Ink bottle inside (can be accessed via drawer), 5: Easy installation (Ethernet and power outlet 100-240V AC –...
-
Page 11: Setting Up The T2-C Press
2 Setting up the T2-C press 2.1 Physical setup The T2-C press is packed in a wooden crate and shipped strapped on top of a wooden pallet (total weight of the package including the crate is around 80kg). After opening the wooden crate, the machine must be 132.3 lbs. -
Page 12: Cabling (Network And Power Supply)
2.2 Cabling (network and power supply) The machine has two cable inlets: 1. Power Supply 2. Ethernet Only the power supply cable is necessary for powering up the machine. The network cable is necessary for sending new print jobs to the T2-C press and for remote support/software updates. 1: Ethernet port, 2: Power On/Off switch, 3: Power Supply NOTE: Ethernet cable is not included in the T2-C press’... -
Page 13: Power On
3 Power On 3.1 Visible safety check Before powering on the machine, visibly ensure that no foreign objects are interfering with the print engine module and web-path. 3.2 Power on process 1. Press the physical power switch on the left side of the T2-C press, switching it from 0 to 1. Turning the main power switch on starts up the TrojanControl software on touch screen and also starts up the print engine. -
Page 14: Installing Ink Tanks And Printhead
3.3 Installing ink tanks and printhead 3.3.1 Installing the ink tanks The T2-C press uses CMYK ink tanks, each contain 2 liters of ink when opened. Every T2-C ink tank is QA chip protected ensuring that only genuine Trojanlabel ink tanks can be used. The tray for the ink tanks is situated on top of the machine. - Page 15 1. Connect the black QA chip reader cables. One QA chip reader cable for each ink tank. It does not matter which QA chip reader cable is connected to which ink tank, however the length of these cables are made to best fit to the closest ink tank.
-
Page 16: Installing The Printhead
3.3.2 Installing the printhead Unpacking printhead: 1. Open the end of the printhead package outer box and slide out the foil bag. Inspect the integrity of the foil vacuum sealing. The foil bag should be formed tightly to the contours of the printhead cartridge as shown above. - Page 17 5. Remove the protective strip from the electrical contacts. While holding the printhead cartridge by the handle with one hand, grasp the pull tab with the other hand and, slowly and carefully, peel back the plastic strip covering the electrical contacts. NOTE: Dispose of the removed strip immediately and do not allow the removed strip to contact the electrical contacts.
- Page 18 Installing the printhead: 1. Open top lid on T2-C press to gain access to the print engine. 2. Press Release Printhead button in TrojanTwo -> Maintenance menu to open printhead latch: NOTE: The above warning label can be found on the printhead latch. Trying to open the blue plastic latch manually by the handle will most likely break the latch.
- Page 19 3. Insert printhead by the handle into the cradle. a. Open printhead latch all the way up. b. Insert printhead into the cradle by the handles. c. Pull the printhead backwards until it snaps into the proper place standing upright. 4.
- Page 20 5. Press Install Printhead button in TrojanTwo -> Maintenance menu to start priming up the printhead with ink. NOTE: Printhead priming takes about 3-5 minutes and system state becomes online when the process is finished and machine is ready for printing. IMPORTANT: Printhead can only filled up with ink when reservoir ink tanks are filled.
-
Page 21: Loading The Label Material
4 Loading the label material There are two common methods of threading the machine, threading from scratch, i.e. there is no material present in the machine or using the currently installed material to thread the machine. 4.1 Unwinder and rewinder roll direction 4.1.1 Rolling direction unwinder - Ink jet coating on the inside or outside Regardless of the threading procedure, you must insert the label roll on the unwinder core according to the... -
Page 22: Rolling Direction Rewinder
4.1.2 Rolling direction rewinder The rewinder can place the label material on the outside or inside of the roll. The criteria are the same as for the unwinder, please refer to the above for placement and direction and update the Media settings to reflect this. - Page 23 4. Press ‘Reset Sidesteer Position’ button at TrojanTwo tab -> Handling menu to set unwinder core horizontal position to the default position. 5. Adjust the left edge of the media roll to be 57,3mm (2.25”) from the wall. This ensures that the media left edge will be at the same position as the left edge of the printhead nozzles (where printing zone begins).
- Page 24 6. Thread the label material over the first metal roll (1.), then between the NIP clamps (2.), then over the metal roll under the printhead (3.), then over the last metal roll (4.) and fix it with adhesive tape to an empty paper core on the rewinder shaft (5.). Media going through between the NIP clamps.
- Page 25 7. Close the NIP clamp. NIP clamp closed. 8. Press ‘Calibrate Web’ button at TrojanTwo tab -> Handling menu. 9. Tension calibration is completed when ‘Web State’ becomes ready at right side status bar on the touchscreen. TrojanTwo-Compact User Guide v3.8 Page | 24...
-
Page 26: Adjusting Label Edge Sensor
4.3 Adjusting label edge sensor The label edge sensor is for adjusting the left edge of the media physically throughout the whole web path for the best rollup performance. Adjusting the sensor can be done manually by physically moving the sensor. Moving the sensor has immediate effect on the label roll’s position. -
Page 27: Calibrate Tension For The Label Web
4.4 Calibrate tension for the label web It is assumed that the label rolls are placed correctly and the machine is threaded with media. 1. Web state is currently: ‘Not calibrated’: 2. Go to TrojanTwo tab -> Media settings menu and select the correct Media Profile that fits the paper or create a profile that matches the material and print job. -
Page 28: Splicing And Changing The Label Roll
4.5 Splicing and changing the label roll 1. Go to TrojanTwo tab -> Handling menu and press ‘Release Web’ button to release the tension for the label roll. 2. Cut the media above the unwinder shaft somewhere close to the unwinder. 3. -
Page 29: Select And Queue Print / Start Print Job
5. Go to TrojanTwo tab –> Handling menu and press ‘Calibrate Web’ button to calibrate tension for the media. 5 Select and queue print / start print job 1. Select “Job library” (See section 11.3.4 for full Job Library description). Print selected job Number of copies Print from page... - Page 30 5. If the Print Queue is paused, press the resume button on the overview screen. If the queue is active the print job will start immediately, and print job progress is viewed in the “Overview”-screen, which is automatically displayed when starting a print. Print queue is paused.
-
Page 31: Pause, Resume Or Stop A Print Job
6 Pause, resume or stop a print job Pause, resume and stop of print job is done from the TrojanTwo tab -> Overview menu. Pause: Press the Pause/Resume button. Print state will change to “Paused”. Pause/Resume Stop Print job paused ... - Page 32 Stop: Press the stop button. Print state will change to “NA” and current print job is canceled and removed from print queue. Print job canceled. NOTE: NA = Not Available TrojanTwo-Compact User Guide v3.8 Page | 31...
-
Page 33: Moving The Label Web
7 Moving the label web It is possible to move the label web forwards and backwards at two speeds. Go to TrojanTwo -> Handling menu and select speed and direction by selecting one of the four directional/speed buttons highlighted below. When a directional button is pressed, the four buttons are replaced with one single stop button. Pressing the button will stop the web moving (See section 11.3.2 for Handling menu). -
Page 34: Printing Modes
8 Printing modes The T2-C press supports three printing modes: Continuous, Diecut or Blackmark, depending on the format of the applied label material. 8.1 Continuous printing mode Continuous label material format is when the label roll has no pre-cut gaps or pre-printed registration marks (black marks) between the labels. -
Page 35: Die-Cut Printing Mode
8.2 Die-cut printing mode Diecut label material format is when the labels are pre-cut into shape prior to printing and there are label gaps between the labels. To set the T2-C press to Diecut printing mode go to TrojanTwo tab -> Media settings menu and select the ‘Diecut’... - Page 36 AUTOSET Simply put the gap in view and push and hold the AUTOSET button for 1 second. The AUTOSET LED will remain on when the setup is complete. If the setup is not adequate, the AUTOSET and Output LEDs will flash 3 times. This may indicate a backing material that is too dense to penetrate. UP/DN Adjustments The Label Eye sensor has the ability to "tweak"...
-
Page 37: Blackmark Printing Mode
IMPORTANT: Because of inter-page actions the printed labels have to have: Minimum 3 mm gap at 6IPS mode (recommended gap is 4mm). Minimum 3 mm gap at 12IPS mode (recommended gap is 4mm). Maximum gap size is 65 mm IMPORTANT: Setting label gap outside the minimum and maximum range can result to label skipping, missed TOF error message or enormously high label gaps. - Page 38 Calibrating the label gap / blackmark sensor: LERC10 label eye sensor AUTOSET Simply put the gap in view and push and hold the AUTOSET button for 1 second. The AUTOSET LED will remain on when the setup is complete. If the setup is not adequate, the AUTOSET and Output LEDs will flash 3 times.
-
Page 39: Gap Size And Speeds
Label eye sensor for detecting label gaps and black marks. Sensor can be moved manually along the 2 rods (indicated with yellow arrow on picture above). IMPORTANT: Requirements for the format of the blackmarks are the same as for label gaps as blackmarks practically act as label gaps. -
Page 40: Shutting Down The T2-C Press
9 Shutting down the T2-C press Shut down procedure: 1. Go to HOME tab. 2. Press ‘Shut down’ menu. 3. Press the big red ‘Shutdown TrojanController’ button. 4. Reconfirm by selecting ok. 5. Green info button is displayed, no need to press ok on that button. 6. -
Page 41: Driver Installation And Features
10 Driver installation and features 10.1 Driver installation The TrojanLabel Universal Driver can be found on the USB stick supplied with the T2-C package. The TrojanLabel Universal Driver is available for downloading on the Internet as well: http://www.trojanextranet.com/media/60728/universalstoreonlywin_driver_13-sirius_r13.1- 26feb2018.zip ... - Page 42 Select ‘I accept the terms in the license agreement’ checkbox and press ‘Next’ button to continue Select ‘Configure to print over the Network’ NOTE: USB printing is not supported for the T2-C press. TrojanTwo-Compact User Guide v3.8 Page | 41...
- Page 43 During the setup process, the installer will detect the T2-C press as a TrojanTwo on the network. Select the detected TrojanTwo and press ‘Next’ button to continue installation. 192.168.0.16 TrojanTwo TrojanTwo 000BAB675346 Depending on Local Network policy there might be occasions when the auto detection of the T2-C press is not working.
- Page 44 Print test page (test page is the regular Microsoft Windows test page set to A4 size sheet). Unselect if you do not want to print this out. Set this printer as the default printer (the T2-C press can be set as the default printer on the particular PC meaning that the T2-C will be on the top of the printer list when printing is selected).
- Page 45 Select the ‘TrojanLabel Universal Driver’ field and rename to Trojanlabel TrojanTwo-Compact: Installation completed. TrojanTwo-Compact User Guide v3.8 Page | 44...
-
Page 46: Driver Features And Functions
10.2 Driver features and functions The driver is compatible with WinXP, Vista, Win7, Win8 and Win10 (both 32bit and 64bit versions). IMPORTANT: T2-C driver is not compatible with MAC, Linux and Android operating systems. The T2-C press can print from any software which is able to print from Microsoft Windows environment. - Page 47 Media: Type: List of available color profiles Size: predefined size from the list or custom size Media Name: Save custom size into the profile list Oversize: Full bleed printing = oversizing the image by 1mm over the edges when printed. Aspect ratio is locked ...
- Page 48 Store only: Sending and storing the selected print job into the T2-C press’ job library without actually printing. The stored job can be printed out later from the Job Library menu at the T2-C touch screen. Mask Optimisation: Mask Optimization is a facility that switches between two different methods of image processing, affecting how an image is processed and printed.
- Page 49 Advanced settings: Import/Export buttons: Can import or export media sizes and print settings between driver installations. The export feature can save all media sizes and print settings profiles into a file. The import feature can import media sizes list and print settings profiles from a file that is exported from another driver installation.
-
Page 50: User Interface (Ui)
11 User Interface (UI) 11.1 Right side status bar The status bar provides real time information about the T2-C press’s current status. The main points are: System State: the machine is only ready to print if the system state is ‘ONLINE’. Other system statuses can be ‘JobAvailable’... -
Page 51: General Settings (Home Tab)
Print queue: displays the current print queue status. Can be ‘Running (x)’ or ‘Paused (x)’ where x is the number of jobs pending in the print queue. Rewinder (m): displays the length of the label material in meters currently on the rewinder. ... -
Page 52: Settings Menu
11.2.2 Settings menu Service ID: A unique ID for each T2-C press. Based on the service ID, Trojanlabel support team can access to the Trojan Control via the internet from remote and provide technical support. Actual software version: Version number of the Trojan Control interface (GUI) currently running on the machine. - Page 53 Print head price when entered is also included in cost/label calculation in statistics menu (see section 13.2.3). Print head life time is theoretical value given in milliliters, which can be included in cost/label calculation as well. The value entered here represents the printed ink volume until a planned print head change.
- Page 54 Updater Button By default for system updates the ’Alternative update URL’ field has to be empty (see chapter 12 for update process via auto updater or via Alternative update URL for offline updating). Press green ‘Download’ button to download updates if available (each time when a new update is available a newsletter is released by Trojanlabel).
- Page 55 WARNING: When preview generation is set to ‘Instantly’, it greatly increases the transfer time of large print jobs due to generating a preview image for every page in real time is demanding for the CPU and can also cause Data Path Underrun error when large variable data jobs are sent.
- Page 56 Log out IMPORTANT: The default password for the admin user is 123. NOTE: Passwords can only contain numbers. WARNING: Do not lock out yourself! At least one user must have ‘User Management’ right otherwise there is no way to add or change properties of other users. In case you end up locked out please contact Trojanlabel support who can restore the default user settings.
- Page 57 Printing prefrences button Maintenances tab: Pre job maintenance: enabled/disabled. When disabled there is no print head maintenance prior start to print. Mid job maintenance: enabled/disabled. When disabled there is no print head maintenance during print jobs. Post job maintenance: enabled/disabled. When disabled there is no print head maintenance after print jobs.
- Page 58 Settings tab: Default print queue state: Running: (Default) Print jobs are queued progressively as they sent and processed in FIFO (first in first out) system. The queue can be managed from Print queue menu (see section 11.3.5). Paused: The print queue is paused when machine starts. ...
-
Page 59: Statistics Menu
Instant printing buffer size (seconds): timer set for the buffering when Instant print option is enabled. Edge regulation: enabled/disabled. When disabled, the label edge sensor is not used. NOTE: Label edge sensor is for physical alignment of the label web. Moving the label edge sensor results in aligning the left edge of the label web physically throughout the paper path for perfect roll up on the rewinder. - Page 60 Statistics list for the last 30 printed jobs (contains: number of pages, print speed, ink consumption, ink cost/label calculation, ink + print head cost/label, ink + media + print head cost/label calculation). Cost/label (ink only) calculation is the cost/1 label in the actual print job based on ink tank price given at HOME ->...
-
Page 61: Shutdown
11.2.4 Shutdown Shuts down the T2-C press completely. NOTE: When shutting down the unit it is advised to wait with turning the power switch off until the shutdown process is finished. There is a message on the display when the shutdown process is initiated to indicate that the shutdown process is still going on. - Page 62 Type the actual IP address of the T2-C press into a browser at a user PC: Type actual IP address here Exporting statistics page Press ‘Export to CSV’ button on page to save the statistics into a CSV file. Closer view NOTE: Ink consumption is more detailed in this view and displayed for each used base color (CMYK) and in total as well.
-
Page 63: T2-C Press Handling Menus (Trojantwo Tab)
11.3 T2-C press handling menus (TrojanTwo tab) 11.3.1 Overview menu Overview menu when T2-C press is printing. Pause/Resume print job. Stop/Cancel print job. Information from currently printed job, including: Preview image of the label which is being printed at the moment. ... -
Page 64: Handling Menu
11.3.2 Handling menu Handling menu includes all the web path related actions. Backward/Forward Web button Moving label web backward/forward (movement speed is defined at HOME -> Settings -> Printing Preferences menu, see chapter 11.2.2). Fast Backward/Forward Web button Moving label web fast backward/forward (movement speed is defined at HOME ->... -
Page 65: Maintenance Menu
Release Web button Releases tension on the label web, letting users to change label roll. Calibrate Web button Calibrates and sets proper tension for the label web. NOTE: Printing only starts when web status is Ready (calibrated) in right status bar (Section 11.1). ... - Page 66 Medium Clean button Additional maintenance routine for fixing streaks, spitting ink through the nozzles and for cleaning printhead surface. Takes about 2-3 minutes. Heavier form of Light Clean. Advised to use when automatic maintenance routines, ink circulations and Light Cleanings are not enough to recover print quality.
-
Page 67: Job Library Menu
11.3.4 Job Library menu Stores 30 printed jobs with random job name by default (print streams uploaded from driver). Print jobs can be renamed: Renamed print jobs are stored beyond the default 30 with random name. Only the drive space is the limit for storing jobs. Renaming can be done at information window. - Page 68 Collate options. NOTE: Describes the order how the different pages will be printed out within one print job when printing a multipage file: 1. Copies of a page are printed one after the other within a print job. 2. Copies of pages are printed in sequential order within a print job. Information from selected print job (see below for more details).
- Page 69 Rename print job: Tap on the black field with the name of the actual print job to rename it. Giving a unique name to a print job ensures that the particular print job will not be deleted until the user wants to delete it.
-
Page 70: Print Queue Menu
11.3.5 Print Queue menu Print jobs are queued progressively as they sent and processed in FIFO (first in first out) system. The queue can be managed from Print queue menu. The print queue is stored even if the T2-C press is restarted. NOTE: The currently printed job in the queue cannot be deleted. -
Page 71: Diagnostics Menu
Deleting the selected print job. (Same as in job library). 11.3.6 Diagnostics menu Information about software, firmware, serial numbers and total label counter. Temperature: Adjusting ink temperature to room temperature for the best print quality. The average temperature of the room where the T2-C press is set up displayed in temperature field based on the feedback of the built in temperature sensor. -
Page 72: Media Settings Menu
11.3.7 Media Settings menu Media Settings Basic: TOF mode: TOF (Top Of Form) has to be set according to the applied label media type: Continuous (continuous roll, no gaps between labels). Diecut (gaps between labels, the labels are pre die-cut on the liner). ... - Page 73 TOF offset (mm): Top Of From (top of label) can be +/- depending on moving the top of the image up or down on label. NOTE: limits -160mm +160mm BOF offset (mm): Bottom of Form (bottom of label) can be +/- depending on moving the bottom of the image up or down on label.
- Page 74 Media Settings Advanced: Minimum unwinder diameter (mm): When roll diameter reaches the minimum unwinder diameter value, the printing will be paused and new label roll can be loaded and spliced. This sensor setting is to avoid running out from label material during a print job. ...
- Page 75 KWS levels: KWS level 0 KWS level 1 KWS level 3 KWS level 5 KWS level 7 KWS level 9 KWS level 11 WARNING: The degree of KWS has effect on printhead life. The higher KWS level is set the more protection the printhead gets against dehydration of nozzles.
-
Page 76: Updating Software And Firmware
12 Updating software and firmware Trojanlabel is regularly updating the Trojan Control interface and the firmware for the T2-C press. Each time when a new update is available a newsletter or a technical bulletin is sent out to customers. If internet connection is available for the T2-C press, then updating is done over the internet by just pressing the download button and going through the installation process. -
Page 77: Updating Via Offline Updater
1. Make sure the T2-C press is connected to the internet. 2. Make sure that ‘Alternative update URL’ field is empty. NOTE: the ‘Alternate update URL’ field is reserved for customized updates and for offline updating. 3. Press green download button. 4. - Page 78 5. The update server will provide an update URL (usually with the IP address of the certain user PC). 6. Type the update URL into HOME-> Settings…-> ’Alternate update URL’ field and press save button: 7. Press green download button. 8.
-
Page 79: Using The Built In Slitter For T2-C Press
13 Using the built in slitter for T2-C press 13.1 Purpose The T2-C press has a built in in-line slitter that works perfectly with die cut label material. Slit up to four (4) rolls, with the three (3) easy to replace oscillating blades that ensures long life time and perfect cuts. The blades can placed in any position or moved to the side when not in use. - Page 80 The blades which are currently not intended to be used, can be pulled on the sides. Turn the brass knob (marked with red circle on above picture) clockwise to tighten a blade onto position and counter-clockwise to loosen and move it. ...
-
Page 81: Replacing The Slitter Blades
13.3 Replacing the slitter blades The blade for the slitter is a consumable and needs to be replaced time and time again when the blade wears and slit edges are not sharp anymore. Part number for the slitter blade is: 10000036 Blade set (6 blades), type: LUTZ 0700.0400. Slitter blade. - Page 82 3. Loosen brass finger screw that fixes the blade holder bracket (1.) and remove the blade holder (2.). 4. Remove the 2 screws that fix the blade onto the blade holder using a hex key size 2.5. TrojanTwo-Compact User Guide v3.8 Page | 81...
- Page 83 5. Take off the old blade and replace with a brand new blade. 6. Fix the new blade with the 2 screws (see point 4. above for screws). 7. Attach the blade holder bracket back to where it was and fix it with the screw (see point 3. above). 8.
-
Page 84: Maintenance
14 Maintenance 14.1 Regular cleaning/checking tasks 14.1.1 Wipe down surfaces Cleaning the NIP roller: The NIP roll assembly includes a rubber roller (NIP clamp) and a metal roller that the label material is sitting on. Based on weekly visual checking it is recommended to clean these rollers when they look dusty/dirty. - Page 85 3. Wipe the dust and debris off with a wet lint free cloth from the rubber and metal rollers. NIP clamp rubber roller marked with arrow. NIP metal roller marked with arrow. Use a wet lint-free cloth and roll NIP roller to wipe off dust from all over the surface. TrojanTwo-Compact User Guide v3.8 Page | 84...
- Page 86 Cleaning other rollers. Visually inspect all other metal rollers throughout the web path and use wet lint-free cloth to wipe the ink/dust off from each roller. Remove label web from web path if needed to gain access to all rollers.
-
Page 87: Emptying Waste Ink Bottle
14.1.2 Emptying waste ink bottle Maintenance routines which protect the printhead produce some waste ink. This waste ink goes to the waste ink bottle. The waste ink bottle is located inside the machine cabinet and can be accessed through a drawer on the left side of the machine. IMPORTANT: It is advised to check waste ink bottle at least on a weekly bases and empty it regularly. -
Page 88: Replacing The Wiper Roller
3. Unscrew the cap of the waste ink bottle carefully and dispose the waste ink. WARNING! The ink might be considered as Hazardous Waste in some countries. Make sure you fill the waste ink from the bottle into a separated tank and disposal is done according to the local regulations! However in other countries, the Trojan ink is not considered as hazardous waste and can be disposed down the drain. - Page 89 Replacing the wiper roller: 1. Open top left side lid on machine: 2. Press Home Maintenance Module button in TrojanTwo tab -> Handling menu to gain access to the wiper module: The maintenance module slides out from under the printhead. Wiper roller indicated with arrow. TrojanTwo-Compact User Guide v3.8 Page | 88...
- Page 90 3. Detach and remove the used micro fiber roller (MFR): Unclick and pull the micro fiber roller out from under the plastic latch. Micro fiber roller out. On the right side where there is a gear mounted to the micro fiber roller, just lift out the gear from the wiper motor gear house.
- Page 91 4. Install new wiper roller: Fit the gear on the right end of the micro fiber roller onto the proper place from above. The gear has to fit to the gear of the wiper motor. Push the axis of the micro fiber roller under the plastic latch until it clicks onto the right place. TrojanTwo-Compact User Guide v3.8 Page | 90...
-
Page 92: Manual Printhead Wiping
5. Press Install Maintenance Module button at TrojanTwo tab -> Maintenance menu to move maintenance tray back into the proper position where it protects the printhead. 14.3 Manual printhead wiping The manual printhead wipe has 3 functions, these are: Cleans printhead nozzle surface from waste ink, dust, debris and particles. - Page 93 Manual wiping process: 1. Open top right side lid on T2-C press to gain access to the print engine. 2. Press Home Maintenance Module button at TrojanTwo tab -> Handling menu to gain access to printhead from below: Maintenance module in home position. TrojanTwo-Compact User Guide v3.8 Page | 92...
- Page 94 3. Use distilled water and make a piece of lint-free cloth wet: Wet lint-free cloth NOTE: USE LINT-FREE CLOTH ONLY! Using other than lint-free cloth can cause blocked printhead nozzles due to lose fibers or scratch the printhead damaging it physically. 4.
- Page 95 WARNING: DO NOT MOVE THE CLOTH BACK AND FORTH! Always wipe with a single move from one end to the other. Do not apply to much pressure either. Just gently wipe the surface of the printhead. Wiping finished. TrojanTwo-Compact User Guide v3.8 Page | 94...
-
Page 96: Clean Or Replace Aerosol Filter
14.4 Clean or replace aerosol filter There are 2 fans that suck the ink aerosol away to a filter from the print area to prevent print quality issues related to aerosol build up. This filter is a consumable and needs to be checked and if necessary cleaned or replaced time and time again. -
Page 97: Preparing The T2-C Press For Transportation
15 Preparing the T2-C press for transportation 15.1 Removing the printhead 1. Press ‘Release printhead’ button at TrojanTwo tab -> Maintenance menu. 2. Release printhead process is removing the ink form the printhead and from the ink tubes around the printhead and pumping all the ink from this area back to the reservoir ink tanks. 3. -
Page 98: Storing The Printhead
15.2 Storing the printhead Storing used or opened print heads: Use a clean, lint-free microfiber cloth moistened (not dripping) with clean DI water to do a single pass cleaning of the nozzles using light to no pressure. Keep ink coupling in upright position to avoid ink dropping down. Secure the original orange protective print head cover onto the printhead. -
Page 99: Removing The Ink From The Reservoir Ink Tanks
15.3 Removing the ink from the reservoir ink tanks To remove the ink from the reservoir ink tanks, a script must be run from the hidden service menu. WARNING: The hidden service menu is reserved for skilled technicians only! End users are not advised to use other functions in the hidden service menu (unless technical support of Trojanlabel is asking for this) than the empty ink process and empty ink filters process. -
Page 100: Removing The Ink From The Ink Filters
3. Select ‘Empty IR Tanks’ script from the upper scroll down list and press ‘Run’ button to run script. 4. The empty IR tanks process takes about 5 minutes as it is emptying the reservoir ink tanks one by one at a time. Movement of the ink from the reservoir ink tanks to the 2L ink tanks is indicated on the right side status bar where the ink levels are displayed. -
Page 101: Empty And Clean Waste Ink Bottle
15.5 Empty and clean waste ink bottle See chapter 14.1.2 for emptying the waste ink bottle. For transportation, it is advised to fix the drawer of the waste ink tray with the 2 screws. Cleaning of the waste ink bottle can be done simply by washing the waste ink bottle under tap water. -
Page 102: Troubleshooting
16 Troubleshooting This section will help you troubleshoot various error states and scenarios. 16.1 Error States Problem Solution Web status display: The initialization of the web-path routine failed during start up, Error (1). usually due to a time out of the initializing process. Press the emergency button, wait 5 seconds and release it again. - Page 103 Web status display: Error (7) - Motor safety switch is shorted, please contact support. Too high (BldcEnableSwitchShorted) input current for BLDC driver causes Emergency Board relays to hang. Web status display: Error (8) - Factory calibration variables not loaded, please contact support. (VarsNotLoad) Web status display: Error (9) - Incompatible FPGA Version, please contact support.
- Page 104 B) Try to move the maintenance tray manually and check if the tray can move freely on the rails. Then use the red button at HOME-> Settings->Network menu to restart the print engine. Contact support if A) and B) options cannot solve the issue. Error display: One or more ink tanks are out of ink.
- Page 105 16.2 Error messages on screen When an error happens instructions and error messages can appear on the screen. Example: missed TOF error. Missed TOF (Top of Form). Wrong TOF mode is selected at Media Settings menu or gap/blackmark sensor is not calibrated (see chapter 8 for printing modes and sensor calibration).
- Page 106 Ink Transfer failure. When a crossed out arrow appears in status bar. This means that pump cannot bring the ink up from the ink tank to the reservoir tank. Can be pump motor failure, like encoder wheel on motor is filthy or pump stuck, electrical failure, wrong settings for factory parameters etc.
- Page 107 17 Appendix List of spare parts: Consumables: Part number: Part description: 20010006 Printhead Niagara LL2X 30010031 2L Ink Tank Trojan Niagara Cyan 30010032 2L Ink Tank Trojan Niagara Magenta 30010033 2L Ink Tank Trojan Niagara Yellow 30010034 2L Ink Tank Trojan Niagara Black 10003356 T2 Wiper Roller Gen 2 (Micro Fiber Roller) 10000036...
- Page 108 T1008.02 Edge sensor T1010.01 QA board T1011.01 Connector PCA T1012.07 Novo Ink Board version T1012.07 or later. T1017.02 Reservoir Sensor board T1021 Web path and BLCD drive T1014 Temp sensor ER Contact ER contact Schneider_RS744-800247 Tubes, cables and other parts: Part number: Part description: T_SP-240-48...
- Page 109 ASA-1405-0C Step Motor Assembly for Unwinder/Rewinder ATSPP026 ATSPP026 sidesteer sensor and cable from T1021 J25 to Sidesteer Sensor T2C Slitter Stop Plate T2C Slitter Stop Plate Belt2-8 Transmission belt Belt3-9 Transmission belt Belt1-135 Transmission belt Belt2-1 Transmission belt SP-M010 Magnet holder for step motors Eclipse N813 Magnet for step motors Neodymium Magnet...
Need help?
Do you have a question about the Trojanlabel Trojan T2-C and is the answer not in the manual?
Questions and answers