Table of Contents
Advertisement
Available languages
Available languages
USA office: Fontana
AUS office: Truganina
GBR office: Ipswich
If you're having difficulty, our friendly
customer team is always here to help.
FRA office: Saint Vigor d'Ymonville
USA:cs.us@costway.com
AUS:cs.au@costway.com
GBR:cs.uk@costway.com
FRA:cs.f r @costway.com
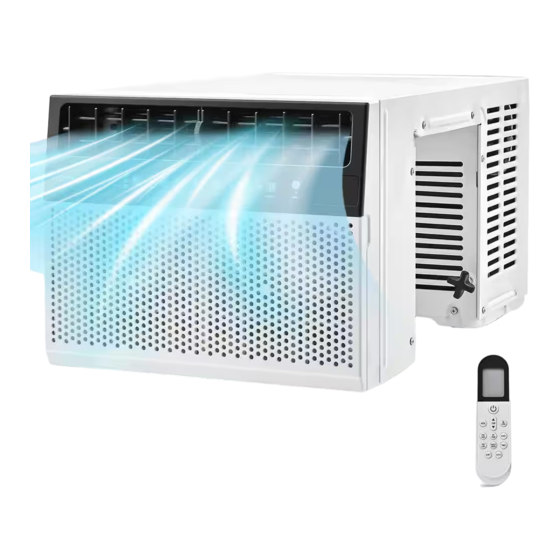
Window Air Conditioner
Climatiseur de Fenêtre
FP10271US
FP10247US
THIS INSTRUCTION BOOKLET CONTAINS IMPORTANT SAFETY INFORMATION. PLEASE READ AND KEEP FOR FUTURE REFERENCE.
Advertisement
Table of Contents

Related Manuals for Costway FP10271US


Summary of Contents for Costway FP10271US
- Page 1 GBR office: Ipswich FRA office: Saint Vigor d'Ymonville USA:cs.us@costway.com If you're having difficulty, our friendly AUS:cs.au@costway.com customer team is always here to help. GBR:cs.uk@costway.com THIS INSTRUCTION BOOKLET CONTAINS IMPORTANT SAFETY INFORMATION. PLEASE READ AND KEEP FOR FUTURE REFERENCE. FRA:cs.f r @costway.com...
-
Page 2: Safety Instruction
Before You Start Please read all instructions carefully. Retain instructions for future reference. Separate and count all parts and hardware. Read through each step carefully and follow the proper order. We recommend that, where possible, all items are assembled near to the area in which they will be placed in use, to avoid moving the product unnecessarily once assembled. -
Page 3: Important Safety Instructions
WARNING: To reduce the risk of fire, electrical shock, injury to persons, or An imminently hazardous situation. You damage when using the air conditioner, follow basic precautions, including could be killed or seriously injured if you DANGER the followings: don’t immediately follow instructions. ●... - Page 4 ● Be aware that refrigerants may not contain an odor. taking place, the area around the equipment is to be surveyed to make sure – the maximum refrigerant charge amount:FP10271US-8.82Oz that there are no flammable hazards or ignition risks. “No Smoking” signs shall be displayed.
- Page 5 ● Electronic leak detectors shall be used to detect flammable refrigerants, but the sensitivity may not be adequate, or may need re-calibration. ● In addition to conventional charging procedures, the following (Detection equipment shall be calibrated in a refrigerant-free area.) Ensure requirements shall be followed.
- Page 6 f) Make sure that cylinder is situated on the scales before recovery takes The recovered refrigerant shall be put in the correct recovery cylinder, and place. the relevant Waste Transfer Note should be arranged. Do not mix refrigerants in recovery units and especially not in cylinders. If compressors g) Start the recovery machine and operate in accordance with or compressor oils are to be removed, ensure that they have been manufacturer's instructions.
- Page 7 INSATALLATION REQUIREMENTS WINDOW REQUIREMENTS Please read all instructions prior to installing your air conditioner. Two people NOTE are recommended to install this product. If a new electrical outlet is required, have the outlet installed by a qualified electrician before installing the unit. Before installing the unit, check the dimensions of your window to make sure hours.
-
Page 8: Installation Instructions
ELECTRICAL REQUIREMENTS To test the power supply cord before operation: 1. Plug the power cord into a grounded 3 prong outlet. WARNING 2. Press the Test button, and then press and release the Reset button to restore power. REQUIRED GROUNDING METHOD 1. - Page 9 NOTE: STEP 4 – ADJUST THE SUPPORT KNOB There are NO packing materials inside the air conditioner to remove—Do Not open the cabinet. 1) Adjust the support knob Properly dispose of/recycle all packing material. anti-clockwise until it is locked with the wall.
-
Page 10: Control Panel
STEP 6 – ATTACH TOP FOAM SEALER WARNING 1) Measure the length of the bottom of the window. 2) Cut the top foam sealer to the corresponding length. 3) Remove adhesive from one side of the sealer and attach it to the bottom of the window. - Page 11 B. FILTER RESET BUTTON To Set the Temperature: Press this button when the filter indicator is on. The light will illuminate every The temperature can be set between 62 and 86 and 30 ) when 250 hours of operation as a reminder to clean the filter. the air conditioner is in Cool and Energy Saver mode.
-
Page 12: Remote Control
Energy Saver – Set the unit to the desired temperature for the room. E. MY TEMP BUTTON Selecting Energy Saver mode will cycle the fan off and on with the To change the thermostat sensor from the air compressor to limit energy consumption and maintain the desired conditioner to the remote location. -
Page 13: Safety Protections
DRAIN THE INTERNAL WATER INDOOR DRAINAGE 1) Put the water container under the water outlet on the left side of the unit. 2) Unplug the water plug, the water will automatically flow into the water container. 3) When the water is finished, re-plug the water stopper. NOTE: NOTE: Insert the two AAA batteries. -
Page 14: Filter Cleaning
2. Anti-frozen protection function FILTER CLEANING Clean the filter once every two weeks, or it would influence the unit function When the compressor continuously runs over 10 minutes, if tube if filter clogged with dust. function will be on, E4 will be shown on LED display, compressor and water 1) Hold the two sides of the air inlet grille with your hands, and open the wheel motor will stop working, but upper fan remains running;... -
Page 15: Installation Of The Filters
INSTALLATION OF THE FILTERS 4) Keeping a firm grip on air conditioner, lift up and remove the air conditioner from the window and sill. 1) Insert the filter into the unit in correct direction (the oblique angle should be towards the outside of the unit). NOTE: When loosening the support knob, please hold the unit tightly to prevent the whole unit from turning to the outside of the window. -
Page 16: Troubleshooting
TROUBLESHOOTING Trouble Cause Solution The remote Too long distance Bring the remote control If an error code illuminates on the digital display, unplug the power cord from control does close to the Air conditioner the wall and plug it back in. Most of the time, this will reset the error code. If not work and ensure airs at signal the error code continues to display, please try the solutions suggested here. -
Page 17: Instruction De Sécurité
Ce symbole vous avertit des dangers potentiels qui peuvent vous tuer ou vous blesser, vous et les autres. Tous les messages de sécurité suivent le symbole d'alerte de sécurité et les mots « DANGER », « AVERTISSEMENT » ou « ATTENTION ». Ces mots signifient : Une situation dangereuse imminente. -
Page 18: Instructions De Sécurité Importantes
INSTRUCTIONS DE SÉCURITÉ AVERTISSEMENT : Pour réduire les risques d'incendie, de choc électrique, de blessures ou de dommages lors de l'utilisation du climatiseur, IMPORTANTES suivez les précautions de base, notamment les suivantes : ● L'appareil doit être rangé dans un endroit bien ventilé où la taille de la pièce n'est pas inférieure à... - Page 19 ● Sachez que les réfrigérants peuvent ne pas avoir d'odeur. doit être disponible. Disposez d'un extincteur à poudre ou à CO² à proximité - la quantité maximale de charge de réfrigérant : FP10271US-8.82Oz de la zone de chargement. - la quantité maximale de charge de réfrigérant : FP10247US-9.88Oz ●...
- Page 20 ● Assurez-vous que la zone est à l'air libre ou qu'elle est correctement ● Lors de l'intrusion dans le circuit frigorifique pour effectuer des réparations ventilée avant de pénétrer dans le système ou d'effectuer tout travail à - ou pour toute autre raison - les procédures conventionnelles doivent être chaud.
- Page 21 - Les bouteilles doivent être maintenues en position verticale. d) Pompez le système de réfrigérant, si possible. - Assurez-vous que le système de réfrigération est mis à la terre avant de le e) Si le vide n'est pas possible, fabriquez un collecteur pour que le charger en réfrigérant.
-
Page 22: Identification Des Pièces
IDENTIFICATION DES PIÈCES ● Lors du retrait du fluide frigorigène d'un système, que ce soit pour l'entretien ou la mise hors service, il est recommandé de veiller à ce que tous les fluides frigorigènes soient retirés en toute sécurité. Lors du transfert du fluide frigorigène dans les bouteilles, assurez-vous que seules les bouteilles de récupération de fluide frigorigène appropriées sont utilisées. - Page 23 EXIGENCES EN MATIÈRE D'INSATALLATION EXIGENCES RELATIVES AUX FENÊTRES Veuillez lire toutes les instructions avant d'installer votre climatiseur. Deux REMARQUE personnes sont recommandées pour installer ce produit. Si une nouvelle prise électrique est nécessaire, faites installer la prise par un électricien qualifié...
-
Page 24: Exigences Électriques
3. Déballez soigneusement le climatiseur. Retirez tous les matériaux REMARQUE : d'emballage et assurez-vous que le sol est protégé lors du retrait. En raison Ne faites pas fonctionner d'autres appareils électriques sur ce circuit, de la grande taille de ce climatiseur, deux personnes doivent le déplacer sinon vous risquez de déclencher le disjoncteur/fusible. -
Page 25: Instructions D'installation
INSTRUCTIONS D'INSTALLATION ÉTAPE 2 - FIXATION DES BLOCS DE MONTAGE SUR LE CADRE DE LA FENÊTRE ÉTAPE 1 - DÉBALLER LE CLIMATISEUR 1) Retirez l'adhésif des blocs de montage et placez les blocs de montage sur le cadre de la fenêtre. AVERTISSEMENT 2) Appuyez fermement sur les blocs de montage pour les fixer en place. -
Page 26: Étape 7 - Installation Terminée
ÉTAPE 4 - RÉGLAGE DU BOUTON DE SUPPORT ÉTAPE 6 - FIXER LA MOUSSE D'ÉTANCHÉITÉ SUPÉRIEURE 1) Réglez le bouton de support dans le sens inverse des aiguilles d'une montre 1) Mesurez la longueur du bas de la fenêtre. usqu'à ce qu'il soit verrouillé avec le 2) Coupez la mousse d'étanchéité... -
Page 27: Panneau De Contrôle
B. BOUTON DE RÉINITIALISATION DU FILTRE AVERTISSEMENT Appuyez sur ce bouton lorsque le voyant du filtre est allumé. Le voyant s'allumera toutes les 250 heures de fonctionnement pour vous rappeler de nettoyer le filtre. C. BOUTON DE LA MINUTERIE Programmez une durée de (1 heure à 24 heures) pour que le climatiseur Risque d'électrocution s'éteigne ou se mette en marche. - Page 28 Pour régler la température : Sleep(Veille) - En mode Sleep, la température réglée augmentera automatiquement de 1°C (1°F) après 2 heures de fonctionnement, puis de La température peut être réglée entre 62 et 86 et 30 ) lorsque le 1°C (1°F) après deux autres heures. Après cela, la température réglée reste climatiseur est en mode refroidissement et économie d'énergie.
- Page 29 D. BOUTONS DE VENTILATEUR HAUT, VENTILATEUR BAS ET I. BOUTON SLEEP SILENCE Appuyez sur ce bouton pour activer le mode veille. FAN HIGH(VENTILATEUR HAUT) - Appuyez sur ce bouton pour régler la vitesse du ventilateur à un niveau élevé. Peut être utilisé en mode Cool ou J.
- Page 30 PROTECTIONS DE SÉCURITÉ AVERTISSEMENT 1. Fonction d'alarme de sécurité et de protection contre le manque Si le liquide de la pile de la télécommande coule sur votre peau d'eau ou vos vêtements, rincez-les à grande eau dès que possible ; si vous trouvez une fuite, n'utilisez pas la télécommande.
-
Page 31: Précautions Et Entretien
PRÉCAUTIONS ET ENTRETIEN REMARQUE : Tirez doucement sur le filtre pour éviter Veillez à éteindre l'appareil et à débrancher la fiche avant de procéder à de le tordre et de l'endommager. l'entretien ou de l'envoyer au centre de service. Plongez et lavez le filtre délicatement dans de l'eau chaude (environ 40 NETTOYAGE DES SURFACES /104°F) mélangée à... -
Page 32: Dépannage
DÉPANNAGE FIN DE SAISON UTILISE. Si un code d'erreur s'affiche sur l'écran numérique, débranchez le cordon d'alimentation du mur et rebranchez-le. La plupart du temps, cela réinitialisera le code d'erreur. Si le code d'erreur continue de s'afficher, SUIVANT LES INSTRUCTIONS DE VIDANGE. essayez les solutions proposées ici. - Page 33 DÉPANNAGE CAUSE SOLUTION Mauvais effets Filtre encrassé Nettoyez ou remplacez la maille du filtre refroidissement Entrée ou sortie d'air Retirez l'obstruction ou de Return / Damage Claim Instructions obstruée chauffage DO NOT discard the box / original packaging. Distance trop longue Approchez la In case a return is required, the item must be returned in original box.
Need help?
Do you have a question about the FP10271US and is the answer not in the manual?
Questions and answers