Table of Contents
Advertisement
Available languages
Available languages
Quick Links
USA office: Fontana
AUS office: Truganina
GBR office: Ipswich
If you're having difficulty, our friendly
customer team is always here to help.
FRA office: Saint Vigor d'Ymonville
USA:cs.us@costway.com
AUS:cs.au@costway.com
GBR:cs.uk@costway.com
FRA:cs.f r @costway.com
Portable Air Conditioner
Climatiseur Portable
FP10348
THIS INSTRUCTION BOOKLET CONTAINS IMPORTANT SAFETY INFORMATION. PLEASE READ AND KEEP FOR FUTURE REFERENCE.
Advertisement
Table of Contents

Related Manuals for Costway FP10348


Summary of Contents for Costway FP10348
- Page 1 GBR office: Ipswich FRA office: Saint Vigor d'Ymonville USA:cs.us@costway.com If you're having difficulty, our friendly AUS:cs.au@costway.com customer team is always here to help. GBR:cs.uk@costway.com THIS INSTRUCTION BOOKLET CONTAINS IMPORTANT SAFETY INFORMATION. PLEASE READ AND KEEP FOR FUTURE REFERENCE. FRA:cs.f r @costway.com...
- Page 2 Thank you for choosing the luxurious and elegant portable air conditioner. Please keep the manual for future reference, and read the manual carefully before use. Before You Start Please read all instructions carefully. Retain instructions for future reference. Caution, risk of fire Separate and count all parts and hardware.
-
Page 3: Features And Components
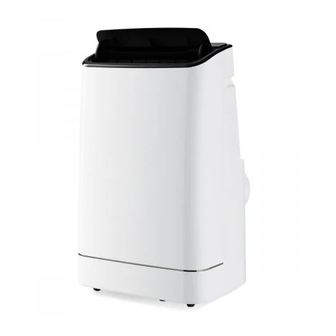
Features and Components * When moving the machine, make sure that it is in an upright position. 1. Features * The machine should stay away from gasoline, flammable gas, stoves and other heat sources. New look, compact structure, streamlined machine, aristocratic atmosphere. With cooling, dehumidification, fan function, and continuous water drainage * Don't disassemble, overhaul and modify the machine arbitrarily, otherwise functions. -
Page 4: Installation And Adjustment
Installation and Adjustment 1. Installation: Warning: before using the mobile air conditioning, keep it upright for at least two hours. Handle The air conditioning can be easily moved in the room. In the moving process, ensure that the air conditioning is in the upright position and the air conditioning should be placed on a flat surface. -
Page 5: Important Notice
1.2 Install the window sealing plate assembly 1) Half open the window, and mount the window sealing plate assembly to the window (as shown in Fig.2 and Fig.3); the assembly can be placed in horizontal and vertical direction. 2) Pull various components of the window sealing plate assembly open, adjust their opening distance to bring both ends of the assembly into contact with the window frame, and fix various components of the assembly. - Page 6 II. Operating Instructions of the Remote Control 1. SWING Key: The SWING function can only work after turning on the unit, but you can turn on or off. The remote control panel is as follows: 2. TIMER Key: In the case of powering on, press the key to close timing; in the case of powering off, press the key to open timing.
-
Page 7: Drainage Instructions
III. A Variety of Protection Functions Drainage Instructions 3.1 Frost Protection Function 1. Manual drainage: In cooling, dehumidifying or energy-saving mode, if the temperature of the 1) When the machine stops after the water is full, turn off the machine power exhaust pipe is too low, the machine will automatically enter protection and unplug the power plug. - Page 8 Maintenance 2. Continuous drainage (Optional) (only applicable to dehumidifying mode), as shown in figure: Cleaning: before cleaning and maintenance, turn 1) Unplug the water plug on. off the machine and unplug the plug. 2) Set the drainage pipe into the water outlet. 1.
-
Page 9: Troubleshooting
3. Unit Storage In cooling mode, the room 1) Unscrew the drainage cover, unplug the water plug, and discharge the temperature is lower than Change the set temperature. water in the water pan into other water containers or directly tilt the body to the set temperature. - Page 10 Smart Life (Wi-Fi) Guide Note: If problems not listed in the table occur or recommended solutions do not work, please contact the professional service organization. OPERATION GUIDE: Please ensure your mobile device is connected to WiFi router. Also, the WiFi router should already be connected to Internet before doing user registration and network configuration All the technical and specific parameters, please refer to product nameplate.
- Page 11 Back to home page of Smart Life and login. *Add a new smart Air Conditioner To add a new Smart Air conditioner. *Select your corresponding device as below steps: Once added successfully, you can control the unit to set your room temperature whether you are driving on road or at the office.
- Page 12 *Change working modes and set the temperature *Set schedules to programme a customized timer *Set fan speeds for comfort and energy savings.
- Page 13 *Lorsque vous déplacez la machine, assurez-vous qu'elle est en position Merci d'avoir choisi ce luxueux et élégant climatiseur verticale. portable. Veuillez conserver ce manuel pour vous y référer ultérieurement et le lire attentivement avant de l'utiliser. *La machine doit rester éloignée de l'essence, des gaz inflammables, des poêles et autres sources de chaleur.
-
Page 14: Caractéristiques Et Composants
Caractéristiques et Composants 1. Caractéristiques Nouveau look, structure compacte, machine épurée, atmosphère aristocratique. Avec fonction de refroidissement, déshumidification et Poignée ventilateur, fonctions d'évacuation continue de l'eau. Le panneau de commande est doté d'un affichage LED. La machine est Boîtier du belle et élégante. -
Page 15: Installation Et Réglage
Installation et Réglage 1.2 Installation de la plaque d'étanchéité de la fenêtre 1) Ouvrez à moitié la fenêtre et montez l'ensemble de la plaque d'étanchéité 1. Installation: de la fenêtre sur la fenêtre (comme indiqué sur la figure 2 et la figure 3) ; Avertissement: avant d'utiliser le climatiseur mobile, maintenez-le en l'ensemble peut être placé... -
Page 16: Remarque Importante
1. Bouton d’Oscillation: La fonction d’oscillation ne peut fonctionner qu'après avoir allumé l'appareil, mais vous pouvez l'activer ou le désactiver. 2. Bouton Minuterie: En cas de mise sous tension, appuyez sur le bouton pour fermer la minuterie; en cas de mise hors tension, appuyez sur le bouton pour ouvrir la minuterie. - Page 17 5 Bas : Appuyez sur le bouton pour réduire la température et ajuster le Remarque: réglage de la minuterie. 1. N'activez pas le mode sommeil en mode déshumidification ou ventilation ! 2. Le témoin de remplissage d'eau s'allume et le buzzer émet une alarme 6 Haut : Appuyez sur le bouton pour augmenter la température et pendant plusieurs secondes, le compresseur s'arrête de fonctionner lorsque...
- Page 18 Instructions pour le drainage 2. Drainage continu (en option) (applicable uniquement au mode déshumidification), comme indiqué sur la figure : 1. Vidange manuelle: 1) Débranchez la prise d'eau sur. 1) Lorsque la machine s'arrête après que l'eau soit pleine, éteignez la 2) Placez le tuyau de drainage dans la sortie d'eau.
-
Page 19: Entretien
Entretien 3. Rangement de l'unité : 1 : Dévissez le couvercle de drainage, débranchez la prise d'eau et évacuez Nettoyage : avant le nettoyage et l'entretien, l'eau contenue dans le bac à eau dans d'autres récipients d'eau ou inclinez éteignez la machine et débranchez la fiche. directement le corps pour évacuer l'eau dans d'autres récipients. - Page 20 Remarque: Si des problèmes non répertoriés dans le tableau se produisent En mode refroidissement, la ou si les solutions recommandées ne fonctionnent pas, veuillez demander température ambiante est Modifiez la température de inférieure à la température réglée ; l'aide d'un technicien qualifié. consigne.
- Page 21 Guide Smart Life (Wi-Fi) Retournez à la page d'accueil de Smart Life et connectez-vous. Pour ajouter un nouveau climatiseur intelligent. GUIDE D'UTILISATION : *Sélectionnez l'appareil correspondant en suivant les étapes ci-dessous : Veuillez vous assurer que votre appareil mobile est connecté au routeur Wifi. De même, le routeur Wifi doit être connecté...
- Page 22 *Ajoutez d'un nouveau climatiseur. *Changez de mode de fonctionnement Réglez la température Une fois ajouté avec succès, vous pouvez contrôler l'unité pour régler la *Réglez la vitesse des ventilateurs pour le confort et les économies d'énergie. température de votre pièce, que vous soyez sur la route ou au bureau. Étape 3 *Mettez votre climatiseur en marche et à...
- Page 23 *Définissez les horaires pour programmer une minuterie personnalisée. Return / Damage Claim Instructions DO NOT discard the box / original packaging. In case a return is required, the item must be returned in original box. Without this your return will not be accepted. Take a photo of the box markings.
Need help?
Do you have a question about the FP10348 and is the answer not in the manual?
Questions and answers
Where can I get the fitting that attaches to the back of the unit exhaust model FP10348US-WH
Should the oscillating flap close automatically when the machine is turned off and does it need to be closed to be stored? Will the oscialltin flap be damaged if forced to close manually?