Advertisement
Quick Links
Please give us a chance to make it right and do better !
Contact our friendly customer service department for help first.
Replacements for missing or damaged parts will be shipped ASAP !
US office: Fontana
UK office: Ipswich
DE office: Hamburg
FR office: Saint Vigor d'Ymonville
Contact Us!
Do NOT return this item.
AU office: Truganina
PL office: Gdańsk
US:cs.us@costway.com
UK:cs.uk@costway.com
AU:cs.au@costway.com
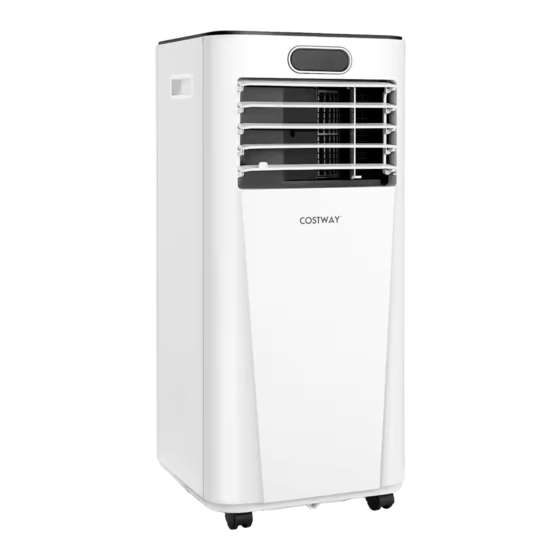
Portable Air Conditioner
THIS INSTRUCTION BOOKLET CONTAINS IMPORTANT SAFETY INFORMATION. PLEASE READ AND KEEP FOR FUTURE REFERENCE.
USER'S MANUAL
FP10120US
Advertisement

Related Manuals for Costway FP10120US


Summary of Contents for Costway FP10120US
- Page 1 DE office: Hamburg FR office: Saint Vigor d'Ymonville PL office: Gdańsk USER’S MANUAL Contact Us! Portable Air Conditioner FP10120US US:cs.us@costway.com Do NOT return this item. UK:cs.uk@costway.com AU:cs.au@costway.com THIS INSTRUCTION BOOKLET CONTAINS IMPORTANT SAFETY INFORMATION. PLEASE READ AND KEEP FOR FUTURE REFERENCE.
- Page 2 1. BEFORE YOU BEGIN 1.1 PRODUCT DESCRIPTION Our powerful portable air conditioners are great cooling solutions for single rooms, creating a comfortable atmosphere in your space. It also has ventilation and dehumidifying function for circulating air and removal of moisture. They're self-contained systems that do not require any permanent installation allowing you to move to the space in which it is most needed.
- Page 3 The appliance shall be disconnected from its power source during The unit shall be installed in accordance with national wiring ■ ■ service. regulations. Always operate the unit from a power source of equal voltage, Do not use means to accelerate the defrosting process or to ■...
- Page 4 3.2 FEATURES 3. PRODUCT OVERVIEW √ High Capacity in a compact size with fan, cooling and 3.1 PRODUCT DIAGRAM dehumidifying function. √ Temperature setting and display √ LED Digital display √ Electronic control with built-in timer, sleep mode √ Self-evaporating system for better efficiency √...
- Page 5 4.2 Choose your location Step 1: ● If tipped more than 45°, allow the unit to set upright for at least 24 hours before start Connect the hose connector to one end of the exhaust hose. ● Place the unit on a firm, level surface in an area with at least 20 inch of free space around it to allow for proper air circulation.
- Page 6 5. OPERATION 5.1 CONTROL PANEL AND DISPLAY Step 5: Attach the hose connector to the exhaust air outlet of unit. Step 6: Adjust the length of the flexible exhaust hose, and avoid bends in the hose. Then place Air Conditioner near an electrical outlet.
- Page 7 5.3 SETTINGS Press it to switch the fan speed between Speed High and Low. 5.3.1 Start-up and Shutdown Set a time for the unit to automatically Press POWER to turn the unit on. Timer start or stop. Press the Up and Down buttons to adjust the time.
- Page 8 C. Drying your room 5.3.4 Automatic Defrost Press MODE button on the control panel or remote control, the At low room temperatures, frost may build up at the evaporator dry indicator lights up. The fan speed is unable to select. User should during operation.
- Page 9 Notes: ● Switch off the unit before operating. 1. Keep the water plug properly. ● Remove the plug of the water 2. During drainage, the body can be tilted outlet opening, and keep it in a slightly backwards. safe area. 3.
- Page 10 6.2 CLEANING UP OF REFRIGERANT 6. CLEANING AND CARE General Measures: 6.1 CLEANING THE AIR FILTER (every two weeks) 1. Gas/vapor heavier than air. May accumulate in confined spaces, Dust collects on the filter and restricts the airflow. The restricted particularly at or below ground level.
-
Page 11: Troubleshooting
7. TROUBLESHOOTING √ Overflow while ■ Empty the water tank Water moving the unit. before transport. Leakage Symptom Inspection Solution √ Check if the drain ■ Straighten the hose hose is kinked or bends. to avoid a trap existing. √ Check whether the ■... - Page 12 8.2 DISPOSAL 8. DECOMMISSIONING 8.1 STORAGE Releasing refrigerant into atmosphere is strictly Long-Term Storage - If you will not use the unit for an extended forbidden! period of time (more than a few weeks) it is best to clean the unit WARNING!!! and dry it out completely.
Need help?
Do you have a question about the FP10120US and is the answer not in the manual?
Questions and answers
How to insert battery
The information provided does not include specific instructions on how to insert the battery in the Costway FP10120US. However, the remote control for the unit requires 2 AAA batteries. Typically, you would slide open the battery compartment on the back of the remote, insert the batteries matching the + and - symbols, then close the compartment.
This answer is automatically generated
Coil Temperature Sensor Failure how do i repair this error