Table of Contents
Advertisement
Available languages
Available languages
USA office: Fontana
AUS office: Truganina
GBR office: Ipswich
If you're having difficulty, our friendly
customer team is always here to help.
FRA office: Saint Vigor d'Ymonville
USA:cs.us@costway.com
AUS:cs.au@costway.com
GBR:cs.uk@costway.com
FRA:cs.f r @costway.com
Portable Air Conditioner
Climatiseur Portable
FP10264US / FP10266US
THIS INSTRUCTION BOOKLET CONTAINS IMPORTANT SAFETY INFORMATION. PLEASE READ AND KEEP FOR FUTURE REFERENCE.
Advertisement
Table of Contents

Subscribe to Our Youtube Channel
Related Manuals for Costway FP10264US


Summary of Contents for Costway FP10264US
- Page 1 Portable Air Conditioner Climatiseur Portable FP10264US / FP10266US USA office: Fontana AUS office: Truganina GBR office: Ipswich FRA office: Saint Vigor d'Ymonville USA:cs.us@costway.com If you're having difficulty, our friendly AUS:cs.au@costway.com customer team is always here to help. GBR:cs.uk@costway.com THIS INSTRUCTION BOOKLET CONTAINS IMPORTANT SAFETY INFORMATION. PLEASE READ AND KEEP FOR FUTURE REFERENCE.
-
Page 2: Before You Begin
1. BEFORE YOU BEGIN 1.1 PRODUCT DESCRIPTION Before You Start Our powerful portable air conditioners are great cooling solutions for single Please read all instructions carefully. rooms, creating a comfortable atmosphere in your space. It also has ventilation and dehumidifying function for circulating air and removal of Retain instructions for future reference. -
Page 3: The Following Should Always Be Observed For Safety
THE FOLLOWING SHOULD ALWAYS BE OBSERVED FOR 2. FOR YOUR SAFETY SAFETY ● This appliance is intended to be used by expert or trained users in shops, Your safety is the most important thing we concerned! in light industry and on farms, or for commercial use by lay persons. ●... - Page 4 ■ Do not operate the unit if it is dropped, damaged or showing signs of Servicing shall only be performed as product malfunction. recommended by the skilled personnel. ■ Do not clean the appliance with any chemicals. Maintenance and repair requiring the assistance of skilled personnel shall be carried out under the ■...
- Page 5 2.2.5 Presence of fire extinguisher – Marking to the equipment continues to be visible and legible. Markings and If any hot work is to be conducted on the refrigeration equipment or any signs that are illegible shall be corrected; associated parts, appropriate fire extinguishing equipment shall be available –...
-
Page 6: Product Overview
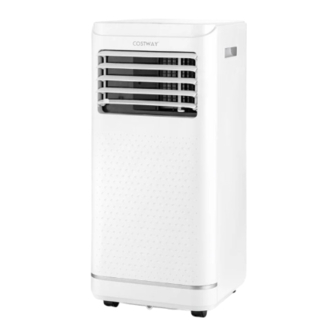
3. PRODUCT OVERVIEW 3.2 FEATURES √ High capacity in a compact size with fan, cooling and dehumidifying function. 3.1 PRODUCT DIAGRAM √ Temperature setting and display √ LED Digital display √ Electronic control with built-in timer, sleep mode √ Self-evaporating system for better efficient √... - Page 7 4.2 Choose your location 4.3 ATTACH THE EXHAUST HOSE ● If tipped more than 45°, allow the unit to set The air conditioner needs to be ventilated to the outside so that the air upright for at least 24 hours before start up. containing waste heat and moisture discharged from the appliance can be discharged from the room.
-
Page 8: Operation
5. OPERATION Step 4: Close your window to secure the kit in place. It needs to hold the windows kit 5.1 CONTROL PANEL AND DISPLAY firmly in place, secure the window kit with duct tape if required. It is recommended that the gap between the adapter and the sides of the window should be sealed off for maximum efficiency. -
Page 9: Remote Control
5.2 REMOTE CONTROL 5.3 SETTINGS 5.3.1 Start-up and Shutdown Press POWER to turn the unit on. Press MODE button to select the desired operation mode. Press POWER again to turn off the power. High Cool 5.3.2 Operation mode The unit has four operation modes: Fan, Cool, Dehumidifier, Sleep. Down The unit working temperature under cooling mode is 16℃-35℃/61℉-95℉. - Page 10 C. Drying your room 5.3.4 Automatic Defrost At low room temperatures, frost may buildup at the evaporator during Press MODE button on the control panel or remote control, the dry operation. The unit will automatically start defrosting and the POWER LED indicator lights up.
-
Page 11: Cleaning And Care
● Switch off the unit before operating. Notes: ● Remove the plug of the water outlet 1. Keep the water plug properly. opening, and keep it in safe area. 2. During drainage, the body can be tilted ● Securely and properly connect the slightly backwards. -
Page 12: Troubleshooting
1. Press POWER button to switch off the unit and unplug the power cord. 6. Prevent access to sewers and public waters. 2. Remove the filter mesh from the unit. 7. Stop the source of the release, if it is safe to do so. Consider the use of water spray to disperse vapors. - Page 13 √ Check if the desired ■ Set the mode and √ Coil temperature ■ Check connection or sensor failures. replace it. To clean or operating mode is temperature at proper replace the temperature selected and the set-point according to sensor. temperature is properly the manual.
-
Page 14: Avant De Commencer
8.2 DISPOSAL 1. AVANT DE COMMENCER WARNING! Releasing refrigerant into atmosphere is strictly forbidden! 1.1 DESCRIPTION DU PRODUIT Nos puissants climatiseurs portables sont d'excellentes solutions de refroidissement pour les pièces individuelles, créant une atmosphère confortable dans votre espace. Ils disposent également d'une fonction de ventilation et de déshumidification pour faire circuler l'air et éliminer l'humidité. -
Page 15: Pour Votre Sécurité
Des informations complémentaires sont disponibles dans ● Si une fuite est détectée, évacuez immédiatement toutes les personnes du le MANUEL D'UTILISATION, le MANUEL DE SERVICE, magasin, ventilez la pièce et contactez le service d'incendie local pour les etc. informer qu'une fuite de propane s'est produite. ●... - Page 16 ■ Faites toujours fonctionner l'appareil à partir d'une source d'alimentation ■ L'appareil doit être stocké de manière à éviter tout dommage mécanique. de même tension, fréquence et puissance, comme indiqué sur la plaque ■ Ne pas détruire ou brûler le produit. d'identification du produit.
- Page 17 2.2 PRÉCAUTIONS DE SÉCURITÉ LORS DE L'ENTRETIEN 2.2.6 Absence de sources d'inflammation Aucune personne effectuant des travaux sur un système de réfrigération qui Veuillez suivre ces avertissements lors de l'entretien d'un appareil avec R32. impliquent l'exposition d'une tuyauterie contenant ou ayant contenu un réfrigérant inflammable ne doit utiliser de sources d'inflammation de telle 2.2.1 Contrôles de la zone manière que cela puisse entraîner un risque d'incendie ou d'explosion.
-
Page 18: Aperçu Du Produit
3. APERÇU DU PRODUIT - La tuyauterie ou les composants frigorifiques sont installés dans une position où ils ne risquent pas d'être exposés à une substance susceptible de corroder les composants contenant du réfrigérant, à moins que les 3.1 SCHÉMA DU PRODUIT composants ne soient construits dans des matériaux intrinsèquement résistants à... -
Page 19: Caractéristiques
3.2 CARACTÉRISTIQUES 4.2 Choisissez votre emplacement √ Grande capacité dans un format compact avec fonction de ventilation, de ● Si l'appareil est incliné de plus de 45°, refroidissement et de déshumidification. laissez-le reposer à la verticale pendant au moins 24 heures avant de le mettre en √... - Page 20 4.3 FIXATION DU TUYAU D'ÉVACUATION Étape 4 : Fermez votre fenêtre pour fixer le kit en Le climatiseur doit être ventilé vers l'extérieur afin que l'air contenant la place. Le kit de fenêtre doit être maintenu chaleur perdue et l'humidité évacuée par l'appareil puisse être évacué de la fermement en place.
- Page 21 5. FONCTIONNEMENT 5.2 TÉLÉCOMMANDE 5.1 PANNEAU DE COMMANDE ET AFFICHAGE High Cool Down Appuyez sur cette touche pour allumer PUISSANCE ou éteindre la machine Sleep ℃/℉ Appuyez sur cette touche pour basculer le MODE mode de fonctionnement entre ventilateur, refroidissement et déshumidificateur. Timer Power Appuyez sur cette touche pour changer...
- Page 22 5.3 RÉGLAGES B. Ventilation de la pièce Appuyez sur la touche MODE à plusieurs reprises jusqu'à ce que 5.3.1 Mise en marche et arrêt l'indicateur FAN s'allume. Appuyez sur la touche POWER pour mettre l'appareil en marche. En mode ventilation, l'air de la pièce est brassé, mais pas refroidi. Appuyez sur la touche MODE pour sélectionner le mode de Appuyez plusieurs fois sur la touche SPEED pour sélectionner la fonctionnement souhaité.
- Page 23 5.3.3 Réglage de la minuterie (1 heure-24 heures) : B. Lorsque l'unité fonctionne en mode de séchage, une fois que le capteur de température du serpentin détecte que la température de l'évaporateur est La minuterie a deux modes de fonctionnement : inférieure à...
-
Page 24: Nettoyage Et Entretien
Remarques : ● Éteignez l'appareil avant de l'utiliser. 1. Conservez la fiche d'eau correctement. ● Retirez le bouchon de l'orifice de sortie d'eau et conservez-le dans un endroit sûr. 2. Pendant le drainage, le corps peut être légèrement incliné vers l'arrière. ●... -
Page 25: Dépannage
1. Appuyez sur le bouton POWER pour éteindre l'appareil et débranchez le 6. Empêchez l'accès aux égouts et aux eaux publiques. cordon d'alimentation. 7. Arrêtez la source du rejet, s'il est possible de le faire sans danger. 2. Retirez la maille du filtre de l'appareil. Envisagez l'utilisation d'eau pulvérisée pour disperser les vapeurs. - Page 26 √ Vérifiez si le mode de √ Défauts du capteur de ■ Vérifiez la connexion ou ■ Réglez le mode et la température du serpentin. remplacez-la. Nettoyer ou fonctionnement souhaité température au point de remplacer le capteur de est sélectionné et si la consigne approprié...
- Page 27 ATTENTION : L'évaporateur à l'intérieur de la machine doit être séché avant l'emballage de l'unité pour éviter d'endommager les composants et les moisissures. Débranchez l'appareil et placez-le dans un endroit sec et ouvert pendant plusieurs jours pour le sécher. Une autre façon de sécher l'unité est Return / Damage Claim Instructions d'allumer la machine, de la régler en mode de ventilation à...
Need help?
Do you have a question about the FP10264US and is the answer not in the manual?
Questions and answers