Table of Contents
Advertisement
Installation, Operation, and Maintenance
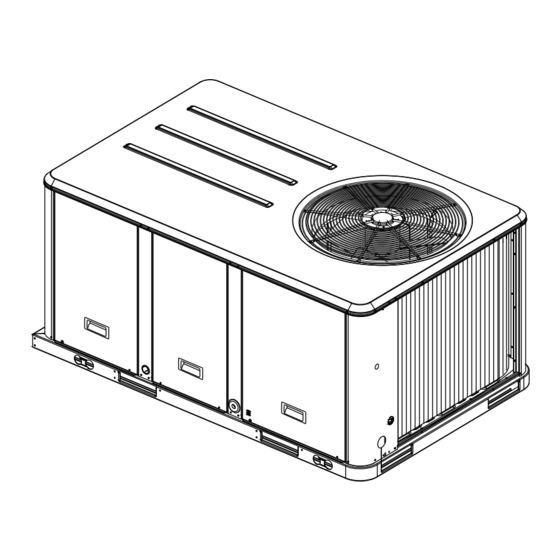
Packaged Rooftop Air Conditioners
Precedent™ — Heat Pump
3 to 10 Tons — 60 Hz
Model Numbers:
Model Numbers:
Model Numbers:
Only qualified personnel should install and service the equipment. The installation, starting up, and servicing of
heating, ventilating, and air-conditioning equipment can be hazardous and requires specific knowledge and training.
Improperly installed, adjusted or altered equipment by an unqualified person could result in death or serious injury.
When working on the equipment, observe all precautions in the literature and on the tags, stickers, and labels that are
attached to the equipment.
September 2022
WSC036H-WSC060H
WSC092H, WSC102H, WSC120H
W/DHC036H-W/DHC120H
RT-SVX23R-EN
SAFETY WARNING
Advertisement
Table of Contents
Troubleshooting

Subscribe to Our Youtube Channel
Related Manuals for Ingersoll-Rand Precedent W/DHC036H


Summary of Contents for Ingersoll-Rand Precedent W/DHC036H
- Page 1 Installation, Operation, and Maintenance Packaged Rooftop Air Conditioners Precedent™ — Heat Pump 3 to 10 Tons — 60 Hz Model Numbers: WSC036H-WSC060H Model Numbers: WSC092H, WSC102H, WSC120H Model Numbers: W/DHC036H-W/DHC120H SAFETY WARNING Only qualified personnel should install and service the equipment. The installation, starting up, and servicing of heating, ventilating, and air-conditioning equipment can be hazardous and requires specific knowledge and training.
- Page 2 Introduction Read this manual thoroughly before operating or servicing this unit. WARNING Warnings, Cautions, and Notices Proper Field Wiring and Grounding Required! Safety advisories appear throughout this manual as required. Failure to follow code could result in death or serious Your personal safety and the proper operation of this machine injury.
- Page 3 Introduction WARNING Follow EHS Policies! Failure to follow instructions below could result in death or serious injury. • All Trane personnel must follow the company’s Environmental, Health and Safety (EHS) policies when performing work such as hot work, electrical, fall protection, lockout/tagout, refrigerant handling, etc.
-
Page 4: Table Of Contents
Table of Contents Low Voltage Wiring Model Number Descriptions ....6 (AC and DC) Requirements ... . .29 Model Number Notes . - Page 5 Table of Contents Zone Temperature Control ... . . 44 Cooling Season ..... .56 Variable Air Volume Applications ...
-
Page 6: Model Number Descriptions
Model Number Descriptions Digit 1 - Unit Type Digit 14 - Fresh Air Selection Digit 19 - Disconnect/Circuit Breaker (three-phase only) W Packaged Heat Pump No Fresh Air Dual Fuel Heat Pump Manual Outside Air Damper 0-50% No Disconnect/No Circuit Breaker Motorized Outside Air Damper Unit Mounted Non-Fused Disconnect Digit 2 - Efficiency... -
Page 7: Model Number Notes
Model Number Descriptions Clogged Filter Switch, Fan Failure 10. Motorized outside air damper is not Switch, Discharge Air Sensing available on multi-speed or SZVAV and Condensate Drain Pan Overflow (Single Zone Variable Air Volume) Switch or MZVAV (Multi Zone Variable Air Digit 26 - System Monitoring Volume) products. -
Page 8: General Information
General Information Unit Inspection Unit Description As soon as the unit arrives at the job site Before shipment, each unit is leak tested, dehydrated, charged with refrigerant and compressor oil, and run tested for proper • Verify that the nameplate data matches the data on the control operation. -
Page 9: System Input Devices And Functions
General Information ® RBCI - ReliaTel™ BACnet Communications Note: On units equipped with factory installed MERV 13 filters, a clogged filter switch with different pressure Interface (Optional) settings will be installed. This switch will close when the This module is used when the application calls for an open differential pressure is approximately 0.8' w.c. -
Page 10: Power Exhaust Control (Optional)
General Information If four consecutive open conditions occur during an active call Centigrade, Supply air tempering, Remote zone temperature for cooling, the compressor will be locked out, a diagnostic sensor, 12/24 hour time display, Smart fan, and Computed communicated to ICS™, if applicable, and a manual reset recovery. - Page 11 General Information Evaporator Frost Control Phase Monitoring protection This input incorporates the Frostat™ control (FOS) located on Precedent units with 3-phase power are equipped with phase the indoor coil and can be activated by closing a field supplied monitoring protection as standard. These devices protect contact installed in parallel with the FOS.
-
Page 12: Pre-Installation
Pre-Installation WARNING Fiberglass Wool! Exposure to glass wool fibers without all necessary PPE equipment could result in cancer, respiratory, skin or eye irritation, which could result in death or serious injury. Disturbing the insulation in this product during installation, maintenance or repair will expose you to airborne particles of glass wool fibers and ceramic fibers known to the state of California to cause cancer through inhalation.... -
Page 13: Dimensions And Weights
Dimensions and Weights Figure 1. Typical installation clearances for single and multiple unit applications WSC036-048H, W/DHC036H Units WSC060H, WSC092-120H, W/DHC048-120H Units RT-SVX23R-EN... - Page 14 Dimensions and Weights WARNING WARNING Heavy Objects! Improper Unit Lift! Failure to properly lift waterbox could result in death or Failure to properly lift unit in a LEVEL position could serious injury. result in unit dropping and possibly crushing operator/ Each of the individual cables (chains or slings) used to technician which could result in death or serious injury, lift the waterbox must be capable of supporting the...
- Page 15 Dimensions and Weights Figure 2. Rigging and center-of-gravity data (a) (b) Table 2. Factory installed options (fiops)/accessory net weights (lbs) WSC036H-048H, WSC060H, WSC092-120H, W/DHC036H W/DHC048-060H W/DHC074-102H W/DHC120H Net Weight Net Weight Net Weight Net Weight Accessory 3 to 4 Tons 4 to 5 Tons 6 to 10 Tons 10 Tons...
- Page 16 Dimensions and Weights Figure 3. Heat pump - 3 to 4 tons standard efficiency, Figure 6. Heat pump - 3 to 4 tons standard efficiency, 3 tons high efficiency 3 tons high efficiency - unit clearance and roof opening Note: 2-in.
- Page 17 Dimensions and Weights Figure 9. Heat pump - 3 to 4 tons standard efficiency, Figure 11. Heat pump - 3 to 4 tons standard efficiency, 3 tons high efficiency - economizer, manual or 3 tons high efficiency - swing diameter for motorized fresh air damper;...
- Page 18 Dimensions and Weights Figure 14. Heat pumps - 5 to 10 tons standard efficiency, Figure 17. Heat pumps - 5 to 10 tons standard efficiency, 4 to 8.5 tons high efficiency - horizontal 4 to 8.5 tons high efficiency - downflow duct airflow supply and return connections field fabricated Note: Reference tabular information for duct clearance to combustible materials in...
- Page 19 Dimensions and Weights Figure 20. Heat pumps - 5 to 10 tons standard efficiency, Figure 23. Heat pump - 10 tons high efficiency 4 to 8.5 tons high efficiency - swing diameter Note: 2-in. Electrical Connection: single point power when heat installed. for hinged door(s) option INDOOR TOP PANEL OUTDOOR TOP PANEL...
- Page 20 Dimensions and Weights Figure 26. Heat pumps - 10 tons high efficiency - Figure 28. Heat pumps - 10 tons high efficiency -swing downflow duct connections field fabricated diameter for hinged door(s) option Note: Reference tabular information for duct clearance to combustible materials in the application consideration chapter.
-
Page 21: Installation
Installation Foundation Figure 30. Heat pumps - 5 to 10 tons standard efficiency, 4 to 8.5 tons high efficiency - horizontal Horizontal Units airflow supply and return If the unit is installed at ground level, elevate it above the snow line. -
Page 22: Roof Curb
Installation Roof Curb Figure 32. Heat pump - 3 to 4 tons standard efficiency, 3 tons high efficiency - downflow airflow The roof curbs for these units consists of a "full perimeter" supply/return - through-the-base utilities enclosure to support the unit just inside of the unit base rail. The W/DHC120H unit contains a support base alignment rail 3 5/8”... -
Page 23: Rigging
Installation If a Curb Accessory Kit is not used: Figure 35. View for base to roof curb alignment • The ductwork can be attached directly to the factory- W/DHC120H on 50 x 84 roof curb provided flanges around the unit’s supply and return air openings. -
Page 24: General Unit Requirements
Installation • Verify correct model, options and voltage from unit Figure 37. Fork lift pockets (all heat pump units except nameplate. W/DHC120H) • Verify that the installation location of the unit will provide the required clearance for proper operation. • Assemble and install the roof curb (if applicable). -
Page 25: Horizontal Discharge Conversion Wsc060H, Wsc092-120H, W/Dhc048-120H
Installation Horizontal Discharge Conversion Figure 39. Supply duct cover WSC060H, WSC092-120H, Supply Duct Cover W/DHC048-120H Note: 5 to 10 tons standard efficiency units and 4 to 10 tons high efficiency supply cover to return opening and return cover to supply opening. For mixed airflow conversions, additional duct covers will be required. -
Page 26: Tco-A Instructions
Installation terminals. Next, remove the two screws which secure it to Figure 43. Supply and return openings the heater element mounting plate. Once TCO-A has been removed from the heater element mounting plate, discard this device. Figure 44. TCO-A location Supply duct cover Insulation side down... -
Page 27: Air-Fi ® Wireless Communication Interface
Installation ® Air-Fi Wireless Communication Figure 45. Downflow view Interface The factory installed wireless communications interface is installed in the downflow discharge position. If a unit is to be converted to horizontal discharge, the following conversion must be performed: 1. If the unit has an economizer, it must be pulled out in the operating position. -
Page 28: Main Electrical Power Requirements
Installation Main Electrical Power 4. Disconnect the 5-in. pipe nipple and union from the “Through-the-Base Gas” kit assembly. Requirements 5. Using pipe sealant, attach the 6½-in. nipple and gas shutoff assembly to the 90° elbow on the gas supply line. 6. -
Page 29: Electric Heat Requirements
Installation Electric Heat Requirements To convert drain condensate through-the-base of unit: • Verify that the power supply complies with the electric heater specifications on the unit and heater nameplate. 1. Remove evaporator access panel and supply air access panels. • Inspect the heater junction box and control panel;... -
Page 30: Filter Installation
Installation Drain Pan Removal (Units with Condensate Standard Wiring Overflow Switch Option) 1. Location of the applicable electrical service entrance is Before drain pan removal, the switch wire must be illustrated in the Dimensions and Weights chapter. disconnected from wire tie on panel and/or any tape before Complete the unit's power wiring connections at the main drain pan can be removed. -
Page 31: Field Installed Control Wiring
Installation Figure 52. W/DHC120H WARNING Hazardous Voltage! Failure to disconnect power before servicing could result in death or serious injury. Disconnect all electric power, including remote disconnects before servicing. Follow proper lockout/ tagout procedures to ensure the power can not be inadvertently energized. -
Page 32: Controls Using Dc Analog Input/Outputs (Standard Low Voltage Multiconductor Wire)
Installation Controls Using DC Analog Input/Outputs Figure 53. ReliaTel™ conventional thermostat field (Standard Low Voltage Multiconductor wiring diagram Wire) RTRM Before installing any connecting wiring between the unit and components utilizing a DC analog input/output signal, refer to the Dimensional information in the Dimension and Weights chapter for the electrical access locations provided on the unit. - Page 33 Installation Figure 55. Customer control low voltage routing (all units except W/DHC120H) REFRIGERATION COMMUNICATION REFRIGERATION COMMUNICATION MODULE INTERFACE INTERFACE MODULE UNPOWERED CONVENIENCE OUTLET ReliaTel™ CONVENTIONAL WIRING ReliaTel™ ROUTE FIELD WIRING AS SHOWN TBU WIRING SECURE FIELD AND SECURE WITH 2 WIRE TIES ROUTE FIELD WIRING AS SHOWN INSTALLED WIRING AND SECURE WITH 3 WIRE TIES...
-
Page 34: Space Temperature Averaging (Reliatel™ Only)
Installation Figure 57. ReliaTel™ (with TBUE) control customer wire routing (W/DHC120H) Space Temperature Averaging (ReliaTel™ only) Space temperature averaging is accomplished by wiring a number of remote sensors in a series/parallel circuit. Using the BAYSENS016* or BAYSENS077*, at least four sensors are required to accomplish space temperature averaging. - Page 35 Installation Figure 58. Examples Note: Wiring pin numbers are for reference only. There are multiple smoke detector systems that could have differently numbered pins. For correct wiring details, please refer to the specific smoke detector literature that accompanied this unit. RT-SVX23R-EN...
- Page 36 Installation Figure 59. Typical field wiring diagrams for optional controls BA YSENS075* BA YSENS075* BA YSENS108* BA YSENS106* BA YSENS110* BA YSENS119* BAYSENS073* BAYSENS074* BAYSENS075* ASYSTAT669A OPTIONAL REMOTE SENSOR RT-SVX23R-EN...
- Page 37 Installation Table 8. Iron pipe size (SI) millimeters Table 6. Temperature versus resistance (temperature vs. resistance is negative) Iron Pipe Size (SI) Millimeters Length of Pipe 15 mm 20 mm 25 mm 32 mm 40 mm Temperature (Meters) Pipe Pipe Pipe Pipe Pipe...
-
Page 38: Pre-Start
Pre-Start Use the checklist provided below in conjunction with the “General Unit Requirements” checklist to ensure that the unit 100 X AV - VD % Voltage Imbalance = where; is properly installed and ready for operation. WARNING Volt 1 + Volt 2 + Volt 3 Hazardous Voltage w/Capacitors! AV (Average Voltage) = Failure to disconnect power and discharge capacitors... -
Page 39: Compressor Crankcase Heaters
Pre-Start • Turn the field supplied disconnect switch that provides Before closing the main power disconnect switch, insure that power to the main power terminal block or to the “Line” side the “System” selection switch is in the “Off” position and the of the optional factory mounted disconnect switch to the “Fan”... -
Page 40: Test Modes
Pre-Start Table 9. Service test guide for component operation Test Step Mode Econ Comp1 Comp 2 Heat 1 Heat 2 Ohms Multi-Speed Fan Output Minimum Position Setpoint 2.2K Minimum Selectable Ventilation Economizer Test Open 3.3K Open Minimum Cool Stage 1 4.7K Position Minimum... - Page 41 Pre-Start Table 11. Heat pump with single zone VAV fan control CV Fan Test Step Mode Heat 1 Heat 2 SOV1 Econ S Fan Speed Command Fan On Min. Min Speed Econ 100% Min Speed Cool 1 Norm Norm Min. 57% or 70% Cool 2 Norm...
-
Page 42: Unit Start-Up
Unit Start-Up Sequence of Operation Three-Stages of Cooling Note: 6 to 10T high efficiency units only. Units are offered with two control options, electromechanical or When the unit is configured for three-stage cooling, and the ReliaTel™. system switch is set to the cool position and the zone Notes: temperature rises above the cooling setpoint control band, the •... -
Page 43: Operation (For Cooling Only Units)
Unit Start-Up ReliaTel™ Control Evaporator Fan Multi-Speed Indoor Motor Operation (for Cooling Only Units) Notes: When the fan selection switch is set to the “Auto” position, the • Multi-speed indoor fan available only on 6, 7.5 (dual RTRM energizes the (K6) relay coil approximately 1 second compressor) and 8.5 tons high efficiency, and 10 tons after energizing the compressor contactor coil (CC1) in the products with ReliaTel™... -
Page 44: Supply Air Static Pressure Limit
Unit Start-Up The supply fan will accelerate or decelerate as required to Potentiometer: reset temperature setpoint and reset amount. maintain the supply static pressure setpoint. The amount of reset applied is dependent upon how far the outdoor air temperature is below the supply air reset setpoint. Supply Air Static Pressure Limit The amount is zero where they are equal and increases linearly toward the value set at the reset amount input. -
Page 45: Variable Air Volume Applications (Single Zone Vav)
Unit Start-Up Variable Air Volume Applications Table 13. Discharge air cool setpoints (DACR) (continued) (Single Zone VAV) Setpoint (°F) Voltage (Vdc) Supply Fan Output Control 42 - 0.3 57 - 1.75 43 - 0.45 58 - 1.83 Units configured for Single Zone VAV will be controlled via the 44 - 0.55 59 - 1.9 0-10 Vdc Indoor Fan Speed output located on the RTOM. -
Page 46: Reliatel™ Control Dehumidification
Unit Start-Up When the unit is equipped with the optional fan failure switch, 2. A purge cycle will consist of transitioning to the mode that wired between terminals J7-5 and J7-6 on the RTOM, the hasn’t run in 90 minutes of total compressor operation. The RTRM will stop all cooling functions and produce an analog cycle will last for a period of 3 minutes. -
Page 47: Reliatel™ Control Heating Operation (For Cooling Only Units)
Unit Start-Up Ignition Module Two of the three methods for determining the suitability of the outside air can be selected utilizing the enthalpy potentiometer Two-stage (IGN) runs self-check (including verification that the on the ECA, as described below: gas valve is de-energized). (IGN) checks the high-limit 1. -
Page 48: Drain Pan Condensate Overflow Switch (Optional)
Unit Start-Up Table 15. Ignition module diagnostics (continued) Flame rollout (CBM failure, incorrect gas pressure, incorrect primary air). Requires manual reset of the Six blinks switch. ReliaTel™ module will communicate a heat fail Seven blinks diagnostic back to the RTRM. Drain Pan Condensate Overflow Switch (Optional) This input incorporates the condensate overflow switch (COF) -
Page 49: Sequence Of Operation - Heat Pumps
Sequence of Operation - Heat Pumps Heating Operation Emergency Heat Operation When the system switch is set to the “Heat” MODE, the RTRM When the system selection switch is in the “EM HEAT” MODE, energizes relay (K3). When the normally open (K3) contacts and the zone temperature falls below the heating setpoint open, the switch over valves (SOV1 and 2) are de-energized. -
Page 50: Units With Belt Drive Indoor Fan
Sequence of Operation - Heat Pumps When verifying direct drive fan performance, the tables must • To stop the SERVICE TEST, turn the main power be used somewhat differently than those of belt driven fans. disconnect switch to the “Off” position or proceed to the Fan performance diagnostics can be easily recognized when next component start-up procedure. -
Page 51: Reliatel™ Units Equipped With Direct Drive Indoor Plenum Fan (Optional Except For 10 Ton Units)
Sequence of Operation - Heat Pumps 1. In the indoor fan compartment, locate the R136 Table 17. RPM table potentiometer on the RTOM circuit board (also designated “DA COOL - FAN SPD”). Also, locate the TP1 test pin loop PPF-IDFRPM next to the R136 potentiometer. -
Page 52: Return Air Smoke Detector
Sequence of Operation - Heat Pumps Economizer Start-Up Figure 61. Plenum fan rpm label WARNING Live Electrical Components! Failure to follow all electrical safety precautions when exposed to live electrical components could result in death or serious injury. When it is necessary to work with live electrical components, have a qualified licensed electrician or other individual who has been properly trained in handling live electrical components perform these... -
Page 53: Compressor Start-Up
Sequence of Operation - Heat Pumps Compressor Start-Up WARNING Live Electrical Components! WARNING Failure to follow all electrical safety precautions when Live Electrical Components! exposed to live electrical components could result in Failure to follow all electrical safety precautions when death or serious injury.... -
Page 54: Heating Start-Up
Sequence of Operation - Heat Pumps Heating Start-Up Using the Service Test Guide in Table 9, p. 40, continue the SERVICE TEST start-up procedure for each compressor circuit. 1. Clamp an amp meter around one of 1 stage heater power wires at the heater contactor. -
Page 55: Maintenance
Maintenance When removing or installing the new belts, do not stretch them WARNING over the sheaves. Loosen the belts using the belt tension adjustment bolts on the motor mounting base. Hazardous Service Procedures! Once the new belts are installed, using a Browning or Gates Failure to follow all precautions in this manual and on tension gauge (or equivalent) illustrated in Figure 62, p. -
Page 56: Monthly Maintenance
Maintenance Table 18. Belt tension measurement and deflection • Inspect the evaporator and condenser coils for dirt, bent ranges fins, etc. If the coils appear dirty, clean them according to the instructions described in “Coil Cleaning” later in this Deflection Force (Lbs.) section. -
Page 57: Coil Cleaning
Maintenance Coil Cleaning 1. Remove enough panels from the unit to gain access to the coil. Regular coil maintenance, including annual cleaning, 2. Protect all electrical devices such as motors and enhances the unit’s operating efficiency by minimizing: controllers from any over spray. compressor head pressure and amperage draw;... - Page 58 Maintenance Final Process Wiring Diagram Numbers (from unit control panel) ________________________________________________ For future reference, you may find it helpful to record the unit data requested below in the blanks provided. Schematics Complete Model Number ________________________________________________ ________________________________________________ Connections Unit Serial Number ________________________________________________ ________________________________________________ Table 19.
-
Page 59: Troubleshooting
Troubleshooting 4. If a System failure is indicated, recheck Step 1 Step WARNING If the LED is not lit in Step 1, and 24 Vac is present in Step 2, the RTRM has failed. Replace the RTRM. Hazardous Service Procedures! 5. -
Page 60: Resetting Cooling And Heating Lockouts
Troubleshooting Heat Failure Zone Sensor LED 4 (Service) “On” indicates a clogged filter. Measure the voltage between terminals J6-7 and J6-6. “Off” during normal operation. Heat Operating = approximately 32 Vdc. “Flashing” indicates an evaporator or condensate overflow Heat Off = less than 1 Vdc, approximately 0.75 Vdc. switch failure. -
Page 61: Zone Temperature Sensor (Zts) Service Indicator
Troubleshooting Zone Temperature Sensor (ZTS) Test 2 Cooling Set Point (CSP) and Heating Set Point (HSP) Service Indicator Table 20. Cooling (CSP) and heating setpoint (HSP) The ZSM SERVICE LED is a generic indicator, that will signal the closing of a Normally Open switch at any time, providing Nominal ZTEMP Nominal CSP or HSP the Indoor Motor (IDM) is operating. -
Page 62: Programmable And Digital Zone Sensor Test
Troubleshooting Method 3 Unit Operation without a Zone Sensor To test LED’s with ZSM connected to unit, test voltages at LED This procedure is for temporary operation only. The terminals on ZSM. A measurement of 32 Vdc, across an unlit economizer and condenser fan cycling functions are disabled. - Page 63 Troubleshooting Table 21. Fault detection and diagnostic codes Primary Fault Codes Information Code Temp Mixed Air Outdoor Pressure Sensor Space Unit Temp Temp Economizer RTEM Dead band Fail Airflow Press Dead Unit Fails Economizing Damper Sensor Sensor Actuator Comm Fail (If Used) Sensor Fail band Fail...
-
Page 64: Mixed Air Temperature Low Limit Diagnostic
Troubleshooting Unit Economizer Control (ECA) Troubleshooting Procedures for Troubleshooting ReliaTel™ Direct Drive Plenum Fan Control Prior to troubleshooting, verify all wiring and wiring connections. The motor has internal protections that will shut Verify Economizer Status by Economizer Actuator (ECA) LED down the motor before damage occurs. -
Page 65: Wiring Diagrams
Wiring Diagrams Note: Wiring diagrams can be accessed using e-Library by entering the diagram number in the literature order number search field or by contacting technical support. Table 23. Unit wiring diagram numbers Schematic Type Voltage Drawing Number Description 208-230, 460, Control 4366-1007 6 to 7.5 Ton Heat Pump... - Page 66 Wiring Diagrams Table 23. Unit wiring diagram numbers (continued) Schematic Type Voltage Drawing Number Description Connection - 208-240 V 4366-1094 12.0 and 17.4 kW - 208 to 240 V/60 Hz/3 Ph BAYHTRR312*, BAYHTRR318* Electric Heat Connection - 208-240 V 4366-1095 23.0 kW - 208 to 40 V/60 Hz/3 Ph BAYHTRR323* Electric Heat Connection -...
-
Page 67: Limited Warranty
Limited Warranty Heat Pump WCD, WCH, WSC, WHC and Some states do not allow limitations on how long an implied warranty lasts or do not allow the exclusion or limitation of DHC (Parts Only) incidental or consequential damages, so the above limitation Models Less Than 20 Tons for Commercial or exclusion may not apply to you. - Page 68 Trane and American Standard create comfortable, energy efficient indoor environments for commercial and residential applications. For more information, please visit trane.com or americanstandardair.com. Trane and American Standard have a policy of continuous product and product data improvement and reserve the right to change design and specifications without notice.
Need help?
Do you have a question about the Precedent W/DHC036H and is the answer not in the manual?
Questions and answers