
Related Manuals for Alliance Laundry Systems SC70


Summary of Contents for Alliance Laundry Systems SC70
- Page 1 Frontload Washer Model: SC70 Product: 738299, 738458, 738316 Publish Date: 19 Feb 2021 Translation of the original instructions. Keep These Instructions for Future Reference. Part No. D2582EN May 2021 www.alliancelaundry.com...
- Page 3 Dear ALLIANCE customer! Welcome to the family of ALLIANCE customers. We hope that you will have many years of use from your new machine. The machine has many features. To make the most of its functions, we recommend that you read the operating instructions before using the machine.
- Page 4 REPLACEMENT PARTS If literature or replacement parts are required, contact the source from which the machine was purchased or contact Alliance Laundry Systems at +1(920)748-3950 for the name and address of the nearest authorized parts distributor. CUSTOMER SERVICE For technical assistance, contact your local distributor or contact:...
-
Page 5: Table Of Contents
Cleaning and maintenance ..................................................Errors what to do? ....................................................Service ............................. Before calling a service technician ................... Technical information ......................Program chart ......................... SC70 ............................Adjustment of the displayed washing time ................Removal ........................................................Quick guide ........................................................ -
Page 6: Introduction
Introduction Dear Customer, we thank you for purchasing this quality product. We hope it meets all your expectations. Scandinavian design combines pure lines, everyday functionality, and high quality. These are the key characteristics of all our products, and the reason why they are highly appreciated across the globe. -
Page 7: Safety Precautions
Safety precautions General Please read the instruction manual and save it for future reference. • Please do not use the washing machine if you have not read and understood these instructions or use first. • Failure to observe the instructions for use or inappropriate use of the washing machine may result in damage to the laundry or the appliance, or injury to the user. - Page 8 • To connect the washing machine to water supply, make sure to use the supplied water supply hose and gaskets. Water pressure has to be between 0.1 and 1 MPa (approximately 1 10 kp/cm , 1-10 bar, 10 100 N/cm •...
- Page 9 • Do not use colourants (dyes) or bleaching substances (substances for discolouration or removal of colourants) as they contain sulphuric compounds that could cause corrosion. • Excessive use of products containing chlorine compounds increases the risk of premature failure of appliance components.
- Page 10 • staff kitchen areas in shops, offices and other working environments; • farm houses; • by clients in hotels, motels and other residential type environments; • bed and breakfast type environments; • areas for communal use in blocks of flats or in launderettes. For appliances without plug, disconnection must be incorporated in the fixed wiring in accordance with the wiring rules.
- Page 11 • The washing machine is made in compliance with all relevant safety standards. This washing machine may be used by children aged 8 years and above and by persons with reduced physical, sensory or mental capabilities or lack of experience and knowledge, but only if they are supervised during the use of the appliance, if they have been provided relevant instructions regarding safe use of the washing machine, and if they understand the hazards of inappropriate...
- Page 12 • Close the water supply to the washing machine, undo the water supply hose from the water supply tap, and wait until the water flows out of the tap and the hose. • After the drain pump filter is emptied, there can still be a small amount of water in the machine.
-
Page 13: Washing Machine Description
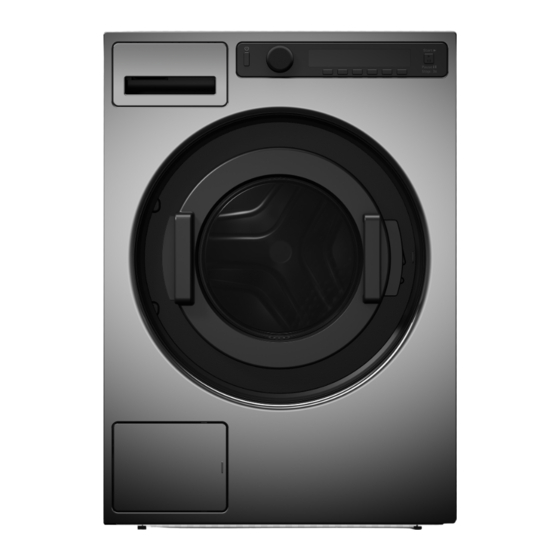
Washing machine description 1. Main switch (ON/OFF) 2. Program selector knob 3. Display 4. Program selector buttons 5. Button (start/pause) 6. Dispenser tray 7. QR and AUID code (on the inside of the washing machine door) 8. Rating plate with information about the washing machine (on the inside of the wash- ing machine door) 9. -
Page 14: Dispenser Tray
Dispenser tray Prewash compartment Compartment for main wash liquid de- tergent. Use the foldable barrier (3). Compartment for main wash powder detergent. Do not use the foldable barrier (3). Softener / conditioner compartment Tab for detergent compartment remov-... -
Page 15: Before Using For The First Time
Before using for the first time Packaging Remove all packaging. Please sort the materials in compliance with local recommendations (see chapter "DISPOSAL"). Transport protection Before using the appliance, remove the three transport bolts and plastic plugs which protect the appliance during transport. Release and remove the bolts as shown in the figures. - Page 16 Cleaning Disconnect the washing machine from the power mains and open the door. Clean the washing machine drum with a damp cloth and a mild detergent. In the case of a 3 phase connection of the appliance, switch off the main socket switch. Connect the washing machine to the power mains and run the dedicated drum cleaning program.
-
Page 17: Installation And Connection
Installation and connection Positioning the washing machine The washing machine can be installed as a built-in (integrated) or a free-standing unit. Place the machine on a level surface so that the power outlet on the wall is accessible. INFORMATION! Before connecting the washing machine to the power mains, wait for at least 2 hours until it reaches room temperature. - Page 18 Opening the washing machine door (top view) Stacking a dryer on top of a washing machine To stack a dryer on top of a washing machine, use the extra vacuum feet and the tipping guard (A+B), supplied in the cardboard box in the dryer drum.
- Page 19 Adjusting the feet Place the washing machine so that it is stable. 1. Level the washing machine in longitudinal and traverse direction by rotating the adjustable feet (using a No. 32 spanner). The feet allow levelling by +/- 1 cm. 2.
- Page 20 The water intake hose has to be fastened firmly enough for the hose to have a good seal. After connecting the hose, the seal must be checked for any leaks. Only use the water supply hose supplied with the appliance. Do not use any used or other hoses. INFORMATION! If the connection on the supply hose is of different dimensions than the water tap (e.g.
- Page 21 Drain hose can also be connected directly to the washbasin drain via a siphon. In this case, the hose, should be 600 900 mm above the floor. Internal hose diameter should be at least 18 mm. See figure. At least 18 mm...
- Page 22 Connecting to the power mains ELECTRIC SHOCK! After installation, the washing machine should stand still for two hours before it is connected to the power mains. Connect the appliance to an earthed power outlet. After installation, the wall outlet should be freely accessible.
-
Page 23: Tips Before Washing
Tips before washing This chapter includes several tips on how to prepare the laundry for washing. Laundry sorting Sort the laundry according to: • how soiled it is, • colour, • material. Clothing 1. Close the zips and hook-and-loop fasteners so that they do not damage the fabric. 2. - Page 24 Table continued from last page Perchloroethylene R11, R113, petroleum Dry cleaning in kerosene, pure alcohol, and R113 Dry cleaning not allowed Ironing Ironing with a hot iron with a maximum temperature of 200 °C Ironing with a hot iron with a maximum temperature of 150°C Ironing with a warm iron with a maximum temperature of 110°C Ironing not allowed Natural drying...
- Page 25 Reducing allergic reactions The options include washing with the Allergy Program Cotton and Allergy Program Synthetics. These programs can be used for people with sensitive skin, such as those suffering from allergies, or small children. Saving time and energy Save time and energy by using the Quick program Economy and efficiency You can save a lot of energy by not using the programs operating at higher temperatures.
-
Page 26: Washing Process Step By Step (1-8)
Washing process step by step (1-8) STEP 1: Sort the laundry See chapter "TIPS BEFORE WASHING". INFORMATION! Use a washing net for underwire bras. Empty the pockets. Coins, nails etc. could damage the machine and the fabric. STEP 2: Turn on the main switch. Turning on Press the on/off button. - Page 27 STEP 4: Add the detergent and the conditioner. Recommended amount of detergent is usually specified on the detergent packaging. When washing a smaller amount of laundry, the amount of detergent used can be decreased. Observe manufacturers' recommendations regarding the type of detergent suitable for certain temperatures, load size, and water hardness.
- Page 28 Choose the program depending on the type of laundry and how heavily soiled it is (see chapter "TIPS BEFORE WASHING"). Estimated program duration will appear on the display. Choose between the following programs: (owner/distributor can change parameters and rename the program) Programe (factory default Description program)
- Page 29 Table continued from last page Programe (factory default Description program) DRAIN Use this program when you only want to drain the water from the machine. MOP 60°C A program specially developed for cleaning mops. MOP 90°C A program specially developed for cleaning mops. MICROFIBRE 40°C A program specially developed for cleaning microfibre fabrics.
- Page 30 STEP 6: Choosing the program settings Using the program settings, the washing programs can be further adjusted to your wishes. See chapter: SETTINGS. (only appliance owner/distributor may change the settings) Some program settings may not be available for your selected program. Start delay Choose the delayed start when you wish the washing program to start after a certain period of time (from 1 h to 100 h after you press the Start button).
- Page 31 Adding or removing laundry after the start of the program To add laundry during washing program, you must first select the enable/disable option. (See chapter: SETTINGS). To add or remove laundry during the progress of a washing program, use the Start/Pause button to pause the program.
- Page 32 If you do not take any action within 5 minutes after the end of the program, the display will switch off to standby mode in order to save power. The display will light up again if you press the ON/OFF button. WARNING! After the washing cycle, close the water tap and pull out the washing machine plug from the power socket.
-
Page 33: Settings
Settings Only appliance owner/distributor may change the settings! (owner/distributor should check Service manual) On display Setting Description Max. RPM no Drain --> max. rpm Setting affect all programs Drain Valve/Drain Setting of draining via valve or pump, depending on the type of appliance;... - Page 34 Table continued from last page On display Setting Description Child Lock On/Off Choose between switching the Child lock On or Off. When the child lock is activated, no other function can be selected. Programmes Selected program will be shown on display Set Language Select your language - press •...
- Page 35 Table continued from last page On display Setting Description Add Clothes function is available in Wash phase on majority of the programs. Add clothes function is available also on program Rinse (only during first rinse on Rinse pro- gram). If water level is higher than al- lowed to open door, water will be pumped out.
-
Page 36: Cleaning And Maintenance
Cleaning and maintenance Cleaning the filter The washing machine has a filter that will retain smaller objects such as coins, buttons, hair etc. Before cleaning, drain the water from the washing machine using the Drain program, and disconnect the washing machine from the power mains. Open the pump filter cover using appropriate tools (emergency door opening tool is located on the back side of the dispenser). - Page 37 Cleaning the detergent compartment and door rubber gasket Press the tab to completely remove the detergent compartment from its housing. Rinse and thoroughly clean the tray. You may also remove the cap from the plug in the condi- tioner compartment (A). Clean any residue from the cap and tube.
- Page 38 INFORMATION! Do not clean the washing machine with a jet of water! ELECTRIC SHOCK! Always disconnect the washing machine from the power mains before cleaning. In the case of a 3 phase connection of the appliance, switch off the main socket switch. Cleaning the washing machine interior against odours Modern detergents often allow washing clothes at low temperatures.
- Page 39 Table continued from last page Hold the rib with the other hand and pull it to- wards you. Lift the drum rib. Remove any objects. Place the rib into the installation slot indicated with "F" towards you. Make sure all ribs are firmly in place in their respective slots in the drum.
-
Page 40: Errors What To Do
Errors what to do? Disturbances from the environment (e.g. the power grid) may result in various error reports (see Troubleshooting table). In such case: • Switch off the appliance, wait for 1 minute, switch the appliance back on, and repeat the washing program. - Page 41 Table continued from last page Problem/error Cause What to do? Washing time is • Low inlet water temperat- • Program duration can be up to 60% longer than anti- ure. longer than initially anticipated in the nor- cipated (the time mal progress.
- Page 42 Table continued from last page Problem/error Cause What to do? There are white • This is not due to poor • Immediately rinse the laundry again. residues of wash- rinsing by your washing • Use liquid detergents that do not contain ing powder on the machine, but rather due to zeolites.
- Page 43 Table continued from last page Problem/error Cause What to do? • Increase the amount of laundry in the washing machine and restart the program (see "STEP 7: Start the wash / Adding or removing laundry after the start of the program").
- Page 44 Manual opening of washing machine door ELECTRIC SHOCK! Washing machine door may be opened manually if the appliance is not connected to the power mains and if the water has been pumped out of the machine. A. Choose the Spinning or Drain program to pump the water from the machine. If this does not work, water has to be drained from the washing machine drum manually.
- Page 45 Failure display In case of a failure while a program is in progress, the relevant Error XX is indicated on the display unit. Press the INFO button to display the error description. Switch off the appliance and turn it back on. Errors indicated on the display unit may include the following: Error Error indication on the...
- Page 46 Table continued from last page Error Error indication on the What to do? display unit Overflow If there is water in the drum that exceeds a certain level, and an error is reported on the display unit, the washing program will be interrupted and water will be pumped out of the washing machine.
- Page 47 Smaller loads (e.g. one towel, one sweater, one bathrobe etc.) or clothes made of materials with special geometrical properties are virtually impossible to distribute evenly across the washing machine drum (slippers, large items etc.). This results in several attempts to redistribute the laundry, which in turn leads to longer program duration.
-
Page 48: Service
Service Before calling a service technician When you contact a service centre, please state the model (1), type (2), and serial number (3) of your washing machine. Model, type, and serial number are indicated on the rating (type) plate located on the washing machine door casing. -
Page 49: Technical Information
Technical information Height 850 mm Width 595 mm Depth 585 mm Weight 76,5 /77,0 /82,5 kg (depending on the model) Drum volume 60 l Rated power See rating plate Heater power See rating plate Water pressure 0,1 1 MPa 1 10 kp/cm 10 100 N/cm Emission sound pressure level in accordance <... -
Page 50: Program Chart
Program chart SC70 Water consump- tion (approxim- ately, in litres) Program Eco 40-60 1400 0,90 2:55 Heavy wash 60°C 1400 1,30 1:50 Heavy wash 90°C 1400 2,30 2:20 White/Color 20°C 1400 0,14 1:15 White/Color 40°C 1400 0,25 1:20 White/Color 60°C... -
Page 51: Adjustment Of The Displayed Washing Time
Table continued from last page Water consump- tion (approxim- ately, in litres) Program Allergy Synthetic 60°C 1200 0,80 1:55 Cleaning 1,10 1:10 Program A 1400 Program B 1400 Program C 1400 Program D 1400 Program E 1400 Program F 1400 Program G 1400 Program H... - Page 52 Unevenly distributed laundry or lumps of laundry in the washing machine drum can cause problems such as vibration and noisy operation. The appliance can sense such lumps and will try to redistribute the laundry. Smaller loads (e.g. one towel, one sweater, one bathrobe etc.) or clothes made of materials with special geometrical properties are virtually impossible to distribute evenly across the washing machine drum (slippers, large items etc.).
-
Page 53: Removal
Removal Disposal / recycling of packaging Our product packaging is made of environmentally friendly materials that can be recycled, disposed of, or destroyed without any hazard to the environment. To this end, packaging materials are labelled appropriately. The symbol on the product or its packaging indicates that the product should not be treated as normal household waste. -
Page 54: Quick Guide
Quick guide Sort the laundry. Close the zippers. Empty the pockets and turn them inside out. Check the laundry care symbols. Sort the laundry based on how heavily soiled it is, by colour, and by material. Switch on the main ON/OFF switch Open the washing machine door and insert the laundry. - Page 55 Alliance CE s.r.o. Místecká 1116 742 58 Příbor Czech Republic We reserve the right to make changes. 577592-a5...
Need help?
Do you have a question about the SC70 and is the answer not in the manual?
Questions and answers