Mocka Hamptons Assembly Instructions Manual
Entertainment unit
Hide thumbs
Also See for Hamptons:
- Assembly instructions manual (18 pages) ,
- Manual (12 pages) ,
- Assembly instructions (5 pages)
Advertisement
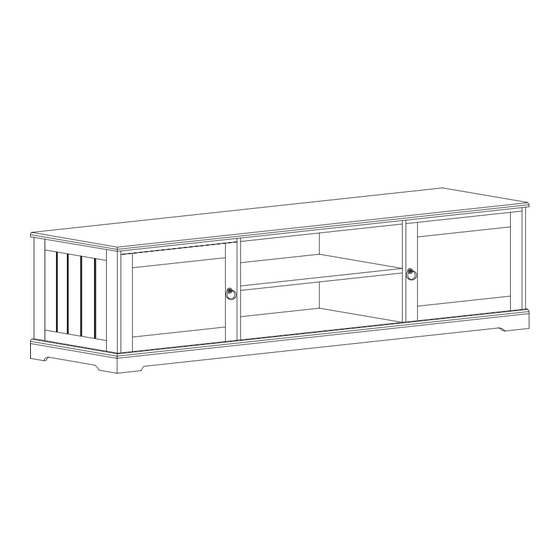
Hamptons
Entertainment Unit
Thank you for your purchase.
Please follow the instructions below for correct assembly
C
A
B
bolt
locking
dowel
x12
nut x12
x20
F
G
H
shelf
long
cover
plug x2
screw x 2
x 4
P
K
L
screw
wedge
hinge
x24
x12
x 4
Hardware Supplied
mocka.co.nz I mocka.com.au I PO BOX 18, Pinkenba QLD 4008
D
E
stopper
long screw
x8
x2
I
J
long
handle
screw x 5
x 2
1
.
Phillips & Flathead screwdrivers and hammer required.
For quicker assembly, we recommend the use of
a power drill on a low-speed setting.
*We recommend using a Flathead screwdriver to tighten
all locking nuts 100% before first use.
Please clear any loose wood from the locking nut holes
before inserting the nut to ensure it locks 100%.
Advertisement
Table of Contents

Related Manuals for Mocka Hamptons


Summary of Contents for Mocka Hamptons
- Page 1 *We recommend using a Flathead screwdriver to tighten all locking nuts 100% before first use. Hardware Supplied Please clear any loose wood from the locking nut holes before inserting the nut to ensure it locks 100%. mocka.co.nz I mocka.com.au I PO BOX 18, Pinkenba QLD 4008...
- Page 2 Insert 8 x bolt (A) into panels [1] .Attach 5 x screw (J) into panel [6] and[1]. Attach 4 x bolt (A) into panel [5] and[7]. Tighten with a screwdriver. Tighten with a screwdriver. mocka.co.nz I mocka.com.au I PO BOX 18, Pinkenba QLD 4008...
- Page 3 Insert 8 x dowel (C) into panel [1]. Attach panel [1] to panels [3] and [4],[5] and [7] and secure with 4 x locking nuts (B). and[7] and secure with 8 x locking nuts (B). Cover locking nuts (B) with 4x covers (H). mocka.co.nz I mocka.com.au I PO BOX 18, Pinkenba QLD 4008...
- Page 4 Attach centre support 2 xshekf plug (G) to panel [2]. Attach 2 x long screw (F) to centre support (G) asshown. Insert 2 x stopper (E) into panel [5] and[7]. Insert 8 x dowel (C) into panel [2]. mocka.co.nz I mocka.com.au I PO BOX 18, Pinkenba QLD 4008...
- Page 5 Attach 12x wedge (P1) to panel [9] and [10] . Tighten with a screwdriver. Attach 4x hinge (K) to panel [12] and secure with 8 x small screw (L). Insert 2 x bolts (I) into panel [12] . mocka.co.nz I mocka.com.au I PO BOX 18, Pinkenba QLD 4008...
- Page 6 Attach panel [11] to panel as shown. Secure with 16 x screws (L). Tighten with a screwdriver. mocka.co.nz I mocka.com.au I PO BOX 18, Pinkenba QLD 4008...
Need help?
Do you have a question about the Hamptons and is the answer not in the manual?
Questions and answers