Table of Contents
Advertisement
Quick Links
Advertisement
Table of Contents

Related Manuals for BenQ V5000i


Summary of Contents for BenQ V5000i
- Page 1 Digital Projector User Manual V5000i V 1.00...
-
Page 2: Warranty And Copyright Information
For other information, please visit www.BenQ.com. Copyright Copyright © 2023 by BenQ Corporation. All rights reserved. No part of this publication may be reproduced, transmitted, transcribed, stored in a retrieval system or translated into any language or computer language, in any form or by any means, electronic, mechanical, magnetic, optical, chemical, manual or otherwise, without the prior written permission of BenQ Corporation. -
Page 3: Table Of Contents
Table of Contents Warranty and Copyright information ................2 Important safety instructions ..................4 Introduction ........................8 Shipping contents ......................8 Projector exterior view ....................11 Controls and functions ....................12 Positioning your projector .................... 15 Obtaining a preferred projected image size..............15 Adjusting the projected image .................. -
Page 4: Important Safety Instructions
Important safety instructions Your projector is designed and tested to meet the latest standards for safety of information technology equipment. However, to ensure safe use of this product, it is important that you follow the instructions mentioned in this manual and marked on the product. - Page 5 9. Do not place this product on an 11. Do not block the ventilation holes. unstable cart, stand, or table. The - Do not place this projector on a blanket, product may fall, sustaining serious bedding or any other soft surface. - Do not cover this projector with a cloth or any damage.
- Page 6 3000 m it from the power supply's power outlet (10000 feet) and call BenQ to have the projector serviced. (0 feet) 17. This apparatus must be earthed. To avoid damaging the DLP chips, never aim a high-power laser beam into the projection lens.
- Page 7 Notice To ensure safe use of this product, please read the user manual for details before you operate your projector. Risk Group 2 Laser Caution 1. According to the classification of This product belongs to CLASS 1 consumer photobiological safety of light sources laser product and complies with IEC and light source systems, this product is 60825-1:2014, EN 60825-1:2014/A11:2021...
-
Page 8: Introduction
• The supplied accessories will be suitable for your region, and may differ from those illustrated. • *The warranty card is only supplied in some specific regions. Please consult your dealer for detailed information. Optional accessories • BenQ 3D glasses • Universal wall mount Introduction... - Page 9 Installing the Android TV dongle You must first install the Android TV dongle before you can begin to use the projector. To install the dongle: 1. Remove the wireless dongle compartment cover. 2. Connect the Micro USB cable located in the compartment to the Micro USB port on the dongle.
- Page 10 Replacing the remote control batteries Only use the remote control provided with the projector. Do not use the remote control included in the QS02 Android TV dongle packaging. 1. Push down and open the battery cover, as illustrated. 2. Remove the old batteries (if applicable) and install two AAA batteries.
-
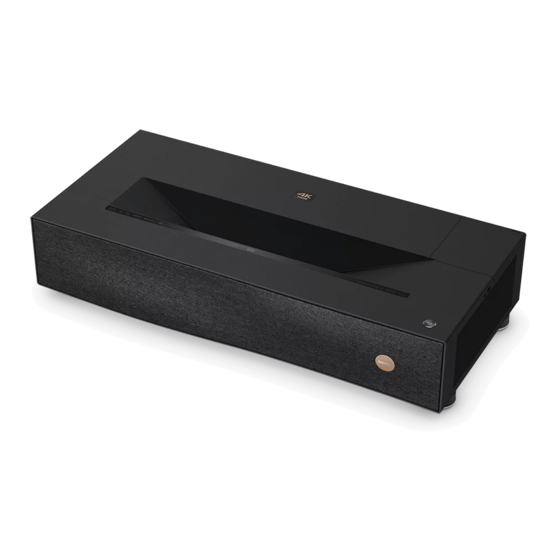
Page 11: Projector Exterior View
Projector exterior view SPDIF AUDIO HDMI 3 HDMI 2 HDMI 1 SERVICE RS-232 HDCP 2.2 HDCP 2.2 HDCP 2.2 TRIGGER AUDIO RETURN+ 2.5A 1.5A 12 13 14 15 16 17 18 19 20 1. Eye protection sensors 13. HDMI input port 2. -
Page 12: Controls And Functions
Controls and functions Remote control Only use the remote control provided with the projector. Do not use the remote control included in the QS02 Android TV dongle packaging (availability of the QS02 remote control may vary by country/region). 3. Arrow keys ( , All the key presses described in this document are available on the remote Navigates up/down/left/right to select a... - Page 13 13. OK Confirms a selected item in the ATV or projector OSD menu. When the input source is ATV, press OK to play or pause a video or audio file during media playback. Android TV home screen Displays Android TV home screen. Android settings Displays Android settings.
- Page 14 Remote control effective range Only use the remote control provided with the projector. Do not use the remote control included in the QS02 Android TV dongle packaging. The remote control must be held at an angle within 30 degrees perpendicular to the projector's IR remote control sensor(s) to function correctly.
-
Page 15: Positioning Your Projector
All measurements are approximate and may vary from the actual sizes. BenQ recommends that if you intend to permanently install the projector, you should physically test the projection size and distance using the actual projector in situ before you permanently install it, so as to make allowance for this projector's optical characteristics. -
Page 16: Adjusting The Projected Image
Adjusting the projected image Adjusting the projection angle If the projector is not placed on a flat surface or the screen and the projector are not perpendicular to each other, the projected image becomes trapezoidal. You can rotate the adjuster feet to fine-tune the image. - Page 17 • To correct keystoning at the left side of the image, use • To automatically correct the vertical and horizontal sides of the distorted image, press OK for 2 seconds. 3. When done, press to save your changes and exit. Screen Adjustment To make manual adjustments to the projected image and correct for any distortions or to fine-tune the image, you can use the Screen Adjustment menu.
-
Page 18: Connection
Connection When connecting a signal source to the projector, be sure to: 1. Turn all equipment off before making any connections. 2. Use the correct signal cables for each source. 3. Ensure the cables are firmly inserted. Notebook or Projection desktop computer Screen Speakers... -
Page 19: Operation
Operation Starting up the projector 1. Plug the power cord. Turn on the power outlet switch (if necessary). The power indicator on the projector lights orange after power has been applied. 2. Press on the projector or the remote control to start the projector. -
Page 20: Qs02 Android Tv Setup
QS02 Android TV setup Before you start Check that you have: • A Wi-Fi Internet connection • A Google Account Pairing the remote control If you have not previously paired the projector’s remote control to the QS02 Android TV dongle, the Android TV setup process will require that you do so by simultaneously pressing and holding the back and home screen buttons on the remote control. - Page 21 Set up your device There are 3 options to set up your device • Quick Setup using an Android phone • Using your phone or computer • Using your remote control If using the remote select Not Now on the remote control tutorial screen. Operation...
- Page 22 Display Android TV home screen For more information, visit https://support.google.com/androidtv/ Operation...
-
Page 23: Playing Media Files On A Usb Flash Drive (Media Reader)
Playing media files on a USB flash drive (Media Reader) To play media files stored on a USB flash drive you must use the Media Reader USB Type-A port on the right side of the projector. MEDIA READER Do not use the USB Type-A port at the rear of the projector to play media files, it does not support data transfer and is only used to supply power. -
Page 24: Using The Menus
Using the menus The projector is equipped with On-Screen Display (OSD) menus for making various adjustments and settings. The OSD screenshots below are for reference only, and may differ from the actual design. Below is the overview of the Basic OSD menu. Main menus Current input signal Press OK to enter view a menu... -
Page 25: Securing The Projector
Securing the projector Using a security cable lock The projector has to be installed in a safe place to prevent theft. Otherwise, purchase a security cable to secure the projector. A security bar is located on the right side of the projector. -
Page 26: Upgrading Firmware
1. Check and write down your firmware version from the Information > Firmware Upgrade menu. 2. Call BenQ service center to provide the version number and verify the projector is free from firmware compatibility problem.Avoid turning on the projector immediately after turning it off as excessive heat may shorten light source life. -
Page 27: Menu Operation
Menu operation Menu system Please note that the on-screen display (OSD) menus vary according to the signal type selected and the projector model you are using. The menu items are available when the projector detects at least one valid signal. If there is no equipment connected to the projector or no signal detected, limited menu items are accessible. - Page 28 0 - 100 Contrast 0 - 100 Color 0 - 100 Tint 0 - 100 Sharpness 0 - 15 1.8/2.0/2.1/2.2/2.3/2.4/2.5/2.6/ Gamma Selection BenQ Color Temperature R Gain G Gain B Gain Color Temperature Tuning R Offset G Offset Advanced Color B Offset...
- Page 29 Main menu Sub-Menu Options Advanced Color Noise Reduction Off/Low/Middle/High Setting Picture Reset Current Reset/Cancel Picture Mode Cinema Music Sound Mode Game Sports User 100Hz -10 – 10 300Hz -10 – 10 User EQ 1kHz -10 – 10 4kHz -10 – 10 10kHz -10 –...
- Page 30 Screen Adjustment Manual Focus Installation Set Calibration When Offsetting Set Calibration When Offsetting Auto Screen Adjustment Sensitivity Test Pattern Off/On Smart Guide BenQ ALR Screen Off/On High Altitude Mode Off/On 12V Trigger Off/On 9600/14400/19200/38400/57600/ Baud Rate 115200 Language Eye Protection...
- Page 31 Options Reminder Message Off/On LED Indicator Off/On Direct Power On Power On/Off Operation Settings Settings Auto Power Off System BenQ HDMI Media Off/On Streaming (QS02) Firmware Upgrade Factory Default Reset/Cancel Reset System Reset/Cancel Detected Resolution Source Picture Mode Light Source Mode...
-
Page 32: Basic Menu
Basic menu The projector is preset with several predefined picture modes so that you can choose one to suit your operating environment and input signal picture type. • Bright: Maximizes the brightness of the projected image. This mode is suitable for environments where extra-high brightness is required, such as using the projector in well lit rooms. - Page 33 • HLG: Delivers Hybrid Long Gamma effects by adding a logarithmic curve with extra brightness over the top of the signal. This mode is only available when HLG is enabled. • ISF Night: Only available when ISF is enabled. Picture Mode •...
-
Page 34: Advanced Menu
Menu Type Switches to the Advanced OSD Menu. See Advanced menu on page Advanced menu Picture Picture Mode Picture Mode on page Details Adjusts the level of detail clarity. The higher the effect, the more details will be shown but with lower black performance. Adjustment •... - Page 35 Gamma Selection Gamma refers to the relationship between input source and picture brightness. • 1.8/2.0/2.1/BenQ: Select these values according to your preference. • 2.2/2.3: Increases the average brightness of the picture. Best for a lit environment, meeting room or family room.
- Page 36 Advanced Color Temperature Tuning Advanced color temperature is used for fine-tuning White Balance from the bright parts to the dark parts of the video by different brightness levels which are divided into 11 points signal levels (%). Users can adjust the intensity of Red/Green/Blue in the range of 0 - 200 for the color temperature of selected point at different brightness levels.
- Page 37 CinemaMaster • Color Enhancer Allows you to fine-tune the saturation of colors with larger flexibility. It modulates complex color algorithms to flawlessly render saturated colors, fine gradients, intermediate hues and subtle pigments. • Flesh Tone Provides a smart adjustment of hue only for calibrating people's skin color, not other colors in the image.
- Page 38 Audio A variety of sound modes enables user to select and adjust the best mode Sound Mode that matches current environment. Select desired frequency bands (100Hz, 300Hz, 1kHz, 4kHz, and 10kHz) to User EQ adjust the levels according to your preference. The settings made here define the User mode.
- Page 39 (with 3D game discs), 3D Blu-ray players (with 3D Blu-ray discs), and so on. After you have connected the 3D video devices to the projector, wear the BenQ 3D glasses and make sure the power is on to view 3D contents.
- Page 40 HDMI Format Selects a suitable RGB color range to correct the color accuracy. • Auto Automatically selects a suitable color range for the incoming HDMI signal. • Limited HDMI Settings Utilizes the Limited range RGB 16-235. • Full Utilizes the Full range RGB 0-255. HDMI Equalizer Sets a suitable value to maintain the HDMI picture quality in long distance data transmission.
- Page 41 2D Keystone Correcting keystone on page 16 for details. • Before using 2D Keystone ensure that the auto screen adjustment camera lens is clean and not covered by dust and that there are no obstructions in front of the projection wall/screen.
- Page 42 Enabling this feature will optimize the picture mode for BenQ ALR screens. BenQ ALR Please ensure that you have installed the ALR screen before turning on this Screen feature.
- Page 43 BenQ video display devices. Accordingly, we recommend that setup and calibration be performed by an ISF certified installation technician.
- Page 44 Allows the projector to turn off automatically if no input signal is detected after a set period of time to prevent unnecessary waste of lamp life. BenQ HDMI Media Streaming (QS02) Enables or disables functions related to Android TV dongle (QS02).
-
Page 45: Maintenance
Maintenance Care of the projector Cleaning the lens Clean the lens whenever you notice dirt or dust on the surface. Please be sure to turn off the projector and let it cool down completely before cleaning the lens. • Use a canister of compressed air to remove dust. •... - Page 46 Light Source Usage Time = (hours used in Normal mode) + (hours used in ECO mode) + (hours used in SmartEco mode) Total (equivalent) light source hour = 1.0 x (hours used in Normal mode) + 1.0 x (hours used in ECO mode) + 1.0 x (hours used in SmartEco mode) For time used in each light source mode shown in OSD menu: •...
- Page 47 Normal power-down cooling 0.5s 0.5s 0.5s 0.5s Download TI 0.5s 0.5s 0.5s 0.5s Burn-in ON Burn-in OFF 0.5s 0.5s 0.5s 0.5s CW failed 0.5s 0.5s 0.5s 0.5s PW failed 0.5s 0.5s 0.5s 0.5s Light source events Light source error in normal operation 0.5s 0.5s 0.5s...
-
Page 48: Troubleshooting
Troubleshooting The projector does not turn on. Cause Remedy Plug the power cord into the AC power jack on the projector, and plug the power cord into the power There is no power from the power cord. outlet. If the power outlet has a switch, make sure that it is switched on. -
Page 49: Specifications
180 W (Max); < 0.5 W (Standby) Mechanical Please visit below website and choose your country to find your service contact window. Weight http://www.benq.com/welcome 13.2 Kg + 200 g (29.12 + 0.44 lbs) Transporting Output terminals Original packing or equivalent is recommended. -
Page 50: Dimensions
119.854 77.425 Blanking) XGA_60 60.004 48.363 XGA_70 70.069 56.476 XGA_75 75.029 60.023 78.75 1024 x 768 XGA_85 84.997 68.667 94.5 XGA_120 (Reduce 119.989 97.551 115.5 Blanking) 1152 x 1152 x 864 67.5 864_75 BenQ 1024x576 Notebook 35.82 46.996 Timing Specifications... - Page 51 Refresh User Clock Resolution Mode rate frequency Manual (MHz) (Hz) (kHz) Supported BenQ 1024x600 Notebook 64.995 41.467 51.419 Timing 1280 x 1280x720 74.25 XXXX XXXX 720_60 1280 x 1280 x 768 59.87 47.776 79.5 768_60 WXGA_60 59.81 49.702 83.5 WXGA_75 74.934...
- Page 52 Refresh User Clock Resolution Mode rate frequency Manual (MHz) (Hz) (kHz) Supported 1920x1080 1920X1080_ @240HZ 3840x2160_ 3840x2160 30 For 4K2K 67.5 model 3840x2160_ 3840x2160 60 For 4K2K model • XXXX: Support auto-detect 3D and manually set 3D format. If source can output CEA861 720p/1080p and color space is RGB with 3D info frame then 3D auto detect function is also workable.
- Page 53 • XXXX: Support auto-detect 3D and manually set 3D format. If source can output CEA861 720p/1080p and color space is RGB with 3D info frame then 3D auto detect function is also workable. • XXX: Support manually set 3D format. •...
Need help?
Do you have a question about the V5000i and is the answer not in the manual?
Questions and answers