
Related Manuals for Canon IX-R7000


Summary of Contents for Canon IX-R7000
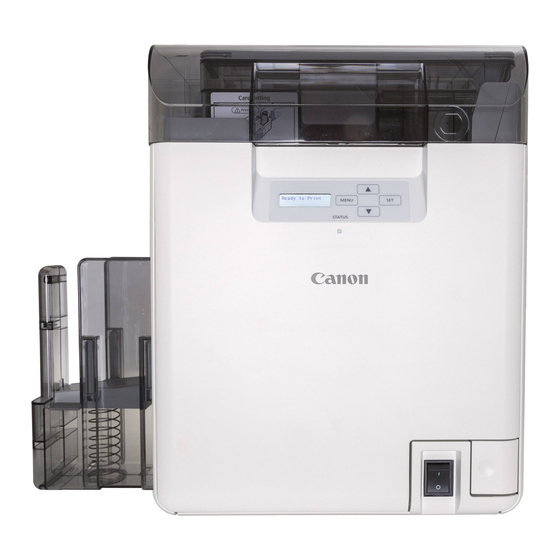
- Page 1 IX-R7000 Getting Started Guide Read this guide rst. Please read this guide before operating this product. When nished reading, store it in a safe place for future reference.
- Page 2 About Instruction Manuals Thank you for purchasing the Canon IX-R7000. The following manuals come with this product. ⨋ Getting Started Guide (This Manual) • Read this manual first. • This manual describes the procedures for installing and making preparations for using this product.
-
Page 3: Table Of Contents
Table of Contents Before You Begin ..........................1 Conventions ..............................1 Sample Screens ............................. 1 Trademarks ............................... 2 Abbreviations ..............................2 Request to the Customer ........................2 Legal Notice ..............................2 Important Safety Instructions ..................4 Installation ............................11 Setup Flow ..............................11 Step 1. Preparation for Installation ....................12 Step 2. -
Page 4: Before You Begin
Indicates helpful reference information for using the manual. Indicates an operation that must not be performed. Read these items carefully, and make sure not to perform the described operations. Sample Screens The sample IX-R7000 printer driver screens displayed in this manual were created with Windows 10. -
Page 5: Trademarks
Trademarks • Canon and the Canon logo are trademarks of Canon Inc. • Microsoft and Windows are trademarks or registered trademarks of Microsoft Corporation in the United States and/or other countries. • Adobe and Acrobat are trademarks of Adobe Systems Incorporated. - Page 6 Do not make any changes or modifications to the equipment unless otherwise specified in the manual. If such changes or modifications should be made, you could be required to stop operation of the equipment. CANON U.S.A., INC. One Canon Park, Melville, NY 11747, U.S.A. TEL No. 1-855-852-2666...
-
Page 7: Important Safety Instructions
Important Safety Instructions Prior to using this printer, please read this section ("Important Safety Instructions") thoroughly. Warnings and important matters are described here to ensure safe use of this product. Do not attempt to operate this printer in any way other than those mentioned in the manual. ■... - Page 8 • Do not place the printer in an unstable location; e.g., on a wobbling or inclined table, or a location subject to frequent vibrations. The printer could fall down or fall over, resulting in personal injury. • Never place the printer where it will be exposed to rapid changes in temperature, such as indirect sunlight, near an air conditioner, or in a car on a hot day.
- Page 9 CAUTION • To avoid damaging the power plug, which could cause a short circuit and cause a fire or electrical shock, do not pull on the power cord to unplug the cord from the power supply. Always grip the plug to remove it from the power supply.
- Page 10 CAUTION • If the printer is dropped and damaged, turn the printer off immediately, disconnect the power plug from the power outlet, and contact your place of purchase. If you continue to use the printer, this could cause a fire or serious electrical shock. •...
- Page 11 ■ Moving CAUTION • Turn the printer off prior to moving it. Remove the power plug from the power outlet, and disconnect the interface cable. Otherwise, the power cord and other cables could be damaged, resulting in a fire or electric shock.
- Page 12 The power cord is subjected to stress, for example, it is pulled excessively or secured with staples. The power plug is loose. The power cord is tied in a bundle. The power cord protrudes into a walkway. The power cord is placed in front of heating appliance. CAUTION •...
- Page 13 The faces of two cards are in contact for an extended period of time. The card is kept for an extended period of time in a very hot location such as a car parked in the sun. The card is bent, or used with excessive force. •...
-
Page 14: Installation
Installation Setup Flow Step 1. Preparation for Installation (P. 12) Step 2. Installing the Printer (P. 14) Step 3. Installing the Ink Ribbon/Transfer Film/Cleaning Tape (P. 15) Step 4. Loading the Cards (P. 24) Step 5. Turning the Printer On (P. 26) Step 6. -
Page 15: Step 1. Preparation For Installation
Step 1. Preparation for Installation Checking the Installation site. 11.8" (300 The printer needs the installation space shown in the diagram below. Also, maintain at least of open space above the printer. • Installation space Top view Front view • Temperature and humidity Temperature: 50 to 86 degrees Fahrenheit (10 to 30 degrees Celsius ) Humidity: 20% to 80% RH (without condensation) WARNING... - Page 16 - A location exposed to oily smoke or steam; e.g., near a countertop or humidifier. - A location exposed to rain or snow. - A location exposed to salty wind. - A location subject to high temperatures. - A location near open flames. •...
-
Page 17: Step 2. Installing The Printer
Step 2. Installing the Printer Move the printer to the installation site. CAUTION • Carry the printer as shown in the above. Holding the printer in any other way may cause injury, diagram or damage to the printer. Remove all pieces of the packaging and fixing tape from the printer. Attaching the card stacker. -
Page 18: Step 3. Installing The Ink Ribbon/Transfer Film/Cleaning Tape
Step 3. Installing the Ink Ribbon/Transfer Film/Cleaning Tape Prepare the ink ribbon/transfer film (sold separately). The cleaning tape is included with the transfer film. → Installing the Ink Ribbon (P. 15) ● Installing the Ink Ribbon → Installing the Transfer Film (P. 19) ●... - Page 19 Remove the ink ribbon cassette. Pull out the handle of the ink ribbon cassette with the handle turned up. Note • When placing the ink ribbon cassette down, in order to prevent debris adhering to it, place it with the handle on the bottom. Take the new ink ribbon out of the package.
- Page 20 Load the ink ribbon spindle (magenta) into the magenta cassette holder. As shown in the diagram, push the ink ribbon spindle into the cassette holder at an angle ( a ), and straighten it in the direction of arrow ( b ). ...
- Page 21 Insert the ink ribbon cassette. Insert the ink ribbon cassette until a "click" is heard. Note • When inserting the ink ribbon cassette, insert while turning the knob in order to prevent slack. Ink ribbon slack may lead to abnormalities in the print.
- Page 22 ■ Installing the Transfer Film Remove the transfer film cassette. Pull out the handle of the transfer film cassette with the handle turned up. Note • When placing the transfer film down, in order to prevent debris adhering to it, place it with the handle on the bottom. Push the pin down on top of the transfer film cassette.
- Page 23 Take the new transfer film out of the package. The transfer film has a spindle with a white holder and a spindle with a black holder. Cleaning tape White holder Black holder Load the transfer film (black) spindle into the white cassette holder. As shown in the diagram, push the transfer film spindle into the cassette holder at an angle ( a ), and straighten it in the...
- Page 24 Attach the pin on top of the transfer film cassette. Tightly fit the tip of the pin into the grooves. Note • Make sure that the transfer film is running between the two pins on top of the transfer film cassette. Take up the transfer film slack.
- Page 25 Insert the transfer film cassette. Insert the transfer film cassette until a "click" is heard. Note • When inserting the transfer film, insert the film while turning the knob in order to prevent slack. Transfer film slack may lead to abnormalities in the print. ■...
- Page 26 Attaching the cleaning tape. 1. Raise the holder and insert the cleaning tape. 2. Push the holder until you hear it click, and set the cleaning tape. 3. Peel off and remove the protective film on the cleaning tape surface. Insert the cleaning tape cassette.
-
Page 27: Step 4. Loading The Cards
Step 4. Loading the Cards Open the top cover and the card case cover. 1. Pull the lock lever, and open the cover. Lock lever Load the cards. 1. Pull the card retainer. Hold the card retainer lever with your fingers, and pull it right out. - Page 28 • The printing side of the card (front surface) is on the left. When using pre-printed cards that have a specified orientation, load the cards so that after printing, the printed upper surface is at the rear of the cassette. 3.
-
Page 29: Step 5. Turning The Printer On
Step 5. Turning the Printer On Make sure that the power switch is turned off (“O” is pressed). Connect the power cord. 1. Joint the connector of the power cord to the printer inlet. 2. Insert the power plug of the power cord in the outlet. - Page 30 Press the power switch to turn the power on. After [Initializing..] appears on the LCD panel, the operating indicator turns blue and [Ready to Print] appears. When the IXR-YMCKK of ink ribbon is loaded, "Ribbon Type" error messages is displayed. Change type setting of the ink ribbon in the user mode.
- Page 31 ▼ Press the key until [Ribbon Setup] is displayed, then press the SET key. Printer Info. SET:>> Ribbon Setup Ribbon Type SET:>> ▼ Press the key until [Ribbon Type] is displayed, then press the SET key. Ribbon Type Ribbon Type YMCK YMCK ▲/▼...
-
Page 32: Step 6. Installing The Printer Driver
Step 6. Installing the Printer Driver The printer can be connected to a computer with a USB connection or an Ethernet local area network (LAN) connection. → Using the Printer via a USB Cable (P. 29) ● To connect the printer with a USB cable →... - Page 33 Insert the supplied printer driver CD in the CD-ROM drive. Note • If [User Account Control] dialog box appears, click [Yes]. • The installation window may not appear depending on the CD-ROM drive auto run setting. In this case, go through the following.
- Page 34 3. Select [Agree]. Carefully review the software license agreement. 4. Click [Next]. 5. Follow the screen below, prepare to install, and click [Next]. 6. Click [Start].
- Page 35 7. Check [Always trust software from "CANON FINETECH NISCA INC."] checkbox. 8. Click [Install]. 9. When the printer connection screen appears, connect the USB cable. Installation will begin when the printer is recognized. Do not insert or remove USB cable.
- Page 36 ■ Using the Printer via a LAN Cable • Connection to the corporate LAN must be made by a network administrator. • See “Using the printer via a network” in “Printer Driver Manual” for network settings. • If the printer is not on the same network as the computer, then use the operation panel to set the printer network settings.
- Page 37 Select the language of the printer driver. 1. Select "English", "Spanish", or "Portuguese". 2. Click [Next]. Install the printer driver. 1. Select [Use network for the connection of printer and the computer]. 2. Click [Next]. 3. Select [Agree]. Carefully review the software license agreement.
- Page 38 5. Connect the printer to the network using a LAN cable. Do not insert USB cable. In this case, the connection of LAN cable is not recognized. 6. Click [Next]. 7. Click [Start]. [Network port setting] screen appears . ...
- Page 39 8. When this printer is displayed, select one of the followings. If printer settings are complete, click this printer and then click [Select]. If printer settings are not complete, click this printer and then click [Printer Setting]. Note •...
- Page 40 11. Check [Always trust software from "CANON FINETECH NISCA INC."] checkbox. 12. Click [Install]. 13. Click [Finish]. 14. Remove the printer driver CD, and then click [Yes]. Rebooting of the computer will begin automatically. This completes installation of the driver.
-
Page 41: Specifications
Specifications Product name IX-R7000 Function Double-sided printing (full color) Print system Thermal retransfer system Print media Material: PVC, PET, PET-G, Composite PVC, PC Thickness: 0.03"(0.76mm) * with ID sheet: 0.03" - 0.04" (0.76mm - 1.00 mm) Size: according to CR-80 standards (3.37" x 2.13" (86 mm x 54 mm)) - Page 42 CANON U.S.A., INC. One Canon Park, Melville, NY 11747, U.S.A. www.usa.canon.com 4Y5-8973-030 CANON FINETECH NISCA INC. 2018-2023 PRINTED IN CHINA...
Need help?
Do you have a question about the IX-R7000 and is the answer not in the manual?
Questions and answers