Table of Contents
Advertisement
Quick Links
Advertisement
Table of Contents

Subscribe to Our Youtube Channel
Related Manuals for Miele professional PT 5135 C


Summary of Contents for Miele professional PT 5135 C
- Page 1 Operating and installation instructions for condenser tumble dryer PT 5135 C en - GB To avoid the risk of accidents or damage to the machine it is essential to read these instructions before it is installed, commissioned and used for the first time.
-
Page 2: Caring For The Environment
Caring for the environment Disposal of the packing Energy saving tips material To avoid unnecessarily long drying times and high consumption of energy: The transport and protective packing has been selected from materials which – Make sure that your laundry is are environmentally friendly for disposal thoroughly spun before drying. -
Page 3: Table Of Contents
Contents Caring for the environment ......... . 2 Warning and Safety instructions . - Page 4 Contents Cleaning the heat exchanger ........35 Removing the heat exchanger .
- Page 5 Contents Technical data ........... 52 Settings menu .
-
Page 6: Warning And Safety Instructions
Warning and Safety instructions It is essential to read these instructions. This tumble dryer complies with current safety requirements. Inappropriate use can, however, lead to personal injury and damage to property. To avoid the risk of accidents and damage to the tumble dryer, please read these instructions carefully before using it for the first time. - Page 7 Warning and Safety instructions The tumble dryer can only be used by people with reduced physical, sensory or mental capabilities, or lack of experience or knowledge, if they are are supervised whilst using it or have been shown how to use it in a safe way and recognise and understand the consequences of incorrect use.
- Page 8 Warning and Safety instructions The electrical safety of this tumble dryer can only be guaranteed when correctly earthed. It is essential that this standard safety requirement is met. If in any doubt, please have the electrical installation tested by a qualified electrician. Miele cannot be held liable for the consequences of an inadequate earthing system (e.g.
- Page 9 Warning and Safety instructions Please observe the instructions in "Installation and connection" and "Technical data". The socket must be easily accessible after installation in order to disconnect the tumble dryer from the electricity supply. For hard-wired machines, the all-pole isolator provided on-site must be easily accessible after installation in order to disconnect the tumble dryer from the electricity supply.
- Page 10 Warning and Safety instructions Correct use The maximum load of dry laundry for this tumble dryer is 6.5 kg. See the Programme chart for the maximum recommended loads in individual programmes. Do not let anyone sit or lean on the door, as this can cause the tumble dryer to tip up.
- Page 11 Warning and Safety instructions The dryer must not be used without the fluff filters in place or if the fluff filters are damaged in any way. Damaged filters can cause operational faults and blockages in the airways, condenser unit and heating elements.
- Page 12 Warning and Safety instructions To prevent the risk of fire, the following textiles must not be dried in this tumble dryer: – items which have not been washed. – items, such as workwear, which have not been thoroughly cleaned and which are still soiled with grease, oil or other deposits (such as cosmetics, lotions etc).
- Page 13 Warning and Safety instructions Danger. This tumble dryer must not be connected to a controllable socket (e.g. a timer switch or a peak load shut-off device). If the dryer programme were to be interrupted before the end of the cooling down phase, the laundry could self-combust. To prevent the risk of fire, the following must not be tumble dried: –...
- Page 14 Warning and Safety instructions Benzine, petrol, paraffin or any easily flammable liquid must not be stored or used near the tumble dryer. Danger of fire and explosion. Do not allow air contaminated with chlorine, fluorine or other vapours containing solvents to get into the tumble dryer. Fire hazard.
- Page 15 Warning and Safety instructions Accessories Only use genuine Miele original spare parts and accessories with this tumble dryer. If non-Miele parts are used, guarantee, performance and product liability claims may be invalidated. A Miele tumble dryer can be stacked on top of a Miele washing machine using the appropriate stacking kit (available as an optional accessory).
-
Page 16: Operating The Tumble Dryer
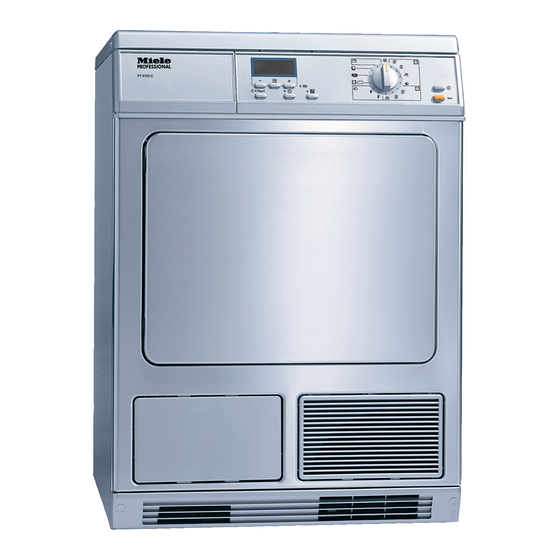
Operating the tumble dryer Control panel a Display f Low temperature button The display lights up when the For drying delicate fabrics (Care label symbol r). machine is switched on. As soon as the dryer is ready to use, g Programme selector the Entry menu appears in the The programme selector can be display. -
Page 17: Display
Operating the tumble dryer Display The following are shown in the display: – Programme selection – Programme duration and the programme start and end time The following are selected via the display – Special programmes Automatic (if activated) Denim Shirts –/+ buttons Outerwear Proofing... -
Page 18: Before Using For The First Time
Settings menu. the Entry menu appears. : 00 When the tumble dryer is switched on for the first time, the Miele Professional welcome screen will appear. Set the time of day ^ Set the hour with the - and + buttons,... -
Page 19: Notes And Tips On Laundry Care
Notes and tips on laundry care 1. Sort the laundry – New dark-coloured garments should be washed and dried separately Garment care label symbols from light-coloured garments the first few times they are washed, to avoid Drying the risk of colours running and Normal/higher temperature discolouring other garments or even the plastic components in the tumble... -
Page 20: Load The Tumble Dryer
Notes and tips on laundry care 2. Load the tumble dryer 3. Select a programme – On many programmes, different Using the tumble dryer drying levels can be selected incorrectly could cause a fire. Read depending on individual the "Warning and Safety instructions" requirements before using the machine. -
Page 21: Short Instructions
Short instructions A Sort the laundry It is very important to read the "Notes and tips on laundry care" section before proceeding. B Load the tumble dryer To avoid damaging your laundry, when shutting the door check that no items of laundry have become trapped in the door opening. - Page 22 Short instructions C Select a programme To select a Special programme ^ Press the On/Off button s briefly to A selection of programmes will appear switch on. in the display when you select Special programmes. Please note: Denim – If no further selection is made within 15 minutes, the dryer will switch off Shirts automatically.
- Page 23 Short instructions Low temperature button Changing the programme sequence ^ For drying particularly sensitive Further information about the following fabrics (care symbol r), e.g. can be found under "Changing the acrylics, press the Low temperature programme sequence": button. – Coin box Because the heater rating is reduced –...
- Page 24 Short instructions Before the end of a programme There is a cooling down phase at the end of the drying sequence: Cooling down will appear in the display. The programme will not finish until the cooling down phase has been completed.
-
Page 25: Delay Start
Delay start To begin delay start Depending on the Delay start setting, ^ Press the Start button. you can set the time you wish a programme to finish or start at, or you Normal can delay the start of the programme. Factory default: Delay start not activated. -
Page 26: Programme Chart
Programme chart Basic programmes Cottons max. 6.5 kg Normal+, Normal** Use for – Single and multi-layered cotton fabrics such as: – Towelling, T-shirts, underwear, flannelette bed linen and baby clothes. – Workwear, jackets, cotton blankets, aprons, face flannels, tea towels, bed linen, towels, table linen that can be washed hot, overalls. - Page 27 Programme chart Towelling max. 6.5 kg Normal+ Use for – Large quantities of single-layer and multi-layer towelling items. – Towels, dressing gowns, face flannels, towelling bedding. Smoothing max. 3 kg Use for – Cotton and linen fabrics. – Minimum iron mixed fibre, cotton or synthetic fabrics, e.g.: trousers, anoraks, shirts.
-
Page 28: Special Programmes
Programme chart Special programmes Denim max. 3.5 kg Normal, Hand iron r Use for – Denim garments, e.g. jeans, jackets, skirts, shirts. Shirts max. 2.5 kg Normal, Hand iron r Use for – Shirts and blouses. Outerwear max. 3.5 kg Normal, Hand iron r Use for –... - Page 29 Programme chart Standard pillows max. 2.5 kg Normal Use for – Feather or down pillows. – Quantity: 2 pillows 80x80 cm Delicates max. 4 kg Normal+, Normal, Hand iron r Use for – Delicate cotton, synthetic and mixed fibre fabrics –...
- Page 30 Programme chart Basket programmes (20-90 min) Note – The drying basket (optional accessory) must be in place when items are dried or aired using this programme. – To prevent the risk of damage when the drum rotates, do not place large items which could come into contact with the drum or drum ribs in the drying basket (e.g.
-
Page 31: Changing The Programme Sequence
Changing the programme sequence Payment system Adding or removing laundry after a programme has started Opening the door or cancelling the programme after it has started may The laundry, the drum and the cause loss of credit (depending on back of the machine all become how the machine was set up*). -
Page 32: Cleaning And Care
Cleaning and care ^ Remove any fluff from the hollow part Cleaning the fluff filters of the door opening. You could also Fluff from items being dried is collected use a cleaning brush which is by the fluff filters in the door and the available as an optional extra from door opening. -
Page 33: Cleaning Them With Water
Cleaning and care Cleaning them with water Replacing the filters If there is a great deal of compacted Do not replace the filters if they fluff on any of the filters, they can be are damp or wet. Damp or wet filters removed and cleaned under hot could cause operational faults. -
Page 34: Cleaning The Tumble Dryer
Cleaning and care Cleaning the tumble dryer Disconnect the tumble dryer from the mains electricity supply. Do not use solvents, abrasive cleaners, glass cleaners or all-purpose cleaners. These could damage plastic surfaces and other parts. The tumble dryer must never be hosed down. -
Page 35: Cleaning The Heat Exchanger
Cleaning and care Cleaning the heat exchanger Check the heat exchanger unit regularly. It should always be cleaned immediately the Clean condenser unit or Clean out airways message appears. Removing the heat exchanger ^ Turn the lever on the inner cover downwards to the vertical position. -
Page 36: Checking The Condenser Unit (Heat Exchanger Unit)
Cleaning and care If you can see some fluff: ^ Clean the condenser unit as described below. To clean the condenser unit ^ Use a shower head or similar to rinse the unit out as shown. ^ Pull the condenser (heat exchanger) unit out of its housing by the handle. -
Page 37: Replacing The Condenser Unit
Cleaning and care ^ Check the condenser unit again for Replacing the condenser unit any visible fluff, and if necessary ^ Push the condenser unit all the way flush it through again until it has all back into the housing, until it clicks gone. -
Page 38: Problem Solving Guide
Problem solving guide Problem solving guide With the help of the following notes minor faults in the performance of this dryer, some of which may result from incorrect operation, can be put right without contacting the Service Department. Repair work to electrical appliances should only be carried out by a suitably qualified person in accordance with current local and national safety regulations. - Page 39 Problem solving guide Problem Possible cause Remedy Power failure If the dryer is switched off – After switching the dryer on / Programme during a drying programme power has been restored, stopped or there has been a power confirm with OK and start the cut: programme again.
-
Page 40: An Unsatisfactory Drying Result
Problem solving guide An unsatisfactory drying result Problem Possible cause Remedy The laundry is not The load consisted of – Finish drying using the sufficiently dry. different fabrics. Warm air programme. – Select a different programme next time (see "Programme chart"). -
Page 41: Other Problems
Problem solving guide Other problems Problem Possible cause Remedy The drying You might be asked to Please check all possible clean the ducting causes, described below. process goes on too long or even system/filters again. switches off. Ventilation to and from the Open a door or window while dryer may be insufficient, the dryer is in operation for... - Page 42 Problem solving guide Problem Possible cause Remedy Water leaks from – The inner cover of the – Ensure that the the dryer after the condenser unit has not condenser unit is condenser unit has been locked properly positioned correctly and been cleaned.
- Page 43 Problem solving guide Problem Possible cause Remedy The programme does No obvious cause. – Is the dryer switched not start and the display is dark. – Is the door closed properly? – Has the fuse or circuit breaker tripped? When the power comes back on after a power cut, confirm with OK and start the programme...
-
Page 44: Changing The Lamp
Problem solving guide Changing the lamp The lamp specification and Disconnect the tumble dryer from maximum wattage is stated on the the mains electricity supply. data plate and on the lamp cover. ^ Open the door. ^ Replace the lamp. ^ To close the cover push it upwards You will find the interior lamp cover at the top of the drum aperture. -
Page 45: After Sales Service
After sales service Repairs PC / Optical interface In the event of any faults which you The indicator or check light marked PC cannot remedy yourself, or if the tumble on the fascia panel is the interface used dryer is under guarantee, please by Miele service technicians during contact servicing work for testing purposes and... -
Page 46: Installation And Connection
Installation and connection Front view a Mains connection cable f External drainage options (e.g. via wash basin, wash basin drain outlet b Control panel or gully) c Door Optional accessory: Extension hose d Service panel for condenser unit g Intake and exhaust vents for cooling the condenser unit e Four height adjustable screw feet... -
Page 47: Side View
Installation and connection Side view View from above Rear view Washer-dryer stack a Protruding lid edge (see arrows) for The tumble dryer can be combined with holding when moving the tumble a Miele washing machine in a dryer. washer-dryer stack. A stacking kit is required which can be purchased from b Air exhaust vent for cooling the Miele. -
Page 48: Installing The Tumble Dryer
Installation and connection Installing the tumble dryer Levelling the machine Make sure the dryer door can be opened without hindrance after installation. Transporting the dryer to its installation site The machine must be perfectly level to ensure safe and proper operation. When moving the dryer, hold it by the lid where it protrudes to the rear. -
Page 49: Room In Which The Dryer Is Located
Installation and connection Payment system Never block the vents on the The dryer can be fitted with a payment dryer. system (optional accessory). In order to ensure sufficient This must be connected and ventilation to the dryer, do not programmed by a Miele Service reduce the vent gap between the technician. -
Page 50: External Drainage Of The Condensed Water
Installation and connection External drainage of the condensed water The condensed water is pumped away through the drain hose which is located at the back of the dryer at the bottom. Drain hose length: ....2 m Delivery head: . -
Page 51: Electrical Connection
Installation and connection Electrical connection If the machine is disconnected All electrical work must be from the electricity supply adequate carried out by a suitably qualified measures must be taken to ensure and competent person in that the machine cannot be accordance with current local and reconnected to the electricity supply national safety regulations (BS 7671... -
Page 52: Technical Data
Technical data Height 850 mm Width 595 mm Depth 710 mm Depth with door open 1188 mm Weight 58 kg Drum volume 130 litres Maximum capacity 6.5 kg dry weight Length of connection cable 1600 mm Voltage Connected load Fuse rating See data plate Lamp wattage Test certificates awarded... - Page 53 Changing default settings Default settings can be altered to adapt the tumble dryer to different requirements. Depending on the programmable status, the Settings/Supervisor level menu can be locked with a code to prevent it being accessed by unauthorised personnel (the Language J setting can still be altered).
-
Page 54: Settings Menu
Settings menu Opening the Settings menu Closing the Settings menu Back A If the Settings menu is not locked, some of the settings may be Language F changed. Supervisor level A The entry menu showing the current ^ Select Back and confirm your time of day will appear after the dryer selection with the OK button. -
Page 55: Language J
Settings menu Language J You can select the language displayed via the Languages J sub-menu. Enter code The flag after the word Language acts ^ Use the + button to enter the first as a guide to prevent a language which number. -
Page 56: Anti-Crease
Settings menu Anti-crease Time of day At the end of the programme the First select whether you want the drum can be set to rotate at intervals clock displayed as a 24 hour or 12 for one or two hours to prevent hour clock, or to not display it at all. -
Page 57: Standby
Settings menu Standby You cannot extend the cooling down time for the Warm air, Cool air, To save energy, the display goes out Woollens handcare or Smoothing after 10 minutes and the indicator programmes. light for the Start button flashes slowly. -
Page 58: Clean Out Airways
Settings menu Clean out airways Clean condenser unit The electronic unit in the dryer Check the condenser unit from time detects the degree of a blockage to time, and clean it if necessary. caused by fluff or detergent residues The Clean the condenser unit in the fluff filter or ducting, and the maintenance message will remind following prompt comes up in the... -
Page 59: Delay Start
Settings menu Delay start You can set a later start time using Delay start (see "Delay start"). You can decide how this time is displayed. – Programme end The finish time for the programme is selected. – Programme start The start time for the programme is selected. - Page 60 United Kingdom Miele Co. Ltd. Fairacres, Marcham Road Abingdon, Oxon, OX14 1TW Customer Contact Centre Tel: 0330 160 6600 Malaysia E-mail: mielecare@miele.co.uk Miele Sdn Bhd Internet: www.miele.co.uk Suite 12-2, Level 12 Menara Sapura Kencana Petroleum Australia Solaris Dutamas No. 1, Jalan Dutamas 1 Miele Australia Pty.
Need help?
Do you have a question about the PT 5135 C and is the answer not in the manual?
Questions and answers