
Related Manuals for Miele professional PT 8203 SL WP


Summary of Contents for Miele professional PT 8203 SL WP
- Page 1 Operating instructions Heat pump dryer PT 8203 SL WP To avoid the risk of accidents or damage to the en - GB, IE machine, it is essential to read these instructions before it is installed and used for the first time.
-
Page 2: Tips For Saving Energy
Caring for the environment Disposal of the packing material Tips for saving energy The packaging is designed to protect the This heat-pump tumble dryer offers the appliance from damage during transporta- latest technological features. These help tion. The packaging materials used are se- reduce its energy consumption during dry- lected from materials which are environ- ing by about 50 % compared to the energy... -
Page 3: Table Of Contents
Contents Caring for the environment .................... 2 Tips for saving energy ......................2 Warning and Safety instructions.................. 5 Description of the machine .................... 11 Drying .......................... 13 Laundry preparation ......................13 Important notes about drying....................14 Before using for the first time ....................15 Commission the machine.................... - Page 4 Contents Communication module XKM RS232.................. 34 Technical data ........................35 Electrical connection ...................... 35 Installation data ...................... 35 Emissions ........................ 35...
-
Page 5: Warning And Safety Instructions
Warning and Safety instructions This tumble dryer complies with current safety requirements. Inappropriate use can, however, lead to personal injury and damage to property. To protect yourself and to avoid the risk of damage to the tumble dryer, please read these instructions carefully before using it for the first time. - Page 6 Warning and Safety instructions Preventing problems Empty all pockets to prevent the risk of flammable items such as lighters and cosmetics getting into the tumble dryer. To prevent the risk of fire, do not dry the following textiles in the tumble dryer: –...
- Page 7 Warning and Safety instructions Technical safety This tumble dryer complies with current safety requirements. Inappropriate use can, however, lead to personal injury and damage to property. This tumble dryer must only be set up and commissioned by a Miele Service technician or authorised Miele Service Dealer.
- Page 8 Warning and Safety instructions Heat pump and refrigerant: – This tumble dryer uses refrigerant gas which is not flammable and not explosive. – After transporting the machine to its installation site allow it to stand for approx. 30 minutes before connecting it to the electrical supply. This is to protect the heat-pump from damage.
- Page 9 Warning and Safety instructions Correct use The max. dry laundry weight is 10 kg. Do not damage, remove or bypass the safety features and control elements of the tumble dryer. Only operate the tumble when all removable outer panels are in place so that it is im- possible to touch an electrical component or moving part.
- Page 10 Warning and Safety instructions If any damage is found on the copper pipes on the heat-pump stop using the machine and vacate the room. – Warn other people present of the danger. – Please see the safety data sheet for further information regarding the handling of this re- frigerant.
-
Page 11: Description Of The Machine
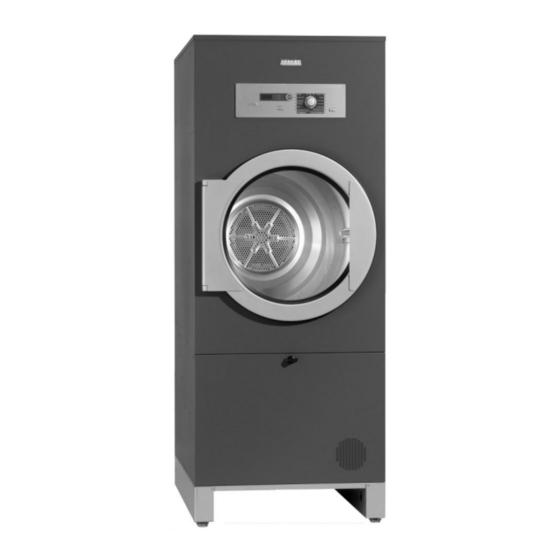
Description of the machine Control panel Electrical connection with controls with cable gland Drum door Shaft for communication module Pull the door handle to open the drum XKM RS 232 door. Never use force to open the door. Optional accessory Fluff filter compartment cover Condensate drainage Turn the handle to open the fluff filter Air outlet vent... - Page 12 Description of the machine ① ② Extra dry 10% moisture 20% moisture 20% moisture Delicates 25% moisture Woolens 40% moisture Timed drying - warm air Timed drying - cool air A: Minimum iron B: Cottons ③ ④ ⑤ ⑥ ⑦ ⑧...
-
Page 13: Drying
Drying Laundry preparation Not all textiles are suitable for drying in a tumble dryer. Please ob- serve the symbols on the textile care label. Symbols on care labels: – dry with normal temperature. – dry with low temperature –... -
Page 14: Important Notes About Drying
Drying Important notes about drying Protect the drum from damage (scratches and dents). Before placing items in the tumble dryer wrap any large metal parts such as buckles, hooks, clasps and zips etc. with a cloth. Items with closed metal zips can cause the moisture sensing elec- trodes in the drum ribs to be bridged. -
Page 15: Before Using For The First Time
Close the drum door. Be careful not trap any items in the door when closing it. Trapped items can get damaged. Load capacities (dry weight) PT 8203 SL WP Drum volume 200 litres Cottons Load capacity 8-10 kg Minimum iron... -
Page 16: Selecting A Programme
Drying Selecting a programme Extra dry 10% moisture 20% moisture 20% moisture 25% moisture Delicates 40% moisture Woollens Timed drying - warm air Timed drying - cool air A: Minimum iron B: Cottons Minimum iron For drying synthetic and mixed fibre textiles. Cottons For drying cotton and linen textiles. -
Page 17: Lowering The Temperature
Drying Select a pro- Use the "Programme selector" to select your programme. gramme The LED next to the programme selected will light up. The pro- gramme is now set. The segment display will then either show the residual moisture level as a % or the time remaining in minutes. -
Page 18: After The End Of A Programme
Drying After the end of a programme Open the drum door. If the drum door is left closed, the dryer will start up again for a brief period every 30 minutes for safety reasons. Unload the tumble dryer. Make sure nothing is left in the drum. -
Page 19: Adding Or Removing Individual Items
Drying Adding or remov- Caution when adding or removing laundry after a programme ing individual has started! items Do not reach into a rotating drum to remove laundry. Danger or ser- ious injury to fingers, hands and arms. Always make sure that the drum is stationary before reaching in to remove laundry. -
Page 20: Reprogramming
Reprogramming Changing standard options Tip: Individual drying programmes can be altered to suit specific re- quirements, practices and processes. Before you start, first ensure that: – the tumble dryer has been switched off with the switch. – the door is closed. To access programming level Go to program- Press and hold the /... -
Page 21: Go To Programming Level
Reprogramming Example of reprogramming To alter the Make sure you are in programming level to select the programmable buzzer at the end function P2. of a programme Turn the rotary programme selector one click clockwise. The "low temperature" LED will flash briefly twice. ... -
Page 22: Programmable Functions
Reprogramming Programmable functions Programmable function Programming option Factory default Buzzer volume 0 = Buzzer quiet 1 = Buzzer loud Buzzer at end of programme and/or in the event of a 0 = not used fault 1 = at end of programme or when there is a fault 2 = only for faults 3 = only at end of programme 4 = not used... - Page 23 Reprogramming Programmable function Factory Programming option default P 19 Residual moisture for prog. 1 Cottons Extra dry -2 % -4 % -6 % -7 % P 20 Residual moisture for prog. 2 Cottons Dry -2 % -4 % -6 % P 21 Residual moisture for prog.
-
Page 24: Problem Solving Guide
Problem solving guide Trouble shooting With the help of the following guide, minor faults in the performance of the machine, some of which may result from incorrect operation, can be put right without contacting Miele Service. This will save time and money. The following guide may help you to find the reason for a fault, and to correct it. -
Page 25: Service
Problem solving guide Service In the event of a any faults please call Miele Service. When contacting the Service Department, please quote the model, serial (SN) and material (M.-Nr) numbers. These are shown on the data plate (visible when the door is open): Please also pass on the error message appearing in the machine display to the Service Department Only use genuine Miele original spare parts. -
Page 26: Cleaning And Care
Cleaning and care Cleaning the tumble dryer The tumble dryer must be switched off at the on-site mains switch before any cleaning or maintenance work. Danger of electrical shock and damage to components. Do not use a pressure washer or hose pipe to clean the tumble ... -
Page 27: Cleaning The Fluff Filters
Cleaning and care Cleaning the fluff filters A damaged fluff filter must be replaced before the machine is used again. The heat-pump and the airways can get blocked by fluff and lint. This is a fire risk. Never use the tumble dryer without the fluff filters in place. This tumble dryer has two levels of fluff filtration. -
Page 28: Cleaning The Filter Behind The Air Inlet
Cleaning and care Cleaning the filter behind the air inlet The air inlet to the dryer is located at the front of the tumble dryer (d). A fluff filter is located behind this air inlet which has to be cleaned regularly. -
Page 29: Installation And Connection
Installation and connection Installation requirements The tumble dryer must only be installed and commissioned by a Miele service engineer or a Miele authorised Service dealer. The tumble dryer must be installed in accordance with all relevant regulations and standards. ... -
Page 30: Set Up
Installation and connection Set up Place the tumble dryer on a totally level, secure and horizontal sur- face that is able to take the load of the machine (see "Technical data"). The floor load created by the dryer is concentrated and transferred to the installation footprint via the machine feet. -
Page 31: Securing The Machine
Installation and connection Securing the machine The tumble dryer can be secured to the floor by fitting the clamps supplied over the feet. Fittings supplied are for installation on a concrete floor. For other types of flooring please purchase suitable fitting materials separ- ately. -
Page 32: Electrical Connection
Installation and connection Electrical connection The electrical connection must be carried out by a qualified electri- cian who must ensure that all electrical work is carried out in ac- cordance with applicable electrical regulations and standards (BS 7671 in the UK). ... -
Page 33: Air Intake Vent
Installation and connection Air intake vent Air intake for the condenser is via an air intake vent at the front of the dryer. Air is taken from the room in which the dryer is installed. A fluff filter is located in the air intake vent in the dryer. This must be regularly cleaned by hand. - Page 34 Installation and connection Communication module XKM RS232 The serial interface RS-232 can be retrofitted to the tumble dryer via an XKM RS 232 (optional accessory available from Miele). This com- munication module must only be used with Miele Professional ma- chines that are fitted with an appropriate slot for the module. The data interface provided via communication module XKM RS232 complies with SELV (Safety Extra Low Voltage) in ac- cordance with EN 60950.
- Page 35 Installation and connection Technical data Electrical connection Voltage See data plate Frequency See data plate Total connected load See data plate Current draw See data plate Heater rating See data plate Fuse rating See data plate Installation data Overall machine width 711 mm Overall machine height 1800 mm...
- Page 36 United Kingdom Miele Co. Ltd. Fairacres, Marcham Road Abingdon, Oxon, OX14 1TW Professional Sales, Tel: 0845 365 6608 E-mail: professional@miele.co.uk Malaysia Internet: www.miele-professional.co.uk Miele Sdn Bhd Australia Suite 12-2, Level 12 Miele Australia Pty. Ltd. Menara Sapura Kencana Petroleum ACN 005 635 398 Solaris Dutamas No.
Need help?
Do you have a question about the PT 8203 SL WP and is the answer not in the manual?
Questions and answers