Table of Contents
Advertisement
Quick Links
Advertisement
Table of Contents

Related Manuals for Backyard Creations Compass OFW283R


Summary of Contents for Backyard Creations Compass OFW283R
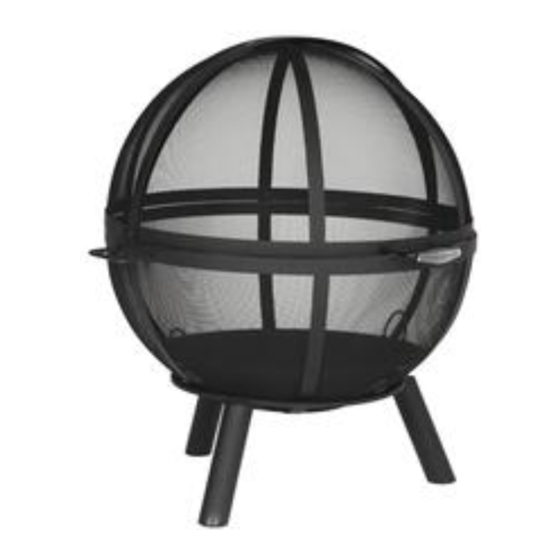
- Page 1 COMPASS 35" SPHERE FIRE PIT MODEL #OFW283R MENARDS SKU #259-5266 Questions, problems, missing parts? Before returning to your retailer, call our customer service department at 1-877-447-4768, 8:00 a.m. – 4:30 p.m., CST, Monday-Friday or email us at customerservice@ghpgroupinc.com. AS-283 09-13-21...
-
Page 2: Package Contents
PACKAGE CONTENTS PART DESCRIPTION QUANTITY Front handle Top front screen Top rear screen Log grate Handle Fire bowl Side Handle Bottom hemisphere Poker... -
Page 3: Hardware List
HARDWARE LIST ` ` M6x16 M6x25 Washer Wrench Screw Screw Flange nut Qty. 8 Qty. 6 Qty. 2 Qty. 12 Qty. 4 Qty. 1 SAFETY INFORMATION Please read and understand this entire manual before attempting to assemble, operate or install the product. - Page 4 CAUTIONS: • Adequate fire extinguishing material should be readily available. • Always ensure that the mesh sphere is secured over fire bowl while in use. • Burn only seasoned hard wood or fire logs in the fire pit. • DO NOT attempt to move the fire pit while it is hot or in use. •...
- Page 5 ASSEMBLY INSTRUCTIONS 1. Flip the bottom hemisphere (H) upside down. Attach 3 legs (I) to the bottom hemisphere (H) using 6 M6x16 screws (AA) and 6 washers (CC). Secure with a phillips screwdriver. Hardware Used M6x16 Screw Washer 2. Attach the 2 side handles (G) to the bottom hemisphere (H) using 4 M6 nuts (DD).
- Page 6 ASSEMBLY INSTRUCTIONS 4. Attach the front handle (A) to the top front screen (B) using 2 M6 nuts (DD). Tighten the nuts with the included wrench (FF). Hardware Used M6 Nut 5.Install 2 M6x25 screws (BB) through the holes on the side of the bottom hemisphere (H) and top rear screen (C).
- Page 7 ASSEMBLY INSTRUCTIONS 7. Place the log grate (D) into the fire bowl (F), then place the fire bowl (F) into the bottom hemisphere (H). 8. Your fire pit is now ready for use. Keep the poker (J) near the fire pit for use. WARNING Always use poker (J J J j j J J J j j j J J J J ) j J J J J J J J J J J J J J J J J J J J J J J J J J J J J J J J J J J J J J J J J J J J J J J J J J J J J J J J J J J J J J J J J J J J J J J J J J J J J J J J J J J J J J j j j j J j j j j j j j j j j j j j j j j toJ J J open and close top front screen during use.
-
Page 8: Care And Maintenance
CARE AND MAINTENANCE • Allow the fire pit to cool completely before moving it. • To extend the life of your fire pit , clean it after each use. • To protect the fire pit finish, use a soft cloth to wipe the fire pit and poker. •... -
Page 9: Replacement Parts List
REPLACEMENT PARTS LIST For replacement parts, call our customer service department at 1-877-447-4768, 8:00 a.m. – 4:30 p.m., CST, Monday – Friday. PART DESCRIPTION PART # Front handle AS-283-01 AS-283-02 Top front screen Top rear screen AS-283-03 AS-283-04 log grate AS-283-05 Handle AS-283-06...
Need help?
Do you have a question about the Compass OFW283R and is the answer not in the manual?
Questions and answers