
Subscribe to Our Youtube Channel
Related Manuals for Rubine RCF-GAVIA Series


Summary of Contents for Rubine RCF-GAVIA Series
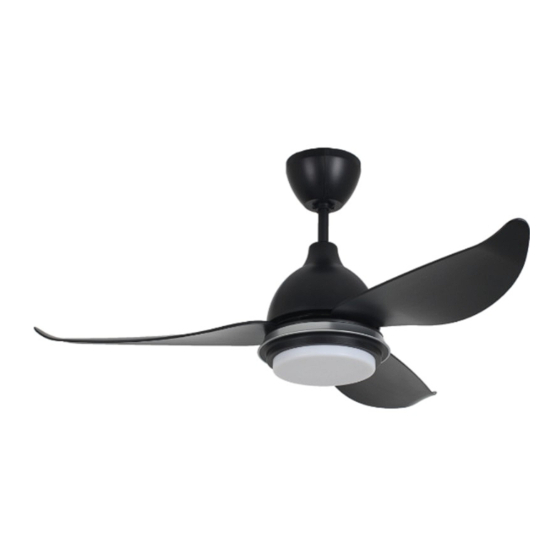
- Page 1 RCF-GAVIA SERIES USER MANUAL/PANDUAN PENGGUNA/用户手册 RCF-GAVIA43 / RCF-GAVIA56 MODEL / MODEL / 型号 CEILING FAN / KIPAS SILING /吊扇...
- Page 2 SUPPLIED PARTS / BAHAGIAN YANG DIBEKALKAN / 提供零件 PARTS QUANTITY PARTS QUANTITY BAHAGIAN BAHAGIAN KUANTITI KUANTITI 零件 数量 零件 数量 HANGING TUBE / TRANSMITTER / ROD BESI / ALAT KAWALAN / 吊杆 遥控器 TOP CANOPY / SENGKUAP ATAS / 吊盅 WIRE NUT / PENUTUP WAYAR / 接线帽...
- Page 3 WARNING / AMARAN / 警告 A) TO ENSURE YOUR PERSONAL SAFETY, PLEASE READ THROUGH THE INSTRUCTION MANUAL BEFORE OPERATING THE PRODUCT. SEBELUM MENGENDALIKAN PRODUK, SILA BACA BUKU PANDUAN INI DENGAN TELITI DEMI KESELAMATAN PENGGUNA. 为了确保您的人身安全,请在使用前详细阅读本产品说明书。 1)Do not bend the blade holders during installation, blades balancing or fan cleaning. Dilarang membengkokkan bilah kipas semasa pemasangan, pengimbangan ataupun pembersihan kipas siling.
- Page 4 B) SAFETY GUIDELINES / LANGKAH KESELAMATAN & PENCEGAHAN / 安全注意事项 1) Please do not install the ceiling fan at high humidity areas. Elakkan kipas dipasang di kawasan yang berminy akatau lembap. 请不要将吊扇安装在潮湿的地方。 2) Be cautious when drilling the wall to avoid damaging electrical wiring and other hidden parts. Berhati-hati semas amenggerudi siling agar tidak merosakkan atau memutuskan wayar elektrik yang tidak kelihatan.
- Page 5 INSTALLATION PROCEDURES / TATACARA PEMASANGAN / 安装步骤 STEP 1 (See Diagram 1) LANGKAH 1 (Rujuk Gambar 1) 步骤 图 Before installation, remove the bolt at the rubber wheel. Sebelum pemasangan, keluarkan roda getah rod besi. 在安装之前,把吊杆两侧的胶轮和塑胶套的横栓拆下。 1) Hang the tuber wheel on the U-Hook. (Figure a) (Gambar a) Posisikan roda getah di atas cangkuk-U.
-
Page 6: Step 3 (Safety Cable Installation)
STEP 3 (Safety Cable Installation) LANGKAH 3 (Pemasangan Dawai Keselamatan) 步骤 安装安全钢丝绳 Safety Cable Dawai Keselamatan 钢丝绳 Screw Skru Screw Skru 螺丝 螺丝 1) Remove the safety cable screw from the hanging tube bracket. (Diagram 1) (Gambar 1) Keluarkan skru dawai keselamatan dari pendakap rod besi. 移开吊杆支架上的安全钢丝绳螺丝(图... -
Page 7: Step 4 (Electrical Wiring Connection)
STEP 4 (Electrical Wiring Connection) LANGKAH 4 (Penyambungan Wayar Elektrik) 步骤 (电线连接) 1) Before installing the fan turn off the power supply. Sebelum menyambungkan wayar elektrik, pastikan bekalan kuasa dimatikan. 在安装风扇之前请关闭电源。 2) With the two pieces of lead wires from the screw pack, connect the wire to the fan. Keluarkan dua utas wayar dari bungkusan yang diberi dan sambungkan ia dengan wayar elektrik utama dari kipas. -
Page 8: Step 6 (Blades Installation)
STEP 6 (Blades Installation) LANGKAH 6 (Pemasangan Bilah Kipas) 步骤 安装扇叶) 5) Insert the blade screws through the flat washer, Place fan blade into position and aligned holes from fan blade to holes on fan motor, then secure it by the screws. Malay ???... - Page 9 STEP 7 (Installation of Light LED) LANGKAH 7 (Pemasangan Lampu LED) 步骤 安装LED灯具) Connect BLACK wire from motor to BLACK wire from LED light kit. Connect BLUE wire from motor to BLUE wire from LED light kit. Attach LED fan light kit to fitter plate by rotating clockwise to lock into place. The fan light kit come with integrated LED light source, no need to install light bulbs.
- Page 10 Gejala Penyelesaian Bergoyang Pastikan semua skru pada bilah kipas diketatkan. securely fastened Pastikan pemasangan bilah kipas betul dan diketatkan. Make sure their distance is not less than 2 meters Sekiranya pemasangan kipas melebihi 1 unit, pastikan jarak antara 2 kipas melebihi 2 meter. 小于2米...
- Page 11 FOR ALL PARTS UNTUK SEMUA BAHAGIAN KIPAS (KECUALI AKSESORI) 所有产品 (不包括配件) 在线注册 1. 登录到www.rubine.com.my. 1. Log on to www.rubine.com.my 1. Layari www.rubine.com.my 2. 点击 ‘Support’,其次是 2. Click on ‘Support’, followed by ‘Product Warranty Registra�on’. dengan ‘Product Warranty 您需要注册成为RUBINE的一员。 3. 您将会通过电子邮件获取保加确认。...
Need help?
Do you have a question about the RCF-GAVIA Series and is the answer not in the manual?
Questions and answers