Advertisement
Quick Links
ISSUE: 0223
by forest
SHED INSTRUCTIONS
BEFORE YOU START (0)
Missing something or need more information?
Visit our website for spare instructions and
Call our aftersales team on
more information
0333 321 3142
www.forestgarden.co.uk
Forest Garden, Oak Drive, Hartlebury Trading Estate, Hartlebury, Worcestershire, DY10 4JB
EU Authorised Representative: Authorised Representative Service, 77 Camden Street Lower Dublin, D02 XE80, Ireland
Advertisement

Related Manuals for Forest BECKWOOD SHED


Summary of Contents for Forest BECKWOOD SHED
- Page 1 Visit our website for spare instructions and Call our aftersales team on more information 0333 321 3142 www.forestgarden.co.uk Forest Garden, Oak Drive, Hartlebury Trading Estate, Hartlebury, Worcestershire, DY10 4JB EU Authorised Representative: Authorised Representative Service, 77 Camden Street Lower Dublin, D02 XE80, Ireland...
- Page 2 BEFORE YOU START.. Please read through this guide to prepare yourself before assembling your shed. We recommend that you check all the components and fixings. Your parts list can be found on your shed label. All our sheds are constructed in the same way, they simply come with different components depending on the type of shed you have.
- Page 3 CARE & ATTENTION To help you get the most out of our products it is useful to know a little more about the properties of timber, what is normal and how your shed may behave as the seasons change. Wood is an extremely durable material for construction but as a natural product when used outdoors it is susceptible to changes in the environment.
- Page 4 HEALTH & SAFETY We strongly recommend that PPE (Personal Protective Equipment) is used throughout your build to ensure you are protected from any potential health and safety risks. Do not exempt yourself from wearing PPE. Cut-Resistant Protective Glasses Protective Boots Protective Mask Working At Gloves...
- Page 5 ASSEMBLY GUIDE We have provided several fixing packs for your build. Each fixing pack will contain a set of assembly instructions and its fixings for each step. Each set of instructions will include a number, which will link to the assembly guide below to ensure you are constructing the shed in the correct order.
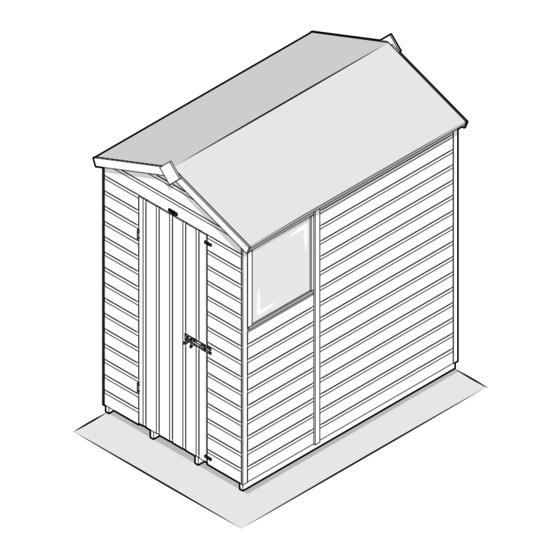
- Page 6 IDENTIFY YOUR CHOSEN SHED From the floor plans below, identify your shed based on the width, depth and roof type provided. You will need this to identify the side panel positions before assembling your shed. Use the key as a guide. 1ft Panel (295 x 1831mm) 4ft Panel (1180 x 1831mm) (With &...
- Page 7 10’ 10’ 15’ APEX SPA1015DDNWM, SPA1015DD6WM 20’ APEX SPA1020DDNWM, SPA1020DD8WM INFILL PANELS (PENT SHEDS) Pent sheds will have ‘Infill Panels’ of which are secured to the top of the Side Panels. They will be the same width as the panel beneath. They are used to increase the height of the panels to create the angled roof. Lay these out with your Side Panels around your shed floor(s) for preparation.
- Page 8 6’ 5’ 8’ 8’ 4’ REVERSE APEX SPR64NWM, SPR641WM 6’ 6’ REVERSE APEX REVERSE APEX 7’ REVERSE APEX SPR86NWM, SPR862WM SPR86DDNWM, SPR86DD2WM SPR57DDNWM, SPR57DD2WM 7’ 10’ 10’ 6’ REVERSE APEX 7’ REVERSE APEX SPR106DDNWM, SPR106DD4WM SPR77DDNWM, SPR77DD2WM 8’ REVERSE APEX SPR108DDNWM, SPR108DD4WM 15’...
- Page 9 SHED INSTRUCTIONS FLOOR ASSEMBLY (1) THERE ARE NO FIXINGS FOR THIS SECTION. Look through the different visuals and follow the step that suits your chosen shed. FLOOR BEARERS Before assembly, your Floor must be firm and level to ensure the shed lines up and is assembled properly. We recommend that there should be access to all sides of your shed for assembly and any maintenance.
- Page 10 STEP 1: POSITION FLOOR(S) Due to the health and safety concerns of the Floor weights, we do not advise to secure the floors together. If you wish to secure the floors together, you do so at your own risk. SINGLE FLOOR Position the Floor in your desired location.
- Page 11 MULTIPLE FLOORS Position the Floors in your desired location. Butt the Floor bearers together and ensure they are flush on each side. The bearers will be butted together along their side face as shown above.
- Page 12 ISSUE: 0123 SHED INSTRUCTIONS SIDE PANEL ASSEMBLY (2) FIXING PACK CONTAINS: FIXING PACK CODE: SHEDPANELSFP You may receive more than one of the same fixing pack to provide enough screws for the larger shed sizes. 5 x 60mm Screws 4 x 50mm Screws 4 x 40mm Screws QTY: 3 QTY: 52...
- Page 13 STEP 1: SIDE PANEL ASSEMBLY LAY OUT YOUR PANELS WORK FROM BACK TO FRONT Lay out the panels around your shed Floor(s) to your desired panel We recommend starting in a back corner and then work configuration. Use your floor plan on your parts list to confirm panel from the back panels to the front panels for assembly.
- Page 14 STEP 2: SECURE SIDE PANELS TO FLOOR(S) SCREWS SCREWS SECURE 3FT - 4FT PANELS TO BEARER SECURE 1FT - 2FT PANELS TO BEARER SCREWS SCREWS SECURE PANELS TO BEARERS BENEATH ANGLE INTO BEARERS BENEATH SCREWS SCREWS SECURE PANELS TO BEARERS BENEATH SECURE TO FLOORBOARD BENEATH SECURE TO FLOOR BEARERS/FLOORBOARD BENEATH Secure the Side Panels to the Floor(s) by screwing into the floor bearers beneath (50mm screws).
- Page 15 STEP 3: SECURE DOOR PANEL TO FLOOR SCREWS SCREWS SECURE DOOR PANEL TO BEARERS & FLOORBOARD BENEATH SCREWS SECURE DOOR PANEL TO BEARER BENEATH SCREWS SECURE DOOR PANEL TO BEARER BENEATH SECURE TO FLOOR BEARERS/FLOORBOARD BENEATH Secure the Door Panel to the Floor by screwing into the floor bearers beneath (50mm screws). Secure the Door Panel to the floorboards if there are no bearers beneath (40mm screws).
- Page 16 STEP 4: PENT INFILL PANELS SCREWS INFILL PANEL ABOVE THE DOOR PANEL SCREWS 2FT INFILL PANEL SCREWS 3FT & 4FT INFILL PANEL SCREWS SECURE INFILL PANELS TOGETHER SECURE INFILL PANELS TO SIDE PANELS (PENT SHEDS ONLY) Position and secure the Infill Panels to the top of the Side Panels. They will be the same width as the Side Panel beneath. The Infill Panels are for the roof angle on your pent shed.
- Page 17 ISSUE: 0123 SHED INSTRUCTIONS APEX & PENT SECTIONS (3) FIXING PACK CONTAINS: FIXING PACK CODE: SHEDGABLEFP You may receive more than one of the same fixing pack to provide enough screws for the larger shed sizes. 4 x 50mm Screws QTY: 8 APEX SECTION PENT SECTION...
- Page 18 STEP 1: APEX SECTION ASSEMBLY APEX SHEDS SCREWS SECURING APEX SECTION TO SINGLE DOOR PANEL REVERSE APEX SHEDS SCREWS SECURING APEX SECTION TO SIDE PANEL...
- Page 19 LARGER APEX SHEDS SCREWS SECURING APEX SECTION TO DOUBLE DOOR PANEL APEX SECTIONS Position and secure the Apex Sections to the Side Panels as shown above. For an apex shed, secure the Apex Sections to the front and back of your shed. For a reverse apex shed, secure the Apex Sections to the sides of your shed. SCREWS WORKSHOPS SCREWS...
- Page 20 STEP 2: PENT SECTION ASSEMBLY PENT SHEDS SCREWS LARGER PENT SHEDS SCREWS PENT SECTIONS Position and secure the Pent Sections to the Side Panels and Infill Panels as shown above.
- Page 21 ISSUE: 0123 SHED INSTRUCTIONS WINDOW ASSEMBLY (4) FIXING PACK CONTAINS: FIXING PACK CODE: SHEDWINFP You may receive more than one of the same fixing pack to provide enough fixings for the sheds with more windows. 3.5 x 30mm Screws 3.5 x 25mm Screws QTY: 14 QTY: 16 L-Brackets (50mm)
- Page 22 OW PLACED NST BOARD (INSIDE) STEP 1: WINDOW SILL ASSEMBLY TRIM & POSITION YOUR Z-STRIP(S) Place the Z-Strip on top of the board in the window opening. Mark out and trim the Z-Strip to the required size. Ensure the Z-Strip sits across the window opening framework as shown above. SCREWS WINDOW SILL(S) Using the positioned Z-Strip(s), position the Window Sill(s) flush to the top of the Z-Strip.
- Page 23 STEP 2: WINDOW ASSEMBLY SCREWS INSIDE WINDOW SITS INTO Z-STRIP Z-STRIP SITS ON TOP OF BOARD WINDOW POSITION SCREWS INSIDE WINDOW & INTERIOR WINDOW STRIPS Position the Window onto the Z-Strip from the outside of your shed. The Window will be placed up against the top board on the inside of your Window Panel.
- Page 24 STEP 3: WINDOW COVER STRIPS SCREWS SCREWS SECURE WINDOW COVER STRIPS Position and secure the Window Cover Strips to the Window Panel framework. The double Window Panel will have a wider cover strip for the centre of the Window Panel as shown above. These will further hold the Window(s) in place.
- Page 25 ISSUE: 0123 SHED INSTRUCTIONS COVER STRIPS & DOOR STRIPS (5) FIXING PACK CONTAINS: FIXING PACK CODE: SHEDSTRIPSFP You may receive more than one of the same fixing pack to provide enough screws for the larger shed sizes. 3.5 x 30mm Screws QTY: 30 DOOR WEATHER STRIPS SLAMMING STRIP...
- Page 26 STEP 1: DOOR STRIPS SINGLE DOOR DOOR PANEL FRAME SCREWS SCREWS DOOR WEATHER STRIP DOOR WEATHER STRIP SLAMMING STRIP DOOR PANEL FRAME SCREWS SCREWS DOOR WEATHER STRIP DOOR WEATHER STRIP SLAMMING STRIP DOOR WEATHER STRIP SLAMMING STRIP Secure the Door Weather Strip to the side you want the Secure the Slamming Strip, to the Door Panel in the door hinges, and ensure it is flush to the Floor and against the face opening as shown above.
- Page 27 DOUBLE DOOR DOOR PANEL FRAME SCREWS SCREWS DOOR WEATHER STRIP DOOR PANEL FRAME SCREWS SCREWS DOOR WEATHER STRIP DOOR WEATHER STRIPS Secure the Door Weather Strips to the Door Panels framework, and ensure they are flush to the Floor and against the face of the Door Panel framework.
- Page 28 STEP 2: COVER STRIPS APEX & REVERSE APEX SHEDS CORNERS ADJOINING PANELS ADJOINING PANELS ADJOINING PANELS SCREWS SCREWS SCREWS SCREWS COVER STRIPS Secure the Cover Strips to the corners and adjoining panels. Ensure they are flush to the bottom edge of the panels. Make sure to secure the Cover Strips to the framework behind and not into the joins of the panels.
- Page 29 PENT SHEDS FRONT ADJOINING PANELS FRONT CORNERS SIDE/BACK ADJOINING PANELS BACK CORNERS SCREWS SCREWS SCREWS SCREWS COVER STRIPS Secure the Cover Strips to the corners and adjoining panels. Ensure they are flush to the bottom edge of the panels. Make sure to secure the Cover Strips to the framework behind and not into the joins of the panels.
- Page 30 STEP 3: WORKSHOP APEX COVER STRIPS WORKSHOPS SCREWS WORKSHOP APEX COVER STRIPS Position and secure the Apex Cover Strips to Apex Sections. Ensure they are flush to the bottom edge of the board on the Apex Sections. Make sure to secure the Apex Cover Strips to the framework behind and not into the joins of the Apex Sections.
- Page 31 ISSUE: 0123 SHED INSTRUCTIONS WORKSHOP TRUSS ASSEMBLY (6) FIXING PACK CONTAINS: FIXING PACK CODE: WORKSHOPTRUSSFP TRUSS FIXING PACK CODE: STPK21 EXTRA U-BRACKETS (PACK OF 2) CODE: MSUBPK2 M6 Nut QTY: 12 Truss Brackets Hanger Brackets U-Brackets (MSMTJB21) (MSTSB21) (MSUB) (8x10,8x12,10x10) QTY: 2 (8x10,8x12,10x10) QTY: 2 (8x10,8x12,10x10) QTY: 4 (10x15) QTY: 4...
- Page 32 STEP 1: TRUSS ASSEMBLY SCREWS BOLTS SCREWS TRUSS BRACKETS U-BRACKETS & TRUSS BRACE Assemble the Truss as shown above. Ensure the truss brackets Space the U-brackets evenly and secure them to the are flush to the edge of the Angled Roof Beams to establish the Angled Roof Beams.
- Page 33 10x15 WORKSHOPS SCREWS SCREWS SECURE HANGER BRACKETS SECURE TRUSSES Position each hanger bracket, using the measurements Position and secure the assembled truss to the hanger provided and secure to the Side Panels. Ensure they are the brackets. The trusses will be inside your shed and facing the same distance on each side of your shed.
- Page 34 10x20 WORKSHOPS SCREWS SCREWS SECURE HANGER BRACKETS SECURE TRUSSES Position each hanger bracket, using the measurements Position and secure the assembled truss to the hanger provided and secure to the Side Panels. Ensure they are the brackets. The trusses will be inside your shed and facing the same distance on each side of your shed.
- Page 35 STEP 2: ROOF BEAMS ASSEMBLY SCREWS 28mm Z-BRACKETS Position and secure a Z-bracket to one end on 12 x Roof Beams as shown above. The Roof Beam should be flush to the Z-bracket. (For 8x10, 8x12 & 10x10 workshops, this will be all of your Roof Beams). (For 10x15 &...
- Page 36 10x15 & 10x20 WORKSHOPS SCREWS SCREWS SCREWS SECURE OUTER & MIDDLE ROOF BEAMS Position and secure the Z-brackets onto the Apex Section framework with the other end of the Outer Roof Beams on a U-bracket or truss bracket as shown above. Position and secure the Middle Roof Beams (45x28x1426mm) to the U-brackets and truss brackets as shown above.
- Page 37 10x15 & 10x20 WORKSHOPS SCREWS SCREWS SCREWS SECURE THE FINAL OUTER ROOF BEAMS Position and secure the Z-brackets to the Apex Section and secure the other end of the Outer Roof Beams to the U-brackets and truss brackets as shown above.
- Page 38 ISSUE: 0123 SHED INSTRUCTIONS OSB ROOF SHEETS & FELT (7) FIXING PACK CONTAINS: FIXING PACK CODE: OSBSHEDROOFFP You may receive more than one of the same fixing pack to provide enough screws and felt tacks for the larger shed sizes. 3.5 x 30mm Screws Felt Tacks QTY: 60...
- Page 39 STEP 1: OSB ROOF SHEETS & ROOF STRIPS APEX & REVERSE APEX SHEDS SCREWS OSB ROOF SHEETS & ROOF STRIPS Position and secure the Roof Strip(s) along the edge of each OSB Roof Sheet as shown above. The Roof Strip(s) will be the same length as the OSB sheet edge.
- Page 40 PENT SHEDS SCREWS FRONT & BACK ROOF STRIPS SCREWS SIDE ROOF STRIPS SCREWS FRONT & BACK ROOF STRIPS SCREWS SIDE ROOF STRIPS...
- Page 41 PENT SHEDS SCREWS FRONT & BACK ROOF STRIPS SCREWS SIDE ROOF STRIPS SCREWS PENT ROOF STRIPS Position your OSB Roof Sheets onto your shed. Position and secure your Front and Back Roof Strips to the OSB Roof Sheets. Ensure they are flush along the edge. Position and secure your Side Roof Strips to the OSB Roof Sheets as shown above. These will be in between your Front and Back Roof Strips.
- Page 42 STEP 2: SECURE ROOF SHEETS SHEDS WITH A SINGLE RIDGE SCREWS ROOF SHEETS Position and secure the OSB Roof Sheets to the Apex Sections framework, Side Panels framework and the Ridge Beam. SHEDS WITH ROOF BEAMS SCREWS ROOF SHEETS Position and secure the OSB Roof Sheets to the Apex Sections framework, Side Panels framework and the Roof Beams.
- Page 43 SHEDS WITH A TRUSS SCREWS ROOF SHEETS Position and secure the OSB Roof Sheets to the Apex Sections framework, Side Panels framework, Truss, and Roof Beams. Ensure each OSB Roof Sheet sits half way onto the Truss. WORKSHOPS WITH MULTIPLE TRUSSES Assemble your OSB roof sheets with the roof structure fixing packs (6) for the 10x15 and 10x20 workshops.
- Page 44 SCREWS MIDDLE ROOF SHEETS Position and secure the Middle OSB Roof Sheets to the Side Panels framework, Trusses, and Middle Roof Beams. The Middle Roof Sheets are 1475mm. Install the Middle Roof Sheets with the Middle Roof Beams assembly. Ensure each OSB Roof Sheet sits half way onto the Truss.
- Page 45 PENT SHEDS WITH SINGLE ROOF BEAM SCREWS ROOF SHEETS Position and secure the OSB Roof Sheets to the Pent Sections framework, Side Panels framework and the Roof Beam. Ensure each OSB Roof Sheet sits half way onto the Roof Beam. The overhang at the back should be approximately 45-50mm. PENT SHEDS WITH TWO ROOF BEAMS SCREWS ROOF SHEETS...
- Page 46 STEP 3: FELT SHEDS WITH A SINGLE RIDGE 2 x FELT PIECES Measure out 2 equal lengths, cut with a sharp knife, overlap them on top, around the edges and fold the corners; tack to keep secure. Ensure there is a 50mm overhang at the bottom and work from the bottom to the top. Hammer the tacks into the felt at 150mm intervals.
- Page 47 PENT SHEDS WITH A SINGLE ROOF BEAM 2 x FELT PIECES Measure out 2 equal lengths, cut with a sharp knife, overlap them on top, around the edges and fold the corners; tack to keep secure. Ensure there is a 50mm overhang at the bottom and work from the bottom to the top. Hammer the tacks into the felt at 150mm intervals.
- Page 48 ISSUE: 0123 SHED INSTRUCTIONS FASCIA’S & FINIALS (8) FIXING PACK CONTAINS: FIXING PACK CODE: SHEDFASCIASFP 4 x 40mm Screws 3.5 x 25mm Screws 1.6 x 25mm Pin Beckwood Badge QTY: 16 QTY: 4 QTY: 2 QTY: 1 FASCIA SIDE FASCIA FRONT FASCIA FINIAL...
- Page 49 STEP 1: FASCIA ASSEMBLY APEX & REVERSE APEX SHEDS SCREWS APEX & REVERSE APEX WORKSHOPS SCREWS APEX & REVERSE APEX FASCIA’S Position and secure the Fascia’s to the front and back or the sides of your shed as shown above. The fascia’s bottom edge will meet each other when positioning.
- Page 50 PENT SHEDS SCREWS SINGLE SIDE FASCIA SCREWS DOUBLE SIDE FASCIA SCREWS SINGLE FRONT FASCIA SCREWS DOUBLE FRONT FASCIA PENT FASCIA’S Position and secure the Side Fascia/Side Fascia’s to the Roof Strips behind. Ensure they are flush to the front of the roof. Position and secure the Front Fascia/Front Fascia’s to the Roof Strips behind as shown above.
- Page 51 SCREWS PENT FASCIA’S Position and secure the Fascia’s into the front and back Pent Sections framework and Roof Strips behind as shown above. STEP 2: FINIAL ASSEMBLY APEX & REVERSE APEX SHEDS ONLY SCREWS FINIALS Position and secure the Finials to the Fascia’s as shown above. Ensure to secure through the Fascia’s into the framework behind.
- Page 52 STEP 3: BADGE PINS PIN YOUR BADGE Position and secure your badge above the door opening, into the Door Panel framework behind with the pins provided.
- Page 53 ISSUE: 0123 SHED INSTRUCTIONS DOUBLE DOOR INSTALLATION (9) FIXING PACK CONTAINS: FIXING PACK CODE: SHEDDOUBLEDOORFP Turn Buttons Flush Hinges Padbolt (150mm) Barrel Bolts (75mm) QTY: 2 QTY: 4 QTY: 1 QTY: 2 BARREL BOLT FLUSH HINGE SLAMMING STRIP DOOR PADBOLT Please take care when installing the security screws.
- Page 54 STEP 1: DOOR PREPARATION HINGE POSITION SHIPLAP CLOSED DOOR NOTCH IN LINE WITH DOOR FACE DOOR FACE OVERLAP CLOSED DOOR SCREWS DOOR HINGES Position and secure 2 x hinges to the Door framework. Please take note of the hinge position. Repeat the process for both Doors.
- Page 55 STEP 2: DOOR INSTALLATION SCREWS DOOR INSTALLATION Position the Door into the door opening, ensuring it is level. Ensure the hinges are up against the framework. Secure the hinges in place. Allow a 5mm gap at the top when positioning the Door. Repeat the process for both Doors. STEP 3: DOOR FIXINGS SCREWS SCREWS...
- Page 56 FRAMEWORK SECURITY SECURITY PADBOLT BARREL BOLTS Position and secure the Padbolt to the Doors framework. Position and secure the Barrel Bolts flush to the Slamming The front hole on the Padbolt will require the smaller security Strip as shown above. Use its screws supplied and ensure to screw to be secured to the Door.
Need help?
Do you have a question about the BECKWOOD SHED and is the answer not in the manual?
Questions and answers