Advertisement
Quick Links
Advertisement

Related Manuals for YitaHome FTPLCG-0302


Summary of Contents for YitaHome FTPLCG-0302
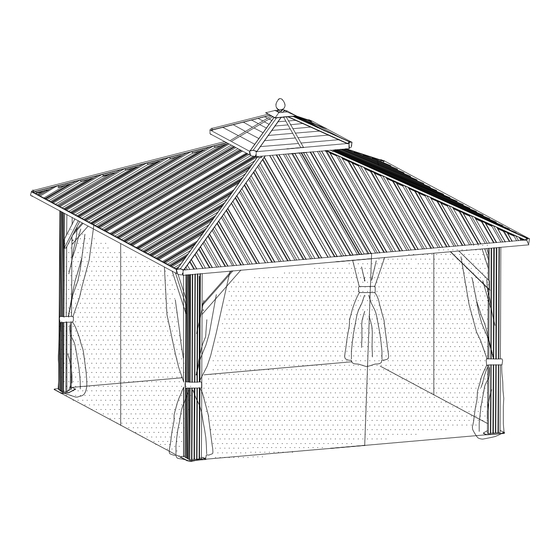
- Page 1 ASSEMBLY INSTRUCTIONS LHHY-V 1 FTPLCG-0302 FTPLCG-0303 FTPLCG-0304 10X10 FT HARDTOP GAZEBO...
- Page 2 WARNING 1. Must use ground nails, ropes, and expansions screws for whichever ground you install on for stability to avoid devastat- ing injuries for people inside or nearby and property damage caused by a collapsing gazebo. 2. Do not use this gazebo in high winds, heavy snow, or inclem- ent weather.
- Page 3 ASSEMBLY INSTRUCTIONS 1. Two or more people are required for assembly. 2. A ladder and electric drill may be necessary. 3. Do not erect the structure in heavy winds or inclement weather. 4. Do not leave up this unit for extended periods of time, as it is not a permanent structure or designed to withstand sustained wind or rain.
- Page 4 ASSEMBLY INSTRUCTIONS Item no. Reference Image Qty. Item no. Reference Image Qty.
- Page 5 ASSEMBLY INSTRUCTIONS Item no. Reference Image Qty. Item no. Reference Image Qty. M6X47mm M6X15mm M5X12mm X144 M6X16mm M6X23mm M6X25mm ST4.8X12mm M6X10mm M6X42mm...
- Page 6 ASSEMBLY INSTRUCTIONS 4pcs 4pcs 12pcs...
- Page 7 ASSEMBLY INSTRUCTIONS 4pcs 4pcs 4pcs 32pcs When connecting B and B1 via P, make sure that 1 holes on part P (as shown in the picture) should be facing upwards. Do not install it upside down.
- Page 8 ASSEMBLY INSTRUCTIONS 96pcs...
- Page 9 ASSEMBLY INSTRUCTIONS 16pcs 16pcs...
- Page 10 ASSEMBLY INSTRUCTIONS 4pcs 4pcs 16pcs...
- Page 11 ASSEMBLY INSTRUCTIONS 4pcs 4pcs 24pcs 4pcs...
- Page 12 ASSEMBLY INSTRUCTIONS 4pcs 4pcs 8pcs...
- Page 13 ASSEMBLY INSTRUCTIONS 8pcs...
- Page 14 ASSEMBLY INSTRUCTIONS 4pcs...
- Page 15 ASSEMBLY INSTRUCTIONS 4pcs 4pcs 8pcs...
- Page 16 ASSEMBLY INSTRUCTIONS 8pcs...
- Page 17 ASSEMBLY INSTRUCTIONS 2pcs...
- Page 18 ASSEMBLY INSTRUCTIONS 8pcs 4pcs 4pcs Do not tighten the screw 1 before completing step 17. It’s view from the bottom inside gazebo.
- Page 19 ASSEMBLY INSTRUCTIONS 4pcs 4pcs...
- Page 20 ASSEMBLY INSTRUCTIONS 8pcs 4pcs 4pcs...
- Page 21 ASSEMBLY INSTRUCTIONS 4pcs 24pcs 8pcs 4pcs...
- Page 22 ASSEMBLY INSTRUCTIONS 8pcs 4pcs The marked parts use the same screws as in step 13. It's view from the bottom inside gazebo.
- Page 23 ASSEMBLY INSTRUCTIONS 48pcs 16pcs 4pcs 4pcs 4pcs 4pcs 4pcs 4pcs Attach Z and Z1 by lightly tapping with a screwdriver.
- Page 24 ASSEMBLY INSTRUCTIONS...
- Page 25 ASSEMBLY INSTRUCTIONS...
- Page 26 ASSEMBLY INSTRUCTIONS 92pcs 56pcs 8pcs 4pcs 24pcs Notes: 1. When installing the ceiling, fix the screws on the central beam first to prevent the iron sheet from falling and causing injury. 2. Do not fully secure the screw until all screws are properly in position.
- Page 27 ASSEMBLY INSTRUCTIONS 4pcs 4pcs 4pcs 4pcs 8pcs...
- Page 28 ASSEMBLY INSTRUCTIONS 4pcs The other part has 6 holes hanging on Part B. One part of the curtain has 6 holes hanging on Part B. The other part has 6 holes hanging on Part B1. One part of the curtain has 6 holes hanging on Part B1.
- Page 29 ASSEMBLY INSTRUCTIONS Pay attention to the sidewall curtain's installation position.
- Page 30 ASSEMBLY INSTRUCTIONS 4pcs The other part has 6 holes hanging on Part B. One part of the netting has 6 holes hanging on Part B. The other part has 6 holes hanging on Part B1. One part of the netting has 6 holes hanging on Part B1.
- Page 31 ASSEMBLY INSTRUCTIONS Note: Attach 1 to 2 to secure parts T1 and T (curtains) together. Attach 1 to 3 to secure the back curtain (T). Attach 1 to 3 to secure the front netting (T1). Pay attention to the sidewall Hang the hook attached to netting's installation position.
- Page 32 ASSEMBLY INSTRUCTIONS 12pcs 12pcs To improve wind resistance, be sure to complete this installation step. If expansion screws or ground nails are not installed,strong winds Cement surfaces may topple the gazebo. Expansion screws are essential for stability on cement surfaces, and ground nails are for grassy surfaces.
- Page 33 ASSEMBLY INSTRUCTIONS Installation Completed...
- Page 34 Pure & Easy CONTACT US: If you have any questions about the installation of YITAHOME products, just contact us at +� (���) ���-���� from Mon-Fri �:�� AM-�:�� PM PST / Sat. �:�� AM-��:�� PM PST or e-mail us at after-sale.cs@hotmail.com Alternative method to contact us (amazon.com orders only)
Need help?
Do you have a question about the FTPLCG-0302 and is the answer not in the manual?
Questions and answers