
Related Manuals for Kaisai ONE


Summary of Contents for Kaisai ONE
- Page 1 INSTRUKCJA OBSŁUGI KLIMATYZATOR ŚCIENNY TYPU SPLIT OWNER’S MANUAL SPLIT TYPE ROOM AIR CONDITIONER BEDIENUNGSANLEITUNG SPLIT-WANDKLIMAANLAGE...
- Page 2 INSTRUKCJA OBSŁUGI KLIMATYZATOR ŚCIENNY TYPU SPLIT 05 PILOT ZDALNEGO STEROWANIA 23 ZESTAW SMART AC 38 NETHOME PLUS - ROZWIĄZYWANIE PROBLEMÓW 50 OWNER’S MANUAL SPLIT TYPE ROOM AIR CONDITIONER 55 AIR CONDITIONER REMOTE CONTROLLER 73 SMART AC KIT 88 NETHOME PLUS 100 BEDIENUNGSANLEITUNG SPLIT-WANDKLIMAANLAGE 105 FERNBEDIENUNG 123...
- Page 3 Dla zapewnienia prawidłowej obsługi, zapoznaj się z instrukcją i przechowuj ją do wykorzystania w przyszłości. W przypadku zagubienia instrukcji obsługi, skontaktuj się z lokalnym dystrybutorem lub odwiedź stronę www.kaisai.com lub prześlij W przypadku zagubienia instrukcji obsługi, skontaktuj się z lokalnym dystrybutorem lub odwiedź stronę www.kaisai.com lub wiadomość...
- Page 4 Spis treści Spis treści Instrukcja obsługi Instrukcja obsługi Środki bezpieczeństwa Środki bezpieczeństwa Utrzymanie i konserwacja ................16 ........08 ........06 Care and Maintenance .............12 Specyfikacje i funkcje urządzenia Specyfikacje i funkcje urządzenia Wykrywanie i usuwanie usterek ..10 ..08 ............18 Troubleshooting ..............14 5 Europejskie wytyczne w zakresie utylizacji ....
- Page 5 Środki bezpieczeństwa Środki bezpieczeństwa OSTRZEŻENIA DOTYCZĄCE INSTALACJI ELEKTRYCZNEJ • Należy używać wyłącznie określone przewody zasilające. Jeśli przewód ulegnie uszkodzeniu, jego Zapoznaj się ze środkami bezpieczeństwa przed przystąpieniem do montażu Zapoznaj się ze środkami bezpieczeństwa przed przystąpieniem do montażu wymianę należy zlecić producentowi lub autoryzowanemu serwisowi. Nieprawidłowy montaż...
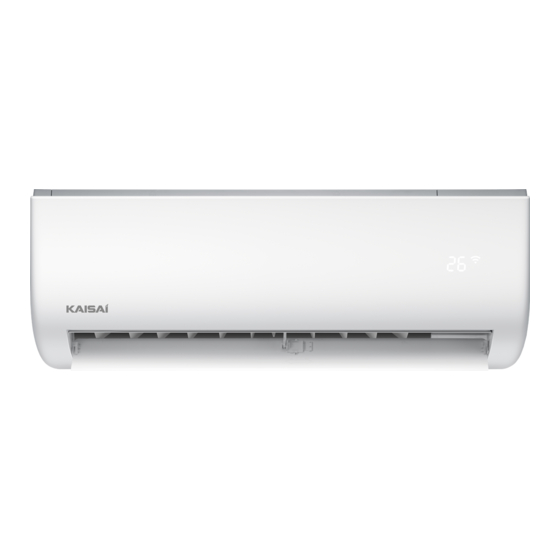
- Page 6 Uzyskanie optymalnej wydajności Specy kacje i funkcje urządzenia Jeżeli klimatyzator będzie używany w warunkach spoza tych zakresów, zadziałają zabezpieczenia ogranicza- jące optymalną wydajność urządzenia. Podzespoły urządzenia Typ inwerterowy Filtr powietrza (wyciągany) DLA JEDNOSTEK Tryb CHŁODZENIA Tryb GRZANIA Tryb OSUSZANIA Z DODATKOWĄ Temperatura 17°C - 32°C 0°C - 30°C...
- Page 7 Funkcje przypomnienia dla ltra • Szczegółowy opis poszczególnych funkcji dostępny powietrza (niektóre modele) jest w instrukcji obsługi pilota. Funkcja przypomnienia o czyszczeniu ltra Po 240 godzinach pracy, na wyświetlaczu Sterowanie kierunku przepływu powietrza • Pozostałe funkcje jednostki wewnętrznej zostanie wyświetlony pulsujący symbol „CL”...
- Page 8 Obsługa ręczna (bez pilota) Programator nocny (funkcja SLEEP) • Funkcja SLEEP służy do ograniczenia zużycia energii Funkcja SLEEP służy do ograniczenia zużycia energii podczas snu (kiedy niepotrzebne sa te same usta- podczas snu (kiedy niepotrzebne są te same usta- Korzystanie z urządzenia bez pilota wienia temperatury dla zapewnienia komfortu).
- Page 9 Konserwacja – dłuższa przerwa UWAGA w użytkowaniu Utrzymanie i konserwacja Utrzymanie i konserwacja • Przed wymianą ltra lub czyszczeniem należy Jeżeli przewidujesz dłuższą przerwę w pracy urządze- wyłączyć jednostkę i odłączyć ją od źródła nia, wykonaj następujące czynności: zasilania. • Podczas wyjmowania ltra nie wolno dotykać...
- Page 10 Problem Możliwa przyczyna Żaluzje na wylocie powietrza powracające do swojego pierwotnego Wykrywanie i usuwanie usterek Wykrywanie i usuwanie usterek położenia generują dźwięk szumu powietrza. Jednostka wewnętrzna emituje hałas Po pracy w trybie GRZANIA, z urządzenia może dochodzić skrzypienie wywołane rozszerzaniem i kurczeniem się elementów jednostki wykonanych z tworzywa sztucznego.
- Page 11 Wykrywanie i usuwanie usterek Wykrywanie i usuwanie usterek Problem Możliwa przyczyna Rozwiązanie Poczekaj na przywrócenie W przypadku wystąpienia problemu, prosimy sprawdzić poniższe punkty przed skontaktowaniem się z serwi- W przypadku wystąpienia problemu, prosimy sprawdzić poniższe punkty przed skontaktowaniem się z serwi- Usterka zasilania zasilania sem.
- Page 12 Europejskie wytyczne w zakresie utylizacji Urządzenie zawiera czynnik chłodniczy i inne potencjalnie niebezpieczne materiały. Prawnie wymagane jest specjalne postępowanie w zakresie zbiórki i przetwarzania tego typu urządzeń. Produkt ten nie może być usuwany jako odpad gospodarstwa domowego. W celu pozbycia się urządzenia można: •...
- Page 13 Dane techniczne pilota zdalnego sterowania Dane techniczne pilota zdalnego sterowania SPIS TREŚCI SPIS TREŚCI Spis treści Model Model RG66A1/BGEF RG66A1/BGEF RG66A Dane techniczne pilota zdalnego sterowania....24 Dane techniczne pilota zdalnego sterowania ........
- Page 14 Przyciski funkcji Przyciski funkcji OBSŁUGA PILOTA ZDALNEGO STEROWANIA OBSŁUGA PILOTA ZDALNEGO STEROWANIA WSKAZÓWKI DOTYCZĄCE KORZYSTANIA Z WSKAZÓWKI DOTYCZĄCE KORZYSTANIA Z Należy bezwzględnie zapoznać się z działaniem pilota zdalnego sterowania przed rozpoczęciem korzystania Należy bezwzględnie zapoznać się z działaniem pilota zdalnego sterowania przed rozpoczęciem korzystania NIE MASZ PEWNOŚCI DO CZEGO SŁUŻY DANA NIE MASZ PEWNOŚCI DO CZEGO SŁUŻY DANA PILOTA ZDALNEGO STEROWANIA...
- Page 15 Wskaźniki na ekranie monitora LCD zdalnego sterowania Wskaźniki na ekranie monitora LCD zdalnego sterowania Sposób korzystania z funkcji podstawowych Sposób korzystania z funkcji podstawowych Informacje są wyświetlane tylko wtedy, gdy pilot jest włączony. Informacje są wyświetlane tylko wtedy, gdy pilot jest włączony. USTAWIENIA TEMPERATURY USTAWIENIA TEMPERATURY Włączanie/wyłączanie...
- Page 16 Sposób korzystania z funkcji podstawowych Sposób korzystania z funkcji podstawowych Sposób korzystania z funkcji podstawowych Sposób korzystania z funkcji podstawowych Praca w trybie ogrzewania (HEAT) Praca w trybie ogrzewania (HEAT) Praca w trybie osuszania/odwilżania (DRY) Praca w trybie osuszania/odwilżania (DRY) Naciśnij przycisk MODE, aby wybrać...
- Page 17 Funkcja wyłączenia zegara (TIMER OFF) Funkcja wyłączenia zegara (TIMER OFF) Funkcja TIMER OFF umożliwia ustawienie czasu, po Funkcja TIMER OFF umożliwia ustawienie czasu, po UWAGA: Każdorazowe naciśnięcie przycisku UWAGA: Każdorazowe naciśnięcie przycisku Ustawianie funkcji zegara (TIMER) Ustawianie funkcji zegara (TIMER) którym urządzenie wyłączy się...
- Page 18 Jednoczesna konfiguracja włączenia i wyłączenia zegara ustawienie(TIMER ON i TIMER OFF) Jednoczesna konfiguracja włączenia i wyłączenia zegara ustawienie(TIMER ON i TIMER OFF) Przykład: Ustawienie urządzenia w taki sposób, aby włączało się po 6 godzinach, pracowało przez 2 Przykład: Ustawienie urządzenia w taki sposób, aby włączało się po 6 godzinach, pracowało przez 2 godziny, a następnie wyłączyło się...
- Page 19 Naciśnij ten przycisk ogrzewania z temperaturą zadaną 17°C. W dwukrotnie w ciągu efekcie urządzenie będzie pracować przy Funkcja SLEEP jednej sekundy, aby ustawionej temperaturze 8°C. Na wyświetlaczu aktywować funkcję jednostki wewnętrznej pojawi się komunikat „FP”. ogrzewania przy Funkcja SLEEP (sen) jest wykorzystywana do temperaturze 8°C.
-
Page 20: Table Of Contents
Spis treści 1. Specyfikacje ................. .39 S P I S T R E Ś... -
Page 21: Pobieranie I Instalowanie Aplikacji
Uwaga Więcej informacji dostępnych jest na internetowej stronie serwisowej. Dla prawidłowego odczy- tu kodu QR wymagany jest smartfon z kamerą o minimalnej rozdzielczości 5 milionów pikseli. • Ze względu na zmienny stan sieci, mogą wystąpić dłuższe przerwy w dostawie usługi, wyma- 4. -
Page 22: Konfiguracja Sieci
należy odczekać 8 minut na automatyczne wyjście klimatyzatora z trybu sterowania aplikacją. KONFIGURACJA SIECIOWA Z URZĄDZENIEM ANDROID 1. Upewnij się, że twoje urządzenie mobilne nawiązało połączenie z siecią Wi-Fi, której chcesz używać. Ponadto, należy „zapomnieć” pozostałe, nieużywane sieci Wi-Fi, ponieważ mogą zakłócić... - Page 23 5. Naciśnij „+Add Device”. 6. Zeskakuj kod QR, dołączony do zestawu 7. Wybierz własną sieć Wi-Fi, na przykład My 9. Jeżeli konfiguracja zakończy się powodze- SMART. Home (powyższy rysunek należy traktować niem, urządzenie będzie widoczne na liście. wyłącznie jako odniesienie). 8.
-
Page 24: Obsługa Aplikacji
14. Jeżeli konfiguracja zakończy się powodze- niem, urządzenie będzie widoczne na liście. 9. Wybierz net_ac_XXXX 10. Wpisz domyślne hasło: 12345678 i naciśnij przy- cisk „Join”. UWAGA: • Ukończeniu konfiguracji sieciowej, aplikacja wyświetli komunikat potwierdzający powodze- nie operacji. • Ze względu na różny stan sieci, wyświetlany stan sieci może nadal offline. W takiej sytuacji należy odświeżyć... -
Page 25: Specjalne Funkcje
8. SPECJALNE FUNKCJE Specjalne funkcje obejmują: programator czasu włączenia, programator czasu wyłączenia, funkcję 8°C HEAT, program nocny, tryb testowy. UWAGA: Jeżeli klimatyzator nie obsługuje którejś z wymienionych funkcji, funkcja ta będzie ukryta na liście dostępnych opcji. Programator czasu włączenia/wyłączenia Użytkownik może ustalić konkretne godziny załączenia lub wyłączenia klimatyzatora w ciągu tygodnia. - Page 26 NETHOME PLUS - ROZWIĄZYWANIE PROBLEMÓW Co się stanie, jeśli wymienię urządzenie przenośne/tablet, czy muszę konfigurować urządzenie klimatyzacyjne od samego początku? 1. Przydatne pytania i odpowiedzi Nie musisz, aplikację Nethome Plus można zainstalować na nowym urządzeniu i zalogować się za pomocą konta. Warunki najlepszego działania modułu WiFi Czy potrzebny jest statyczny internetowy IP? •...
- Page 27 Kiedy skanuję kod QR, nie widać żadnych postępów. Urządzenie klimatyzacyjne nie jest w stanie „AP". Odłącz przewód zasilający Nie mogę obsługiwać urządzenia klimatyzacyjnego zdalnie, status jest offline. urządzenia, odczekaj 10 sekund, podłącz go ponownie i naciśnij przycisk "LED" 7 • Upewnij się, że przewód zasilający klimatyzatora jest podłączony do razy, aż...
- Page 28 For proper operation, please read and keep this manual carefully. Thank you for choosing our product. If you have lost the Owner’s Manual, please contact the local agent or visit www.kaisai.com For proper operation, please read and keep this manual carefully.
- Page 29 Table of Contents Spis treści Table of Contents Instrukcja obsługi Owner’s Manual Spis treści Care and Maintenance Safety Precautions Instrukcja obsługi Środki bezpieczeństwa Utrzymanie i konserwacja Safety Precautions Care and Maintenance ................16 ........06 .............60 ............04 Troubleshooting Unit Specifications and Features Care and Maintenance Care and Maintenance .............12...
- Page 30 ELECTRICAL WARNINGS Safety Precautions Safety Precautions • Only use the specified power cord. If the power cord is damaged, it must be replaced by the manufacturer or certified service agent. Keep power plug clean. Remove any dust or grime that accumulates on or around the plug. Dirty •...
- Page 31 Room relative humidity less than 80%. If the air conditioner operates in excess of this gure, the surface set temperature -- ..in one second interval. of the air conditioner may attract condensation. Please sets the vertical air ow louver to its maximum “...
- Page 32 For a detailed explanation of each function, For a detailed explanation of each function, Air Filter Reminders (some units) Air Filter Reminders (some units) • • refer to the Remote Control Manual. refer to the Remote Control Manual. Air Filter Cleaning Reminder Air Filter Cleaning Reminder After 240 hours of use, the “run”...
- Page 33 FAN or DRY mode. button 1 1 . Locate the MANUAL CONTROL button on the right-hand side panel of the unit. 2. Press the MANUAL CONTROL button one SLEEP Operation time to activate FORCED AUTO mode. 3. Press the MANUAL CONTROL button again to activate FORCED COOLING mode.
- Page 34 Maintenance – CAUTION Long Periods of Non-Use Care and Maintenance Care and Maintenance Before changing the lter or cleaning, • If you plan not to use your air conditioner for an turn o the unit and disconnect its power extended period of time, do the following: supply.
- Page 35 Issue Possible Causes A rushing air sound may occur when the louver resets its position. Troubleshooting The indoor unit makes noises A squeaking sound may occur after running the unit in HEAT mode due to expansion and contraction of the unit’ s plastic parts.
- Page 36 Problem Possible Causes Solution Troubleshooting Troubleshooting Wait for the power to be Power failure restored When troubles occur, please check the following points before contacting a repair company. When troubles occur, please check the following points before contacting a repair company. Problem Problem Possible Causes...
- Page 37 European Disposal Guidelines This appliance contains refrigerant and other potentially hazardous materials. When disposing of this appliance, the law requires special collection and treatment. Do not dispose of this product as household waste or unsorted municipal waste. When disposing of this appliance, you have the following options: •...
- Page 38 Buttons design is based on typical model and might be slightly different from the Alle beschriebenen Funktionen werden vom Gerät ausgeführt. Wenn das Gerät über diese actual one you purchased, the actual shape shall prevail. Funktion nicht verfügt, erfolgt beim Drücken der entsprechenden Taste auf der All the functions described are accomplished by the unit.
- Page 39 Function Buttons Function Buttons HANDLING THE REMOTE CONTROLLER HANDLING THE REMOTE CONTROLLER TIPS FOR USING REMOTE CONTROL TIPS FOR USING REMOTE CONTROL NOT SURE WHAT A FUNCTION DOES? NOT SURE WHAT A FUNCTION DOES? Before you begin using your new air conditioner, make sure to familiarize yourself with its remote Before you begin using your new air conditioner, make sure to familiarize yourself with its remote control.
- Page 40 Remote LCD Screen Indicators Remote LCD Screen Indicators How To Use The Basic Functions How To Use The Basic Functions Information are displayed when the remote controller is powered up. Information are displayed when the remote controller is powered up. SETTING TEMPERATURE SETTING TEMPERATURE The operating temperature range for units is...
- Page 41 How To Use The Basic Functions How To Use The Basic Functions How To Use The Basic Functions How To Use The Basic Functions HEAT operation HEAT operation DRY operation(dehumidifying) DRY operation(dehumidifying) 1. Press the MODE button to select 1. Press the MODE button to select 1.
- Page 42 TIMER OFF function TIMER OFF function The TIMER OFF function allows you to The TIMER OFF function allows you to NOTE: NOTE: When setting the TIMER ON or When setting the TIMER ON or Setting the TIMER function Setting the TIMER function set a period of time after which the unit set a period of time after which the unit TIMER OFF functions, up to 10 hours,...
- Page 43 Setting both TIMER ON and TIMER OFF at the same time Setting both TIMER ON and TIMER OFF at the same time Example: Setting the unit to turn on after 6 hours, operate for 2 hours, then turn off Example: Setting the unit to turn on after 6 hours, operate for 2 hours, then turn off (see the figure below) (see the figure below) Keep in mind that the time periods you set for both functions refer to hours after the...
- Page 44 Under cooling mode, press this button, button twice in one second will seconds to twice in one second the mode or adjusting the set temperature the remote controller will adjust the activate 8 Degree heating function. activate sleep to activate 8 C...
- Page 45 Contents C O N T E N S 1. Specification................. .89 1.
-
Page 46: Download And Install App
3. Attach the QR code packed with SMART KIT to the side panel of the machine, ensure it is con- • Due to different network situation, control process may return time-out sometimes. If this venience to be scanned by the mobile phone. Alternatively, user can take picture of the QR Code situation occurs, the display between board and App may not be the same, please do not feel and save in into their own phone. -
Page 47: Network Configuration
6. NETWORK CONFIGURATION Caution: • It is necessary to forget any other around network and make sure the Android or IOS device just connect to the WIFI network you want to configure. • Make sure the Android or IOS device WIFI function works well and can be connected back to your original WIFI network automatically. - Page 48 10. Choose net_ac_XXXX. 10. Type defult password: 12345678 and click 5. Press “+Add Device”. 6. Scan QR Code which 9 is packed with smart “Join”. kit. 7. Read the instruction above and press the 8. Click settings to enter the setting page, 11.
-
Page 49: How To Use App
14. Configuration Success, you can see the device on 3. Thus, user can control air conditioners on/off status, the list. operation mode, temperature, fan speed and so on. NOTE: When finishing network configuration, APP will display NOTE: success cue words on the screen. Not all the function of the APP is available on air con- Due to different internet environment, it is possible that ditioner. - Page 50 8°C HEAT User can let the AC run under 8 C Heat by one-click. When people go outisde, this function can protect your furniture from frost damage.
- Page 51 The network security key you used is wrong. Make sure you are using the right How does the WiFi module installation procedure work? one. Turn on the "AP" mode on the air conditioning unit. After activating the “AP” I'm searching for the Nethome Plus application on the App Store from my mode the unit acts as an Access Point.
- Page 52 When scanning the QR code I receive the following error message: “QR Code is illegal!”. Make sure you're scanning the right QR code sticker (the white one located in the WiFi module box). When I scan the QR code it doesn't show any progress.
- Page 53 Um es ordnungsgemäß zu bedienen, lesen Sie diese Bedienungsanleitung und bewahren sie zum späteren Nachschlagen auf. Falls Sie die Bedienungsanleitung verlieren, kontaktieren Sie bitte Ihren lokalen Händler oder besuchen Sie die Internetseite www.kaisai.com bzw. schreiben Sie an die E-Mail-Adresse: handlowy@kaisai.pl, um eine elektronische Version der Bedienung- sanleitung zu erhalten.
- Page 54 Spis treści Inhalt Instrukcja obsługi Bedienungsanleitung Środki bezpieczeństwa Utrzymanie i konserwacja ................16 ........06 3 Instandhaltung und Wartung ........Sicherheitsvorkehrungen Care and Maintenance Spis treści Instandhaltung und Wartung .............12 Specyfikacje i funkcje urządzenia Wykrywanie i usuwanie usterek ..08 ............18 4 Fehlerbehebung ............
- Page 55 Sicherheitsvorkehrungen ELEKTRISCHE WARNUNGEN • Verwenden Sie nur vorgegebene Versorgungskabel. Falls die Leitung beschädigt wird, muss sie Lesen Sie die Sicherheitsvorkehrungen vor der Installation vom Hersteller oder einem zertifizierten Servicetechniker ersetzt werden. • Halten Sie die Versorgungsleitung sauber. Entfernen Sie Staub und Schmutz, der sich am Kabel oder Eine fehlerhafte Installation durch Nichtbeachtung der Anweisungen kann zu schwerwiegenden Schäden um den Stecker ansammelt.
- Page 56 Erzielung der optimalen Leistung Spezi kationen und Funktionen des Gerätes Die optimale Leistung für KÜHLEN, HEIZEN und TROCKNEN ist in den folgenden Temperaturbereichen erreichbar. Beim Betrieb der Klimaanlage außerhalb dieser Bereiche werden verschiedene Schutzeinrichtun- Baugruppen des Gerätes gen aktiviert, die den optimalen Leistungsgrad der Anlage beeinträchtigen. Invertertyp Luft lter (ausziehbar)
- Page 57 • Erinnerungsfunktionen für Eine ausführliche Erklärung aller Funktionen finden Luftfilter (bei einigen Modellen) Sie im Handbuch der Fernbedienung. Erinnerungsfunktion für die Filterreinigung • Steuerung der Luftstromrichtung Nach 240 Betriebsstunden erscheint auf dem Weitere Funktionen Display der Inneneinheit das blinkende Symbol Vertikale Luftstromregelung „CL“...
- Page 58 Handbetrieb (ohne Fernbedienung) • Nachttimer (Funktion SLEEP) Die Funktion SLEEP wird verwendet, um den Die Funktion SLEEP wird verwendet, um den Energieverbrauch während des Schlafes zu Energieverbrauch während des Schlafes zu reduzieren (wenn die täglichen reduzieren (wenn die täglichen Benutzung des Geräts Temperatureinstellungen nicht für den Komfort ACHTUNG Temperatureinstellungen nicht für den Komfort...
- Page 59 ACHTUNG Wartung – längerer Stillstand • Schalten Sie das Gerät aus und trennen Sie Wartung Wenn Sie einen längeren Stillstand der Anlage es von der Stromquelle, bevor Sie den Filter planen, gehen Sie wie folgt vor: austauschen oder reinigen. • Berühren Sie beim Ausbau des Filters keine Metallteile im Inneren des Gerätes.
- Page 60 Problem Mögliche Ursache Lamellen am Luftaustritt, die in ihre Ausgangsposition zurückkehren, Fehlerbehebung erzeugen das Geräusch von Luftschall. Die Inneneinheit erzeugt Lärm Nach dem Betrieb im Modus HEIZEN kann die Anlage knirschen, was durch das Dehnen und Schwinden von Kunststoffteilen des Gerätes verursacht wird.
- Page 61 Fehlerbehebung Problem Mögliche Ursache Lösung Warten, bis Spannung wieder Überprüfen Sie beim Problem die folgenden Punkte, bevor Sie die Servicestelle kontaktieren. Stromausfall anliegt Problem Mögliche Ursache Lösung Gerät ist ausgeschaltet Spannungsversorgung einschalten Temperatursollwert kann höher sein als die Niedrigere Temperatur einstellen Durchgebrannte Sicherung Sicherung ersetzen Das Gerät...
- Page 62 Europäische Richtlinien zur Entsorgung Das Gerät enthält Kältemittel und andere potenziell gefährliche Stoffe. Für die Sammlung und Verarbeitung von Geräten dieser Art ist ein Sonderverfahren vorgeschrieben. Dieses Produkt darf nicht als Hausmüll entsorgt werden. Zur Entsorgung können Sie: • das Gerät an einer dafür vorgesehenen Sammelstelle für Elektroaltgeräte entsorgen; •...
- Page 63 Fernbedienung-Spezifikationen Fernbedienung-Spezifikationen INHALTSVERZEICHNIS INHALTSVERZEICHNIS Spis treści Modell Modell RG66A1/BGEF RG66A1/BGEF RG66A Fernbedienung-Spezifikationen ......125 Fernbedienung-Spezifikationen 2 Fernbedienung-Spezifikationen 2 Nennspannung...
- Page 64 Funktionstasten Funktionstasten BENUTZUNG DER FERNBEDIENUNG BENUTZUNG DER FERNBEDIENUNG TIPPS ZUR VERWENDUNG DER TIPPS ZUR VERWENDUNG DER Bevor Sie mit der Benutzung Ihrer neuen Klimaanlage beginnen, machen Sie sich unbedingt Bevor Sie mit der Benutzung Ihrer neuen Klimaanlage beginnen, machen Sie sich unbedingt SIE SIND NICHT SICHER, WAS EINE SIE SIND NICHT SICHER, WAS EINE FERNBEDIENUNG...
- Page 65 Anzeigen auf dem Remote-LCD- Anzeigen auf dem Remote-LCD- Grundfunktionen Grundfunktionen Bildschirm Bildschirm Wenn die Fernbedienung eingeschaltet wird, werden Informationen Wenn die Fernbedienung eingeschaltet wird, werden Informationen EINSTELLEN DER TEMPERATUR EINSTELLEN DER TEMPERATUR angezeigt. angezeigt. Der Betriebstemperaturbereich für die Geräte Der Betriebstemperaturbereich für die Geräte EIN/AUS-Anzeige EIN/AUS-Anzeige beträgt 17-30°C.
- Page 66 Grundfunktionen Grundfunktionen Grundfunktionen Grundfunktionen Heizbetrieb Heizbetrieb TROCKENBETRIEB (Entfeuchten) TROCKENBETRIEB (Entfeuchten) 1. Drücken Sie die MODE-Taste, um den 1. Drücken Sie die MODE-Taste, um den 1. Drücken Sie die MODE-Taste, um den DRY- 1. Drücken Sie die MODE-Taste, um den DRY- HEIZ-Modus auszuwählen HEIZ-Modus auszuwählen Modus auszuwählen...
- Page 67 TIMER OFF-Funktion TIMER OFF-Funktion Mit der Funktion TIMER OFF können Sie eine Mit der Funktion TIMER OFF können Sie eine ANMERKUNG: Wenn Sie die Funktionen ANMERKUNG: Wenn Sie die Funktionen Einstellen der TIMER-Funktion Einstellen der TIMER-Funktion Zeits einstellen, nach der sich das Gerät Zeits einstellen, nach der sich das Gerät TIMER ON oder TIMER OFF einstellen (bis TIMER ON oder TIMER OFF einstellen (bis...
- Page 68 Gleichzeitiges Einstellen von TIMER ON und TIMER OFF Beispiel: Einstellen, dass das Gerät nach 6 Stunden eingeschaltet, 2 Stunden lang betrieben und dann ausgeschaltet wird (siehe Abbildung unten) Beispiel: Einstellen, dass das Gerät nach 6 Stunden eingeschaltet, 2 Stunden lang Gleichzeitiges Einstellen von TIMER ON und TIMER OFF Beachten Sie, dass sich die von Ihnen für beide Funktionen eingestellten Zeiträume auf betrieben und dann ausgeschaltet wird (siehe Abbildung unten)
- Page 69 Erweiterte Funktionen aktivieren Wenn die Klimaanlage im Heizmodus mit der eingestellten Temperatur von 17 SLEEP-Funktion betrieben wird, drücken Sie die Temp-Taste Drücken Sie diese zweimal in einer Sekunde, um die 8 Grad- Die SLEEP-Funktion wird verwendet, Taste zweimal in Heizfunktion zu aktivieren. Das Gerät um den Energieverbrauch während des einer Sekunde, um arbeitet mit einer Einstelltemperatur von...
- Page 70 Contents 1. Parameter................. . . 139 INHALT 2.
- Page 71 Hinweis Weitere Informationen finden Sie auf der Service-Website. Für das korrekte Lesen des QR-Codes ist ein Smartphone mit Kamera mit einer Mindestauflösung von 5 Millionen Pixel erforderlich. Aufgrund des variablen Zustands des Netzwerks können längere Unterbrechungen auftreten, die 4. MONTAGE DES SMART-KITS •...
- Page 72 NETZWERKKONFIGURATION MIT ANDROID-GERÄTEN 1. Stellen Sie sicher, dass Ihr mobiles Gerät mit dem Wi-Fi-Netzwerk verbunden ist, das Sie verwenden möchten. Außerdem sollten Sie andere ungenutzte Wi-Fi-Netzwerke „vergessen“, da sie den Konfigurationsprozess stören können. 2. Trennen Sie die Stromversorgung der Klimaanlage. 3.
- Page 73 5. Drücken Sie „+Add Device“. 6. Scannen Sie den im SMART-Kit enthaltenen 7. Wählen Sie Ihr eigenes Wi-Fi-Netzwerk, z.B. 9. Wenn die Konfiguration erfolgreich war, wird QR-Code. My Home (die obige Abbildung sollte nur als das Gerät in der Liste angezeigt. Referenz dienen).
- Page 74 14. Wenn die Konfiguration erfolgreich war, wird das Gerät in der Liste angezeigt. 9. Wählen Sie 10. Geben Sie das Standardpasswort ein: 12345678 und net_ac_XXXX aus drücken Sie die Taste „Join“. HINWEIS: Nachdem die Netzwerkkonfiguration abgeschlossen ist, zeigt die App eine Meldung an, die den •...
- Page 75 Woche einstellen. Darüber hinaus ist es möglich, die Kontinuität einzustellen, sodass der Zeitplan des Betriebs in weiteren Wochen angewendet wird. das Produkt: Smart Kit die Handelsbezeichnung: KAISAI FUNKTION 8°C HEAT Typ : OSK 103 Mit nur einem Klick können Sie die Klimaanlage in der Funktion 8°C HEAT starten. Während Ihrer Abwesenheit verhindert diese Funktion eine übermäßige Kühlung des Raumes.
- Page 76 NETHOME PLUS - PROBLEMBEHEBUNG Sie müssen nicht, die Nethome Plus-App kann auf einem neuen Gerät installiert und mit Ihrem Konto angemeldet werden. 1. Nützliche Fragen und Antworten Benötige ich statische Internet-IP? Anforderungen für die beste Wirkung des WiFi-Moduls: Nein, die Nethome Plus-App funktioniert auch mit dynamischem Internet-IP. •...
- Page 77 Wenn ich den QR-Code scanne, sehe ich keinen Fortschritt. Ich kann das Klimagerät nicht fernsteuern, der Status ist offline. Die Klimaanlage befindet sich nicht im "AP"-Zustand. Ziehen Sie das Netzkabel • Stellen Sie sicher, dass das Netzkabel der Klimaanlage an eine vom Gerät ab, warten Sie 10 Sekunden, schließen Sie es wieder an und drücken Stromquelle angeschlossen ist.
- Page 78 kaisai.com...
Need help?
Do you have a question about the ONE and is the answer not in the manual?
Questions and answers