Table of Contents
Advertisement
Advertisement
Table of Contents

Subscribe to Our Youtube Channel
Related Manuals for Kaisai KPC-09AI


Summary of Contents for Kaisai KPC-09AI
- Page 2 KPC-09AI Thank you for choosing our product. For proper operation, please read and keep this manual carefully. If you have lost the Owner’s Manual, please contact the local agent or visit www.kaisai.pl or sent email to: handlowy@fgpoland.pl, for electronic version.
-
Page 3: Table Of Contents
Content Operation Notices Operation environment ..................32 Safety warning ....................32 Part's Name ......................35 Operation Guide Operation introduction for control panel ............... 36 Buttons on remote controller ................37 Introduction for icons on display screen ............... 37 Operation introduction of remote controller ............38 Disassembly and assembly of batteries for remote controller ...... -
Page 4: Operation Environment
Operation environment for commercial industry. ● Do not operate the air conditioner at humid environ- 30cm ment. ● Please keep air inlet and air outlet clean, no obstacles. ● During operation, close doors and windows to improve 30cm cooling effect. ●... - Page 5 Safety warning ● If abnormal condition occurs (e.g. burned smell), please disconnect power at once and then contact local dealer. ● When nobody is taking care of the unit, please turn it off and remove the po- wer plug or disconnect power. ●...
-
Page 6: Part's Name
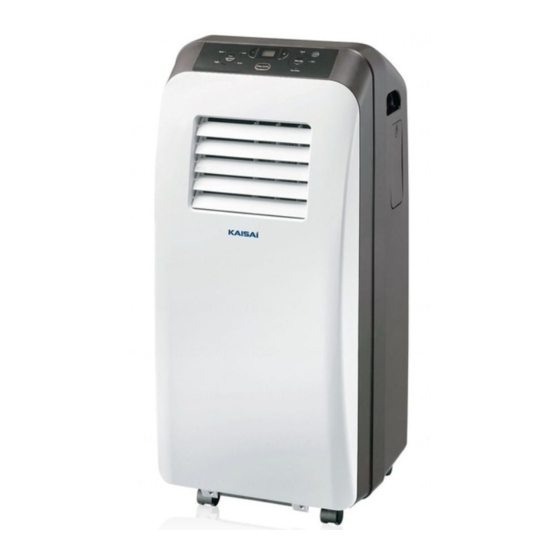
Part's Name control panel handle remote controller box air outlet horizontal louver vertical louver castor air inlet grille joint C joint B heat removal pipe joint A air outlet (condenser) plug of power cord wire-fixing hook remote controller Note: Heat-removal pipe and other installation accessories can't be discarded. -
Page 7: Operation Introduction For Control Panel
Operation introduction for control panel Name of control panel signal receiving window dual-8 nixie tube cool mode indicator dry mode indicator temperature adjustment button ON/OFF button fan speed indicator mode button fan speed button fan mode indicator Operation of control panel Note: ●... -
Page 8: Buttons On Remote Controller
Buttons on remote controller ON/OFF button MODE button button FAN button SWING button SLEEP button TIMER button Introduction for icons on display screen TIMER OFF TIMER ON SIGNAL-SENDING AUTO OPERATION SWING OPERATION COOL OPERATION SLEEP OPERATION DRY OPERATION LOCK FAN OPERATION SET SPEED HEAT OPERATION SET TEMPERATURE SET TIME... -
Page 9: Operation Introduction Of Remote Controller
Operation introduction of remote controller Note: ● After putting through the power, the air conditioner will give out a sound. After that, you can operate the air condition by remote controller. ● Under ON status, after each pressing of the button on remote controller, sign- al-sending icon on display screen of remote controller “... - Page 10 Operation introduction of remote controller AUTO second notch (same as medium speed on control panel) first notch (same as low speed on control panel) fourth notch third notch (same as high speed on control panel) Note: ● Under AUTO fan speed, air conditioner will select proper fan speed according to ex-factory setting.
-
Page 11: Disassembly And Assembly Of Batteries For Remote Controller
Disassembly and assembly of batteries for remote controller 1. Press the mark “ ” on back cover of batteries box cover for remote controller with fingers as shown in the fig, and then remove the batteries box cover along the arrow direction. Battery 2. -
Page 12: Simple Operation And Other Function Introduction
Simple operation and other function introduction Simple operation 1. After putting through power, press ON/OFF button on remote controller to turn on the air conditioner. 2. Press MODE button to select your required operation mode: AUTO, COOL, DRY, FAN. 3. Press “+” or “-” button to set your required temperature. (temperature can’t adjusted under AUTO mode) 4. -
Page 13: Clean And Maintenance
Clean and maintenance Warning: ● Before cleaning the air conditioner, please turn off the unit and disconnect power. Otherwise, it may cause electric shock. ● Do not wash air conditioner with water. Otherwise, it may cause electric shock. ● Do not use volatile liquid (such as thinner or gas) to clean the air conditioner. Otherwise, it may damage the appearance of air conditioner. -
Page 14: Checking Before Use-Season
Checking before use-season 1. Check whether air inlets and air outlets are blocked. 2. Check whether plug and socket are in good condition. 3. Check whether filter is clean. 4. Check whether batteries is installed in remote controller. 5. Check whether joint, window bracket and heat-removal pipe are installed tightly. 6. -
Page 15: Malfunction Analysis
Malfunction analysis General phenomenon analysis Please check below items before asking for maintenance. If the problem still can't be solved, please contact dealer or professional person. Phenomenon Troubleshooting Solution ● Power failure? ● Wait after power recovery. ● Is plug loose? ●... - Page 16 Malfunction analysis Phenomenon Troubleshooting Solution ● It's the normal phenomenon. ● Whether evaporator is defrosted Air conditioner is defrosting. (observe it by pulling out the After defrosting is finished, it filter) will resume operation. ● Temperature can't be adjusted ● Whether the unit operates under under auto mode.
-
Page 17: Installation And Maintenance
Malfunction analysis Warning ■ If there're below phenomenons, please turn off the air conditioner and disco- nnect the power immediately, and then contact dealer immediately. ● Power cord is overheating or damaged. ● Abnormal sound during operation. ● Off-flavor. ● Water leakage ■... - Page 18 Installation and Maintenance Requirements Forelectric Connection Safety precaution 1. Must follow the electric safety regulations when installing the unit. 2. According to the local safety regulations, use qualified power supply circuit. 3. For appliances with type Y attachment,the instructions shall contain the subst- ance of thefollowing.If the supply cord is damaged,it must be replaced by the manufacturer, its service agent or similarly qualified persons in order to avoid a hazard.
-
Page 19: Preparation Before Installation
Preparation before installation Note: check if the accessories are available before installation. Accessory list joint A joint B joint C heat discharge pipe unit screw (3) pipe clip rubber plug battery (2) remote controller user's manual drainage pipe wire hook (2) (AAA 1.5V) Optional accessories:... -
Page 20: Install Wire Hook
Install wire hook ● Assemble the wire hook at the back of the unit with screws (the direction of wire hook is as shown in following fig). direction of wire hook is upward wire hook screw direction of wire hook is downward ●... -
Page 21: Install Drainage Pipe
Install drainage pipe Note: Install drainage pipe before using, otherwise poor drainage will affect normal operation of the unit. 1. Remove the rubber plug at drainage port. drainage port rubber plug 2. Fix the drainage pipe clip on the right of rear side plate near drainage port with a screw. screw drainage port drainage pipe clip 3. -
Page 22: Accessories And Installation Of Heat Exhaust Hose
Accessories and installation of heat exhaust hose ● The length of the exhaust pipe is less than 1m. It is recommended to use it with shortest length. ● When installing, exhaust pipe should be as flat as possible. Don't prolong the pipe or connect it with other exhaust pipe, or Correct installation is as shown in figure (When installing it on wall, height of hall should be about 40cm-100cm from floor). -
Page 23: Install Window Frame
Install window frame (Note: When user want to install in window, optional accessories list is necessary. If the inner width of window is below 28"(718mm), please remove the adjusting plate from window frame and then cut the window frame to make its width the same as the width of window.) adjusting plate window frame... -
Page 24: Installation In A Double-Hung Sash Window
Installation in a double-hung sash window 1. Cut the sponge B to a proper length and attach it to the window sash. sponge B (adhesive) 2. Open the window; place the window frame on the window sash; slide the adjustment plate to make the window frame close to the window sashes at the left and right side of window;... -
Page 25: Installation In A Sliding Sash Window
Installation in a sliding sash window 1. Cut the sponge B to a proper length and attach it to the window sash. sponge B (adhesive) 2. Open the window; place the window frame on the window sash vertically; slide the adjust- ment plate to make the window frame close to the window sashes at the upper and lower side of window;... -
Page 26: Installation And Disassembly Of Heat Discharge Pipe
discharge pipe Installation and disassembly of heat clockwise Install heat discharge pipe 1. Rotate joint A and joint B clockwise into the two ends of heat discharge pipe. joint B clockwise heat discharge pipe joint A 2. Insert joint A of heat discharge pipe (the side with "TOP" is upwards) into the groove until you hear a sound. -
Page 27: Operation Test
Installation and disassembly of heat discharge pipe Disassemble heat discharge pipe 1. Remove joint B: remove joint B from joint C. joint B joint C 2. Remove joint A: Press the clasp and lift joint A upwards to joint A upwards disassemble remove it. -
Page 28: Drainage Way
Drainage way In cooling or drying operation, the condensation water will be drained to the chassis and ● spattered by water-striking motor. As the temperature of condenser is high, most of the condensation water will be evaporated and drained to outdoor. So usually, only a little condensation water will be accumulated inside the chassis and you do not need to discharge the water frequently. -
Page 29: Electric Schematic Diagram
Electric schematic diagram POWER BN(BK) ROOM TEMP. TUBE TEMP. OUTTUBE TEMP. WATER MOTOR SENSOR BU(WH) SENSOR SENSOR YEGN YEGN(GN) ROOM TUBE OUTTUBE WATER(WATER1) COMP. MOTOR K201 YEGN DISP2 COMP. DISP2 COMP R(M) DISP1 ELECTRIC BOX DISP1 HIGH-WP RD W4 YEGN WATER LEVEL MOTOR SWITCH...
Need help?
Do you have a question about the KPC-09AI and is the answer not in the manual?
Questions and answers