Table of Contents
Advertisement
Available languages
Available languages
Quick Links
PROJECT SOURCE and logo design are trademarks or
registered trademarks of LF, LLC. All rights reserved.
Serial Number
Questions, problems, missing parts? Before returning to your retailer, call our customer
service department at 1-866-389-8827, 8 a.m. - 8 p.m., EST, Monday - Sunday.
You could also contact us at partsplus@lowes.com or visit www.lowespartsplus.com.
AS21349
Purchase Date
1
ITEM # 4347310 / 4347311 / 4347312
70235098 / 70235099 / 70235100
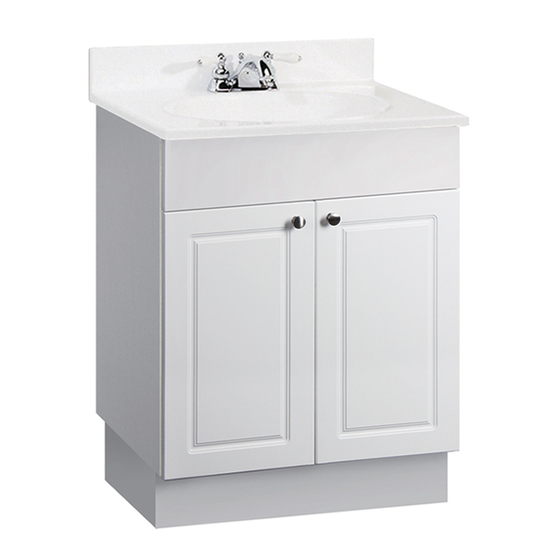
VANITY WITH TOP
MODEL # LS200409 / LS200411 / LS200413
ATTACH YOUR RECEIPT HERE
Français p. 7
Français p.
XX
Advertisement
Chapters
Table of Contents

Related Manuals for Project Source LS200409


Summary of Contents for Project Source LS200409
- Page 1 ITEM # 4347310 / 4347311 / 4347312 70235098 / 70235099 / 70235100 VANITY WITH TOP MODEL # LS200409 / LS200411 / LS200413 PROJECT SOURCE and logo design are trademarks or registered trademarks of LF, LLC. All rights reserved. Français p. 7 Français p.
-
Page 2: Table Of Contents
TABLE OF CONTENTS Package Contents...........................2 Hardware Contents..........................3 Safety Information ..........................3 Preparation ............................3 Assembly or Installation Instructions ....................4-5 Care and Maintenance ........................6 Troubleshooting ..........................6 Warranty ............................6 Replacement Parts List ........................6 PACKAGE CONTENTS Cultured marble top Vanity body Vanity base... -
Page 3: Hardware Contents
HARDWARE CONTENTS Handle Handle screw Screw Qty. 2 Qty. 2 Qty. 2 Anchor bolt Adjusting screw Screw Qty. 2 Qty. 4 Qty. 2 SAFETY INFORMATION Please read and understand this entire manual before attempting to assemble, operate or install the product. -
Page 4: Assembly Or Installation Instructions
ASSEMBLY INSTRUCTIONS 1. Take the vanity body out of the box. Carefully lay the vanity body down on a soft surface to avoid scratching the surface. Attach the handle to the door with screw. Hardware Used Handle Handle screw 2. Place the vanity body upside down on a non-abrasive surface. - Page 5 ASSEMBLY INSTRUCTIONS 3. Attach the rear panel to the wall with anchor bolts and screws. Hardware Used Screw Anchor bolt 4. Apply latex sealant along the top beam of the cabinet. Carefully place and adjust the washbasin onto the vanity. Make sure it touches the latex sealant along the entire length.
-
Page 6: Care And Maintenance
CARE AND MAINTENANCE Clean with a soft cloth using non-abrasive cleaners. TROUBLESHOOTING Problem: Vanity top wobbles when placed on the vanity base. Possible Cause: The vanity base is not installed level and plumb. Corrective Action: Ensure the vanity base is level and plumb. WARRANTY 12 MONTH LIMITED WARRANTY These products have been made to quality standards and are guaranteed for domestic use... - Page 7 ARTICLE # 4347310 / 4347311 / 4347312 70235098 / 70235099 / 70235100 MEUBLE-LAVABO AVEC COMPTOIR PROJECT SOURCE et le logo sont des marques de commerce ou des marques de commerce déposées MODÈLE # LS200409 / LS200411 / LS200413 de LF, LLC. Tous droits réservés.
-
Page 8: Contenu De L'emballage
TABLE DES MATIÈRES Contenu de l’emballage ........................8 Quincaillerie incluse .........................9 Consignes de sécurité ........................9 Préparation ............................9 Instructions pour l’assemblage ou l’installation .................10-11 Entretien ............................12 Dépannage .............................12 Garantie ............................12 Liste des pièces de rechange ......................12 CONTENU DE L’EMBALLAGE PIÈCE DESCRIPTION QUANTITÉ Comptoir en similimarbre Corps de meuble-lavabo Base de meuble-lavabo... -
Page 9: Quincaillerie Incluse
QUINCAILLERIE INCLUSE Poignée Vis de poignée Qté : 2 Qté : 2 Qté : 2 Boulon d’ancrage Vis de réglage Qté : 2 Qté : 4 Qté : 2 CONSIGNES DE SÉCURITÉ Assurez-vous de lire et de comprendre l’intégralité du présent manuel avant de tenter d’assembler, d’installer ou d’utiliser l’article. -
Page 10: Instructions Pour L'assemblage Ou L'installation
INSTRUCTIONS POUR L’ASSEMBLAGE 1. Sortez le corps de meuble-lavabo de la boîte. Posez soigneusement le corps de meuble-lavabo sur une surface douce pour éviter de l’égratigner. Fixez la poignée à la porte à l’aide d’une vis. Quincaillerie utilisée Poignée Vis de poignée 2. - Page 11 INSTRUCTIONS POUR L’ASSEMBLAGE 3. Fixez le panneau arrière au mur à l’aide de boulons d’ancrage et de vis. Quincaillerie utilisée Boulon d’ancrage 4. Appliquez du scellant au latex le long du rebord supérieur de l’armoire. Placez et ajustez soigneusement le lavabo sur le meuble-lavabo. Assurez-vous qu’il est en contact avec le scellant au latex sur toute la longueur du rebord.
-
Page 12: Entretien
ENTRETIEN Nettoyez l’article à l’aide d’un linge doux et de produits nettoyants non abrasifs. DÉPANNAGE Problème : le comptoir bouge lorsqu’il est déposé sur le meuble-lavabo. Cause possible : le meuble-lavabo n’est pas de niveau ni d’aplomb. Mesure corrective : assurez-vous que le meuble-lavabo est de niveau et d’aplomb. GARANTIE GARANTIE LIMITÉE DE 12 MOIS Ces articles ont été...
Need help?
Do you have a question about the LS200409 and is the answer not in the manual?
Questions and answers