Page 2
Features Lets you interact and control your AC operation by simple voice command and user friendly App based on android and iOS platform. The voice assistant solution is based on most popular and commonly used voice recognition Al powered technology platform-Amazon Alexa & Google Home. l)i=llliGI COANDA Directs airflow upward.
Contents ■ Read before Operation Safet y Precautions .......... Name of Parts ..........Preparation before Operation ......■ Operation [M�E) DRY· COOL· FAN Operation ....[(ID) Adjusting the Temperature ....[<: � ) Adjusting the Airflow Direction ..... (4.1 Adjusting the Airflow Rate SMELL PROOF Operation ....
Safety Precautions • Keep this manua l where the use can easily find it. &CAUTION • Read the precautions in this manua l carefully before operating the • Do not use the ai conditione purposes othe than unit. those fo which it is intended .
Name of Parts ■ Indoor Unit 1. Front panel 2. Air inlet 3. Air filter 4. Accessory filter 5. Model Name Plate 6. Indoor temperature sensor: • Detects the air temperature around the unit. 7. Display 8. Air outlet 9. Louvres (vertical blades): ■...
Page 6
3. TEMPERATURE adjustment button: ■ • Changes the temperature setting ..P.III 111111 ,· ,,,DAIKIN 4 . ON/OFF button: t��®mas� • Press this button once to start operation. IIf . ■ I!!] � � <1...
• Set the accessory filters under the tabs of the filter frame on the indoor unit. "Care and Cleaning", • When attaching the accessory filters, refer to and pull out the air filters. l)Ritfij FTKR35UV16W, FTKR50UV16U, FTKR60UV16U � Titanium apatite deodorizing air-purifying filter Ag-ion filter Micro-filter- PM2.5...
� DRY · COOL · FAN O peration The air conditioner operates with the operation mode of your choice. From the next time on, the air conditioner will operate with the same operation P"'DAIKIN mode. *� ■ ®i®SB � To start operation .B·...
Page 9
� Adjusting the Temperature ■ Adjusting the temperature P"'DAIKIN ■ To change the temperature setting [ r @ P ] . ®i®SB � �� .B· c 1. Pre ss r•0� t!'1J ��ct �c<:� • Press £. to raise the temperature and press T to lower the temperature.
� CAUTION P"'DAIKIN s®S8a� * � • Always use a remote controller or Daikin AC Manager-India mobile application to swing the flaps and louvres. •c i!!!J •◄ - If you attempt to move the flaps and louvres forcibly by hand when they are swinging, the 1t)@e t.;>...
Adjusting the Airflow Rate/ (tit7 lJU SMELL PROOF Operation ■ Adjusting the airflow rate You can adjust the airflow rate to increase your comfort. P"'DAIKIN s®S8a� • � ■ To change the airflow rate setting •c i!!!J t)-< t.;>� cf �...
� POWER CHILL Operation POWER CHILL operation quickly maximises the cooling effect in any operation mode. In this mode, the air conditioner operates at maximum capacity. P"'DAIKIN s®S8a� ■ To start POWER CHILL operation * � •c 1,)@e P o w i!!!J•...
� COANDA Operation Directs airflow upward. This function prevents air from blowing directly at users. ■ To start COAN DA operation P"'DAIKIN s®S8a� I t) * � COANDA •-< 1. Press ( •c i!!!J �e c;>�ct <:� • The flaps position will change, preventing air from blowing directly on the l,i'J:]a --··...
� ECONO Operation ECONO operation enables efficient operation by limiting the maximum power consumption. P"'DAIKIN This function is useful to prevent the circuit breaker from tripping when the unit s®S8a� operates alongside other appliances on the same circuit. * �...
Page 15
( wi - Fi ) Wi-Fi Operation After the AC installation, you need to first download the Daikin AC Manager India Mobile App ( Android or iOS ) and register first. After registration, you P"'DAIKIN can refer the Mobile App installation pamphlet which can be downloaded from s®S8a�...
� ON/OFF TIMER Operation ■ To use ON TIMER operation �DAIKIN s®S8a � * � Press@. 1 • ooe n . " •c i!!!J • ◄ �e c;>�ct <:� H R . " is display on the LCD. t.i'm --•••...
Page 17
� ON/OFF TIMER Operation Timer functions are useful for automatically switching the air conditioner on or off at night or in the morning. You can also use OFF TIMER and ON TIMER in combination. ,,,DAIKIN * � ®s®SBa� ■ To use OFF TIMER operation "C...
Page 18
� GOOD SLEEP OFF TIMER � Operatio n You can prevent excessive cooling of the room during sleep by setting a temperature shift value. The air conditioner automatically stops after the preset P"'DAIKIN time has elapsed, thereby conserving electricity. s®S8a� * �...
• Checking the Inverter Output and Temperature Display The inverter output and temperature display for the indoor unit shows the current inverter output, indoor temperature, and set temperature. ■ Checking current inverter output, indoor temperature and set temperature when the air conditioner is in operation DISPLAY 1.
CHILD LOCK Setting the CHILD LOCK disables all the buttons except the CHILD LOCK button. This function prevents children from operating the remote controller by mistake. P"'DAIKIN ■ To set the CHILD LOCK • "--C" is displayed on the LCD.
� DEW CLEAN Operation This Function helps to clean accumulation of Dust & Stain on indoor Heat Exchanger. ,,DAIKIN ■ To use DEW CLEAN operation, Remote Controller and t�Jsoosas� *� Machine should be in ON operation and follow the below steps.
IIJI LED/ 7 S EGMENT BRIGHTNESS � Control Operation The brightness of the indicator lamp/ 7 Segment can be adjusted H(high), L(low), or OFF. To set the brightness setting mode. ■ Press(caSWJ N aj for more than 5 seconds. • is displayed on the LCD.
Care and Cleaning & CAUTION • Before cleaning, be sure to stop the operation and turn off the circuit breaker. • Do not touch the aluminium fins of the indoor unit. If you touch those parts, this may cause an injury. •...
Page 24
Care and Cleaning Air filter 1. Pull out the air filters. • Open the front panel. • Push the filter tab at the centre of each air filter a little upwards, then pull it down. 2. Wash the air filters with water or clean them with a vacuum cleaner.
Page 25
Care and Cleaning Filter type: Titanium apatite deodorizing air-purifying filter/Anti microbial filter. Accessory filter [Cleaning] The accessory filters can be renewed by washing them with water once every 6 months. We recommend replacing them once every 3 years. 1 . Take off the accessory filters. •...
Troubleshooting These cases are not problems. The following cases are not air conditioner troubles but have some reasons. You may just continue using it. Case Explanation Operation does not start soon. • This is to protect the air conditioner. • When "ON/OFF" button was pressed You should wait for about 3 minutes.
Page 27
Troubleshooting Case Explanation The outdoor fan rotates while the ■ Immediately after the air conditioner is stopped: air conditioner is not in • The outdoor unit fan continues rotating for about another 1 minute to operation. protect the system. ■ While the air conditioner is not in operation: •...
Page 28
Troubleshooting Call your service centre immediately. WARNING ■ When an abnormality (such as a burning smell) occurs, stop operation and turn off the circuit breaker. Continued operation in an abnormal condition may result in problems, electric shock or fire. Consult your service centre. ■...
Page 29
Troubleshooting Fault diagnosis by remote controller � .,.DAIKIN ,� . a : ; The remote controller can receive relevant error codes from the indoor unit. ; ! , � -.,°"'� �e c1 1 . When (cA N C E L ) is held down for about 5 seconds,"...
Page 32
Head office: Osaka Umeda Twin Towers South 1-13-1, Umeda, Kita-ku, Osaka, 530-0001,Japan Tokyo office: Yaesu Central Tower, Tokyo Midtown Yaesu, 2-2-1, Yaesu, Chuo-ku, Tokyo,104-0028, Japan http://www.daikin.com 3P602234-2E M21P084B...
Page 34
Safety Precautions • The precautions described herein are classified as WARNING and CAUTION. They both contain important information regarding safety. Be sure to observe all precautions without fail. • Meaning of WARNING and CAUTION notices � WARNING Failure to follow these instructions properly may result in personal injury or loss of life. �...
Page 36
Indoor/outdoor Unit Installation Diagram · :f m : 7 • The mounting plate should be installed on a wall which can support the weight of the indoor unit. @)Mounting plate ,,,--.. @Moi.mtingpl a tefixingscrewM4�25L(Jpc:s.) �oonlingplatefixlngscrewM4":2Ii(7pc1.) For type (i)@@@) (Refer table no. 4) For type@ (Refer table no.
Page 37
■ ■ ■ ■ ■ Installation Tips Installing and Removing the indoor unit. CAUTION---------- Be sure to wear protection gloves. Hook the claws of the bottom frame to the mounting plate. • Installation method 1) Push up. If the claws are difficult to hook, remove the front grille. •...
Page 38
Indoor Unit Installing The Mounting Plate • The mounting plate should be installed on a wall which can support the weight of the indoor unit. 1) Temporarily secure the mounting plate to the wall, make sure that the panel is completely level, and mark the boring points on the wall.
Page 39
Indoor Unit Installing The Indoor Unit ( Right-Side, Right-Back or Right-Bottom Piping) Open the front panel, open the Front grille (If Required), then open the service lid.(Refer to Installation Tips.) Shape the refrigerant pipes. @MoooOoo Pass the drain hose and refrigerant pipes through the wall hole. plate Re f ri g erant Hang the indoor unit on (A) mounting Plate...
Page 40
Indoor Unit Wiring 1) Strip wire ends (15mm). 2) Match wire colours with terminal numbers on indoor and outdoor unit's terminal blocks and firmly screw wires to the corresponding terminals with the screw. 3) Connect the earth wires to the corresponding terminals. Attach the earth wire so that it is not connected to the fan motor connector.
Page 41
Binding Of Insulation Pipe 1. The slit direction should be upward. Sectional view 2. It should be sealed with vinyl tape '" without any gap. Heatlnsulation�"""" ln!!LMlion 3. Do not over tighten with vinyl tape. Communicltilllirl .�n"::l. ��, .111,botlom.) "'1)'11ope GMplpe Wrap vinyl tape with the slit of the heat insulation pipe cover facing up so that there are no gap .
Page 42
Outoor Unit Installing The Outdoor Unit • When installing the outdoor unit, refer to and the "Precautions for Selecting a Location" "Outdoor Unit Installation Diagram". WJII Flaring The Pipe End [ill � "-Remove burrs. � WARNING c"' exacto at Incomplete flaring may result refrigerant gas leakage. Set exactly at the position shown below.
Page 43
Outoor Unit Purging Air And Checking Gas Leakage l'.'.h WARNING ------------------------- • Do not mix any substance other than the specified refrigerant (R32) into the refrigeration cycle. • When refrigerant gas leaks occur, ventilate the room as soon and as much as possible. •...
Page 44
Trail Operation And Testing 1. Trial operation and testing • Check that the inter-unit wire is correctly connected. • Trial operation should be carried out in COOL operation. 1-1 Measure the supply voltage and make sure that it is within the specified range. 1-2 Select the lowest programmable temperature.
Page 48
3P665541-1C M21P0768 DAIKIN INDUSTRIES, LTD. Head office: Osaka Umeda Twin Towers South 1-13-1, Umeda, Kita-ku, Osaka, 530-0001, Japan Tokyo office: Yaesu Central Tower, Tokyo Midtown Yaesu, 2-2-1, Yaesu, Chuo-ku, Tokyo, 104-0028, Japan 3P665541-1C M21P0768 http://www.daikin.com...
Need help?
Do you have a question about the FTKR35UV16W and is the answer not in the manual?
Questions and answers
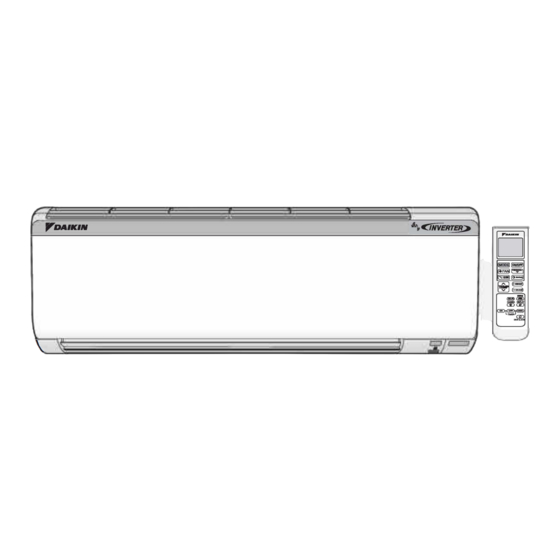
There is missing of air outlet part