
Subscribe to Our Youtube Channel
Related Manuals for Sofar HYD 3 6K-EP Series


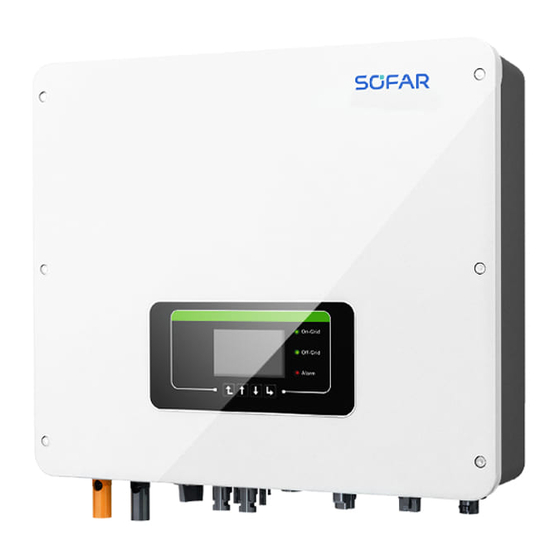
Summary of Contents for Sofar HYD 3 6K-EP Series
- Page 1 HYD 3 …. 6K-EP Installation and operating manual Version 01 | May 2022 English HYD 3000-EP, HYD 3680-EP, HYD 4000-EP, HYD 4600-EP, HYD 5000-EP, HYD 5500-EP, HYD 6000-EP...
-
Page 2: Table Of Contents
TABLE OF CONTENT Table of Content About this manual Copyright declaration Structure of the manual Scope Target group Symbols used Basic safety information Safety information Symbols and signs Product features Product information Labelling on the device Functional features Application modes Installation Installation information Installation procedure... - Page 3 TABLE OF CONTENT Installation location Unpacking the inverter Installation of the inverter Electrical connections Safety instructions Electrical connection Connecting the PE cable Connecting the DC cables Connecting the battery Connecting the AC power cables System monitoring Installation of the WiFi-, GPRS or Ethernet stick Multifunctional COM Port Commissioning the inverter Safety test before commissioning...
- Page 4 TABLE OF CONTENT Energy Storage Modes Menu structure Troubleshooting handling Troubleshooting Maintenance Technical data HYD 3000 ... 6000-EP...
-
Page 5: About This Manual
ABOUT THIS MANUAL About this manual This manual contains important safety information that must be observed during installation and maintenance of the device. Carefully read this manual before use and retain it for future reference! This manual must be treated as an integral component of the device. The manual must be kept in close proximity to the device, including when it is handed over to another user or moved to a different location. -
Page 6: Scope
ABOUT THIS MANUAL Scope This product manual describes the installation, electrical connection, commissioning, maintenance and fault elimination procedures of the HYD 3000 ... 6000-EP inverters. Target group This manual is intended for specialist electrical engineers who are responsible for the installation and commissioning of the inverter in the PV system, as well as the PV system operators. - Page 7 ABOUT THIS MANUAL DANGER Non-observance will result in death or serious injury. Follow the warnings in order to prevent death or serious injury! • WARNING Non-observance may result in death or serious injury. Follow the warnings in order to prevent serious injury! •...
-
Page 8: Basic Safety Information
BASIC SAFETY INFORMATION Basic safety information NOTE If you have any questions or problems after reading the • following information, please contact SofarSolar This chapter details the safety information pertaining to the installation and operation of the device. Safety information Read and understand the instructions within this manual and familiarise yourself with the relevant safety symbols in this chapter before beginning with the installation of the device and eliminating any faults. - Page 9 BASIC SAFETY INFORMATION 2.1.1 Qualified personnel Personnel tasked with the operation and maintenance of the device must have the qualifications, competence and experience required to perform the described tasks, while also being capable of fully understanding all instructions contained within the manual. For safety reasons, this inverter may only be installed by a qualified electrician who: has received training on occupational safety, as well as the installation and commissioning of electrical systems...
- Page 10 BASIC SAFETY INFORMATION device must not be installed if it is visibly damaged. In this case, notify the responsible transport company immediately. 2.1.4 Labelling on the device The labels must NOT be concealed by items and foreign objects (rags, boxes, devices, etc.); they must be regularly cleaned and kept clearly visible at all times.
- Page 11 BASIC SAFETY INFORMATION IMPORTANT Authorisation for grid feed-in Obtain authorisation from the local power grid operator before • connecting the inverter to the public power grid. NOTE Voiding of guarantee Do not open the inverter or remove any of the labels. •...
-
Page 12: Symbols And Signs
BASIC SAFETY INFORMATION 2.1.7 Repair and maintenance DANGER Dangerous voltage! Before carrying out any repair work, first switch off the AC circuit • breaker between the inverter and power grid, and then the DC switch. After switching off the AC circuit breaker and the DC switch, wait •... - Page 13 BASIC SAFETY INFORMATION ATTENTION Implement earthing! The PV generator must be earthed in accordance with the • requirements of the local power grid operator! For reasons of personal safety, we recommend that all PV • module frames and inverters of the PV system are reliably earthed.
- Page 14 BASIC SAFETY INFORMATION Symbol Description Caution! Danger through electric shock Caution! Hot surface The product is compliant with EU guidelines Earthing point Please read the manual before installing the inverter Device degree of protection according to EN 60529 Positive and negative poles of the DC input voltage The inverter must always be transported and stored with the arrows pointing upward RCM (Regulatory Compliance Mark)
-
Page 15: Product Features
PRODUCT FEATURES Product features This chapter describes the product features, dimensions and efficiency levels. Product information The HYD 3000 ... 6000-EP is a grid-coupled PV and energy storing inverter which can also supply energy in stand-alone operation. The HYD 3000 ... 6000-EP has integrated energy management functions which cover a diverse range of application scenarios. -
Page 16: Labelling On The Device
PRODUCT FEATURES operation, the operating current must not exceed the limits specified within the technical data. The selection of the optional inverter parts must be determined by a qualified technician who has good knowledge of the installation conditions. Product dimensions HYD 3...6K-EP: Wall bracket: Labelling on the device... -
Page 17: Functional Features
PRODUCT FEATURES Functional features The DC output generated by the PV generator can be used for both grid feed-in and battery charging. The battery can supply the energy to the grid or the consumer. The emergency current supply mode (EPS) can provide inductive loads such as air conditioning systems or refrigerators with an automatic switchover time of less than 10 milliseconds. - Page 18 PRODUCT FEATURES 3.3.2 Electrical block diagram HYD 3000 ... 6000-EP...
-
Page 19: Application Modes
PRODUCT FEATURES Application modes 3.4.1 Typical energy storage system A typical energy storage system with PV panels and battery unit(s), connected to the grid. PV panels Power Generation Date Monitoring Platform WiFi/GPRS, RS485,USB,CAN2.0 Hydbrid Inverter Smart Meter Grid Normal Load AMASS- Critical Load Storage... - Page 20 PRODUCT FEATURES 3.4.3 System without battery In this configuration, the battery unit(s) can be added later. PV panels Power Generation Date Monitoring Platform WiFi/GPRS, RS485,USB,CAN2.0 Hydbrid Inverter Smart Meter Grid Normal Load AMASS- Critical Load Storage Battery 3.4.4 Back-up mode (off-grid) When there is no grid connection, the PV panels and the battery will provide electricity to the critical load.
- Page 21 PRODUCT FEATURES 3.4.5 System with multiple inverters Up to 10 inverters can be connected in parallel, resulting in an EPS output of up to 60 kVA. PV panels PV panels Power Generation Date Monitoring Platform WiFi/GPRS, RS485,USB,CAN2.0 Hydbrid Inverter Hydbrid Inverter Replica Primary Up to 10*Inverters Parallel...
-
Page 22: Installation
INSTALLATION Installation Installation information DANGER Fire hazard Do NOT install the inverter on flammable material. • Do NOT install the inverter in an area in which flammable or • explosive material is stored. CAUTION Burning hazard Do NOT install the inverter in places where it can be accidentally •... -
Page 23: Installation Procedure
INSTALLATION IMPORTANT Weight of the device Take into account the weight of the inverter when • transporting and moving it. Choose a suitable installation location and -surface. • Commission a minimum of two persons with the • installation of the inverter. Do not set down the inverter upside-down. - Page 24 INSTALLATION and/or dealer immediately. It is recommended that the packaging material should be removed within 24 hours before installing the inverter. 4.3.2 Checking the delivery scope After unpacking the inverter, check that the delivery items are both intact and complete. In the event of any damage or missing components, contact the wholesaler.
-
Page 25: Connections
INSTALLATION No. Image Description Quantity Link port connector 8 pin terminal Split Core Current Transformer COM 16pin connector Communication cable WiFi stick Manual The warranty card Quality Certificate Connections CAUTION Damage during transportation Please check the product packaging and connections carefully •... -
Page 26: Tools
INSTALLATION ① Battery input terminals ② DC switch ③ PV input terminals ④ USB/WiFi ⑤ Link Port 0 ⑥ Link Port 1 ⑦ ⑧ Grid connection port ⑨ Load connection port ⑩ External LCD terminal Tools Prepare the tools required for the installation and the electrical connection. - Page 27 INSTALLATION No. Tool Model Function Removal tool Used to remove the PV terminal Wire stripper Used to strip the wire 4mm Allen key Used to turn the screw to connect the rear panel to the inverter. Crimping tool Used to crimp power cables Multimeter Used to check the...
-
Page 28: Installation Location
INSTALLATION No. Tool Model Function ESD gloves for the installer Safety goggles for the installer Anti-dust respiratory for the installer mask Installation location Choose a suitable position for the installation of the inverter. Ensure that the following requirements have been fulfilled: HYD 3000 ... - Page 29 INSTALLATION Minimum distances for individual HYD 3000 ... 6000-EP inverters: Minimum distances for several HYD 3000 ... 6000-EP inverters: HYD 3000 ... 6000-EP...
- Page 30 INSTALLATION NOTE Choose an easily accessible place that‘s dry, clean, and tidy. • Ambient temperature range: -30℃–60℃. • Relative humidity: 0–100% (non-condensed). • The inverter should be installed in a well-ventilated location. • Maximum altitude: 4000m. • HYD 3000 ... 6000-EP...
-
Page 31: Unpacking The Inverter
INSTALLATION Unpacking the inverter Open the packaging and grip underneath the inverter at the sides with both hands. Lift the inverter out of the packaging and move it to its installation position. HYD 3000 ... 6000-EP... -
Page 32: Installation Of The Inverter
INSTALLATION ATTENTION Mechanical damage In order to prevent injuries and damage to the device, ensure • that the inverter is kept balanced while it is being moved - it is very heavy. Do not place the inverter on its connections, as these are not •... - Page 33 INSTALLATION Place the inverter onto the wall bracket. Secure the inverter to the wall bracket M6 screws. 5. You can secure the inverter to the wall bracket using a lock. HYD 3000 ... 6000-EP...
-
Page 34: Electrical Connections
ELECTRICAL CONNECTIONS Electrical connections Safety instructions This topic describes the electrical connections of the inverter HYD 3000 ... 6000-EP. Read this section thoroughly and carefully before connecting the cables. DANGER Electrical voltage at the DC connections Ensure that the DC switch is OFF before establishing the •... - Page 35 ELECTRICAL CONNECTIONS NOTE The open-circuit voltage of the modules connected in series • must be lower than or equal to 600 Vdc. The connected PV modules must be compliant with IEC 61730 class A. Isc PV (absolute maximum) 18,0 A / 18,0 A HYD 3000-EP 15 A HYD 3680-EP...
- Page 36 ELECTRICAL CONNECTIONS Interface DC input connection port DVCC AC connection port DVCC Battery connection port DVCC Load connection port DVCC USB/WiFi interface DVCA COM interface DVCA Link Port DVCA HYD 3000 ... 6000-EP...
-
Page 37: Electrical Connection
ELECTRICAL CONNECTIONS Wiring overview Component Description Recommended Recommended cable cable type size (mm + : Positive cable of the lithium battery Outdoor multicore 16 – 20 copper cable - : Negative cable of the lithium battery + : Positive cable of PV module PV cable 4 –... -
Page 38: Connecting The Pe Cable
ELECTRICAL CONNECTIONS 3. Connect AC output power cable 4. Connect communication cable (optional) Connecting the PE cable Connect the inverter to the equipotential bonding bar by using the protective earth cable (PE) for grounding. ATTENTION Pole earthing not permissible! As the inverter is transformerless, the plus and minus poles •... -
Page 39: Connecting The Dc Cables
ELECTRICAL CONNECTIONS Install the crimped ring terminal and the washer with the M5 screw and tighten these with a torque of 3 Nm using an Allen key. ① ② M5 screw Ring terminal ③ Threaded hole Connecting the DC cables Please observe the recommended cable dimensions: Cable cross-section (mm Outer diameter of... - Page 40 ELECTRICAL CONNECTIONS Remove the crimp contacts from the positive and negative connections. 2. Remove the insulation of the cables: ① Positive DC cable ② Negative DC cable 3. Insert the positive and negative DC cables into the corresponding cable glands. 4.
- Page 41 ELECTRICAL CONNECTIONS CAUTION Danger of reverse polarity! Ensure that the polarity is correct before connecting the cables • to the DC input ports! 5. Insert the crimped DC cables into the corresponding connector housing until you hear a “clicking” sound. 6.
-
Page 42: Connecting The Battery
ELECTRICAL CONNECTIONS Danger of DC arcing Before removing the plus and minus connector, ensure that the • DC switch has been set to OFF. In order to remove the plus and minus connection from the inverter, insert a removal key into the locking and press on the key with the adequate force as shown in the following illustration: Connecting the battery Insert the connectors into the battery ports, then select a suitable... - Page 43 ELECTRICAL CONNECTIONS Connect the cable. 3. Turn the connector clockwise until it locks into place. 4. Connect the negative cable following the same steps. HYD 3000 ... 6000-EP...
-
Page 44: Connecting The Ac Power Cables
ELECTRICAL CONNECTIONS 5. Remove the connector by turning it anticlockwise. For batteries with a BMS (for example Li-Ion batteries), you need to connect either the CAN Bus or RS485 with the Battery Management system. The inverter will use the CAN Bus or RS485 Bus based on the battery selection on the inverter LCD menu. - Page 45 ELECTRICAL CONNECTIONS AC connection Each inverter must have its own circuit breaker. • Do not connect any consumers between the inverter and circuit • breaker! The AC disconnecting device must be easily accessible. • NOTE The inverter HYD 3000 ... 6000-EP has a built-in RCD (univ. •...
- Page 46 ELECTRICAL CONNECTIONS 5.6.1 AC Load connector CAUTION Electrical voltage Ensure that the grid has been switched off before removing the • AC connector. Select the suitable cable. Remove the insulating layer of the AC output cable using a wire stripper and in accordance with the following illustration: A = 15...25mm B = 6...8mm...
- Page 47 ELECTRICAL CONNECTIONS Disassemble the connector in accordance with the following illustration, guide the AC output cable through the cable gland; Connect the AC output cable in accordance with the following requirements and tighten the terminal using the Phillips screwdriver. Connection Cable Earthing cable (yellow-green) Phase (brown)
- Page 48 ELECTRICAL CONNECTIONS Connect the AC LOAD connector to the AC LOAD port of the inverter by turning it clockwise until it locks into place. Remove the AC LOAD connector by holding the unlock button and turning the connecter anticlockwise to the “unlock” position. CAUTION HYD 3000 ...
- Page 49 ELECTRICAL CONNECTIONS Electrical voltage Ensure that the grid has been switched off before removing the • AC connector. 5.6.2 AC Grid connector Select the suitable cable. Remove the insulating layer of the AC output cable using a wire stripper and in accordance with the following illustration.
- Page 50 ELECTRICAL CONNECTIONS Push the terminal forward until a "click* sound is heard. Connect the AC Load connector to the AC Load port. HYD 3000 ... 6000-EP...
- Page 51 ELECTRICAL CONNECTIONS To remove the connector, please use the removal tool and follow below steps. Feed-in limitation function The Anti-Reflux Power function refers to SOFARSOLAR's feed-in limitation function. When this function is enabled, the feed-in power of point of common coupling (PCC) will be limited to the set Reflux Power limitation.
-
Page 52: System Monitoring
ELECTRICAL CONNECTIONS The inverter output of HYD 5-20KTL-3PH series inverter has 4 sets of relays, which are electrically connected to the output end R/S/T/N respectively to ensure the continuity of the electrical connection of load R/S/T/N when the inverter is switched off the grid. NOTE Anti-Reflux Function = Export Limit function •... -
Page 53: Installation Of The Wifi-, Gprs Or Ethernet Stick
ELECTRICAL CONNECTIONS Installation of the WiFi-, GPRS or Ethernet stick Remove the waterproof WiFi/GPRS cover using a screwdriver. Install the WiFi/GPRS/Ethernet stick. Fasten the WiFi/GPRS module with screws. Definition Function GND.S USB power - USB data + USB data - VBUS USB power + HYD 3000 ... - Page 54 Preparation: The WiFi stick is installed in accordance with the previous section and the SOFAR inverter must be in operation. Carry out the following steps in order to configure the WiFi stick: Connect your PC or smartphone with the WiFi network of the WiFi stick.
- Page 55 ELECTRICAL CONNECTIONS Register your system at the website home.solarmanpv.com. For this, enter the serial number found on the stick logger. Installers use the portal at pro.solarmanpv.com 5.9.2 Setting up the WiFi stick with the app To download the app, search for “SOLARMAN” in the Apple or Google Play store, or use the following QR codes: SOLARMAN Smart (for end customers): •...
- Page 56 ELECTRICAL CONNECTIONS Scan the barcode of the stick logger to assign an inverter to the system. Go to the newly created system in order to configure the stick logger (device/logger) Press the button on the WiFi stick for 1 second to activate the WPS mode of the stick so that the smartphone can be connected to the WiFi stick.
- Page 57 ELECTRICAL CONNECTIONS Status Description READY Logger status Flashing (1 sec.): Normal status Flashing (0.1 sec.): Reset running Off: Error status Reset button Keystroke Description 1 sec. WPS mode 5 sec. Restart 10 sec. Restart (reset) 5.9.3 Setting up the GPRS stick The GPRS stick must be equipped with a SIM card: The GPRS stick must be set up via the SOLARMAN Business.
-
Page 58: Multifunctional Com Port
ELECTRICAL CONNECTIONS Identify the WiFi stick with the serial number and select it. Call up the “Custom” item Enter the command AP+YZAPN= “APN name of your grid operator” (e.g. for T-Mobile: AP+YZAPN=internet.v6.telekom) To check the setting, call up AP+YZAPN You can check the status via the “Logger Status” and “Read” menu item. - Page 59 ELECTRICAL CONNECTIONS HYD 3000 ... 6000-EP...
- Page 60 ELECTRICAL CONNECTIONS Definition Function Description CANH CAN high data CANL CAN low data Communication with BMS 485-2TX+ RS485 differential signal + 485-2TX- RS485 differential signal – 485-1TX+ RS485 differential signal + Wired or parallel system monitoring 485-1TX- RS485 differential signal – GND-S (DRMS) logic interfaces DRMS1/5...
- Page 61 ELECTRICAL CONNECTIONS Remove the cable sheath at a length of 20–40 mm, and the insulation of the cables at a length of 6–10 mm. Connect the wires according to the required functions and pins. Close the housing and secure the cable gland by turning clockwise. Finally, connect the connector.
- Page 62 ELECTRICAL CONNECTIONS 5.10.1 RS485 For the monitoring and control of several inverters, you connect the RS485 wires in daisy-chain. NOTE The RS485 line may not be any longer than 1000 m • Assign each inverter its own Modbus address (1 to 31) via the •...
- Page 63 ELECTRICAL CONNECTIONS The function of the logic interface must be set on the LCD display; please observe the operating steps in chapter 7. Logic interface pins are defined in accordance with various standard specifications. Logic interface for AS/NZS 4777.2:2015 also known as Inverter Demand Response Modes (DRMs) The inverter recognises all supported Demand Response commands and initiates the reaction within two seconds.
- Page 64 ELECTRICAL CONNECTIONS Logic interface for VDE-AR-N 4105:2018-11 This function serves to control and/or limit the output power of the inverter. The inverter can be connected to a radio ripple control receiver in order to dynamically limit the output power of all inverters within the system. The inverter is preconfigured on the following power levels Name Inverter...
- Page 65 ELECTRICAL CONNECTIONS Relay status: Closing is 1, opening is 0 Active power Cos (φ) 100% Logic interface for EN50549-1:2019 The active power output can be ended within five seconds following a command to the input interface. Functional description of the terminal Name Inverter Radio ripple control...
- Page 66 ELECTRICAL CONNECTIONS The inverter is preconfigured on the following power levels. Relay status: Closing is 1, opening is 0 Active Power drop rate Cos (φ) power < 5 seconds 100% 5.10.3 CT and smart meter There are two different system configurations to get grid current information: using only a CT (System A) or a combination of a CT and an energy meter (System B).
- Page 67 ELECTRICAL CONNECTIONS System A: CT without an energy meter HYD 3000 ... 6000-EP...
- Page 68 ELECTRICAL CONNECTIONS System B: CT with an energy meter The HYD 3000 ... 6000-EP inverter is compatible with the DDSU666 single-phase smart meter. PIN 15 and PIN 16 are used for communication with the smart meter, which correspond to PIN 7 and PIN 8 on the electricity meter.
- Page 69 ELECTRICAL CONNECTIONS In a setup without a smart meter, connect the CT to Pin 13 and Pin 14. NOTE To ensure that the CT is connected in the correct direction, • please use the inverter’s CT calibration function. 5.10.4 Link port NOTE Up to 10 units can be connected in parallel.
- Page 70 ELECTRICAL CONNECTIONS In order to evenly distribute the loads among the inverters, • the cable length between each output and the load must be the same. If the maximum apparent power of a load is greater than • 110% of the inverter’s rated output, the device must not be connected via the AC LOAD terminal, but rather directly to the grid.
- Page 71 ELECTRICAL CONNECTIONS Entry Description Parallel Control Enable/disable a parallel setup. Both the Master and Slave unit(s) must have this function enabled. Parallel Primary-Replica Set one inverter as the Master (Replica), and the others as Slave (Replica) Parallel Address Each inverter needs to be assigned a unique parallel address.
-
Page 72: Commissioning The Inverter
COMMISSIONING THE INVERTER Commissioning the inverter Safety test before commissioning ATTENTION Check the voltage range Ensure that the DC and AC voltages are within the permissible • range of the inverter. Check before turning on inverter Please ensure that the inverter and all the wiring are installed correctly, securely, and reliably, and that all environment requirements are met. -
Page 73: Starting The Inverter
COMMISSIONING THE INVERTER the communication cable to the lithium battery has been correctly connected. Starting the inverter Switch on the DC switch. Switch on the battery. Switch on the DC isolator between the battery and inverter. 4. Switch on the AC circuit breaker between the inverter’s GRID port and GRID. -
Page 74: Initial Setup
COMMISSIONING THE INVERTER The selected country code influences the device grid • monitoring. The inverter continuously checks the set limits and, if required, disconnects the device from the grid. Initial setup You need to set the following parameters before the inverter starts to operate. - Page 75 COMMISSIONING THE INVERTER SofarSolar is not responsible for the consequences of • selecting the incorrect country code. The selected country code influences the device grid • monitoring. The inverter continuously checks the set limits and, if required, disconnects the device from the grid. Country Code Standard...
- Page 76 COMMISSIONING THE INVERTER Denmark 005-000 General 005-001 TR322 Dubai 046-000 DEWG 046-001 DEWG MV 018-000 EN50438 018-001 EN50549 018-002 EN50549-HV Europe 022-000 (general) 022-001 France 011-000 VDE0126 011-001 FAR Arrete23 011-002 VDE0126-HV Germany 000-000 VDE4105 000-001 BDEW 000-002 VDE0126 000-003 VDE4105-HV 000-004 BDEW-HV...
- Page 77 COMMISSIONING THE INVERTER Mexico 035-000 Netherlands 007-000 General New Zealand 027-000 Philippines 026-000 Poland 012-000 012-001 012-002 Spain 003-000 RD1699 003-001 RD1699-HV Sweden 021-000 Turkey 004-000 General United 009-000 Kingdom 009-001 009-002 G99-HV Slovakia 029-000 029-001 029-002 South Africa 044-000 044-001 Thailand 040-000...
-
Page 78: Operation Of The Device
OPERATION OF THE DEVICE Operation of the device This chapter describes the LCD and LED displays of the HYD 3000 ... 6000-EP inverter. Control panel and display field 7.1.1 Buttons and display lights Button Button Name Description Back Previous menu level, enter menu Select previous menu entry, increase setting value... -
Page 79: Standard Display
OPERATION OF THE DEVICE LEDs On-grid (green) ON: “Normal” state Flashing: “Standby” mode Off-grid (green) ON: “Normal” state Flashing: “Standby” mode ALARM (red) ON: “Error” Standard display The display shows all relevant information of the inverter. Press UP button, to show PV parameters like current, voltage and power Press DOWN button to show GRID parameters such as voltage, current and frequency... -
Page 80: Energy Storage Modes
OPERATION OF THE DEVICE Energy Storage Modes The HYD 3000 ... 6000-EP offers five operational modes which determine the way the inverter interacts with the battery. NOTE The default mode is the Self-use Mode. • 7.3.1 Self-use Mode The inverter automatically charges and discharges the battery according to the following rules: If PV generation equals the load consumption (ΔP <... - Page 81 OPERATION OF THE DEVICE If the load is more than PV generation plus battery, the inverter will import power from the grid The priority of power supply: PV, Battery, Grid The priority of power consumption: Loads, Battery, Grid NOTE If it is not allowed to export power to the grid, an energy •...
- Page 82 OPERATION OF THE DEVICE Rule 0: Enabled / Disabled From Charge 02h00m - 04h00m 070% 01000W Effective date Dec.22 Mar.21 Weekday select Mon. Tue. Wed. Thu. Fri. Sat. Sun. 7.3.3 Timing Mode With the Timing Mode the user can define fixed times of the day to charge or discharge the battery with a certain power.
- Page 83 OPERATION OF THE DEVICE 7.3.4 Passive Mode In systems with external energy management systems the passive mode should be used. The inverter’s operation will be controlled by the external controller using the Modbus RTU protocol. Please contact SofarSolar if you need the Modbus protocol definition for this device. 7.3.5 EPS Mode With the EPS Mode turned ON, the inverter provides energy to the load...
-
Page 84: Menu Structure
OPERATION OF THE DEVICE generation is reduced by adjusting the MPPT If the PV generation is less than the load consumption, the battery will supply power to the load. Menu structure NOTE Several settings require a password to be entered (the •... - Page 85 OPERATION OF THE DEVICE 2. Time Sets the system time of the inverter 3. Safety Param. Safety parameters are set by using a USB drive (see chapter 6.4) 4. Energy Storage Mode Select the operation mode (default mode is Self-use Mode) 5.
- Page 86 OPERATION OF THE DEVICE 7. Bluetooth Reset Reset the Bluetooth connection 8. CT Calibration Calibrate the direction and phase of the CT Energy Statistics menu This menu displays the PV system’s energy statistics (in kWh) collected by the inverter, including PV generation, load, export, import, charge, and discharge.
- Page 87 OPERATION OF THE DEVICE 1. Current Event List 2. History Event List Software update The user can update the software via the USB flash drive. SofarSolar will provide the firmware update when it is required. Switch the DC and AC switches off and then remove the communication cover.
- Page 88 OPERATION OF THE DEVICE 10. After the update is complete, switch the DC switch off and wait until the LCD screen goes out 11. Re-establish a watertight communication connection 12. Switch the DC and AC circuit breaker back on 13. You can check the current software version in item “3. Software version”...
-
Page 89: Troubleshooting Handling
TROUBLESHOOTING HANDLING Troubleshooting handling Troubleshooting This section contains information and procedures pertaining to the remedying of potential problems with the inverter. To carry out troubleshooting, proceed as follows: Check the warnings, error messages or error codes displayed on the • screen of the inverter. - Page 90 TROUBLESHOOTING HANDLING Earth fault alarm This inverter is compliant with IEC 62109-2 Clause 13.9 for earth fault protection. If an earth fault alarm occurs, the error is displayed on the LCD screen, the red light illuminates and the error can be found in the error history log.
- Page 91 TROUBLESHOOTING HANDLING Event list Code Name Description Solution ID001 GridOVP The voltage of the power grid is If the alarm occurs too high occasionally, it may be due to the power grid. The ID002 GridUVP The voltage of the mains is too low inverter will automatically ID003 GridOFP...
- Page 92 TROUBLESHOOTING HANDLING ID005 GFCI Earth fault If the error occurs occasionally, it may be due to external factors. The inverter will automatically return to normal operation. If the error occurs frequently and lasts for a long time, check whether the insulation resistance between the PV generator and earth (ground) is too low and check the...
- Page 93 TROUBLESHOOTING HANDLING ID021 GFCIDevic Leakage current sampling error eFault(DC) (DC) ID022 GFCIDevic Leakage current sampling error eFault(AC) (AC) ID023 HwADFault DC load voltage sampling error ID024 HwADFault DC input current sampling error ID025 HwADErrD CI(DC) ID026 HwADErrId cBranch ID029 Consistent The GFCI sample between the Fault_GFCI master DSP and the slave DSP is...
- Page 94 TROUBLESHOOTING HANDLING generator and earth (ground), rectify the fault if there is a short circuit. ID043 PEConnect Earth fault Check the PE conductor for Fault function ID044 PV Config Incorrect input mode configuration Check the MPPT input Error mode setting (parallel mode/independent mode) of the inverter and correct if necessary.
- Page 95 TROUBLESHOOTING HANDLING ID057 TempFault Temperature error ambient _Env1 temperature 1 ID058 TempFault Temperature error ambient _Env2 temperature 2 ID059 TempFault Temperature error module 1 _Inv1 ID060 TempFault Temperature error module 2 _Inv2 ID061 TempFault Temperature error module 3 _Inv3 ID062 TempDiffEr rInv ID065...
- Page 96 TROUBLESHOOTING HANDLING ID070 BatOVP Battery overvoltage Check whether the voltage of the battery is higher than the maximum input voltage of the inverter. If this is the case, adjust the number of battery modules in series. ID071 LLCBusOV LLC Bus overvoltage protection ID072 SwBusRms Inverter bus voltage RMS...
- Page 97 TROUBLESHOOTING HANDLING ID098 HwBusOV Inverter bus hardware overvoltage ID099 HwBuckBo BuckBoost hardware overflows ostOCP ID100 HwBatOCP Battery hardware overflow ID102 HwPVOCP PV hardware overflows ID103 HwACOCP Mains current is too high and has triggered hardware protection ID105 MeterCom Communication fault with meter Check communication to mFault unit...
- Page 98 TROUBLESHOOTING HANDLING ID124 BatLowVolt Protection against battery Please check if the battery ageAlarm undervoltage voltage of the inverter is too ID125 BatLowVolt Low battery voltage shutdown low. ageShut ID129 unrecoverH Mains current is too high and has wAcOCP caused an unrecoverable hardware fault ID130 unrecoverB...
- Page 99 TROUBLESHOOTING HANDLING ID141 unrecoverV The bus voltage is unbalanced busUnbala and has caused an unrecoverable error If the error persists, contact Technical Support. ID142 PermSpdF ail(DC) ID143 PermSpdF ail(AC) ID145 USBFault USB error Check the USB connection of the inverter. ID146 WifiFault Wifi error...
- Page 100 TROUBLESHOOTING HANDLING ID157 BMSComm Lithium battery communication Make sure your battery is unicatonFa error compatible with the inverter. CAN communication is recommended. Check the communication line or the connection of the battery and the inverter for errors. ID161 ForceShutd Forced shutdown The inverter has been forcibly disconnected.
-
Page 101: Maintenance
TROUBLESHOOTING HANDLING ID177 BMS OVP BMS overvoltage alarm Internal error in the connected lithium battery. ID178 BMS UVP BMS Undervoltage alarm Switch off the inverter and ID179 BMS OTP BMS High temperature warning the lithium battery, wait 5 ID180 BMS UTP BMS low temperature warning minutes and then switch ID181... -
Page 102: Technical Data
TECHNICAL DATA Technical data HYD * Data Sheet 3000- 3680- 4000- 4600- 5000- 5500- 6000- Battery Parameters Battery type Lithium-ion, Lead-acid Nominal battery voltage (V) Battery voltage 42–58 range (V) Battery capacity 50–2000 (Ah) Max. charging / discharging power 3750 4000 4250 5000... - Page 103 TECHNICAL DATA Max. input voltage Start-up voltage Rated input voltage (V) MPPT operating 90–580 voltage range (V) Full power MPPT 160–520 180–520 200–520 230–520 250–520 300–520 voltage range (V) Number of MPP trackers Max. input current 13/13 per MPPT (A) Max.
- Page 104 TECHNICAL DATA Nominal grid 50 Hz / 60 Hz frequency Output THDi <3% (@nominal power) Power factor 1 default (+/-0.8 adjustable) Output AC (Emergency Power Supply) Max. apparent 3000 3680 4000 4600 5000 power (VA) Peak output 3600, 4400, 4800, 5520, power, duration 6000, 60s...
- Page 105 TECHNICAL DATA Max. discharging efficiency of 94.6% battery Protection PV reverse polarity protection PV insulation detection Ground fault monitoring Overcurrent protection (A) Overvoltage protection DC switch Firm frequency optional response function SPD protection MOV: Type III standard General Data Standby self- <10 W consumption Topology...
- Page 106 TECHNICAL DATA Current sensor External connection (A) Noise <25 dB Weight (kg) 21.5 Cooling Natural Dimensions 482*503*183mm Display LCD, App via Bluetooth Warranty 5 years, optional: up to 20 years Standards EN 61000-6-2, EN 61000-6-3, EN 61000-3-2, EN 61000-3-3, EN 61000-3-11, EN 61000-3-12 IEC 62109-1/2, IEC 62040-1, IEC 62116, IEC 61727, IEC 61683, IEC Safety standards...
- Page 107 Shenzhen SOFARSOLAR Co., Ltd. 11/F, Gaoxinqi Technology Building, District 67, XingDong Community, XinAn Street, Bao’An District, Shenzhen, China SofarSolar GmbH Krämerstrasse 20 72764 Reutlingen Germany Email: service@sofarsolar.com Web: www.sofarsolar.com...
Need help?
Do you have a question about the HYD 3 6K-EP Series and is the answer not in the manual?
Questions and answers