Table of Contents
Advertisement
Quick Links
Advertisement
Table of Contents

Related Manuals for Sofar 25KTLX-G3


Summary of Contents for Sofar 25KTLX-G3
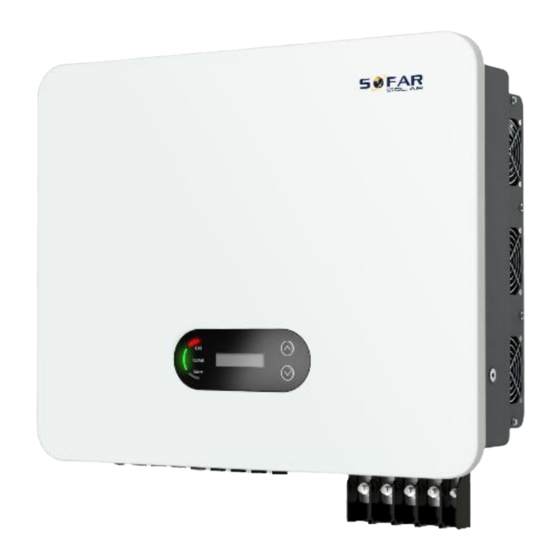
- Page 1 SOFAR 25...50KTLX-G3...
-
Page 2: Table Of Contents
CONTENTS About this manual 1.1 Copyright declaration 1.2 Structure of the manual 1.3 Scope 1.4 Target group 1.5 Symbols used Basic safety information 2.1 Safety information 2.2 Symbols and signs Product features 3.1 Product dimensions 3.2 Power grid types 3.3 Product dimensions 3.4 Labeling on the device 3.5 Functional features 3.6 E ciency curve... - Page 3 5.8 Energy meter connection 5.9 System monitoring Commissioning the inverter 6.1 Safety test before commissioning 6.2 Starting the inverter 6.3 Smartphone app SOFAR View Operation of the device 7.1 Control panel and display field 7.2 Standard display 7.3 Status display 7.4 Menu structure...
-
Page 4: About This Manual
1.3 Scope This product manual describes the installation, electrical connection, commissioning, main- tenance and fault elimination procedures of the SOFAR 25 … 50KTLX-G3 inverters. 1.4 Target group This manual is intended for specialist electrical engineers who are responsible for the instal- lation and commissioning of the inverter in the PV system, as well as the PV system opera- tors. - Page 5 50KTLX-G3 User Manual This manual contains information on safe operation and uses symbols to ensure the safety of persons and property as well as the e cient operation of the inverter. Please read through the following symbol explanations carefully in order to prevent injury or property damage. DANGER Non-observance will result in death or serious injury.
-
Page 6: Basic Safety Information
50KTLX-G3 User Manual 2.Basic Safety Information NOTE If you have any questions or problems after reading the following information, please contact SOFARSOLAR This chapter details the safety information pertaining to the installation and operation of the device. 2.1 Safety information Read and understand the instructions within this manual and familiarise yourself with the relevant safety symbols in this chapter before beginning with the installation of the device and eliminating any faults. - Page 7 50KTLX-G3 User Manual Mount the inverter to a suitable object with a su cient load-bearing capacity (e.g. walls, PV frames etc.) and ensure that the inverter is upright. Choose a suitable place for the installation of electrical devices. Ensure that there is su cient space for an emergency exit which is suitable for maintenance.
- Page 8 50KTLX-G3 User Manual IMPORTANT Authorisation for grid feed-in Obtain authorisation from the local power grid operator before connecting the inverter to the public power grid. NOTE Voiding of guarantee Do not open the inverter or remove any of the labels. Otherwise, SOFARSOLAR shall assume no guarantee.
-
Page 9: Symbols And Signs
50KTLX-G3 User Manual IMPORTANT Unauthorised repairs! Following the elimination of any faults, the inverter should be fully functional once more. Should any repairs be required, please contact a local authorised service centre. The internal components of the inverter must NOT be opened without the relevant authorisation. - Page 10 50KTLX-G3 User Manual 2.2.1 Symbols on the inverter Several symbols pertaining to safety can be found on the inverter. Please read and under- stand the content of these symbols before starting the installation. Symbols Description Residual voltage is present in the inverter! Before opening the inverter, you should wait five minutes to ensure that the capacitor has been fully discharged.
-
Page 11: Product Features
This chapter describes the product features, dimensions and e ciency levels. 3.1 Product dimensions The SOFAR 25 … 50KTLX-G3 is a grid-coupled PV inverter with up to two MPPTs which converts the direct current generated by PV systems into a three-phase alternating current and feeds it into the public power grid. -
Page 12: Product Dimensions
L × W × H = 585 mm × 480 mm × 220 mm Front Side Back bottom view 4-12 wall bracket NOTE · SOFAR 25…36KTLX-G3 inverters support 6-channel PV string input. · SOFAR 40…50KTLX-G3 and the HV models support 8-channel PV string input. -
Page 13: Labeling On The Device
50KTLX-G3 User Manual 3.4 Labeling on the device Labeling must not be covered or removed! 3.5 Functional features The DC output generated by the PV generator is filtered by the input board before it reaches the power board. The input board also provides functions such as the detection of insulation impedance and the measurement of the DC current and voltage. -
Page 14: E Ciency Curve
WiFi/GPRS. F. Software update The device supports local updates via USB stick and remote updates via WiFi/GPRS. 3.5.2 Electrical block diagram 3.6 E ciency curve Vpv=540v Vpv=620v Vpv=850v 100% %of Rated Output Power Power e ciency curve (SOFAR 50KTLX-G3) - Page 15 50KTLX-G3 User Manual 180 190 200 210 220 230 240 250 260 270 280 290 300 Vgrid (V) Rated power ratio vs. Grid voltage...
-
Page 16: Installation
50KTLX-G3 User Manual 4.Installation 4.1 Installation information DANGER Fire hazard · Do NOT install the inverter on flammable material. · Do NOT install the inverter in an area in which flammable or explosive material is stored. CAUTION Burning hazard · Do NOT install the inverter in places where it can be accidentally touched. The housing and heat sink may become very hot while the inverter is being operated. - Page 17 4.3.2 Checking the delivery scope After unpacking the inverter, check that the delivery items are both intact and complete. In the event of any damage or missing components, contact the wholesaler. ① ② Inverter SOFAR Wall bracket ×1 25 … 50KTLX-G3 ×1 ③ ④...
-
Page 18: Tools
⑲ ⑳ Outgoing inspection Warranty registration report ×1 form ×1 *) second Pcs. for SOFAR 40…50KTLX-G3 + SOFAR 50KTLX-G3-HV 4.4 Tools Prepare the tools required for the installation and the electrical connection. ① ② Model: Screwdriver Model: Hammer Drill Recommend... -
Page 19: Installation Location
50KTLX-G3 User Manual ⑦ ⑧ Model: Multimeter Model: Marker Function: Used to check the earthing Function: Used for Marking ⑨ ⑩ Model: Spirit level Model: Measuring Tape Function: Used to align the wall Function: Used to measure distances bracket ⑪ ⑫... - Page 20 50KTLX-G3 User Manual Minimum distances for individual SOFAR 25 … 50KTLX-G3 inverters: 50cm 50cm Minimum distances for several SOFAR 25 … 50KTLX-G3 inverters:...
-
Page 21: Unpacking The Inverter
50KTLX-G3 User Manual 4.6 Unpacking the inverter 1.Open the packaging and have at least two people grip underneath the inverter at both sides. 2.Lift the inverter out of the packaging and move it to its installation position horizontally. ATTENTION Mechanical damage •... - Page 22 50KTLX-G3 User Manual 3.Place the inverter in the wall bracket. Secure the inverter to the wall bracket using the M6 hexagon screw.
-
Page 23: Electrical Connections
50KTLX-G3 User Manual 5.Electrical connections 5.1 Safety instructions This topic describes the electrical connections of the inverter SOFAR 25 … 50KTLX-G3. Read this section thoroughly and carefully before connecting the cables. DANGER Electrical voltage at the DC connections · Ensure that the DC switch is OFF before establishing the electrical connection. The reason is that the electrical charge remains in the capacitor after the DC switch has been switched off. -
Page 24: Electrical Connection
50KTLX-G3 User Manual 5.2 Electrical connection The electrical connection is established as follows: 1.Connect PE cable 2.Connect DC input cable 3.Connect AC output power cable 4.Connect communication cable (optional) 5.3 Connections CAUTION Damage during transportation · Please check the product packaging and connections carefully prior to installation. ①... -
Page 25: Connecting The Dc Cables
50KTLX-G3 User Manual 1.Remove the insulation of the cable. For outside use, cables of > 16mm are recommended for earthing). Note: L2 is 2 to 3 mm longer than L1 2.Crimp the cable to the ring terminal. Recommended OT terminal: OT-M6. 3.Tighten the crimped ring terminal with the M6 screw by using a torque wrench of 5 to 7 Nm: M6 screw... - Page 26 50KTLX-G3 User Manual Please observe the recommended cable dimensions: • Cu cable cross section: 2.5 … 6 mm2 • Cable outside diameter: 6 … 9 mm 1.Insert the positive and negative DC cables into the corresponding cable glands. L=8-10mm L=8-10mm 1.Positive DC cable 2.Negative DC cable 2.Use a crimping plier to crimp the DC cables.
-
Page 27: Connecting The Ac Power Cables
50KTLX-G3 User Manual 4.Verify the voltage level of the DC input with a multimeter and ensure that the polarity is correct. 5.Connect the DC connector to the inverter. Positive Negative Removing the connectors CAUTION Danger of DC arcing · Before removing the plus and minus connector, ensure that the DC switch has been set to OFF. - Page 28 50KTLX-G3 User Manual NOTE · The inverter SOFAR 25 ... 50KTLX-G3 has a built-in AFI (univ. sensitive residual current protection). If an external AFI is required, we recommend an AFI type A or B RCD featuring a residual current of 100 mA or higher.
- Page 29 You need to use five core outdoor cables, the recommended AC cable and residual current device (RCD) can be used as below table: If a RCD is required under local regulations, SOFAR recommends a type A or B RCD with sensitivity of 100 mA or higher.
- Page 30 50KTLX-G3 User Manual 5.6.1 Installation instructions CAUTION Electrical voltage · Ensure that the grid has been switched off before removing the AC connector. 1. Remove the waterproof cover with a screwdriver, and remove the stopper from the waterproof cable gland; 2.
-
Page 31: Communication Port
· When an aluminum cable is used, a copper/aluminum conversion terminal is required. This is supplied together with the copper terminals. 5.7 Communication ports The SOFAR 25 ... 50KTLX-G3 inverters come with one of the following two COM ports and one USB port. 1:USB Port... - Page 32 50KTLX-G3 User Manual 5.7.2 COM port Please follow below steps to install the COM cable according to the correct COM port (check the corresponding type A or B): 12-15mm 20-25mm Housing Housing...
- Page 33 50KTLX-G3 User Manual Please refer to below table for the specific PIN assignments. Note Function Definition RS485 Signal+ RS485 A1-1 RS485 Signal + Inverter monitoring and system RS485 A1-2 control RS485 Signal - RS485 B1-1 RS485 Signal - RS485 B1-2 RS485 Signal + RS485 A2 Energy meter port...
- Page 34 50KTLX-G3 User Manual Grid Protection Relays PIN: PIN: 9 10 11 12 GND K0 DRM: DRM: GND 0 Ripple Control Receiver Note Function Definition Digital Input Signal GND Grounding GND.S Remote shutdown DRM0 0% power feed-in DRM1/5 DI 5 50% power feed-in DRMs/Logic Interface DRM2/6 DI 6...
- Page 35 50KTLX-G3 User Manual Logic interface for VDE-AR-N 4105:2018-11 This function serves to control and/or limit the output power of the inverter. The inverter can be connected to a radio ripple control receiver in order to dynamically limit the output power of all inverters within the system. The inverter remains in the reduced power mode as long as the input is closed.
-
Page 36: Energy Meter Connection
DRM1/5 NOTE · The Logic interface has to be activated in the LCD screen of the inverter, or with SOFAR View App: DRM0 active: Remote Shutdown DRMn active: active power feed-in limitation function · Also, the power levels in percentage can be adjusted if needed 5.8 Energy meter connection... -
Page 37: System Monitoring
Limit the feed-in power of each phase to 1/3 of the Ctrl. Selling Power setpoint 5.9 System monitoring The SOFAR 25 ... 50KTLX-G3 inverters provide various communication methods for the system monitoring: RS485 or WiFi stick (standard), GPRS or Ethernet stick (optional). 5.9.1 RS485 network You can connect RS485-linked devices to your PC via an RS485 USB adapter or connect them to a data logger. - Page 38 50KTLX-G3 User Manual NOTE · The RS485 line may not be any longer than 1000 m · Assign each inverter its own modbus address (1 to 31) via the LCD display · At the last inverter, put a termination resistor of 120 Ohm between RS485+ and RS485- RS 485/USB RS 485/USB...
- Page 39 5.9.3 Configuration of the WiFi stick via the web browser Preparation: The WiFi stick is installed in accordance with the previous section and the SOFAR inverter must be in operation. Carry out the following steps in order to configure the WiFi stick: 1.
- Page 40 50KTLX-G3 User Manual • SOLARMAN Business (for installers): Configuration steps 1. After starting the app, register as a new user or enter the current SOLARMAN access data. 2. Create a new system and save the system data. 3. Scan the barcode of the stick logger to assign an inverter to the system. 4.
- Page 41 50KTLX-G3 User Manual Reset button Keystroke Description 1 sec. WPS mode 5 sec. Restart 10 sec. Restart (reset) 5.9.5 Setting up the Ethernet stick The Ethernet stick is delivered with DHCP as standard, so it automatically gets an IP address from the router. If you wish to set up a fixed IP address, connect a PC to the Ethernet stick and open the configuration page via the web address 10.10.100.254.
-
Page 42: Commissioning The Inverter
• The selected country code influences the device grid monitoring. The inverter continuously checks the set limits and, if required, disconnects the device from the grid. 6.3 Smartphone app SOFAR View The app is available for Android and iOS systems and allows for easy initial setup as well as advanced configurations. - Page 43 50KTLX-G3 User Manual Android After switching on the inverter, the app finds the unit via Bluetooth under its serial number. The app password for the installation is 6868, for the end customer 8888. NOTE · If the Bluetooth connection does not work, please carry out a firmware update of the inverter.
-
Page 44: Operation Of The Device
50KTLX-G3 User Manual 7.Operation of the device This chapter describes the LCD and LED displays of the SOFAR 25 ... 50KTLX-G3 inverter. 7.1 Control panel and display field 7.1.1 Buttons and display lights Buttons Button Name Description Short press: Select previous menu item... -
Page 45: Status Display
50KTLX-G3 User Manual 7.3 Status display The following table displays the various statuses and their meanings: Description Status The control software is started Initialisation Connecting criteria are checked. The voltage and frequency limits Wait must be within the defined range for a specific duration in accor- dance with the selected country code. - Page 46 50KTLX-G3 User Manual Sets the country and standard applicable to the current application conditions and requirements. 4. Country Code Before setting this, ensure that the “Activate country setting” option has been activated. Local control of inverter 5. On/off control Sets the total power generation. 6.
-
Page 47: Software Update
50KTLX-G3 User Manual 2. Event list 1. Current event 2. Event “History 001 ID04 06150825 Fault information (display of the event sequence number, event ID number and time that the event takes place) System information menu 1. Inverter type 2. Serial number 3. - Page 48 50KTLX-G3 User Manual 7. Enter the password (the standard password is 0715). 8. The system will then successively update the main DSP, auxiliary DSP and ARM processors. Pay attention to the displays. 9. If an error message appears, switch off the DC switch and wait until the LCD screen goes out.
-
Page 49: Troubleshooting Handling
50KTLX-G3 User Manual 8.Troubleshooting handling 8.1 Troubleshooting This section contains information and procedures pertaining to the remedying of potential problems with the inverter. To carry out troubleshooting, proceed as follows: • Check the warnings, error messages or error codes displayed on the screen of the inverter. If no error information is displayed on the screen, check whether the following require- ments have been fulfilled: •... - Page 50 50KTLX-G3 User Manual Name Description Solution If the alarm occurs repeatedly, contact the technical support department in order to adjust the The grid frequency is GridUFP voltage and frequency limits after too low you have obtained the approval of the local power grid operator. Check whether too few PV modules have been switched in The input voltage is...
- Page 51 50KTLX-G3 User Manual Name Description Solution The input current is HwAcOCP too high and has triggered the hardware protection The grid current is too AcRmsOCP high Grid current measure- HwADFaultIGrid ment error DC current measurement HwADFaultDCI ID15-ID24 are internal errors of the error inverter.
- Page 52 50KTLX-G3 User Manual Name Description Solution Internal inverter error, switch the DC switch OFF, wait 5 minutes and then switch the DC switch ON. Check whether the error has The grid current is too high SwOCPInstan been rectified. If not, please contact the technical support department.
- Page 53 50KTLX-G3 User Manual Name Description Solution The SCI communication between the control SciCommLose board and communica- tions board is faulty RelayTestFail Grid relay error Check the insulation resistance between the PV generator and The insulation resistance PvIsoFault earth (ground), and rectify the error is too low in the event of short-circuiting.
- Page 54 50KTLX-G3 User Manual Name Description Solution Check the setting of the MPPT UnrecoverPv input mode (parallel mode/inde- Incorrect input mode ConfigSetWrong pendent mode) of the inverter and correct if required. The input current is too UnrecoverIPV high and has caused an Instant unrectifiable error ID74-ID77 are internal inverter...
-
Page 55: Maintenance
50KTLX-G3 User Manual Name Description Solution The inverter automatically reduces the output power when the The inverter has derated frequency of the electrical grid is UnderFreque itself due to a low gri too low. Ensure that the grid ncyDerating frequency frequency is within the permissible range. - Page 56 50KTLX-G3 User Manual 8.2.2 Cleaning the heat sink In order to help guarantee correct long-term operation of the inverter, make sure that there is su cient space for ventilation around the heat sink. Check the heat sink for blockages (dust, snow etc.) and remove them if present. Please clean the heat sink using an air blower and a dry, soft cloth or a soft bristle brush.
-
Page 57: Technical Data
50KTLX-G3 User Manual 9.Technical data SOFAR SOFAR SOFAR SOFAR SOFAR SOFAR SOFAR Datasheet 25KTLX- 30KTLX- 33KTLX- 36KTLX- 40KTLX- 45KTLX- 50KTLX- Input (DC) Recommended max. 37500 45000 49500 54000 60000 67500 75000 PV input power (Wp) Max. DC power for 25000... - Page 58 50KTLX-G3 User Manual Protection DC reverse polarity protection Anti-islanding protection Leakage current protection Ground fault monitoring PV-array string fault monitoring Feed-in limitation function DC switch PV: type II standard, AC: type II standard Input / output SPD Communication Standard communication RS485 / WiFi / Bluetooth, optional: Ethernet mode General Data...
- Page 59 Version 1.4 ENERGY TO POWER YOUR LIFE ADDRESS 11th Floor, Gaoxingqi Technology Building, District 67, Xingdong Community, Xin’an Street, Bao’an District, Shenzhen, China SOFARSOLAR GmbH Krämerstrasse 20 72764 Reutlingen Germany EMAIL service.uk@sofarsolar.com WEBSITE www.sofarsolar.com...
Need help?
Do you have a question about the 25KTLX-G3 and is the answer not in the manual?
Questions and answers