Table of Contents
Advertisement
Quick Links
Advertisement
Table of Contents

Related Manuals for Sofar 1100TL-G3


Summary of Contents for Sofar 1100TL-G3
- Page 1 User manual SOFAR 1.1K~3.3KTL-G3 Copyright © Shenzhen SOFARSOLAR Co., Ltd...
-
Page 2: Table Of Contents
3.3. Product Overview ..................... - 14 - 3.4. Tools ......................... - 15 - 3.5. Determining the Installation Position ............... - 16 - 3.6. Moving the SOFAR 1.1K~3.3KTL-G3 ............- 18 - 3.7. Installing SOFAR 1.1K~3.3KTL-G3 ............... - 19 - 4. Electrical Connections ....................- 21 - 4.1. - Page 3 User manual SOFAR 1.1K~3.3KTL-G3 Notice This manual contains important safety instructions that must be followed during installation and maintenance of the equipment. Save these instructions! This manual must be considered as an integral part of the equipment. The manual must always accompany the equipment,even when it is transferred to another user or field.
-
Page 4: Preface
This manual contains important safety instructions and installation instructions that must be followed during installation and maintenance of the equipment. Scope This product manual describes the installation,electrical connections, commissioning, maintenance and troubleshooting of SOFAR 1.1K~3.3KTL-G3 inverters: 1100TL-G3 1600TL-G3 2200TL-G3... - Page 5 User manual SOFAR 1.1K~3.3KTL-G3 Danger indicates a hazardous situation which, if not avoided, will result in death or serious injury. Danger Warning indicates a hazardous situation which, if not avoided, could result in death or serious injury. Warning Caution indicates a hazardous situation which, if not avoided, could result in minor or moderate injury.
-
Page 6: Basic Safety Information
User manual SOFAR 1.1K~3.3KTL-G3 1. Basic safety information If you have any question or problem when you read the following information, please contact Shenzhen SOFARSOLAR Co., Ltd. Note Outlines of this chapter Safety instruction It mainly introduce the safety instruction when install and operate the equipment. - Page 7 User manual SOFAR 1.1K~3.3KTL-G3 his/her job.Staff in charge of using and maintaining the equipment must be skilled,aware and mature for the described tasks and must have the reliability to correctly interpret what is described in the manual. For safety reason only a qualified electrician, who has received training and / or has demonstrated skills and knowledge in construction and in operation of this unit, can install this inverter.
- Page 8 User manual SOFAR 1.1K~3.3KTL-G3 ways and means for protecting the components (in particular, the electronic components) from violent shocks, humidity, vibration, etc. Electric connection Please comply with all the current electrical regulations about accident prevention in dealing with the solar invert.
-
Page 9: Symbols And Signs
User manual SOFAR 1.1K~3.3KTL-G3 Inverter should work again after removing any faults. If you need any repair work, please contact with the local authorized service center. Can’t open the internal components of inverter without authorized. Shenzhen SOFARSOLAR Co., Ltd. does not take any responsibility Attention for the losses from that. - Page 10 Caution hot surface. Comply with the Conformite Europeenne (CE) certification. Grounding point. Please read this manual before install SOFAR 1.1K~3KTL-G3. This indicates the degree of protection of the equipment according to IEC standard 70-1 (EN 60529 June 1997) . Positive pole and negative pole of the input voltage (DC).
-
Page 11: Product Characteristics
User manual SOFAR 1.1K~3.3KTL-G3 2. Product characteristics Outlines of this chapter Product dimensions It introduces the field of use, and the overall dimensions of SOFAR 1.1K~3.3KTL-G3 inverters. Function description It introduces how SOFAR 1.1K~3.3KTL-G3 inverters work and the function modules inside. - Page 12 SOFAR 1100TL-G3 SOFAR 1600TL-G3 SOFAR 2200TL-G3: 303mm×260.5mm×118mm SOFAR 2700TL-G3 SOFAR 3000TL-G3 SOFAR 3300TL-G3: 321mm×260.5mm×131.5mm Figure 2-2 Front view and left view dimensions of SOFAR 2200TL-G3 Figure 2-3 Front view and left view dimensions of SOFAR 3300TL-G3 - 7 - Copyright © Shenzhen SOFARSOLAR Co., Ltd...
-
Page 13: Function Characteristics
User manual SOFAR 1.1K~3.3KTL-G3 Figure 2-4 Bracket dimensions of SOFAR 1.1K~3.3KTL-G3 Labels on the equipment The labels must NOT be hidden with objects and extraneous parts (rags,boxes,equipment,etc.);the y must be cleaned regularly and kept visible at all times. 2.2. Function characteristics DC power generated by PV array is filtered through Input Board before entering into Power Board. - Page 14 User manual SOFAR 1.1K~3.3KTL-G3 Function module A. Energy management unit This control can be used to switch the inverter on/off through an external (remote) control. B. Feeding reactive power into the grid The inverter is able to produce reactive power and can therefore feed it into the grid through the setting of the phase shift factor.
-
Page 15: Efficiency Curve
User manual SOFAR 1.1K~3.3KTL-G3 Electrical block diagram Figure 2-5 Electrical block diagram 2.3. Efficiency curve - 10 - Copyright © Shenzhen SOFARSOLAR Co., Ltd... -
Page 16: Installation
Installation notes Do NOT install the SOFAR 1.1K~3.3KTL-G3 on flammable material. Do NOT install the SOFAR 1.1K~3.3KTL-G3 in an area used to store Flammable or explosive material. Danger The enclosure and heat sink are very hot while the inverter is working, therefore do NOT install the SOFAR 1.1K~3.3KTL-G3 in... - Page 17 If any damage is found, do not unpack the SOFAR 1.1K~3.3KTL-G3 and contact the dealer as soon as possible. You are advised to remove the packing materials within 24 hours before installing the SOFAR 1.1K~3.3KTL-G3 inverter.
- Page 18 User manual SOFAR 1.1K~3.3KTL-G3 M5Hexagon screws 2pcs Expansion bolts 3pcs M5 flat washer 5pcs spring shim 5pcs Self-tapping screw 3pcs Documents 3pcs Registration Form 1pcs AC output terminal 1pcs Unlocking device 1pcs 485 terminal (2pin) 1pcs Stick Logger 1pcs(Adapter) - 13 -...
-
Page 19: Product Overview
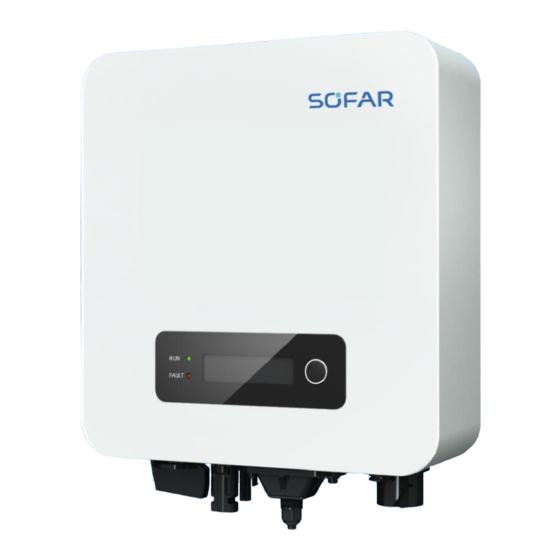
SOFAR 1.1K~3.3KTL-G3 3.3. Product Overview SOFAR 1.1K~3.3KTL-G3 inverter is 100% strictly inspected before package and delivery. It is forbidden to put the SOFAR 1.1K~3.3KTL-G3 inverter upside down during delivery. Please check the product package and fittings carefully before installation. CAUTION Figure.3-2 SOFAR 1.1K~3.3KTL-G3 inverter overview... -
Page 20: Tools
User manual SOFAR 1.1K~3.3KTL-G3 3.4. Tools Prepare tools required for installation and electrical connections. Table 3-3 shows the tools required for installation and electrical connections. Tool Model Function Hammer drill Recommend drill Used to drill holes on the wall. dia. 6mm... -
Page 21: Determining The Installation Position
Safety goggles Operators wear Anti-dust respirator Operators wear 3.5. Determining the Installation Position Determine an appropriate position for installing the SOFAR 1.1K~3.3KTL-G3 inverter. Comply with the following requirements when determining the installation position: Figure 3-3 Installation Requirements - 16 -... - Page 22 User manual SOFAR 1.1K~3.3KTL-G3 Figure 3-4 clearance for single SOFAR 1.1K~3.3KTL-G3 Inverter Figure 3-5 Installation of multiple SOFAR 1.1K~3.3KTL-G3 inverter - 17 - Copyright © Shenzhen SOFARSOLAR Co., Ltd...
-
Page 23: Moving The Sofar 1.1K~3.3Ktl-G3
Figure 3-6 and Figure 3-7. Figure 3-6 Moving the inverter (1) Figure 3-7 Moving the inverter (2) Step 2 Lift the SOFAR 1.1K~3.3KTL-G3 from the packing case and move it to the - 18 - Copyright © Shenzhen SOFARSOLAR Co., Ltd... -
Page 24: Installing Sofar 1.1K~3.3Ktl-G3
Attention inverter to protect its shell. 3.7. Installing SOFAR 1.1K~3.3KTL-G3 Step 1 Determine the positions for drilling holes, ensure the hole positions are level, then mark the hole positions using a marker pen, use the hammer drill to drill holes on the wall. - Page 25 User manual SOFAR 1.1K~3.3KTL-G3 Figure 3-9 - 20 - Copyright © Shenzhen SOFARSOLAR Co., Ltd...
-
Page 26: Electrical Connections
SOFAR 1.1K~3.3KTL-G3 4. Electrical Connections Outlines of this chapter This topic describes the SOFAR 1.1K~3.3KTL-G3 inverter electrical connections. Read this part carefully before connecting cables. NOTE: Before performing electrical connections, ensure that the DC switch is OFF. Since the stored electrical charge remains in a capacitor after the DC switch is turned OFF. So it’s necessary to wait for at least 5 minutes for the capacitor to be electrically discharged. -
Page 27: Electrical Connection
User manual SOFAR 1.1K~3.3KTL-G3 Interface PV input interface DVCC AC output interface DVCC USB interface DVCA RS485 interface DVCA CT interface DVCA Logic interface DVCA WiFi/GPRS/Ethernet interface DVCA 4.1. Electrical connection Figure 4-1 Shows the flowchart for connecting cables to the inverter. - Page 28 User manual SOFAR 1.1K~3.3KTL-G3 as shown in Figure 4-2. Figure 4-2 Preparing a ground cable (1) Note: L2 is 2 to 3mm longer than L1 Step 2 Insert the exposed core wires into the OT terminal and crimp them by using a crimping tool, as shown in Figure 4-3.
-
Page 29: Connecting Dc Input Power Cables
User manual SOFAR 1.1K~3.3KTL-G3 1.M5 screw、2.OT Terminal、3.Tapped hole 4.3. Connecting DC Input Power Cables Table 4-1 Recommended DC input cable specifications Cross-Sectional Area (mm ²) External Cable Diameter(mm) Range Recommended Value 4.0~6.0 4.5~7.8 Step 1 Remove cable glands from the positive and negative connectors. - Page 30 User manual SOFAR 1.1K~3.3KTL-G3 Note: L2 is 2 to 3 mm longer than L1. Step 3 Insert the positive and negative power cables into corresponding cable glands. Step 4 Insert the stripped positive and negative power cables into the positive and negative metal terminals respectively and crimp them using a clamping tool.
-
Page 31: Connecting Ac Output Power Cables
If an external RCD is required, a type-A RCD with rated residual current of 100mA or higher is suggested. Connect the SOFAR 1.1K~3.3KTL-G3 to the AC power distribution frame (PDF) or power grid using AC output power cables. - Page 32 User manual SOFAR 1.1K~3.3KTL-G3 Table 4-2 Recommended AC output cable specifications Model SOFAR SOFAR SOFAR SOFAR SOFAR SOFAR 1100TL-G3 1600TL-G3 2200TL-G3 2700TL-G3 3000TL-G3 3300TL-G3 Cable(Copper) ≧4mm² ≧4mm² ≧4mm² ≧6mm² ≧6mm² ≧6mm² Breaker 16A/400V 16A/400V 25A/400V 25A/400V 25A/400V 25A/400V Multi core copper wire...
- Page 33 User manual SOFAR 1.1K~3.3KTL-G3 Inverter is equipped with an IP66 AC , and the AC output cable needs to connector be wired by the customer. The appearance of is shown in figure 4-11. AC connector AC connector : Figure 4-11...
- Page 34 User manual SOFAR 1.1K~3.3KTL-G3 Step 3 Connect AC output cable as per the following requirements: Connect the yellow-green wire to the hole labeled "PE", fasten the wire using an Cross screwdriver; Connect the brown wire to the hole labeled "L", fasten the wire using an Cross screwdriver;...
-
Page 35: Rs485,Ct,Inverter Logic Interface Connection
Make sure the grid is disconnected before removing the AC connector. Caution 4.5. RS485,CT,inverter logic interface connection The communication interface location of the SOFAR 1.1K~3.3KTL-G3 is shown in the figure below. Figure 4-18 - 30 - Copyright © Shenzhen SOFARSOLAR Co., Ltd... - Page 36 User manual SOFAR 1.1K~3.3KTL-G3 Table 4-3 Recommended communication cable size are shown below, The wiring methods are the same for RS485 and CT, this part describes their wiring methods and logic interface wiring method. Communication function RS485 Cable size 0.5~1.5mm²...
- Page 37 User manual SOFAR 1.1K~3.3KTL-G3 A1: Waterproof stopper Step 3 Select appropriate cable according Table4-2, remove the insulation layer using a wire stripper, the length of the wire core is about 6mm,insert the cable through the cable gland and waterproof cover, according to Table4-4, connect the...
- Page 38 User manual SOFAR 1.1K~3.3KTL-G3 The logic interface pin definitions and circuit connections are as follows: The function of logical interface needs to be set on the display screen, please refer to the operation steps in section 6.3 . Logic interface pin are defined according to different standard requirements.
- Page 39 User manual SOFAR 1.1K~3.3KTL-G3 Table 4-6 Function description of the terminal Pin NO. Pin name Description Connected to (RRCR) Relay contact 1 input K1 - Relay 1 output Relay contact 2 input K2 - Relay 2 output Relay contact 3 input...
- Page 40 User manual SOFAR 1.1K~3.3KTL-G3 Table 4-8 Function description of the terminal Pin NO. Pin name Description Connected to (RRCR) Relay contact 1 input K1 - Relay 1 output Not Connected Not Connected Not Connected Not Connected Not Connected Not Connected...
-
Page 41: Wifi/Gprs Module Installation Procedure
Step 1: Remove WiFi/GPRS waterproof cover using screw driver. Step 2: Install WiFi/GPRS module. Stpe 3: Fasten WiFi/GPRS module using screws. 4.7. Communication method SOFAR 1.1K~3.3KTL-G3 gird-connected inverters offer RS485 (standard) and Wi-Fi (optional) communication modes: - 36 - Copyright © Shenzhen SOFARSOLAR Co., Ltd... - Page 42 User manual SOFAR 1.1K~3.3KTL-G3 A. Communication between one inverter and one PC: 1. RS485 Refer to the figure shown below, connect the TX+ and TX- of the inverter to the TX+ and TX- of the RS485 → USB adapter, and connect the USB port of the adapter to the computer.
- Page 43 User manual SOFAR 1.1K~3.3KTL-G3 Using the Wi-Fi S/N number (NOTE3), then you can login the website: http://www.solarmanpv.com/portal/LoginPage.aspx to remote monitors the inverter. B. Communication between multiple inverters and one PC: 1. RS485 Refer to the following figure: RS485 wires are connected in parallel between inverters, refer to section 4.5 of this manual for wire connection methods.
- Page 44 User manual SOFAR 1.1K~3.3KTL-G3 The operation information (generated energy, alert, operation status) of the inverter can be transferred to PC or uploaded to the server via Wi-Fi. You can register on the website. http://www.solarmanpv.com/portal/Register/Regi_Pub.aspx Using the Wi-Fi S/N number (NOTE3) , then you can login the website: http://www.solarmanpv.com/portal/LoginPage.aspx to remote monitors the inverter.
-
Page 45: Commissioning Of Inverter
5.2. Start inverter Step 1: Turn ON the DC switch. (optional) Step 2: Turn ON the AC circuit breaker. When the DC power generated by the solar array is adequate, the SOFAR 1.1K~3.3KTL-G3inverter will start automatically. Screen showing “normal” indicates correct operation. -
Page 46: Operation Interface
SOFAR 1.1K~3.3KTL-G3 6. Operation interface Outlines of this chapter This section introduces the display, operation, buttons and LED indicator lights of SOFAR 1.1K~3.3KTL-G3 Inverter. 6.1. Operation and Display Panel Buttons and Indicator lights Button: Long press the button to enter the next menu or confirm the selection... -
Page 47: Standard Interface
User manual SOFAR 1.1K~3.3KTL-G3 6.2. Standard Interface - 42 - Copyright © Shenzhen SOFARSOLAR Co., Ltd... - Page 48 User manual SOFAR 1.1K~3.3KTL-G3 When power-on, LCD interface displays INITIALIZING, refer below picture. When control board successfully connected with communication board, the LCD display the current state of the inverter,display as shown in the figure below. - 43 - Copyright © Shenzhen SOFARSOLAR Co., Ltd...
- Page 49 User manual SOFAR 1.1K~3.3KTL-G3 Inverter states includes: wait、check、normal、fault and permanent Wait: Inverter is waiting to Check State at the end of reconnection time. In this state, grid voltage value is between the max and min limits and so on; If not, Inverter will go to Fault State or Permanent State.
-
Page 50: Main Interface
User manual SOFAR 1.1K~3.3KTL-G3 6.3. Main Interface Long press the button under standard interface to enter into main interface, including: Normal ------Long press the button 1.Enter Setting 2.Event List 3.SystemInfo 4.System Time 5.Software Update (A) “Enter Setting” Interface as below: 1.Enter Setting... - Page 51 User manual SOFAR 1.1K~3.3KTL-G3 when entering the password, short press to change the number, long press confirm the current number, and long press after entering the correct password.If "password error, try again" appears, you will need to re-enter the correct password.
- Page 52 Set the address (when you need to monitor multiple inverters simultaneously) Default 01. 9. Set Input mode The input modes of the SOFAR inverter are divided into parallel mode and independent mode (when multi-channel MPPT is input) . Since SOFAR 1.1k ~ - 47 -...
- Page 53 User manual SOFAR 1.1K~3.3KTL-G3 3.3KTL-G3 has only one group of MPPT input, the input modes are not distinguished. 10. Set Language Set the inverter display language. 11. Set Start Parameter 12. Set Safety Voltage 13. Set Safety Frequency 14. Insulation Resistance...
- Page 54 User manual SOFAR 1.1K~3.3KTL-G3 Enable or disable the hard anti-reflux function of the inverter, and set the hard reflux power. 22. Logic interface Enable or disable logical interfaces. Please refer to this manual 4.5 RS485, CT, inverter logic interface connection for details.
-
Page 55: Update Software Online
The user needs to copy the upgrade file to the USB flash drive. 6.4. Update Software online SOFAR 1.1K~3.3KTL-G3 inverters offer software upgrade via USB flash drive to maximize inverter performance and avoid inverter operation error caused by software bugs. - Page 56 User manual SOFAR 1.1K~3.3KTL-G3 success, the LCD will display "Update DSP1 Success", otherwise display "Update DSP1 Fail"; If slave DSP update success, the LCD will display "Update DSP2 Success", otherwise display "Update DSP2 Fail". Step 8 If Fail, please turn off the DC breaker, wait for the LCD screen extinguish, then turn on the DC breaker again, then Continue to update from step 5.
-
Page 57: Trouble Shooting
User manual SOFAR 1.1K~3.3KTL-G3 7. Trouble shooting Outlines of this chapter This topic describes how to perform daily maintenance and troubleshooting to ensure long term proper operation of the inverter. 7.1. Trouble shooting This section contains information and procedures for solving possible problems with the inverter. - Page 58 User manual SOFAR 1.1K~3.3KTL-G3 monitoring. If an Earth Fault Alarm occurs, the fault will be displayed on the LCD screen, the red light will be on, and the fault can be found in the history of the fault. For the machine installed with Wi-Fi/GPRS, the alarm information can be seen on the corresponding monitoring website, and can also be received by the APP on the mobile phone.
- Page 59 User manual SOFAR 1.1K~3.3KTL-G3 automatically returns to normal operating status after correct adjustments. Input current is not Check the input mode (parallel mode/ ID10 Ipv Unbalance balanced independent mode) setting of inverter according to Section 6.3 (C) 6.Input Mode of this user manual, If it’s incorrect, change it according to...
- Page 60 User manual SOFAR 1.1K~3.3KTL-G3 turn ON the “DC switch”. Check whether the The bus voltage is ID27 Vbus Unbalan fault is rectified. If no, please contact technical not balanced support. Check the input mode (parallel mode/ independent mode) setting of inverter according...
- Page 61 User manual SOFAR 1.1K~3.3KTL-G3 Check the insulation resistance between the PV The insulation ID56 Pv Iso Fault array and earth (ground) , if a short circuit resistance is too low occurs, rectify the fault. Over Temp The inverter temp is...
-
Page 62: Maintenance
User manual SOFAR 1.1K~3.3KTL-G3 Ensure the installation position and installation The inverter has method meet the requirements of Section 3.4 of Over Temp derated because of this user manual. Check whether the ambient ID81 Derating the temperature is temperature of the installation position exceeds too high the upper limit. - Page 63 User manual SOFAR 1.1K~3.3KTL-G3 the DC SWITCH is turned OFF and the circuit breaker between inverter and electrical grid is turned OFF. Wait at least for 5 minutes before the Cleaning. Inverter cleaning Please clean the inverter with an air blower, a dry & soft cloth or a soft bristle brush.
-
Page 64: Technical Data
User manual SOFAR 1.1K~3.3KTL-G3 8. Technical data Outlines of this chapter This topic lists the technical specifications for all SOFAR 1.1K~3.3KTL-G3 inverters. 8.1. Input parameters (DC) SOFAR SOFAR SOFAR SOFAR SOFAR SOFAR Technical Data 1100TL- 1600TL- 2200TL- 2700TL- 3000TL- 3300TL- Recommended Max. -
Page 65: Output Parameters (Ac)
User manual SOFAR 1.1K~3.3KTL-G3 8.2. Output parameters (AC) SOFAR SOFAR SOFAR SOFAR SOFAR SOFAR Technical Data 1100TL- 1600TL- 2200TL- 2700TL- 3000TL- 3300TL- Rated Output power 1100W 1600W 2200W 2700W 3000W 3300W Max.Output power 1100VA 1600VA 2200VA 2700VA 3000VA 3300VA Rated Output 4.8A... -
Page 66: Efficiency,Protection And Communication
User manual SOFAR 1.1K~3.3KTL-G3 8.3. Efficiency, Protection and Communication SOFAR SOFAR SOFAR SOFAR SOFAR SOFAR Technical Data 1100TL- 1600TL- 2200TL- 2700TL- 3000TL- 3300TL- Max.Efficiency 97.5% 97.7% Euro Efficiency 96.9% 97.2% MPPT Efficiency >99.9% Self-consumption at <1W night Safety protection Anti islanding,RCMU,Ground fault monitoring... -
Page 67: General Date
User manual SOFAR 1.1K~3.3KTL-G3 8.4. General Date SOFAR SOFAR SOFAR SOFAR SOFAR SOFAR Technical Data 1100TL- 1600TL- 2200TL- 2700TL- 3000TL- 3300TL- Topology Transformerless Ambient temperature -30~60℃ range Permissible humidity 0~100% range Noise figure <25dB DC Switch Optional Cooling Natural convection Max.Operating... -
Page 68: Quality Assurance
User manual SOFAR 1.1K~3.3KTL-G3 9. Quality Assurance Standard warranty period The standard warranty period of inverter is 60 months (5 years).There are two calculation methods for the warranty period: 1. Purchase invoice provided by the customer: the first flight provides a standard warranty period of 60 months (5 years) from the invoice date;... - Page 69 User manual SOFAR 1.1K~3.3KTL-G3 Once the extended warranty service is purchased, our company will issue the extended warranty card to the customer to confirm the extended warranty period. Invalid warranty clause Equipment failure caused by the following reasons is not covered by the warranty: 1) The "warranty card"...
- Page 70 User manual SOFAR 1.1K~3.3KTL-G3 Statement If you have purchased this product in Australia, you should be aware that this warranty is provided in addition to other rights and remedies held by a consumer at law. Our goods come with guarantees that cannot be excluded under the Australian Consumer Law.
- Page 71 User manual SOFAR 1.1K~3.3KTL-G3 - 66 - Copyright © Shenzhen SOFARSOLAR Co., Ltd...
Need help?
Do you have a question about the 1100TL-G3 and is the answer not in the manual?
Questions and answers