Advertisement
Quick Links
ITEM#: TX 93465, TX 93457
Tools Required for Assembly
Socket & Wrench
13mm
Mallet
STEP 1:
Overhead View
A
Connect the Upper Support (3) and the
Lower Support (4) between the Legs by
using the Bolts (A x 16).
Do not fully tighten the bolts.
STEP 3:
6
Slide the Platform (6) through
the Shaft (5), and secure with
the Screws (B). Fix the Cross
Braces (2) on to the legs
2
with the screws (C)
Tighten all Bolts and Screws
CHAR-LOG
LEG
UPPER SUPPORT
WINDMILL HEAD
Tools Included
Phillips
Screwdriver
3
A
4
STEP 4:
Separate assembly instructions
included in box with windmill head.
B
C
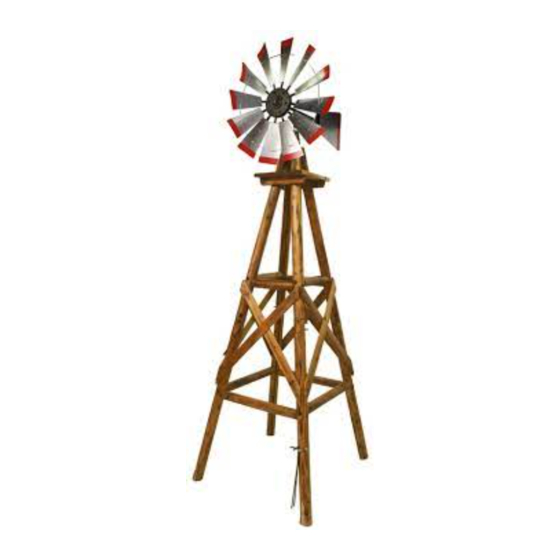
Assemble the Windmill Head (7),
make sure the Stop Nut is screwed
on well.
IMPORTANT: READ CAREFULLY BEFORE BEGINNING
Recessed Hole
1. Do not tighten bolts until fully assembled.
2. Recessed holes to face outward.
3. Insert bolts with washer and secure with washer and nut.
Pre-Checked
4. Pre-checked side must always face downward or inward.
WINDMILL
®
PARTS AND HARDWARE LIST
1
3
4
LOWER SUPPORT
X 4PCS
7
A
NUT & BOLT
X 1PC
D
STAKE
Length: 13.5"
STEP 2:
Fit the Shaft (5) between the angles at the
top of the legs: Secure with the screws (B)
using a standard or electric drill.
A
STEP 5:
Place the Windmill Head (7) on the Shaft (5)
Assembling
Please tighten the Clamp (E) on each
windmill leg (about 8cm to the end ),
in order to avoid the wooden legs
cracked when insert the Stakes (D)
into the ground.
Congratulations
on your assembly!
CROSS BRACE
1S x 2PCS
1P x 2PCS
5
PLATFORM
SHAFT
X 4PCS
B
N08-11
S04-5
X 16PCS
X 16PCS
CLAMP
X 4PCS
5
8
E
2
X 8PCS
6
X 1PC
C
S04-3
X 32PCS
E
X 4PCS
B
D
Advertisement

Related Manuals for Leigh Country CHAR-LOG TX 93465


Summary of Contents for Leigh Country CHAR-LOG TX 93465
- Page 1 IMPORTANT: READ CAREFULLY BEFORE BEGINNING Recessed Hole 1. Do not tighten bolts until fully assembled. 2. Recessed holes to face outward. 3. Insert bolts with washer and secure with washer and nut. Pre-Checked 4. Pre-checked side must always face downward or inward. CHAR-LOG WINDMILL ®...
- Page 2 Limited Warranty and Care Instructions ONE (1) YEAR LIMITED WARRANTY (NON-TRANSFERABLE) This product is covered under United General Supply’s (UGS) one (1) year limited warranty. To the original purchaser of this piece of furniture, cooler, or accessory; UGS warrants that it will be free from defects in material and workmanship for up to one year from the date of purchase under normal use and proper care.
Need help?
Do you have a question about the CHAR-LOG TX 93465 and is the answer not in the manual?
Questions and answers