Table of Contents
Advertisement
Quick Links
Right
Do not use power tools because
they may damage the hardware
or split the wood.
Tools Required for Assembly
Socket & Wrench
13mm
Mallet
STEP 1: Assembling the Rocker Arm Frame
Take one piece of the following parts with a letter "R" behind
each number: 1 , 2 , 3 , 4 , 8 ("R" = Right)
1: Part 1 to part 4
4R
2: Part 3 to part 2
3: Part 2 to part 1
4: Part 4 to part 3
5: Part 8 to Part 2 & 3
Use indicated hardware,
directed by diagram.
8R
REPEAT steps 1 through 5 above using parts labeled
with a letter "L" ("L" = Left) after the part number.
STEP 3: Assembling the Upper Half
Once the bottom half is finished,
take the BACK PANEL (7) and
place it gently on part 4
of the arm frame.
Secure with indicated hardware
in the diagram.
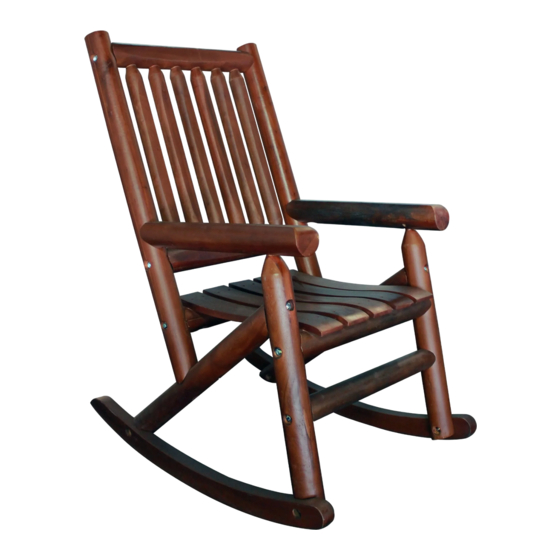
Amber-Log
ITEM # TX 36000, TX 36002, TX 36003, TX 36005, TX 36007,
TX 36008 & TX 86000
1
ARM REST
R
Left
LOWER
5
SUPPORT BEAM
Tools Included
Phillips
Screwdriver
1R
C
A
3R
B
A
7
Pre-Checked
Recessed Hole
®
PARTS AND HARDWARE LIST
2
FRONT LEG
R
L
L
X 2pcs
X 2pcs
6
SEAT PANEL
X 1pc
X 1pc
A
NUT & BOLT
(8x120mm)
X 12pcs
STEP 2: Assembling the Bottom Half
Take assembled SEAT PANEL (6) and one of the arm frames,
Attach the SEAT PANEL (6) to the inside of the arm frame,
secure with the indicated nuts and bolts.
A
2R
Right
A
B
A
A
STEP 4: Finish
IMPORTANT: READ CAREFULLY BEFORE BEGINNING!
Make sure that all parts and hardware are present before
assembly.
Assemble on an a non-marring and level surface.
Do not completely tighten all nuts and bolts until the chair
is fully assembled.
The recessed holes face outward.
Porch Rocker
DIAGONAL
3
SUPPORT
R
L
X 2pcs
7
BACK PANEL
X 1pc
B
C
NUT & BOLT
SCREW
(8x70mm)
(4x40mm)
X 4pcs
X 2pcs
Left
Insert the other arm frame
on the other side and
6
secure loosely with
nuts and bolts.
Take the Lower Support
Beam (5) and secure
under the seat between
the arm frame with
5
nuts and bolts.
Tighten all nuts, bolts,
and screws once
every part and
D
assembled pieces
are in place.
D
Congratulations
on your assembly!
VERTICAL
4
SUPPORT
R
L
X 2pcs
8
RUNNER
L
R
X 2pcs
D
SCREW
(8x120mm)
X 4pcs
Advertisement
Table of Contents

Subscribe to Our Youtube Channel
Related Manuals for Leigh Country Amber-Log TX 86000


Summary of Contents for Leigh Country Amber-Log TX 86000
- Page 1 IMPORTANT: READ CAREFULLY BEFORE BEGINNING! Make sure that all parts and hardware are present before Pre-Checked assembly. Assemble on an a non-marring and level surface. Do not completely tighten all nuts and bolts until the chair is fully assembled. Recessed Hole The recessed holes face outward.
- Page 2 Limited Warranty and Care Instructions LIMITED ONE YEAR WARRANTY (NON-TRANSFERABLE) This product is covered under United General Supply’s (UGS) one (1) year limited warranty. To the original purchaser of this piece of furniture, cooler or accessory; UGS warrants that it will be free from defects in material and workmanship for up to one year from the date of purchase under normal use and proper care.
Need help?
Do you have a question about the Amber-Log TX 86000 and is the answer not in the manual?
Questions and answers