Table of Contents
Advertisement
Quick Links
Advertisement
Table of Contents

Subscribe to Our Youtube Channel
Summary of Contents for Blodgett ZEPHAIRE-240E
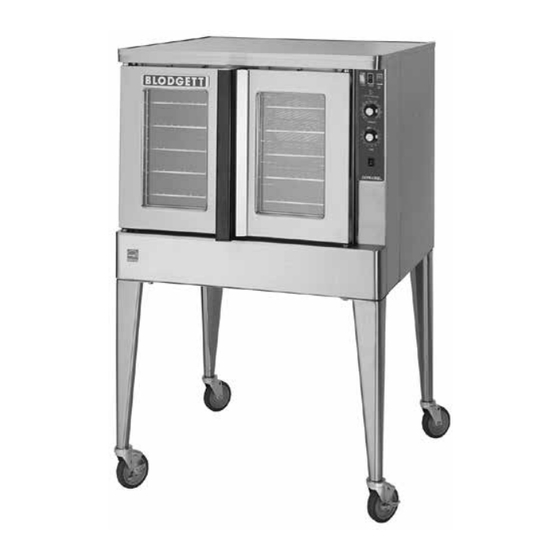
- Page 1 ZEPHAIRE-100-E convEctIon ovEn InStALLAtIon - oPERAtIon - MAIntEnAncE (Formerly ZEPHAIRE-240E PLUS) BLoDGEtt ovEn coMPAnY www.blodgett.com 44 Lakeside Avenue, Burlington, Vermont 05401 USA Telephone: (802) 658-6600 Fax: (802) 864-0183 PN 52789 Rev M (6/15) © 2015 - G.S. Blodgett Corporation...
- Page 2 Your Service Agency’s Address: Model Serial number Oven installed by Installation checked by...
-
Page 3: Table Of Contents
tABLE oF contEntS IMPoRtAnt WARnInG: Improper installa- InStALLAtIon tion, adjustment, alternation, Oven Description and Specifications ........2 service or maintenance can cause property damage, in- Delivery and Location . -
Page 4: Oven Description And Specifications
Heat normally lost, is recirculated within the cooking chamber before being vented from the oven: resulting in substantial reductions in energy consumption and en- hanced oven performance. Air Flow Pattern for Blodgett Electric Convection Ovens Figure 1 ELEctRIcAL RAtInGS MAx LoAD (AMPS) -
Page 5: Delivery And Location
Delivery and Location DELIvERY AnD InSPEctIon ovEn LocAtIon All Blodgett ovens are shipped in containers to prevent The well planned and proper placement of your oven will damage. Upon delivery of your new oven: result in long term operator convenience and satisfactory performance. -
Page 6: Utility Connections - Standards And Codes
If you have any questions regarding the tric appliance. proper installation and/or operation of your Blodgett oven, • Qualified installation personnel must be experienced please contact your local distributor. If you do not have a... -
Page 7: Electrical Connections
3. Reinstall the control panel and the bottom trim. The Blodgett Oven Company cannot assume responsibil- ity for loss or damage suffered as a result oF improper Connect wires to Run supply line through installation. -
Page 8: Oven Assembly
Installation oven Assembly nSF BoLtS These bolts are required by NSF to block any exposed 1. Locate the 5/16” bolts that were shipped with the hole on the back of an oven. This includes: oven. • any unit, single or stacked, without a back panel. 2. -
Page 9: Leg Attachment
Installation oven Assembly LEG AttAcHMEnt cAStER ASSEMBLY 1. Push the oven onto a lift with the bottom of the oven NOTE: Install the locking casters on the front of the down. oven. Install the non-locking casters on the back of the oven. 2. -
Page 10: Double Section Assembly
Installation oven Assembly DoUBLE SEctIon ASSEMBLY ovEn LEvELInG 1. Secure the short legs to the bottom sections as de- After assembly, the oven should be leveled and moved to scribed. the operating location. 1. The oven can be leveled by adjusting the feet or cast- 2. -
Page 11: Ssi-D Infinite Control W/Digital Timer
Operation SSI-D Infinite Control w/Digital Timer contRoL DEScRIPtIon 1. CAVITY LIGHTS ON/OFF - Operates the oven cavity lights. 2. BLOWER HI/LO/OFF SWITCH - Controls the opera- tion of the blower. If the blower switch is in the OFF position the oven will be turned off. 3. -
Page 12: Ssi-M Infinite Control W/Manual Timer
Operation SSI-M Infinite Control w/Manual Timer contRoL DEScRIPtIon 1. CAVITY LIGHTS ON/OFF - Operates the oven cavity lights. 2. BLOWER HI/LO/OFF SWITCH - Controls the opera- tion of the blower. If the blower switch is in the OFF position the oven will be turned off. 3. -
Page 13: The Information Contained In This Manual Is Important For The Prop-Ssd Solid State Digital Control
Operation SSD Solid State Digital control contRoL DEScRIPtIon 1. CAVITY LIGHTS ON/OFF - Operates the oven cavity lights. 2. BLOWER ON/OFF SWITCH - Controls the operation of the blower. If the blower switch is in the OFF posi- tion the oven will be turned off. 3. - Page 14 Operation SSD Solid State Digital control to set the hold time: 7. Push the START/STOP key (9) to stop timer. 1. Press HOLD key (12) to turn hold mode on. 8. Remove the product. NOTE: HOLD light is on. 9. Push HOLD (12) key to turn off hold mode. 2.
-
Page 15: Er Installation, Use, And Mainte-General Guidelines For Operating Personnel
Operation General Guidelines for operating Personnel cook tIMES AnD tEMPERAtURES oPERAtInG tIPS Preheating the oven Pans and Racks Always preheat the oven before baking or roasting. We Product or pan height determines how many racks are recommend preheating 50°F (28°C) above the cook tem- used. -
Page 16: Nance Of This Oven. Adherence Suggested Times And Temperatures
Operation Suggested times and temperatures PRoDUct tEMPERAtURE tIME # SHELvES Meats Hamburger Patties (5 per lb) 400°F (205°C) 8-10 mins. Steamship Round (80 lb. quartered) 275°F (135°C) 2 hrs 45 mins. Standing Rib Choice (20 lbs, trimmed, rare) 235°F (115°C) 2 hrs 45 mins. -
Page 17: Maintenance
If maintenance or repairs are required, contact your local cleaner. Blodgett service company, a factory representative or the cleaning the Exterior Blodgett Oven company. 1. Saturate a cloth with stainless steel cleaner and wipe WARnInG!! down the exterior. -
Page 18: Troubleshooting Guide
*Denotes remedy is a difficult operation and should be performed by qualified personnel only. It is recommended, how- ever, that All repairs and/or adjustments be done by your local Blodgett service agency and not by the owner/operator. Blodgett cannot assume responsibility for damage as a result of servicing done by unqualified personnel.


Need help?
Do you have a question about the ZEPHAIRE-240E and is the answer not in the manual?
Questions and answers