
Related Manuals for Equinox Systems SpectraPix Batten EQLED055


Summary of Contents for Equinox Systems SpectraPix Batten EQLED055
- Page 1 SpectraPix Batten User Manual Order codes: EQLED055 - Black Housing EQLED055A - White Housing...
-
Page 2: Safety Advice
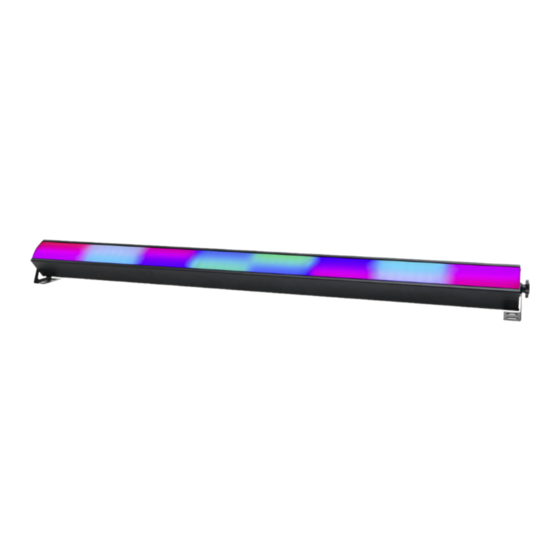
Safety advice WARNING FOR YOUR OWN SAFETY, PLEASE READ THIS USER MANUAL CAREFULLY BEFORE YOUR INITIAL START-UP! • Before your initial start-up, please make sure that there is no damage caused during transportation. • Should there be any damage, consult your dealer and do not use the equipment. •... - Page 3 Product overview & technical specifications SpectraPix Batten The SpectraPix Batten contains 224 SMD 5050 RGB LEDs divided into 16 segments. They feature a wide 120° viewing angle and feature a milky, frost effect front screen along with clear front screen to further expand the versatility of this fixture.
-
Page 4: Technical Specifications
Technical specifications www.prolight.co.uk w.prolight.co.uk www.prolight.co.uk MENU DOWN ENTER ENTER DMX INPUT DMX OUTPUT DMX INPUT DMX OUTPUT www.prolight.co.uk MENU DOWN ENTER DMX INPUT DMX OUTPUT In the box: 1 x fixture with frosted front screen, 1 x clear front screen, 2 x mounting brackets/feet and 01 - Bracket tightening knobs... - Page 5 Operating instructions A u t o Auto mode 3 C H 1 3 C H 2 A 0 0 1 5 C H A d d r DMX address/channel mode A 5 1 0 2 4 C H 4 8 C H 5 3 C H S h 1 S h 5 4...
- Page 6 Operating instructions DMX mode: Addr To access the DMX address mode, press the “MENU” button to show on the LED display. Press the “ENTER” button and use the “UP” and “DOWN” buttons to set the required DMX address. Press the “ENTER” button to confirm the setting. Now use the “UP” and “DOWN” buttons to choose one of the 3/3/5/24/48 or 53 DMX channel modes.
- Page 7 Operating instructions 3 channel mode 2: 48 channel mode: Channel Value Function Channel Value Function 000-255 Red (0-100%) 000-255 Segment 1 red (0-100%) 000-255 Green (0-100%) 000-255 Segment 1 green (0-100%) 000-255 Blue (0-100%) 000-255 Segment 1 blue (0-100%) 000-255 Segment 2 red (0-100%) 5 channel mode: 000-255 Segment 2 green (0-100%) 000-255 Segment 2 blue (0-100%)
- Page 8 Operating instructions 48 channel mode (cont.): 53 channel mode (cont.): Channel Value Function Channel Value Function 000-255 Segment 14 red (0-100%) 000-255 Segment 9 red (0-100%) 000-255 Segment 14 green (0-100%) 000-255 Segment 9 green (0-100%) 000-255 Segment 14 blue (0-100%) 000-255 Segment 9 blue (0-100%) 000-255 Segment 15 red (0-100%) 000-255 Segment 10 red (0-100%)
- Page 9 Operating instructions 53 channel mode (cont.): Channel Value Function Channel Value Function 062-065 Built-in program 13 214-217 Built-in program 51 066-069 Built-in program 14 218-221 Built-in program 52 070-073 Built-in program 15 222-225 Built-in program 53 074-077 Built-in program 16 226-229 Built-in program 54 51 (cont.) 078-081...
- Page 10 Operating instructions Auto mode: Auto To access auto mode, press the “MENU” button to show on the LED display. Now press the “ENTER” button, the Auto mode will now run. Press the “ENTER” button to confirm the setting. Show modes (built-in programs): Shou To access the show modes (built-in programs), press the “MENU”...
-
Page 11: Master/Slave Mode
Operating instructions Master/slave mode: The default setting for this fixture is master. To set the master unit, select from one of the auto, show, sound, colour mix or static colour modes. SLav To set the slave unit, press the “MENU” button to show on the LED display. - Page 12 Operating instructions IR remote functions (if applicable): Button Functions: 1 - Blackout ON/OFF 2 - Up and down buttons 3 - Press once to set the unit into auto mode, press a second time to enter the show modes, then use the up and down buttons to select the show required (Show mode speed must be set via the menu on the batten) 4 - Press once to set the unit into fade mode...
- Page 13 Pixel zone orientation IEC input IEC ouput www.prolight.co.uk SpectraPix Batten User Manual...
-
Page 14: Dmx Setup
DMX setup Setting the DMX address: The DMX mode enables the use of a universal DMX controller. Each fixture requires a “start address” from 1- 512. A fixture requiring one or more channels for control begins to read the data on the channel indicated by the start address. -
Page 15: Line Termination
DMX setup Notice: Be sure to follow the diagrams below when making your own cables. Pin Configuration Do not connect the cables shield conductor to the ground lug or 3-Pin 5-Pin allow the shield conductor to come in contact with the XLRs Pin 1 - Ground outer casing. - Page 16 Multiple fixture power linking & WEEE notice Power linking: This fixture provides power linking via the power output on the rear allowing multiple units to be connected together. The maximum number of fixtures that can be connected is 16 fixtures @ 240V or 8 fixtures @ 120V (including the first fixture).
Need help?
Do you have a question about the SpectraPix Batten EQLED055 and is the answer not in the manual?
Questions and answers