Subscribe to Our Youtube Channel
Summary of Contents for dji O3 Pro
- Page 1 DJI Video Receiver User Guide 使用说明 使用說明 ユーザーガイド 사용자 가이드 Handbuch Guía de usuario Guide d’utilisateur Guida per l’Utente Gebruikershandleiding Руководство пользователя v1.0 2023.08...
-
Page 2: Disclaimer And Warning
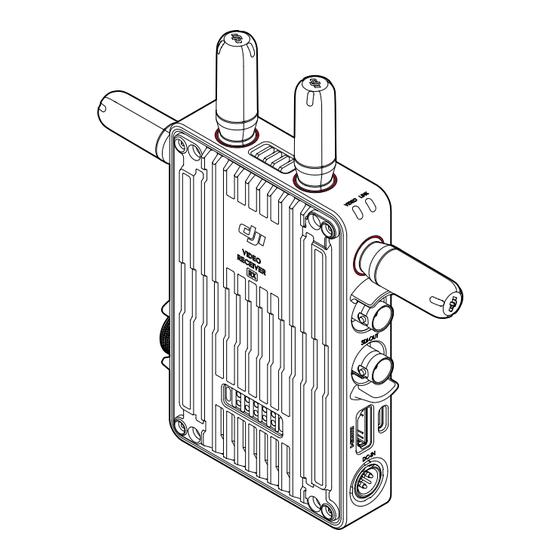
Control and Broadcast modes and simultaneously outputs multiple video signals to display devices for remote monitoring. When used with the DJI Video Transmitter or DJI Ronin 4D Video Transmitter, the video receiver can meet the filming requirements of mediums such as movies, TV series, advertisements, and documentaries. - Page 3 Output the video signal. USB-C Port Connect to the DJI Assistant 2 (Ronin Series) software using a USB-C cable for device activation and firmware updates. Connect headphones with a built-in mic for voice calls. It is required to set the Type-C function on the receiver before use. Refer to the Menu section for more information.
-
Page 4: Installation And Connection
Installation and Connection Mounting the WB37 Intelligent Battery Before first use, activate the WB37 battery by charging with the WB37 Battery Charging Hub (USB-C). Refer to the WB37 Battery Charging Hub (USB-C) User Guide for more information. 1. Mount the WB37 battery adapter to the back of the video receiver and tighten the three M4×12 screws. - Page 5 Activation is required when using the video receiver for the first time. Power on the video receiver and connect it to a computer using a USB-C cable. Launch DJI Assistant 2 (Ronin Series), click the corresponding device icon, and follow the on-screen instructions to activate the device.
-
Page 6: Control Mode
The transmitter device can also receive the control signal from the video receiver when connecting a DJI Pro accessory, such as the DJI Master Wheel to the video receiver for remote control. -
Page 7: Broadcast Mode
Linking Status Indicator Linking Status Indicator Description Solid red Device started, not connected. Blinks red and green alternately Linking. Solid green Successfully linked in Control mode. Wireless video transmission is normal. Broadcast mode enabled. Blinks red Device malfunction. Contact DJI Support. -
Page 8: Home Screen
Display Screen Operations Home Screen 1080P 24 1080P 24 16.8V 16.8V CTRL-A 35.9M/bps 35.9M/bps Control Mode Broadcast Mode 1. Video Specifications Displays the resolution and frame rate of the input from the transmitter device. 2. Power Supply Voltage Displays the voltage of the battery or the DC-in power input. 3. -
Page 9: Firmware Update
1. Power on the device. Make sure the Type-C function is set to USB on the menu. Connect the device to a computer with a USB-C cable. 2. Launch DJI Assistant 2 (Ronin Series) and log in with a DJI account. 3. Select the device and click Firmware Update on the left side of the screen. -
Page 10: Specifications
6-18 V Output Voltage 6-18 V Battery Life 3 hours 50 minutes Output Video Format • When used with the DJI Video Transmitter: 1080p: 23.98/24/25/29.97/30/50/59.94/60fps 720p: 50/59.94/60fps • When used with Ronin 4D: 1080p: 24/25/30/48/50/60fps Output Audio Format SDI embedded, HDMI embedded... - Page 11 免责声明和警告 使用本产品之前,请仔细阅读并遵循本文及与本产品相关的所有安全与合规操作指引。 简介 图传接收器采用 DJI O3 Pro 图传技术,接收发射端视频信号。在无干扰和无遮挡环境下, 可实现最大可达 6 千米 * 地面端通信距离与 40 Mbps 码流高清图传,端到端延时低至 70 ms。 支持多种频段, 具备控制模式和广播模式, 可同时输出多路视频信号到显示设备, 实现远程监看。 配合 DJI 图传发射器或 DJI Ronin 4D 图传发射器使用时,可满足广电、影视剧、广告、纪录片 等各类题材的拍摄需求。 * 无线图传控制系统切换至控制模式(发射端广播模式关闭),在 FCC 标准无干扰环境下测得。 1. 可拆卸天线 传输无线信号。 2. 色标 用于区分接收器和发射器。接收器此处为红色圆圈。用户亦可将包装内附带的不同颜色贴...
- Page 12 6. USB-C 接口 使用 USB-C 线连接至 DJI Assistant 2 (Ronin 系列 ) 调参软件以激活设备、升级固件。亦可 插入自带麦克风的耳机进行语音通话。使用前需在接收器的 Type-C 功能设置中切换接口用 途。详见菜单栏章节。 7. HDMI 接口(A 口) 用于输出视频信号。 8. DC-IN 电源输入接口 可通过标配的供电线实现对图传接收器的供电。供电电压 6-18 V,电流最大 2 A。 9. M4 螺纹接口 用于安装电池转接板以及各类转接件的扩展。 10. 对外供电接口 对外部设备进行供电。 11. 出风口 12. 进风口...
- Page 13 安装连线 安装 WB37 智能电池 首次使用需通过 WB37 充电管家(USB-C)为 WB37 电池充电以激活电池。详情参阅《WB37 充电管家(USB-C)使用说明》。 1. 将 WB37 电池转接板安装至图传接收器背面并旋紧 3 颗 M4×12 螺丝。 2. 将 WB37 智能电池置入电池插槽,按下电池并将其推至底部,直到 RELEASE 按键弹起并发 出“咔”的一声,确保安装稳固。 • 务必在工作环境温度范围内使用 WB37 电池。禁止以任何方式拆解或用尖利物体刺破电 池。否则将会引起电池着火甚至爆炸。详情参阅《WB37 智能电池安全使用指引》。 按住 RELEASE 按键沿安装反方向用力即可取出电池。 安装 NP-F 系列电池...
- Page 14 2. 将 NP-F 系列电池置入电池插槽,按下电池并将其推至底部,直到 RELEASE 按键弹起并发 出“咔”的一声,确保安装稳固。 按住 RELEASE 按键沿安装反方向用力即可取出电池。 连接 DC 转 P-Tap 供电线 可使用含有 P-Tap 接口的电池给图传接收器供电。使用标配的 DC 转 P-Tap 供电线连接供电电 池的 P-Tap 接口及图传接收器的 DC-IN 电源输入接口。 激活 全新的图传接收器需要激活后方可使用。开启图传接收器,使用 USB-C 线将其连接至计算机并 运行 DJI Assistant 2 (Ronin 系列 ) 调参软件,登录 DJI 账号,点击设备图标按照提示进行激活。 调参软件下载地址:https://www.dji.com/transmission/downloads...
- Page 15 择图传接收器为控制 A 或控制 B,再次按压拨轮进行确认。屏幕显示配对中,对频状态指示 灯红绿交替闪烁,表示已进入对频状态。 • 若图传接收器已处于控制模式且已设置为所需的控制 A 或控制 B,则直接长按菜单 拨轮即可进入对频状态。 • 若两个图传接收器同时连接至同一发射端设备,则需先对频设置为控制 A 的图传接 收器,然后再对频设置为控制 B 的图传接收器。 3. 使用 DJI 图传发射器: 开启 DJI 图传发射器,长按图传发射器上的菜单拨轮以进入对频状态,此时图传发射器上的 对频状态指示灯红绿交替闪烁。 使用 DJI Ronin 4D 图传发射器: 在 Ronin 4D 的机身高亮监视器菜单中选择图传设置 > 配对,或长按 Ronin 4D 图传发射器 上的对频按键以进入对频状态,此时图传发射器上的对频状态指示灯红绿交替闪烁。 4. 对频成功后,图传接收器的对频状态指示灯显示绿灯常亮,可与发射端设备进行通信。...
- Page 16 广播模式 广播模式下,图传接收器作为监看设备,其连接数量不设限制。在有多个发射端设备的场景, 以广播模式连接的图传接收器可快速切换发射端机位,实现多路监看。 连接 模式 控制模式 正在搜索 广播模式 1. 图传接收器开机状态下,按压图传接收器的菜单拨轮进入菜单。 2. 按压拨轮进入连接模式菜单,转动拨轮在连接模式中选择广播模式,按压拨轮进行确认。 3. 等待搜索,然后选择连接的设备。 • 在广播模式下,长按菜单拨轮可刷新搜索结果。 对频状态指示灯 对频状态指示灯 描述 红灯常亮 设备已启动,未连接 红绿灯交替闪烁 正在对频 绿灯常亮 控制模式对频成功,无线图传正常连接 广播模式已开启 设备内部故障,请联系 DJI 技术支持 红灯闪烁...
- Page 17 屏幕操作 主界面 1080P 24 1080P 24 16.8V 16.8V CTRL-A 35.9M/bps 35.9M/bps 控制模式 广播模式 1. 视频规格 显示当前发射端输入源的分辨率及帧率。 2. 供电电压 显示接收器供电电池电压或 DC-IN 电源输入的电压。 3. 控制设备 控制模式下,显示接收器当前设置为控制 A 或控制 B。 4. 信道(控制模式) 显示当前信道及信道质量。信道质量显示包括信号强(绿色)及信号弱(红色)。双击菜单 拨轮可快速切换信道。 5. 传输信号强度及传输码率 显示当前传输信号强度及传输码率。 传输信号强度显示包括信号强 (绿色) 、 信号中等 (橙色) 、 信号弱(红色)。...
- Page 18 语言 在语言列表中选择界面语言。 设备信息 查看设备码、版本号等信息。 固件升级 使用 DJI Assistant 2 (Ronin 系列 ) 调参软件可对图传接收器进行升级。 1. 开启设备。确保屏幕菜单中的 Type-C 功能设置为 USB,然后使用 USB-C 连接线连接设备 至计算机。 2. 启动 DJI Assistant 2 (Ronin 系列 ) 调参软件,使用 DJI 账号登陆并进入主界面。 3. 点击设备图标,然后点击左边的固件升级选项。 4. 选择并确认需要升级的固件版本。 5. 调参软件将自行下载并升级固件。 6. 升级完成后,设备将自动重启。...
- Page 19 视频编码格式 6 km (FCC), 4 km (CE/SRRC/MIC) 最大图传距离 (无干扰、无遮挡) 40 MHz 最大通信宽带 -10 至 45℃ 工作环境温度 [1] 部分地区不支持 5.1/5.2/5.8 GHz 频段,部分地区 5.1/5.2 GHz 频段仅限室内使用,详情请参考当地法律 法规。5.600-5.650 GHz 频段未使用。 [2] 通过满电的 WB37 智能电池供电并且配合 DJI 图传发射器使用,在室温 25℃环境下测得。 [3] 如使用 WB37 智能电池,建议工作环境温度在 0℃以上。在 0℃以下使用时,请采取电池保温措施。...


Need help?
Do you have a question about the O3 Pro and is the answer not in the manual?
Questions and answers