
Related Manuals for FujiFilm ZK Cabrio Series


Summary of Contents for FujiFilm ZK Cabrio Series
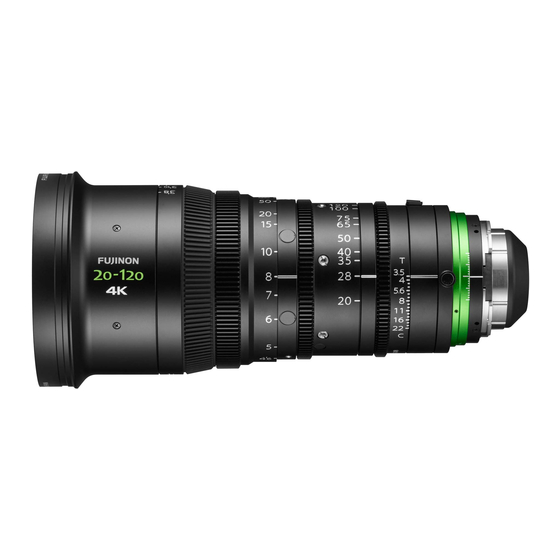
- Page 1 ENGLISH VERSION Japanese English Version version Chinese Version Technical Drawings...
- Page 2 A O S ・ ・ ・ ・ ES 3 B / MB-3 B ES-003...
- Page 3 FOR YOUR SAFETY FOR YOUR SAFETY △ △ W N N △ Indicates the possibility of causing death or serious injury when misused. WARNING △ Indicates the possibility of causing injury or substantial damage when misused. CAUTION △ WARNING ◆ ◆...
- Page 4 FOR YOUR SAFETY NOTICE ◆ ◆ ◆ ◆ ◆ ◆ ◆ ◆ ◆ “ L ND O N N OF D N ”...
- Page 5 PRIOR TO USE INITIALIZATION WHEN POWER OF LENS IS TURNED ON ・ ① “S v ” ② “ ” ・ “ SW 1 ④” ① ② Setting of Servo/Manual Select Knob ①Servo (Auto) ② Manual Section of Lens By turning the focus ring manually by about 60 The focus operates and is initialized Focus degrees, the focus is initialized...
- Page 6 MEMO...
-
Page 7: Table Of Contents
TABLE OF CONTENTS ・ TABLE OF CONTENTS .................................1 ・ General Description.................................2 ・ List of Components .................................2 ・ Installation ....................................4 ・ Adjustment of Flange Focal Length..........................5 ・ Iris Operation .....................................6 ・ Focus Operation ..................................7 ・ Zoom Operation ..................................8 (1) Manual Operation ..............................9 (2) Operation by Zoom Seesaw Control Lever....................9 (3) QuikZoom Operation............................. -
Page 8: General Description
GENERAL DESCRIPTION LIST OF COMPONENTS CINE LENS Q ty ..................................1 ................................. 1 .................................. 1 ..................................1 ..............................1 ......................4 ................................1 ............................1 ....................................1 ................................1... - Page 9 About Bracket ■ INSTALLAION OF THE BRACKET ONTO THE LENS S ALLA O OF B A Lens SUPPORTING SCREW BRACKET...
-
Page 10: Installation
INSTALLATION ■ INSTALLATION ONTO CAMERA WARNING Be sure to attach all the parts securely. Dropping any parts from a height may cause severe accidents. FA E OF AME A FA E OF LE S PIN (POSITION DEPENDS ON CAMERA) SLIT (4 PLACES) CAMERA Note. -
Page 11: Adjustment Of Flange Focal Length
ADJUSTMENT OF FLANGE FOCAL LENGTH ■ CONDITIONS OF OBJECT AND DIAPHRAGM “S ” ■ ADJUSTMENT F.f ADJUSTING RING F.f LOCKING KNOB... -
Page 12: Iris Operation
IRIS OPERATION IRIS MODE SELECT SWITCH IRIS MOMENTARY SWITCH IRIS RING Note. The auto iris mode only operates if the camera supports this mode. (The auto iris mode may not function normally due to the compatibility with the camera. In that case, use the manual mode.) ■... -
Page 13: Focus Operation
FOCUS OPERATION FOCUS RING CONNECTOR FOR FOCUS CONTROL FOCUS SERVO/MANUAL SELECT KNOB “S ”... -
Page 14: Zoom Operation
ZOOM OPERATION ZOOM SEESAW CONTROL LEVER ZOOM RING ZOOM LEVER CONNECTOR FOR ZOOM CONTROL ZOOM SERVO/MANUAL SELECT KNOB Page (1) Manual Operation ..............................9 (2) Operation by Zoom Seesaw Control Lever....................9 (3) QuikZoom Operation............................. 10 (4) Auto Cruising Zoom Operation ........................11... -
Page 15: Manual Operation
1 Manual Operation “ ” 2 Operation by Zoom Seesaw Control Lever “S ”... -
Page 16: Quikzoom Operation
3 QuickZoom Operation ・ W ・ QUICKZOOM & AUTO CRUISING ZOOM SWITCH Operation “S ” Note 1. “F ” Note 2. Note 3. -
Page 17: Auto Cruising Zoom Operation
Auto Cruising Zoom Operation QUICKZOOM & AUTO CRUISING ZOOM SWITCH Operation “S ” Note. “F ” Releasing )... -
Page 18: Macro Operation
MACRO OPERATION MACRO RING MACRO LEVER Note. ■ PROCEDURE TO CANCEL... -
Page 19: Other Functions
OTHER FUNCTIONS VTR Switch VTR SWITCH Note. Note. Return Switch RETURN SWITCH Note. Note. Connector for Expansion CONNECTOR FOR EXPANSION Data Interface (ARRI LDS, Cooke /i) “ LDS” “ / ” “LDS / ”... - Page 20 CONNECTOR PIN ASSIGNMENTS ■ CONNECTOR FOR FOCUS CONTROL R10G-10R-12S ( IROSE) ( 12 ( .5 (2.5 2.5 ) .5 ) ■ CONNECTOR FOR ZOOM CONTROL R10G-10R-12S ( IROSE) ( 12 ( .5 COMMON (2.5 2.5 ) .5 ) ■ CONNECTOR FOR EXPANSION R25-9R-20S ( IROSE) ( 12 ) 232 )
- Page 21 ABOUT FUNCTION & MODE SELECT SWITCHES FUNCTION & MODE SELECT SWITCHES ① ② ③ ④ ⑤ ⑥ ⑦ ⑧ The illustration shows the positions set at the factory. ① ⑤ QUICKZOOM ON/OFF SWITCH AUTO CRUISING ZOOM ON/OFF SWITCH ② ⑥ VTR →...
- Page 22 FUNCTION & MODE SELECT SWITCHES ① ② ⑤ ③ ④ The illustration shows the positions set at the factory. ① CAMERA COMMUNICATION ON/OFF SWITCH ② LDS, /i SELECT SWITCH ③ ANALOG ZOOM DEMAND ZOOM MODE FUNCTION ON/OFF SWITCH ④ AUXILIARY SWITCH ZOOM MODE SELECT SWITCH ⑤...
- Page 23 ■ TABLE OF SWITCH FUNCTIONS The functions of switches (return switch, VTR switch, quickzoom & auto cruising zoom switch, and iris mode select switch) can be changed to other functions by combination of the settings of the function & mode select switches. Refer to the following tables.
- Page 24 IRIS ADJUSTMENT IRIS SENSITIVITY ADJUSTMENT TRIMMER The illustration shows the positions set at the factory. ■ IRIS SENSITIVITY ADJUSTMENT...
- Page 25 REMOVAL AND MOUNTING OF DRIVE UNIT “ v ” “ ” Note: Make sure that the serial numbers of the lens and drive unit match when remounting the drive unit on the lens barrel. The lens may not operate correctly if the serial numbers of the drive unit and lens barrel do not match.
- Page 26 ■ Mounting Ⅰ Preparation (1) ① ② Ⅱ Preparation (2) FOCUS ZOOM IRIS Ⅲ Attaching the drive unit ① ③ FOCUS ② ZOOM IRIS...
- Page 27 ■ Mounting Ⅳ Secure the drive unit Note: DO NO DO NO Ⅳ Initialization “S ” “ ” “ ” ① ② EMO E AP...
- Page 28 CHANGING FOCUS RING AND ADJUSTMENT OF OPTICAL AXIS ⑫ ⑧ ⑪ ⑦ ③ ② ① ④ ⑥ ⑤ ① ② REAR VIEW REAR SIDE VIEW FRONT SIDE VIEW ⑧ ⑨ ③ ② ① ③ ⑤⑥ MACRO LEVER ⑪ ⑫ ⑩ ④...
- Page 29 CHANGING FOCUS RING “ ” ① ② ④ ④ ① ② “ ” “ ”...
- Page 30 2 ADJUSTMENT OF OPTICAL AXIS ■ Confirmation of Optical Axis “ ” REAR VIEW SECTION A - A ④ ③ ⑤ ④ ④...
- Page 31 MAINTENANCE ■ CLEANING THE LENS ■ REMOVING THE MOISTURE ■ STORAGE ■ INSPECTION Note that we may not be able to inspect and repair our products which have been remodeled on the user’s end.
- Page 32 2.5 14 3.5 85 2.9 (85 218 4. (3 2 .45 15.44 ( 31.5 1. 8 88.9 5 .8 44.2 1 .4 42.8 24.9 1 .3 . . . 86.4 81.12 2 .86 26.5 34.5 45 ) . 2.9 . 2.8 .
Need help?
Do you have a question about the ZK Cabrio Series and is the answer not in the manual?
Questions and answers