Advertisement
Table of Contents
FujiFilm TG-BT1 - Tripod Grip Manual
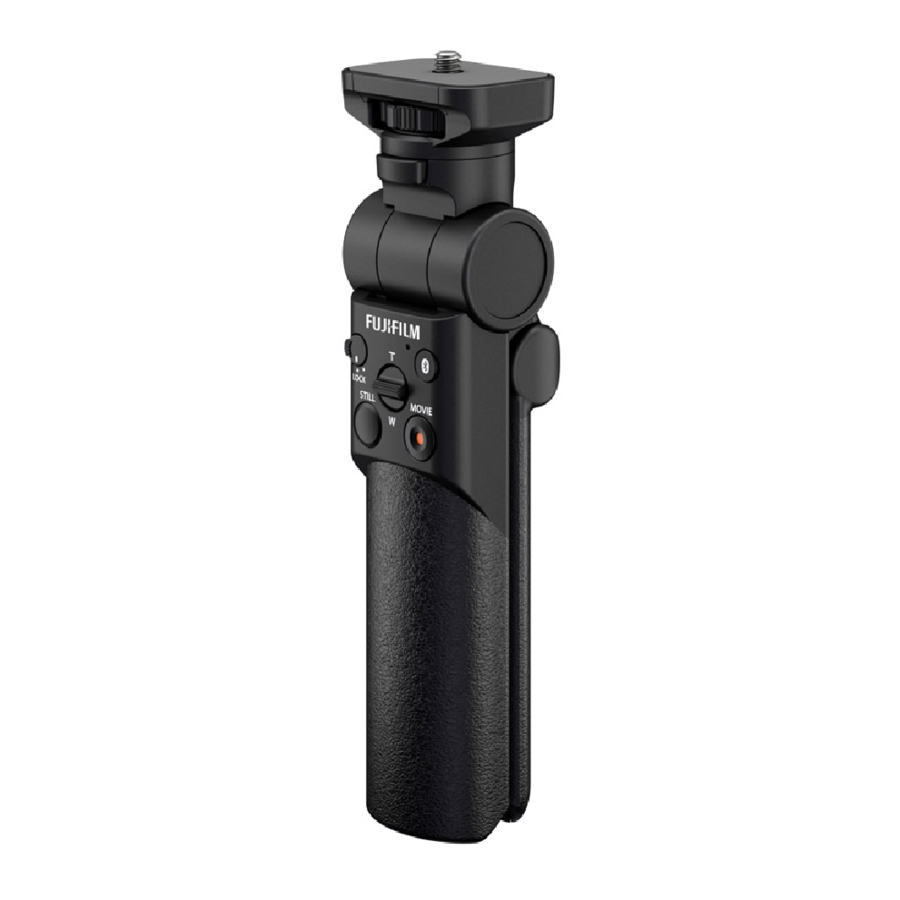
Product Parts

|
|
 (Bluetooth) button
- Rotate the control lock switch to LOCK to prevent unintended operation.
- Do not remove the serial number plate, which provides the CMIIT ID, serial number, and other important information.
Using the Product
Inserting the Battery

- Keeping the round button next to the battery-chamber cover latch pressed (
![]() ), slide the latch down (
), slide the latch down (![]() ) and remove the batterychamber cover.
) and remove the batterychamber cover. - Insert the battery as shown with the "+" side facing up (
![]() ). The correct orientation is shown by the "+" label on the lip of the battery chamber.
). The correct orientation is shown by the "+" label on the lip of the battery chamber. - Replace the battery-chamber cover.
 ), slide the latch down (
 ) and remove the batterychamber cover.
 ). The correct orientation is shown by the "+" label on the lip of the battery chamber.
Pairing
The instructions below offer an example of how the product can be paired with a Fujifilm digital camera. For more information, consult the documentation provided with compatible cameras.
Before Pairing
Before proceeding, confirm that product is compatible with the camera and camera firmware.
- Confirm that the product's control lock switch is unlocked.
- Press and hold the camera
![]() (Bluetooth) button. Bluetooth options will be displayed.
(Bluetooth) button. Bluetooth options will be displayed. - Select ON for Bluetooth > Bluetooth ON/OFF.
- Select Bluetooth > Pairing. The camera will initiate the pairing process.
- Press and hold the grip
![]() (Bluetooth) button. The grip will initiate the pairing process.
(Bluetooth) button. The grip will initiate the pairing process. - If pairing is successful, the camera will display the message, "PAIRING COMPLETE".
 Bluetooth® connection status is shown by an icon in the camera display.
| No icon | No Bluetooth® connection. |
 | Connected. |
 | Connected (locked). |
 (red) (red) | Connected (low battery). |
 (red) (red) | Connected (locked; low battery). |
- If pairing fails, the grip indicator lamp will flicker. Repeat the pairing process from the beginning.
- You will need to repeat the pairing process:
- before using the product with another camera (after pairing the product with another camera, you will also need to repeat the pairing process when switching back to a camera with which the product has previously been paired) and
- after resetting camera settings or deleting pairing information.
- The product will turn off automatically after two minutes when not paired with a camera or if the camera with which it is currently paired is off.
Attaching the Product to the Camera
Align the lock screw with the camera tripod mount and rotate the lock screw wheel to secure the product in place.

Choosing a Camera Angle

- Using one hand to support the camera, press the angle adjusting lock release button and angle the camera up or down. The angle can be adjusted in increments of 10°.
- To allow the camera to be angled left or right, press the flip lock release button. The angle can be adjusted in increments of 90°.
Taking Pictures
- Photographs can be taken by pressing the shutter button halfway to focus and then pressing it then rest of the way down.
- To start movie recording, press the movie recording button. Press the button again to end recording.
- Users of power zoom lenses can press the T (zoom in)/W (zoom out) button to T to zoom in and to W to zoom out. Zoom speed is controlled by the distance the button is pressed. Press the button lightly for slow zoom, deeply for fast zoom.
Using the Grip as a Tripod

- Open the legs to their maximum extent and place the grip on a level surface.
- Depending on the location and the type of camera attached, the assembly may be unbalanced and unsteady. Do not use the product as a tripod if it cannot be properly steadied.

VideosTripod Grip TG-BT1 - Spill the Beans Video
Fujifilm Firmware Updates & Vlogging Tripod Grip TG-BT1 Video
Documents / ResourcesDownload manual
Here you can download full pdf version of manual, it may contain additional safety instructions, warranty information, FCC rules, etc.
Advertisement


Need help?
Do you have a question about the TG-BT1 and is the answer not in the manual?
Questions and answers