Advertisement
Quick Links
Item # 1001 414 657
1001 414 653
Model # YJAF052-A
YJAF052-C
USE AND CARE GUIDE
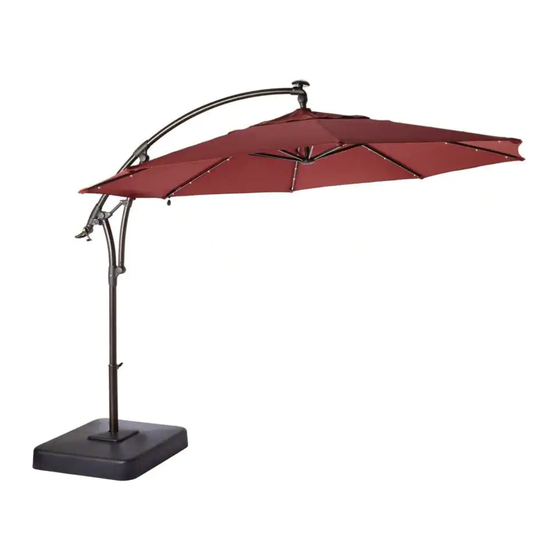
11 FT. LED OFFSET SOLAR UMBRELLA
Questions, problems, missing parts? Before returning to the store
call Hampton Bay Customer Service
8 a.m. - 7 p.m., EST, Monday - Friday, 9 a.m. - 6 p.m., EST, Saturday
1-855-HD-HAMPTON
HAMPTONBAY.COM
THANK YOU
We appreciate the trust and confidence you have placed in Hampton Bay through the purchase of this umbrella. We strive to continually create
quality products designed to enhance your home. Visit us online to see our full line of products available for your home improvement needs.
Thank you for choosing Hampton Bay!
Advertisement

Subscribe to Our Youtube Channel
Related Manuals for HAMPTON BAY YJAF052-A


Summary of Contents for HAMPTON BAY YJAF052-A
- Page 1 THANK YOU We appreciate the trust and confidence you have placed in Hampton Bay through the purchase of this umbrella. We strive to continually create quality products designed to enhance your home. Visit us online to see our full line of products available for your home improvement needs.
-
Page 2: Table Of Contents
Table of Contents Table of Contents ............2 Pre-Assembly ..............3 Planning Assembly ..............3 Safety Information ............2 Hardware Included ..............3 Product Caution ...............2 Package Contents ..............4 Safety Warnings ..............2 Warranty ................. 2 Assembly ............... 5 Operation ..............18 What is Covered ...............2 Care and Cleaning ............ -
Page 3: Pre-Assembly
Pre-Assembly PLANNING ASSEMBLY Read all instructions before assembly. To avoid damaging this product, assemble it on a soft, non- abrasive surface such as carpet or cardboard. NOTE: More than one person may be required to complete the assembly of this product. HARDWARE INCLUDED NOTE: Hardware not shown to actual size. -
Page 4: Package Contents
Pre-Assembly (continued) PACKAGE CONTENTS Part Description Quantity Part Description Quantity Lower bracket Upper base cover Upper bracket Support tube rim Lower umbrella pole Corner connector Locking knob Side panel Solar receiver Lock panel Crank Sand bag Umbrella shade Replacement LED light Lower base cover Replacement LED light cover... -
Page 5: Assembly
Assembly Attaching the brackets Attach the upper bracket (B) onto the lower bracket (A). NOTE: This umbrella should be set up in its desired location to avoid moving it after assembly. HAMPTONBAY.COM Please contact 1-855-HD-HAMPTON for further assistance. - Page 6 Assembly (continued) Attaching the lower umbrella pole to the brackets Attach the lower umbrella pole (C) to the upper bracket (B) and lower bracket (A) using M8x20 combination hex bolts (AA). NOTE: Fully tighten all bolts using the wrench (CC).
- Page 7 Assembly (continued) Inserting the corner connectors Insert the corner connectors (K) into the four ends of the assembled brackets. HAMPTONBAY.COM 1-855-HD-HAMPTON...
- Page 8 Assembly (continued) Sliding the lock panels Slide the perforated lock panels (M) downward between the corner connectors (K).
- Page 9 Assembly (continued) Sliding the side panels Slide the side panels (L) downward between the corner connectors (K). Connect the two pieces of the support tube rims (J). Slide the support tube rims (J) down the lower umbrella pole (C) and connect it to the brackets (A and B). NOTE: Please pay attention to the direction of Part (J).
- Page 10 Assembly (continued) Placing the sand bags Place the sand bags (N) in the umbrella base. NOTE: Place the base in the area where the umbrella is to be used. The umbrella will be very heavy after filled with sand.
- Page 11 Assembly (continued) Filling the sand bags Pull to open the velcro pouch on the sand bag (N) and fill with sand. After filling the sand bags (N), close the pouch and ensure the velcro is sealed. Lock the two sections of the sand bags (N) together. NOTE: The sand bags (N) are to be filled with sand only.
- Page 12 Assembly (continued) Ensuring the locking mechanism is in the open position Ensure the locking mechanism on the lock panel (M) is in the OPEN position by using the wrench (CC) as shown in figure 1. Ensure the locking mechanism on the lower base cover (H) is in the OPEN position by using the wrench (CC) as shown in figure 2. Attach the lower base cover (H) to the side panels (L).
- Page 13 Assembly (continued) Locking the lower base cover Lock the lower base cover (H) and the lock panel (M) by turning the locking mechanisms to the CLOSE position using the wrench (CC) as shown in figure 1 and figure 2. Attach the upper base cover (I) to the assembled base. OPEN POSITION OPEN POSITION CLOSE POSITION...
- Page 14 Assembly (continued) Attaching the locking knob to the lower umbrella pole Attach the locking knob (D) to the lower umbrella pole (C) using the M5x8 bolts (BB) and hex wrench (DD). Make sure the locking knob (D) is placed as shown in figure (1) before attaching. NOTE: When inserting the locking knob (D) into the hole, make sure the two points of the locking knob fit into the two slots on the umbrella pole as shown below.
- Page 15 Assembly (continued) Preparing the umbrella Push the long bent tube of the umbrella shade (G) outwards a little while holding down the tap on the short bent tube to make the hinge slide snap into place as shown below. HAMPTONBAY.COM 1-855-HD-HAMPTON...
- Page 16 Assembly (continued) Attaching the solar reciever Attach the solar receiver (E) to the umbrella shade (G) by turning the solar receiver (E) clockwise until fully tightened. Insert the plug into the plug hole of the solar receiver (E). NOTE: Please leave the solar receiver (E) out in a sunny area to charge before the first time turning on the LED lights.
- Page 17 Assembly (continued) Inserting the umbrella shade into the lower umbrella pole Rotate the locking knob (D) 180 degrees clockwise as shown in figure 1. Insert the umbrella shade (G) into the lower umbrella pole (C) as shown in figure 2. Rotate the locking knob (D) 180 degrees clockwise as shown in figure 3.
-
Page 18: Operation
Operation Attaching the crank Attach the crank (F) to the handle as shown in figure (1). Attach the crank (F) by aligning the tap with the hole on the crank (F) until it snaps into place. To detach the crank, the hex wrench (DD) is required to press the tap to take the crank (F) out. Attach the crank (F) without using the tap as shown in figure (2). - Page 19 Operation (continued) Raising the umbrella Loosen the knob on the umbrella shade as shown in figure 1 by turning it counterclockwise until it is fully loose. Hold the umbrella handle and push the long bent tube upward as shown in figure 2 until it stops and the umbrella is fully extended. Fully tighten the knob on the umbrella shade clockwise as shown in figure 3 to lock the handle in place.
- Page 20 Operation (continued) Opening the umbrella Undo the Velcro belt on the canopy and shake the canopy to separate the umbrella ribs. Slowly turn the crank (F) clockwise to open the umbrella. When the umbrella is fully open, fasten the belt under the hinge of the short bent tube to stabilize the umbrella. Make sure the belt is tightened as shown in figure 3.
- Page 21 Operation (continued) Operating the umbrella Rotate the locking knob (D) 180 degrees clockwise as shown in figure 1. Hold the umbrella handle with one hand and hold the short bent tube with the other hand to rotate the umbrella as shown in figure 2. (The umbrella can rotate up to 360 degrees.) When the umbrella is at the desired position, rotate the knob 180 degrees clockwise as shown in figure 3.
- Page 22 Operation (continued) Operating the umbrella Press the ON/OFF switch to turn the LED light on and off. Fully loosen the knob on the umbrella shade (G) by turning it counterclockwise, then slide the umbrella handle down to adjust the angle of the umbrella.
- Page 23 Operation (continued) Closing the umbrella Loosen the velcro belt as shown in figure 1. Turn the crank counterclockwise to close the umbrella as shown in figure 2. When the umbrella is closed, fully loosen the knob on the umbrella shade (G) by turning it counterclockwise as shown in figure 3. Hold the handle and pull the long bent tube downward as shown in figure 4.
-
Page 24: Care And Cleaning
Operation (continued) Storing the umbrella Tie the umbrella to the umbrella pole with the Velcro belt when not in use as shown below. Care and Cleaning For best results, clean the frame and fabric with a damp cloth, and dry thoroughly. This will help prevent mildew by removing dirt particles that may accumulate. -
Page 25: Maintenance
Maintenance REPLACING THE LED LIGHTS When the LED light does not work or a LED light cover breaks, replace the LED light or LED light cover with the replacement LED light (O) or replacement LED light cover (P). Gently remove the LED light cover in a counterclockwise direction and pull out the LED light. Insert the replacement LED light (O) and reinstall the replacement LED light cover (P) in a clockwise direction. - Page 26 Questions, problems, missing parts? Before returning to the store call Hampton Bay Customer Service 8 a.m. - 7 p.m., EST, Monday - Friday, 9 a.m. - 6 p.m., EST, Saturday 1-855-HD-HAMPTON HAMPTONBAY.COM...
Need help?
Do you have a question about the YJAF052-A and is the answer not in the manual?
Questions and answers
Where can we get replacement cord for our umbrella?