Table of Contents
Advertisement
Available languages
Available languages
Quick Links
Advertisement
Table of Contents

Related Manuals for JOBOBIKE SAM


Summary of Contents for JOBOBIKE SAM
- Page 1 USER MANUAL...
-
Page 2: About Us
About Us Dear Sir/Madam: JOBOBIKE has been present on the bikes market for two decades. We have been producing bikes for well-known worldwide clients’ brands. Helping others to succeed has resulted in our own success. Today, we are one of the leading companies in the electric bikes industry. After many years of hard work, it’s time to shift our identity: from being... -
Page 3: Our Values
Opportunity to bike further Biking without limitations Options of transport Just biking with JOBOBIKE No matter where you are and where you’re heading to, our bikes fit your lifestyle. City or countryside, flat or rocky roads, our bikes will get you there. Moreover, our lifetime customer service is... -
Page 4: Table Of Contents
English Installation Guide General Information ..........6 Assembly Instructions .........8 www.jobobike.eu Operation Instruction ......... 11 Cautions ............. 17 Error Code Definition .......... 19 Warranty Terms ..........20 Main parameters of E-bike ......... 21... - Page 5 Deutsches Handbuch Instrukcja montażu w języku angielskim Allgemeine Informationen ......... 22 Informacje Ogólne ..........54 Montageanleitung ..........24 Instrukcja montażu ..........56 Gebrauchsanweisung ........27 Instrukcja użytkowania ........59 Vorsicht .............. 33 Środki ostrożności ..........65 Fehlercode-Definition ........35 Error Code Definition .......... 67 Garantie .............
-
Page 6: General Information
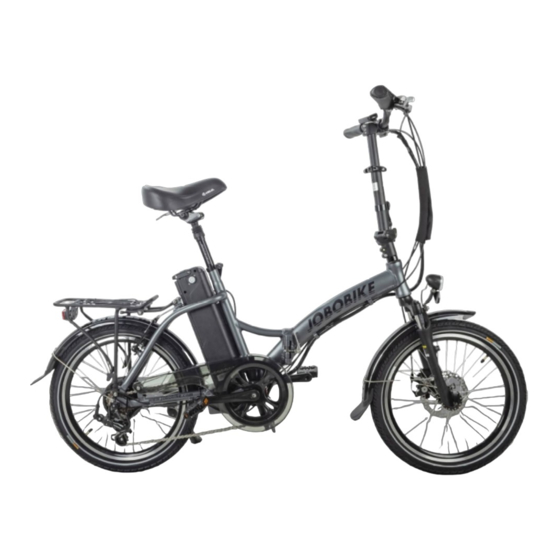
If you still need help, please visit our webiste, contact us by e-mail, or call us for more information. Sam is a 250 watt e-bike, please follow all relevant laws and regulations in your country or region when riding this ebike. Accessory name... -
Page 8: Assembly Instructions
Assembly Instructions Step 1 Unpack the bike Open the package and take out all of the parts. Be careful of not missing even a little piece of part. The parts shall include: E-bike frame Charger Toolkit Keys Step 3 Unfold the kickstand to make the e-bike stand up Saddle Manual... - Page 9 Step 4 Unfold the stem Lift the stem up and lock it with the folding clasp, then fix the folding clasp with the plastic buckle. Step 6 Adjust the saddle height Move the saddle up or down to your desired saddle height. Do not raise the saddle post exceeding the minimum insertion mark on the saddle post tube.
- Page 10 Step 7 Unfold the pedals Pull the pedals outside as the figure shows. Schrader valve NOTICE: Both wheels must be properly settled before operating your bike. If you are not able to assemble your bike, please contact us or look for help from a certified, reputable local bike mechanic.
-
Page 11: Operation Instruction
Operation instruction holding"+"button to turn on the lighting holding both"+"and"-" ON/OFF button; button to enter setting function confirmation interface holding"-"button to activate push-assistance 1.Hold the ON/OFF button for about 3s to switch on /off the E-bike. 2. The E-bike will switch off automatically after 10 minutes of inactivity. 3.The display interface shows power, Speed, Battery SOC, ODO, Push-assistance level, Trip Distance. - Page 12 Function Area Distribution lighting indication battery power motor power speed digital display mode option trip km mode reminder pas level/push-assistance 4.Hold the “+” button for about 2s to turn on the front light ( The brightness of display backlight will automatically decrease). Hold the “+”...
- Page 13 6.Hold the “-” button for about 2 seconds to activate the push-assistance function and you will see the function indicator .The push-assistance function will be switched off as soon as you release the “-”button. The speed is about 6 Km/h when in the mode of Push-assistance.
- Page 14 Push-assistance mode Assistance Level “1” 7.Short press "+" button to add the assistance level. Short press " - " button to minus the assistance level. Assist Level “0”: The minimum output power (No output power provided.) Assist Level “1”: The default output power. Assist Level “5”: The maximum output power.
- Page 15 "-" brake "+" 8.Clench the brake lever to slow down or stop the E-bike. 9.Switch the shifter by“+ "and“-”button to adjust the speed 10.2 Put the battery into the frame as the figure indicated. for fitting with different road conditions. (you can see the lock cylinder through the hole) Install the battery: 10.1 Press the key a little hard and turn it anti-clockwise to...
- Page 16 Charge the battery: 10.3 Turn the key clockwise once to make the lock cylinder extend through the hole to lock the battery.(The battery is not activated in this state) 12. Open the cover and plug the charger into the battery 10.4 Turn the key clockwise again to activate the battery(in socket.
-
Page 17: Cautions
Cut off the power in time when the battery is full of power(led indicator turns green). 7.Make sure the charger you used is provided by JOBOBIKE company and it can only be used to charge the matched E-bike or battery. - Page 18 Brakes by the professional. 9.Make sure the charger is being used at rated voltage and frequency. 1.Make sure the brakes are in good condition. 1 0 . M a ke s u re t h e c h a r g e r i s b e i n g d i s c o n n e c t e d 2.Please replace it with a new one timely if the brake pads immediately from the power supply when the charger is in worn on 1/3.
-
Page 19: Error Code Definition
Error code definition Riding 1.We do not recommend you to ride the E-bike in rainy or Error Code Definition snowy days because of the Slippery road conditions. 2.We recommend you to follow the traffic rule when you are Current Abnormal riding. -
Page 20: Warranty Terms
We will help you by phone or email. In the countries covered by EU law, JOBOBIKE is liable for material defects (material defect liability does not include normal wear and tear) within two years after the sales date. -
Page 21: Main Parameters Of E-Bike
Main parameters of the E-bike Mode: SAM E-bike Under voltage Protection: 30V Motor parameter: XF-C-20 36V250W Over current protection: 15A Whole Size: 163cm x 63cm x 120cm Driving distance: up to 60km Wheel size: 20 inch Charging time: 5hours Weight: 23.5KG... -
Page 22: Allgemeine Informationen
Wenn Sie noch Hilfe benötigen, besuchen Sie bitte unsere Website, kontaktieren Sie uns per E-Mail oder rufen Sie uns an, um weitere Informationen zu erhalten. Sam ist ein 250W E-Bike, bitte beachten Sie alle relevanten Gesetze und Vorschriften in Ihrem Land oder Ihrer Region, wenn Sie dieses E-Bike fahren. -
Page 24: Montageanleitung
Aufbauanleitung Schritt 1 Auspacken des Fahrrads Öffnen Sie das Paket und nehmen Sie alle Teile heraus. Achten Sie darauf, dass kein noch so kleines Teil fehlt. Die Teile: E-Bike-Rahmen Ladegerät Werkzeugtasche Schlüssel Schritt 3 Klappen Sie die E-Bike-Stütze aus, um den E-Bike-Ständer Sattel Handbuch zu montieren... - Page 25 Schritt 4 Einbau des Vorbaus beiden Schrauben festziehen, um sicherzustellen, dass sich der Lenker und der Vorbau nicht bewegen können. Richten Sie den Vorbau auf und befestigen Sie ihn mit einer Faltschließe, dann halten Sie die Faltschließe mit einer Kunststoffschnalle. Schritt 6 Einstellen der Sattelhöhe Move the saddle up or down by sliding the seat post in or...
- Page 26 Prüfen Sie, ob die Reifenwülste und Reifen gleichmäßig auf den Felgen sitzen. Verwenden Sie eine Pumpe mit einem Schrader-Ventil und einem Manometer auf den empfohlenen Druck, der auf der Reifenflanke angegeben Seitenwand angegeben ist. Hinweis: Pumpen Sie die Reifen weder zu stark noch zu schwach auf.
-
Page 27: Gebrauchsanweisung
Betriebsanleitung Halten die Taste "+" gedrückt, Halten Sie die "+"- und um das Licht einzuschalten. "-"-Taste gedrückt, um die Ein/Aus-Taste; Einstellungsoberfläche Funktionsbestätigung aufzurufen. Halten der ''-''-Taste zur Aktivierung der Schiebehilfe 1.Halten Sie die Ein/Aus-Taste etwa 3 Sekunden lang gedrückt, um das E-Rad ein- und auszuschalten. 2.Das E-Bike schaltet sich automatisch aus, wenn das Fahrrad nicht in etwa 10 Minuten arbeitet. - Page 28 Funktionsraumverteilung Lichtanzeige Akkuleistung Digitale Anzeige der Motorleistung Geschwindigkeit Modus-Option Fahrtkilometer Modus-Erinnerung PAS-Stufe/Push-Hilfe 4. Halten Sie die ""+""-Taste etwa 2 Sekunden lang gedrückt, um die Frontbeleuchtung einzuschalten (die Helligkeit der Hintergrundbeleuchtung des Displays wird automatisch reduziert). Halten Sie die ""+""-Taste für weitere 2 Sekunden gedrückt, um das vordere Licht auszuschalten (die Hintergrundbeleuchtung des Displays wird wieder heller).
- Page 29 6. Halten Sie die "-"-Taste ca. 2 Sekunden lang gedrückt, um die Push-Assistance-Funktion zu aktivieren, und Sie sehen die Funktionsanzeige Die Push-Assistance-Funktion wird ausgeschaltet, sobald Sie die "-"-Taste loslassen. Die Geschwindigkeit beträgt ca. 6 km/h im Modus der Schiebehilfe.
- Page 30 Push-assistance mode Assistance Level “1” 7. Drücken Sie kurz die Taste "+", um die Unterstützungsstufe zu erhöhen. Drücken Sie kurz die Taste "-", um die Unterstützungsstufe zu verringern. Unterstützungsstufe "0": Die minimale Ausgangsleistung (Es wird keine Ausgangsleistung bereitgestellt.) Unterstützungsstufe "1": Die Standard-Ausgangsleistung. Unterstützungsstufe "5": Die maximale Ausgangsleistung.
- Page 31 "-" Bremsen "+" 8. betätigen Sie den Bremshebel, um das E-Bike zu verlangsamen oder anzuhalten. 10.2 Setzen Sie die Akku in den Rahmen ein, wie in der 9. schalten Sie die Gangschaltung mit den Tasten "+" und Abbildung gezeigt (Sie können den Schließzylinder durch "-", um die Geschwindigkeit an die unterschiedlichen das Loch sehen).
- Page 32 Laden Sie den Akku auf: 10.3 Drehen Sie den Schlüssel im Uhrzeigersinn, so dass der Schließzylinder durch das Loch fährt. Drücken Sie den Knopf und die leuchtende LED zeigt an, dass die Batterie 12. Öffnen Sie den Deckel und schließen Sie das Ladegerät eingesetzt wurde.
-
Page 33: Vorsicht
"+" auf dem Knopf. geladen wird. Schalten Sie den Strom rechtzeitig ab, wenn die Batterie voll ist (die LED-Anzeige wird grün). 7. Stellen Sie sicher, dass das von Ihnen verwendete Ladegerät von JOBOBIKE geliefert wurde und nur zum... - Page 34 Bremsen Laden eines passenden E-Bikes oder Akkus verwendet werden kann. 8. Stellen Sie sicher, dass der Akku und das Ladegerät von einem Fachmann gewartet werden. 1. Stellen Sie sicher, dass die Bremsen in gutem Zustand sind. 9 . S t e l l e n S i e s i c h e r, d a s s d a s L a d e g e rä t m i t d e r Nennspannung und -frequenz betrieben wird.
-
Page 35: Fehlercode-Definition
Fehlercode-Definition Warnungen 1. Wir empfehlen Ihnen nicht, mit dem E-Bike bei Regen Fehlercode Definition oder Schnee zu fahren, da die Straßenverhältnisse rutschig sind. Strom Abnormal 2. Wir empfehlen Ihnen, die Verkehrsregeln zu beachten, wenn Sie unterwegs sind. Drosselklappe abnormal 3. do not ride the E-Bike when you are not in good health conditions and do not lend the E-Bike to the people who can not manage it. -
Page 36: Garantie
4. Ein Kaufnachweis ist für jeden Garantieanspruch erforderlich. In den Ländern, die dem EU-Recht unterliegen, haftet JOBOBIKE für Sachmängel (die Sachmängelhaftung umfasst nicht den normalen Verschleiß) innerhalb von zwei Jahren nach dem Verkaufsdatum. Voraussetzung für diese Haftung ist, dass die Nutzung und Wartung Ihres Elektrofahrrads allen in dieser Anleitung geforderten Bedingungen entspricht. -
Page 37: Hauptparameter Des E-Bikes
Hauptparameter des E-Bikes Modus: SAM E-Bike Ladegerät-Parameter: AC110V-240V DC36V-3.0A Motor Parameter: XF-C-20 36V250W Unterspannungsschutz: 30V Gesamtgröße: 163cm x 63cm x 120cm Überstromschutz: 15A Radgröße: 20 Zoll Die Fahrstrecke: bis zu 60 km Gewicht: 23.5KG Die Ladezeit: 5 Stunden Nutzlast: 120kg Steuergerät: 36V 250W... -
Page 38: Informations Générales
Le Sam est un vélo électrique de 250 watts.Les vélos électriques doivent être utilisés conformément aux réglementations légales établies par les législations nationales.Vous êtes donc obligé de respecter la réglementation de votre pays. -
Page 40: Instructions D'assemblage
Instructions d’assemblage Étape 1 Déballer le vélo Ouvrir le paquet et retirer toutes les pièces. Faire attention à ne pas manquer ne serait-ce qu’un petit morceau de pièce. Les parties doivent être incluses : Cadre du vélo électrique Chargeur Étape 3 Déplier la béquille du Boîte d’outils Clefs vélo électrique pour mettre le... - Page 41 Étape 4 Déplier la tige Soulever la tige vers le haut et verrouiller la tige avec le fermoir déployant, puis fixer le fermoir avec la boucle en plastique. Étape 6 Ajuster la hauteur de la selle Déplacer la selle vers le haut ou vers le bas jusqu’à la hauteur de selle souhaitée.
- Page 42 Étapes 7 Déplier les pédales Tirer les pédales vers l'extérieur comme le montre la figure suivante. Schrader valve Avis:Les deux roues doivent être correctement fixées avant de faire du vélo. Si vous ne savez pas assembler votre vélo, veuillez nous contacter ou demander l’aide d’un mécanicien de vélo local certifié...
-
Page 43: Instruction D'opération
Instruction d’Opération Appuyer sur le bouton “+” pour allumer les lumières Maintenir les boutons “ + ” e t “ - ” e n m ê m e Bouton ALLUMER/ETEINDRE. t e m p s p o u r a c c é d e r Confirmation de fonction à... - Page 44 Distribution des zones fonctionnelles Indicateur d'éclairage Puissance de la batterie Affichage numérique Puissance du moteur de la vitesse Option de mode Parcours km Rappel de mode Niveau PAS/Assistance à la poussée 4.Appuyer sur le bouton "+" pendant environ 2 secondes pour allumer le phare (La luminosité du rétro- éclairage de l’écran diminuera automatiquement).
- Page 45 Interface de cycle d’indication d’affichage 6.Appuyer sur le bouton “-” pendant environ 2 secondes pour activer la fonction d’assistance à la poussée et vous verrez l’indicateur de fonction .La fonction d'assistance à la poussée sera désactivée dès que vous relâchez le bouton "-". La vitesse en mode d’assistance à...
- Page 46 Mode d’assistance à la poussée Niveau d’assistance “1” 7. Appuyer brièvement sur le bouton "+" pour ajouter le niveau d’assistance. Appuyer brièvement sur le bouton " - " pour réduire le niveau d’assistance. Niveau d’assistance «0 » : La puissance de sortie minimale (aucune puissance de sortie fournie.) Niveau d’assistance «1 »...
- Page 47 "-" Frein "+" 8.Serrer le levier de frein pour ralentir ou arrêter le vélo électrique. 10.2 Placer la batterie dans le cadre comme indiqué sur la 9.Changer le levier de vitesses avec les boutons "+" et "-" figure. (Vous pouvez voir le cylindre de serrure à travers le pour régler la vitesse en fonction des différentes conditions trou.) routières.
- Page 48 Charger la batterie 10.3 Tourner la clef une fois dans le sens des aiguilles d’une montre pour que le cylindre de serrure sort du trou pour verrouiller la batterie. (La batterie n’est pas activée dans cet 12. ouvrir le couvercle et brancher le chargeur dans la prise état-là) de la batterie.
-
Page 49: Précautions
à temps lorsque la batterie est pleine montre. d’énergie (l’indicateur LED devient vert). 7.le chargeur que vous avez utilisé est fourni par la société JOBOBIKE et qu'il ne peut être utilisé que pour charger le vélo électrique ou la batterie correspondant. - Page 50 Freins 8.La batterie et le chargeur doivent être réparés par des professionnels. 9.Le chargeur doit être fonctionné à la tension et à la 1.Les freins doivent être en bon état. fréquence nominales. 2.Faire attention à l'état d'usure des plaquettes de frein. Si 10.
-
Page 51: Définition Du Code D'erreur
Faire du vélo Définition du code d’erreur 1.Nous ne vous recommandons pas de faire du vélo Code d’erreur Définition électrique par temps de pluie ou de neige en raison des conditions routières glissantes. Anomalie actuelle 2.Veuillez respecter les règles de circulation lorsque vous roulez. -
Page 52: Conditions De Garantie
Web et décrire vos problèmes en détail. Nous vous aiderons par téléphone ou par e-mail. Dans les pays couverts par la loi de l'UE, JOBOBIKE est Vidéos d’assemblage responsable des défauts matériels (la responsabilité pour vice matériel n'inclut pas l'usure normale) dans un délai... -
Page 53: Paramètres Principaux Du Vélo Électrique
Main parameters of the E-bike Mode:SAM E-bike Protection contre les surintensités:15A Paramètre du moteur:XF-C-2036V250W Distance de conduire:jusqu’à 60 km Dimension totale : 163cm x 63cm x 120cm Le temps de charge:5heures Taille de la roue:20 pouces Contrôleur:36V250W Poids: 23.6kg Charge utile:120kg Méthode de freinage:Frein à... -
Page 54: Informacje Ogólne
Jeżeli po zapoznaniu się z instrukcją nadal potrzebujesz pomocy, odwiedź naszą stronę internetową, bądź skontaktuj się z nami mailowo lub telefonicznie. Sam to rower elektryczny z silnikiem o mocy 250W. Rower powinien być użytkowany zgodnie z prawem obowiązującym w Twoim kraju. -
Page 56: Instrukcja Montażu
Instrukcja montażu Krok 1 Rozpakuj rower Otwórz karton i wyjmij z niego wszystkie części. Uważaj, aby nie zgubić nawet najmniejszego elementu. W zestawie znajdują się: Rama roweru Ładowarka Saszetka z narzędziami Kluczyki Krok 3 Rozłóż stopkę roweru i postaw go Siodełko Instrukcja Krok 2 Rozłóż... - Page 57 Krok 4 Podnieś kierownicę Podnieś kierownicę i zablokuj za pomocą dźwigni. Zabezpiecz dźwignię plastikową obręczą. Krok 6 Ustaw wysokość siodełka Ustaw siodełko na odpowiedniej wysokości. W razie potrzeby, za pomocą śruby, zwiększ napięcie zacisku tak, aby był wyczuwalny opór przy ułożeniu dźwigni równolegle do śruby, ale nie dokręcaj zbyt mocno.
- Page 58 Krok 7 Rozłóż pedały Rozłóż pedały w sposób ukazany na zdjęciu. Wentyl Schradera NOTICE: Both wheels must be properly settled before operating your bike. If you are not able to assemble your bike, please contact us or look for help from a certified, reputable local bike mechanic.
-
Page 59: Instrukcja Użytkowania
Instrukcja użytkowania Przytrzymaj przycisk “+”, aby włączyć oświetlenie Przytrzymaj przyciski Przycisk WŁ./WYŁ.; “+” I “-“, aby przejść potwierdzenie funkcji menu ustawień Przytrzymaj przycisk “-“, aby uruchomić tryb wspomagania 1.Przytrzymaj przycisk ON/OFF przez około 3 sekundy, aby włączyć lub wyłączyć rower elektryczny. 2.E-bike wyłączy się... - Page 60 function area distribution: Wskaźnik włączenia Moc baterii oświetlenia Moc silnika Wskaźnik prędkości Opcja wyświetlania Przejechany dystans informacjimode Tryb przypomnienia Poziom wpsomagania/ Wskaźnik wspomagania pchania 4.Wciśnij przycisk “+” na około 2 sekundy, aby włączyć oświetlenie (jasność podświetlenia wyświetlacza automatycznie się zmniejszy).Wciśnij przycisk “+” na około 2 sekundy, aby wyłączyć oświetlenie (jasność podświetlenia wyświetlacza automatycznie się...
- Page 61 6.Wciśnij przycisk “-” na około 2 sekundy, aby uruchomić wspomaganie pchania. Na wyświetlaczu ukaże się ikona Wspomaganie pchania wyłączy się, gdy tylko zwolnisz przycisk “-”. Prędkość wspomagania pchania to około 6 km/h.
- Page 62 Tryb wspomagania pchania Poziom wspomagania “1” 7. Wciśnij przycisk "+", aby zwiększyć poziom wspomagania. Wciśnij przycisk " - ", aby zmniejszyć poziom wspomagania. Poziom wspomagania “0”:Silnik nie dostarcza mocy. Poziom wspomagania “1”:Standardowy tryb wspomagania. Poziom wspomagania “5”:Maksymalny tryb wspomagania.
- Page 63 "-" Dzwonek "+" 8.Wciśnij dźwignię hamulca, by zwolnić lub zahamować. 9.Zmieniaj biegi przerzutki za pomocą przycisku“+ ” i 10.3 Przekręć kluczyk zgodnie z ruchem wskazówek wajchy“-”, aby dostosować ustawienia do warunków jazdy. zegara, aby zablokować baterie w ramie. Zamontuj baterię: 10.1 Wciśnij lekko kluczyk w zamku i przekręć...
- Page 64 Naładuj baterię: 10.4 Przekręć kluczyk ponownie zgodnie z ruchem wskazówek zegara, aby włączyć baterię(możliwe jest teraz włączenie wskaźników led). 12. Odsuń zasłonkę i podłącz ładowarkę. Uwaga: Przekręć kluczyk w stronę przeciwną do ruchu wskazówek zegara, aby wyłączyć baterię. Wyjmij baterię: 11.Wciśnij lekko kluczyk w zamku i przekręć...
-
Page 65: Środki Ostrożności
14.2 Aby zmniejszyć amortyzację, prekręć pokrętło zgodnie z ruchem wskazówek zegara. 7.Upewnij się, że używaną przez Ciebie ładowarkę otrzymałeś od JOBOBIKE. Ładowarki mogą być używane tylko do pasujących do nich baterii rowerów elektrycznych. 8.Pamiętaj, że w razie potrzeby bateria i ładowarka są... - Page 66 Hamulce odpowiednim napięciu i częstotliwości prądu. 1 0 . J e ż e l i ł a d o wa r ka n a g r z e j e s i ę z by t m o c n o ( d o temperatury wyższej niż...
-
Page 67: Error Code Definition
Kody błędów Jazda 1.Sugerujemy unikać jazdy rowerem elektrycznym podczas Kody błędów Definicja intensywnych opadów deszczu lub śniegu. 2.Prosimy o przestrzeganie zasad ruchu drogowego. Błąd natężenia prądu 3.Nie jeździj rowerem elektrycznym, jeżeli nie jesteś w dobrym stanie zdrowia i nie pożyczaj go osobom, które Bład manetki nie są... -
Page 68: Gwarancja
Wszystkie filmy z instrukcjami montażu rowerów dostępne są na oficjalnym kanale JOBOBIKE w serwisie YouTube. Jeżeli masz pytania, skontaktuj się z naszym wsparciem technicznym poprzez www.jobobike.pl lub pod adresem mailowym support@jobobike.pl. -
Page 69: Specyfikacja
Specyfikacja Model:SAM E-bike Zasięg:do 80 km Silnik:XF-C-2036V250W Czas ładowania:5godzin Całkowity wymiar:163cm x 63cm x 120cm Kontroler:36V250W Rozmiar koła:20 cali Waga:23.6kg Ładowność:120kg Hamulce:Mechaniczne hamulce tarczowe Wyświetlacz:KD286 Limit prędkości:25km/h Prędkość w trybie wspomagania pchania:6km/h Przerzutka:7-biegowa Ilość poziomów wspomagania:5 poziomów Pojemność baterii:36V13Ah Ładowarka:AC110V-240V DC36V-3.0A... -
Page 70: Terms And Conditions
Terms and Conditions I. General provisions The Seller informs that taking advantage of Services provided electronically may be associated with a risk to any user of the Internet of introducing a malware on a computer system or obtaining and modifying Customers' data by unauthorized persons. - Page 71 shall be terminated when the opinion is posted. 6 . T h e c o m m e n t s s h o u l d b e c o m p o s e d i n a c l e a r a n d understandable manner, and moreover they must not breach any applicable provisions of law, including third party rights –...
-
Page 72: Delivery
III. Delivery IV. Complaints for the goods under warranty 1.The Goods shall be delivered to the address indicated by the Customer when placing the Order. 1.The Seller undertakes to deliver goods free from defects. 2.The Customer may choose the delivery forms of ordered Goods: 2.The seller shall be liable towards the customer who is a a.by a courier company, consumer, under warranty for defects in accordance with the... -
Page 73: Disclaimer
V. Disclaimer 6. If you notice any incorrect information, please kindly suggest the website to modify or delete it. The website will modify or delete any incorrect information timely. Since the revised information has In order to better serve the users, JOBO makes the following not been further verified, it is for reference only. - Page 74 Website: www.jobobike.eu E-mail: service@jobobike.eu...
Need help?
Do you have a question about the SAM and is the answer not in the manual?
Questions and answers