Table of Contents
Advertisement
Quick Links
Advertisement
Table of Contents

Subscribe to Our Youtube Channel
Related Manuals for DREAMS Windsor


Summary of Contents for DREAMS Windsor
- Page 1 Windsor Bedstead 1 hour approx Two person assembly time assembly MK1 220324...
-
Page 2: Assembly Tips
Thank you Hello, thanks for choosing to purchase your bed from Dreams - you're now on your way to creating a functional and fabulous room. Before you begin building your furniture, please take a moment to read through the instructions and make sure that you've got all the relevant parts listed on the following pages. -
Page 3: Parts List
* These items are supplied separately but only when the upgraded slat-frame system is selected at time of purchase*. The legs (H&I) are supplied packed inside the slat-frame carton itself. 0 10 1 Windsor bedstead - Assembly Guide - Page 3... -
Page 4: Tools Required
(H&I) Sprung slat frame Sprung slat frame to the sprung frame (G). centre support leg outer support legs Tools required Please check you have all these below Tape measure Cross head screwdriver Windsor bedstead - Assembly Guide - Page 4... - Page 5 Bed assembly - use pack 'A' 10mm & & & 100% Make certain the bed is squared up as shown in the diagram then tighten all bed assembly bolts 100%. Windsor bedstead - Assembly Guide - Page 5...
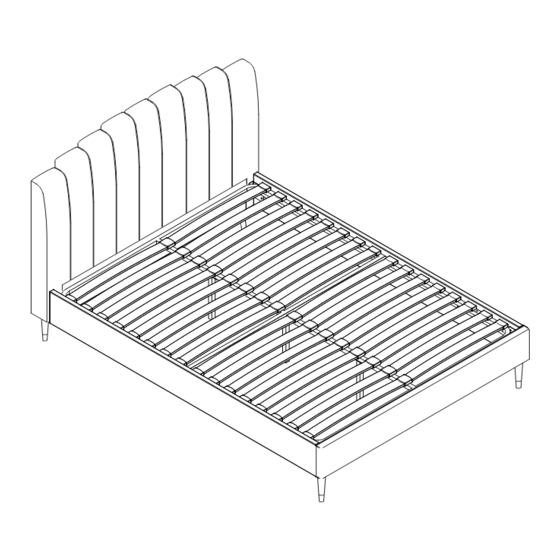
- Page 6 (f) loosely fix one slat in the two holes next to the headboard. Carefully roll out the slats to halfway down the bed aligning with the holes in the centre of metal support rails. Windsor bedstead - Assembly Guide - Page 6...
- Page 7 Adjustable Foot Roll out the rest of the wooden slats and fix with the last two bolt sets, arrange all the slats then fully tighten using Allen key (h) . Windsor bedstead - Assembly Guide - Page 7...
- Page 8 Open the sprung slat frame and lay the frame face down on the working surface. Fit the support legs (I & H) to the positions shown, securing with the bolts (p). Fully tighten using Allen key (h). Windsor bedstead - Assembly Guide - Page 8...
- Page 9 (e, v & g) and sleeve- nuts (f). When all in place tighten using Allen key (h). Finally, please check carefully that all bolts are fully tightened before the bed is used. Windsor bedstead - Assembly Guide - Page 9...
-
Page 10: Care And Maintenance
Metal tends to be more resilient to everyday wear and tear. We recommend to gently dust your metal furniture and keep it dry to maintain its look. Thank you for shopping with us - we hope you have a great night's sleep. Windsor bedstead - Care and maintenance - Page 10... - Page 11 Little dreamers Keep the little ones entertained while you assemble your new purchase.
Need help?
Do you have a question about the Windsor and is the answer not in the manual?
Questions and answers