
Related Manuals for Genmitsu 3018-PROVer


Summary of Contents for Genmitsu 3018-PROVer
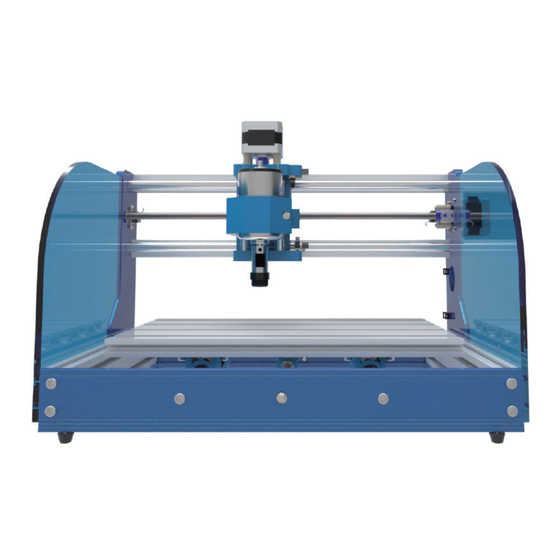
- Page 1 Genmitsu 日 本 語 組 み 立 て 説 明 書 Contents / コンテンツ CNC Router 3018-PROVer English 01 - 40 CNC ルーター 3018-PROVer 日 本 語 41 - 80 V1.3 Mar. 2022...
-
Page 2: Table Of Contents
Contents ............................Welcome ............................Disclaimer ........................... Part 1 - Unboxing ....................Part 2 - Mechanical installation ..........................Part 3 - Wiring ......................... Part 4 - Software Setup ....................Part 5 - Using Offline Controller ......................Part 6 - Troubleshooting... -
Page 3: Welcome
Welcome Thank you for purchasing the Genmitsu 3018-PROVer CNC Router from SainSmart. Included in your package will be a Micro SD card. On the Micro SD Card, you will find: These files can also be downloaded from SainSmart Online Resource Center https://docs.sainsmart.com/3018-prover... -
Page 4: Disclaimer
Disclaimer this manual. connected with the assembly, handling, storage, use, or disposal of the product. Please be careful when using your CNC machine. This machine is an electrical device with moving parts and dangerous areas. power supply; it may cause malfunctions or damage to the machine. -
Page 5: Part 1 - Unboxing
Part 1 - Unboxing support@sainsmart.com. Offline Controller Power Supply... - Page 6 Offline Controller Cable Spindle Cable, 35cm 17# ER11 Schraubenschlüssel 13# ER11 Schraubenschlüssel...
- Page 7 Spacer Template Tool Genmitsu CNC Router 3018-PROVer V1.2 May 2020 MicroSD Card Cable Protector MicroSD Card Reader Spacer...
- Page 8 Optional Accessories (Not Included) Consider following optional upgrades or accessories to make your CNC experience better! You can find them on www.sainsmart.com. Save 10% with discount code PROVER10 GS-775MR 24V 20,000 5.5W Laser Module 3040 Y-Axis Extension Kit CNC MDF Spoilboard RPM Spindle with Collet Acrylic Sheet for CNC, 6Pcs Micro Limit Switches...
-
Page 9: Part 2 - Mechanical Installation
Part 2 - Mechanical installation 2.1 Preparing your base assembly What you will need Step 1: from the bearing mount. Step 2: screw mount as shown in the picture. Step 3: to secure the lead screw mount. - Page 10 2.2 Installing limit switches & cable holders to Y-Axis What you will need Step 1: Step 2: M3 5mm...
- Page 11 Step 3: Install one limit switch on each side by tightening the M3 5mm screws.
- Page 12 2.3 Installing Rubber feet to Y-Axis Base Assembly What you will need Step 1:...
- Page 13 2.4 Installing Limit Switches to X-Axis/Z-Axis Gantry What you will need...
- Page 14 Step 1: Step 2: Install four cable holders on the same side of the gantry. Two on the inside and two on the outside. Step 3: this limit switch.
- Page 15 2.5 Install T-Slot Tension Nuts What you will need Allen Wrench, 4mm Spacer Template Tool Step 1: assembly so that the step motor is facing your right hand side. Step 2: Nuts on each side. Position near the back of the machine (Stepper Step 3: Template into the slot and space out the T-slot nuts as shown in...
- Page 16 2.6 Install Y-Axis Base to X / Z Axis Gantry What you will need Spacer Template Tool Step 1: Step 2:...
- Page 17 Step 3: until you finish the other side. Step 4: screws.
- Page 18 2.7 Install the Spindle What you will need Step 1: Then screw the the collet collar back to the spindle.
- Page 19 Step 2: Step 3: Step 4:...
- Page 20 2.8 Install the Acrylic Baffles What you will need right baffle first, by placing the baffle along side the frame to fit the shape. Peel off the Step 1: Insert the M5 bolts from the outside baffle, the M5 bolt should insert from the left from the other side using your hand.
- Page 21 Step 3: Now tighten the M5 bolts to secure the baffle. Repeat the steps to install the other side.
- Page 22 Congratulations! Now your machine frame is fully assembled!
-
Page 23: Part 3 - Wiring
Part 3 - Wiring PCB Board Diagram Spindle motor motor motor 0-5V spindle controller speed Power control signal supply Offline controller... - Page 24 PCB Label Description Description Mark Description Mark -LAS+ 24VDC -PWM+ GND 0-5V 0-5V spindle controller speed control signal Power ON Spindle Spindle motor interface Offline controller (Note: Only Offline controller ESTOP Z-Probe USB.PWR XLIM+ 24V.PWR XLIM- X limit switch - Status YLIM+ SPINDLE...
- Page 25 Cable Management Labeling: Each cable is labeled at one end according to its intended use. The labeling corresponds to the labeling found on the control module. Cable routing: Most cables are rigid; they do not move when the CNC router is in operation. They must be routed so that they are not in the way of any moving part during operation.
- Page 26 3.1 Install the Main Control Board What you will need Step 1: Step 2: Position the frame so that the back of the machine is on the control board. Put on the M3 T-Slot nuts trough nuts onto the top and bottom beams on the frame, like shown nut loose and in horizontal position so that they can in the figure below.
- Page 27 Step 3: shown below. Step 4: 30mm...
- Page 28 3.2 Connecting X-Axis Limit Switches What you will need Position the machine so that the main control board is facing you. Step 1: stepper...
- Page 29 Step 2: along the top channel of the bottom beam, then loop around the control board. Plug the other end of the cable to the control...
- Page 30 Step 3:...
- Page 31 3.3 Connecting Y-Axis Limit Switches What you will need Step 1: Step 2:...
- Page 32 Step 3: Connect both cables to the corresponding sockets on the control board Step 4:...
- Page 33 3.4 Connecting Z-Axis Limit Switches What you will need 34cm 40cm Step 1: Connect the other end to main control board. Step 2: Connect the other end to main control board.
- Page 34 3.5 Connecting the Stepper Motor cables What you will need Step 1: stepper motor is on the bottom of the machine in the...
- Page 35 Step 2: Connect each stepper motor with the labeled cable to the main control board. Note that the end of 4-pin plug goes to the main board.
- Page 36 3.6 Connecting the Spindle cables What you will need Spindle Cable, 35cm Step 1: Connect spindle cable to the top of the Step 2: Connect the other end of the spindle cable to the main control board.
- Page 37 3.7 Install the Emergency Stop button What you will need with Cable Step 1: back side of the button. Step 2: into the pre-cut hole underneath Step 3: pointy corners facing the metal tighten down.
- Page 38 Step 4: Connect the cable to the main control board. See position show below. Usage: Pushing the button will trigger emergency stop. The button will stay engaged once pushed. The button can only released when twisted clockwise. This prevents double pushing the button from releasing the trigger.
- Page 39 Final Checks Lubricate dust sticking to the rods. the axes Note: Part of the normal maintenance is to periodically clean the threaded rods and re-lubricate as needed. Check snagging on any cables. Cable routing Emergency This is a normally closed switch stop button by turning the button in the direction of the arrows and letting it spring out.
- Page 40 A Brief Glossary Glossary Stock Geometric Code, the language of the commands that the router understands, ca be used for specific G-Code Stepper Motor ER11 Collet Homing Cycle Origin Jogging...
-
Page 41: Part 4 - Software Setup
Part 4 - Software Setup https://docs.sainsmart.com/3018-prover Part 5 - Using Offline Controller https://docs.sainsmart.com/3018-prover-offline... -
Page 42: Part 6 - Troubleshooting
Part 6 - Troubleshooting Symptom Check Candle shows a Serial port error message in the Console window The Offline Controller is not connected. Candle can communicate with the Candle The Stepper motor wiring is correct. The Stepper motors are connected to the correct motherboard ports. The cable connections for the limit switch. - Page 43 コンテンツ はじめに ............................免責事項 ............................第一部 パッケージリスト ......................第二部 組み立て説明 ........................第三部 配線 ........................... 第四部 ソフトウエアの設定方法 ....................第五部 オフラインの使用方法 ..................... 第六部 トラブルシューティング ....................
-
Page 44: はじめに
はじめに SainSmartにてGenmitsu 3018-PROVer CNC ルーターをご購入いただきありがとうございました。 パッケージに含まれているSDカードに以下のファイルがあります。 ● 組み立て説明動画 ● マニュアルのPDFバージョン ● Windows USB ドライバー ● Windows用GrblControl/Candle ソフトウエア ● サンプル・ファイル ● オフライン コントローラ ファイル これらのファイルもSainSmartオンラインリソースセンターにダウンロードできます。 https://docs.sainsmart.com/3018-prover 間違いを避けるために、3018-PROVerを組み立てる前に、Micro SDカード中の組み立て動画をご覧になってください。 テクニカルサポートが必要な場合、メールでご連絡ください。jp@sainsmart.com SainSmartのFacebookグループを参加し、ヘルプとサポートを得られます。 (SainSmart Genmitsu CNC ユーザーグループ:https://www.facebook.com/groups/SainSmart.GenmitsuCNC) グループを参加 しましょう!... -
Page 45: 免責事項
免責事項 当、卓上CNCマシンを操作する人は、マニュアルをご覧になって内容を十分に理解してください。間違った操作をすると人身傷害、 及びCNCマシンの破損など悪い結果になる恐れがあります。 SainSmartは、Genmitsu CNCマシンを組み立てる条件を制御したり、正しく完成したかどうかを確認したりすることはできません。 当社は組み立て、持ち運び、保管、使用、または廃棄に起因または関連する損失、負傷、損害、費用について、何らかの責任を負わ ないことを明確的に声明します。このマニュアルの情報は、いかなる正確性に関する明示または黙示の保証を提供されていません。 CNCマシンを使用する際にご注意ください。この機械は、可動部品と危険領域を備えた電気機器です。 ● Genmitsu CNCマシンは屋内専用です。 ● 本機に精通した経験豊富な大人が監督されない限り、本機を操作するには18歳以上である必要があります。 ● 適切な個人用保護具(安全メガネなど)を着用してください。 ● CNCマシンは安定した場所に置いてください。 ● SainSmart Genmitsu CNCマシンには、230VACまたは110VACの切り替え可能な電源が付属しています。機械の故障や破損を引 き起こすことを防ぐために、ほかの電源を使用しないでください。 ● 緊急停止ボタンはいつでも操作できるかどうかを確認ください。 ● 電源や電気部品は絶対に分解しないでください。さもないと、保証が無効になります。 ● 重傷を負う可能性があるため、機械を運転している際に、機械のスピンドルに触れたり、作業領域の近くに体のいかなる部分も近 づけないようにしてください。 ● CNCマシンが動作していないときでも、大人が監視していない場合は、子供にCNCマシンを操作させないでください。けがをす る恐れがあります。 ● 運転中はCNCマシンから離れないでください。 ● CNCマシンが換気の良い場所にあることを確認してください。 材料によっては、操作中に煙や炎が出る場合があります。... -
Page 46: 第一部 - パッケージリスト
第一部 - パッケージリスト 以下の部品が、すべて含まれているかどうかを確認してください。 欠品やご不明な点がございましたら、jp@sainsmart.com までお問い合わせください。 X-軸/Z-軸 ガントリー Y-軸ベースアセンブリ ER11付きスピンドル ER11 1/8" コレット (2) アクリル バッフル オフライン コントローラ コントロールボード USB A-to-B ケーブル 電源 電源アダプタ ケーブル-JP 電源アダプタケーブル-EU (4)リミットスイッチ... - Page 47 オフラインコント ステッピングモータ ケーブル、X-軸, 17cm リミットスイッチ ケーブル X LIM+、15cm ローラケーブル ステッピングモータ ケーブル、Y-軸, 52cm リミットスイッチ ケーブル X LIM-、53cm ステッピングモータ ケーブル、Z-軸, 28cm リミットスイッチ ケーブル Y LIM+、30cm リミットスイッチ ケーブル Y LIM-、60cm リミットスイッチ ケーブル Z LIM+、34cm リミットスイッチ ケーブル Z LIM-、40cm スピンドルケー 緊急停止ボタン クランプ セット Z-プローブ キット ブル、35cm (ケーブル付き) 六角棒レンチセット (10) 20° V ビット (2) レンチ ドライバー 2、 2.5、 3、 4、 5mm...
- Page 48 シーリングストリップ、Y-軸、27cm スペーサ テンプレー (30) ケーブルタイ (10) ケーブルホルダー シーリングストリップ、X-軸、34cm Genmitsu CNC Router 3018-PROVer V1.2 May 2020 ケーブル保護具 MicroSD カード MicroSDカードリーダー マニュアル(本書) (4) ゴム足 (2) ABS (8) M5 10mm ボルト (2) M3 20mm ねじ (4) M3 20mm T-スロット ナット スペーサ (12) M5 14mm ボルト (16) M3 5mm ねじ (8) M5 20mm T-スロット ナット (2) M6 16mm ボルト (4) M3 8mm ねじ...
- Page 49 追加できるアクセサリ (含まれていません) 下記のアクセサリをチェックし、CNCマシンをアップグレードしましょう! jp.sainsmart.com で下記の製品を探せます。コードを入力すると10%割引になります! ディスカウントコード:PROVER10JP 5.5W レーザー 透明アクリルシート CNC ルーター ビット CNC スピンドルモーター モジュール 4ピース 詳細については、QRコードをスキャンしてください...
-
Page 50: 第二部 組み立て説明
第二部 - 組み立て説明 2.1 ベースアセンブリを準備します 必要な部品 六角棒レンチセット、 Y-軸ベースアセンブリ (2) M6 16mm ボルト ステップ 1: 組み立て済のY-軸ベースア センブリを裏返し、ケーブルタイをベ アリングマウントから取り外します。 ステップ 2: 写真に示すように、アルミ ニウム製プレートの中央スロットを青 えます。 ステップ 3: M6 16mmネジを締めて、 リードスクリューマウントを固定します。... - Page 51 2.2 リミットスイチとY−軸のケーブルホルダーを取り付けます 必要な部品 (10) M3 5mm ネジ (6) ケーブルホルダー (2) リミットスイッチ ドライバー Y-軸ベースアセンブリ ステップ 1: フレームの内側にある4つのリミットスイッチの取り付け窪みを見つけます。 以下に示すように、各所に1つを取り付けます。 ステップ 2: M3 5mmネジを使用して、リミットスイッチのそばにある取り付け穴にケーブルホルダーを取り付けます。フレームの前後内側 に2つのケーブルホルダーを取り付けます(フレームの内側を向いている)。フレームの外側(ステッピングモーター側)に2つ取り付けます。...
- Page 52 ステップ 3: M3 5mmのネジで、フレームの内側前後に1つずつのリミットスイッチを取り付けます。...
- Page 53 2.3 Y-軸 ベースアセンブリにゴム足を組み立てます 必要な部品 六角棒 レンチ (4) ゴム足 Y-軸ベースアセンブリ ステップ 1: 4つの組み立て穴を見つけ、六角レンチで各コーナーにゴム足を取り付けます。...
- Page 54 2.4 X-軸/Z-軸 ガントリーのリミットスイッチを取り付けます 必要な部品 (2) リミット (3) ケーブル (2) ABS ドライバー スイッチ ホルダー スペーサ X-軸/Z-軸 ガントリー (6) M3 5mm ネジ (2) M3 20mm ネジ...
- Page 55 ステップ 1: ステッピングモーター側のリミットスイッチを取り付けます。必要な部品は白いABSスペーサ2つ、M3 20mmネジです。次の図に 示すように、X-軸/Z-軸 ガントリーの組み立て穴を見つけ、M3 20mmネジでリミットスイッチを固定してから、ABSスペーサをガントリーに固 定します。(ヒント:リミットスイッチを取り付ける時、モーターが邪魔にならないようにリードスクリューを回転させて、移動させておくと 作業がしやすくなります。) ステップ 2: ガントリーの同じ側に4つのケーブルホルダーを取り付けます。内側に2つ、外側に2つです。 ステップ 3: 次に、M3 5mmネジで残りのリミットスイッチを反 対側に取り付けます。 これらのリミットスイッチにはスペーサ ーは必要ありません。...
- Page 56 2.5 T-スロット ナットを取り付けます 必要な部品 六角棒レンチ、4mm スペーサ テンプレートツール Y-軸ベースアセンブリ ステップ 1: ステッピングモーター を手前右側に向けて、組み立て済の Y-軸ベースアセンブリを置きます。 ステップ 2: 両側にT-スロットナット を挿入し、機械の背面の近く(ステ ッピングモーター側)に仮置きしま す。 ステップ 3: 写真に示すように、ア クリルのスペーサーテンプレート をスロットに挿入し、仮置きした Tスロットナットの位置を決めます。...
- Page 57 2.6 Y-軸ベースアセンブリをX-軸/Z-軸 ガントリーに取り付けます 必要な部品 (12) M5 14mm 六角棒 レンチセ X-軸/Z-軸 スペーサ テンプレート Y-軸ベースアセンブリ ボルト ット、4mm ガントリー ステップ 1: 写真に示すように、X軸/ Z軸ガントリーをY軸ベースアセンブリの上に仮置きします。 ステップ 2: スペーサーテンプレートを床面に置き、その上にガントリーを載せます。ガントリーの側面にある6つの組み立て穴 をチェックし、全てが[2.5]で置いたナットと一致していることを確認します。...
- Page 58 ステップ 3: (6)M5 14mmネジでTスロットナットに仮止めします。 ※ ステップ 4 が完了するまで、ネジは緩めておきます。 ステップ 4: 反対側でこのプロセスを繰り返します。 その後、 すべてのM5 14mmネジを締めます。 M5 14mm ボルト x 12...
- Page 59 2.7 スピンドルを取り付けます 必要な部品 六角棒 レンチセット、 ER11付きスピンドル ER11 1/8" コレット ステップ 1: スピンドルから黒いコレットカラーを外し、コレットを挿入します。コレットを押して所定の位置にロックされる ことを確認します。次に、コレットカラーをスピンドルに戻します。...
- Page 60 ステップ 2: スピンドルホルダーのネジを緩めます。 ステップ 3: スピンドルの外部スリーブが完全に挿入されるまで、スピンドルをホルダーにスライドさせます。 ステップ 4: 六角ネジを締めてスピンドルを固定します。 ホルダーを損傷する可能性があるため、ネジを締めすぎないでください。...
- Page 61 2.8 アクリル バッフルを取り付けます 必要な部品 (8) M5 10mm (8) M5 20mm 六角棒 レンチセット、 (2) アクリル バッフル ボルト T-スロットナット フレームの側面に沿ってバッフルを置いてみ て、左バッフルと右バッフルを区別します。 バッフルから保護紙をはがします。 ステップ 1: M5 10mmボルトをバッフルの外 側から挿入します(たとえば、左バッフルを 取り付ける場合、ボルトは左側から挿入する 必要があります)。次に、Tスロットナット を反対側から手でボルトに取り付けます。 1回転だけにし、 緩いままにしております。 そして、Tスロットナットの水平を維持して おきます。 ステップ 2: Tスロットナットを機械の側面 ます。...
- Page 62 ステップ 3: 次に、M5 10mmボルトを締めてバッフルを固定します。 手順を繰り返して、反対側も取り付けます。...
- Page 63 おめでとうございます。これで、マシンフレームが完成しました。 それでは、配線を始めましょう!...
-
Page 64: 第三部 配線
第三部 - 配線 PCB ボード図 X 軸 Y 軸 Z 軸 スピンドル モーター モーター モーター 0-5V スピンドル コントローラー 速度制御信号 電源 24V 5A PWM 信号出力 USB 接続 レーザーモジュール 緊急停止 Z-プロッブ X Y Z 軸 リミット/ホーム スイッチ オフラインコントローラー... - Page 65 PCB ラベルの説明 マーク 説 明 マーク 説 明 USB インターフェース -LAS+ レーザー モジュール インターフェース 24VDC 24V 電源インターフェース -PWM+ PWM 信号出力インターフェース 電源オン GND 0-5V 0-5V スピンドル コントローラー速度制御信号 電源オフ Spindle スピンドル モーター インターフェース オフライン コントローラー(注:付属 X 軸モーター インターフェース Offline controller しているオフラインコントローラーに Y 軸モーター インターフェース のみ接続ください。) ESTOP Z 軸モーター イン ターフェース 緊急停止スイッチ インターフェース Z-Probe USB.PWR USB 電源インジケータLED Z ゼロ ツール インターフェース XLIM+ 24V.PWR 24V電源インジケータLED X リミット スイッチ + XLIM- Status 通信 LED X リミット スイッチ - SPINDLE YLIM+ スピンドル ワーキング インジケータ LED Y リミット スイッチ +...
- Page 66 ケーブル管理 ラベル:各ケーブルの一端には、用途に応じてラベルが貼られています。これらのラベルは,コントロールモジュールに貼られて いるラベルと対応しています。 ケーブル配線:ほとんどのケーブルの生地は硬くて、CNCルーターが動作中に、長く伸ばすことができません。可動部の邪魔にな らないように配線する必要があります。CNCルーターが動作中に、スピンドル・モーター・ケーブル、Z軸リミットスイッチのケー ブル、およびZ軸ステップ・モーター・ケーブルが含まれる3セットのケーブルが動きます。X軸とZ軸が全可動域で移動できるよう に、3セットのケーブルが自由に動ける状態にしておく必要があります。 ケーブル保護:ケーブル保護装置は、1本または複数のケーブルに巻き付けるケーブル・スネークの形で提供されます。摩耗による 損傷からケーブルを保護するために、自由に動けるケーブルにそれを使用することを強くお勧めします。 ケーブルホルダー:ケーブルをホルダーの中央に通します。ケーブルタイをホルダーの穴に通し、ケーブルの上に巻き付けて締め 付けます。そして、ケーブルタイの突出末端を切り落とします。 ケーブル管理オプションについては、ビデオを参照してください。...
- Page 67 3.1 メイン コントロール ボードを取り付けます 必要な部品 (4) M3 20mm (4) M3 8mm ネジ コントロール ボード T-スロット ナット ステップ 1: コントロールボードの隅にある4つの取り付 ステップ 2: 機械の背面が手前になるようにフレームを配置します。 け穴を見つけます。M3 8mmボルトを穴に通してM3 T- 次の図に示すように、(4)M3 20mmT-スロットナットをフレームの スロットナットに挿します。 手順2でビームに挿入でき 上部と下部のビームに挿入してボードを取り付けます。 るように、1回転にし、 ナットを緩いままにして水平を 維持しておきます。...
- Page 68 ステップ 3: 下の図に示すように、ボードを水平にスライドし、ボードとマシンの左端の間に約30mmのスペースを空けます。 ステップ 4: すべてのM3 8mmボルトを締めて、ボードをフレームに固定します。 30mm...
- Page 69 3.2 X-軸リミットスイッチを接続します 必要な部品 リミットスイッチケーブル X LIM+、15cm リミットスイッチケーブル X LIM-、53cm シーリングストリップ、 (リミットスイッチケーブルの両端に黒いプラグがあります ) X-軸、34cm コントロールボードが手前になるように機械を配置します。 ステップ 1: リミットスイッチケーブルX-LIM(+)(+はステッピングモーターの近くにあります)の一端をステッピングモー ターの近くのX +リミットスイッチに接続し、他端をX-LIM(+)とマークされたソケットに接続します。 ※ コントロールボード下側に6つの白いソケットがあります。...
- Page 70 ステップ 2: リミットスイッチケーブルX-LIM(-)を右側のX-リミットスイッチに接続します。X-軸/Z-軸ガントリーのビームの みます。 ※ ビーム(梁)...
- Page 71 ステップ 3: シーリングストリップ(平らな面を外側に向け)でリミットスイッチケーブルX-LIM(-)をX-軸/Z-軸 ガントリーの ビームの上のチャネルに押し込みます。...
- Page 72 3.3 Y-軸リミットスイッチを接続します 必要な部品 リミットスイッチケーブル Y LIM+, 30cm シーリングストリップ、 リミットスイッチケーブル Y LIM-, 60cm Y-軸、27cm ステップ 1: リミットスイッチケーブルY-LIM(+)の一端をY +リミットスイッチ(ステッピングモーター側)に接続します。 ステップ 2: リミットスイッチケーブルY-LIM(-)の一端をY-リミットスイッチに接続します。...
- Page 73 ステップ 3: 2つのYリミットスイッチケーブルをコントロールボードの対応するソケットに接続します。 ステップ 4: シーリングストリップ(平らな面を外側に向け)でY-リミットスイッチケーブルをY-軸ベースアセンブリのサイドビ ームの上のチャンネルに押し込みます。...
- Page 74 3.4 Z-軸リミットスイッチを接続します 必要な部品 リミットスイッチケーブル Z LIM-、34cm リミットスイッチケーブル Z LIM-、40cm ステップ 1: 短いリミットスイッチケ ーブルZ-LIM(+)を上部のZ +リミ ットスイッチ(ステッピングモータ ー側)に挿入します。他端をコント ロールボードの対応するソケットに 接続します。 ステップ 2: 長いリミットスイッチ ケーブルZ-LIM(-)を下部のZ-リ ミットスイッチに挿入します。 他端をメインコントロールボード に接続します。...
- Page 75 3.5 ステッピングモーターケーブルを接続します 必要な部品 ステッピングモーターケーブル、X-軸、17cm ステッピングモーターケーブル、Y-軸、52cm ステッピングモーターケーブル、Z-軸、28cm (ステッピングモーターケーブルは両端に白いプラグが付いているケーブルです) ステップ 1: 3つのステッピングモーターを確認し ます。 X軸ステッピングモーターはX-軸/Z-軸 ガ ントリーの側面、Z軸ステッピングモーターは前 面にあります。 Y軸ステッピングモーターは、 Y-軸ベースアセンブリの背面にあります。 ※ 下の写真を参照してください。...
- Page 76 ステップ 2: ラベルの付いたケーブルで各ステッピングモーターをコントロールボードに接続します。 ケーブルの端の4ピンプラグをコントロールボードに間違いのないよう注意して接続してください。...
- Page 77 3.6 スピンドルケーブルを接続します 必要な部品 スピンドルケーブル、 35cm ステップ 1: スピンドルケー ブルをスピンドルの上部の 端子のM +に赤を、M-に黒 を接続します。 ステップ 2: スピンドルケー ブルの他端をコントロール ボードに接続します。...
- Page 78 3.7 緊急停止ボタンを取り付けます 必要な部品 緊急停止ボタン、 ケーブル付き ステップ 1: ボタンの裏側にある黒 いプラスチックナットと四角いロ ックワッシャーを取り外します。 ステップ 2: X-軸/Z-軸 ガントリー のX軸ステッピングモーターの下 の取り付け穴に緊急ボタンを挿入 します。 右の写真を参照してく ださい。 ステップ 3: X-軸/Z-軸 ガントリー の内側に四角いロックワッシャー を先の尖った角を金属板側にして 取り付けます。次に黒いプラスチ ックナットを締めて緊急停止ボタ ンを固定します。...
- Page 79 ステップ 4: ケーブルをコントロールボードに接続します。 下の写真を参照してください。 使用方法: ボタンを押すと、緊急停止がトリガーされ、押されたままの状態を保ちます。 ボタンを時計回りに回したときにのみ、リリース することができます。これにより、ボタンを2回押すことによって、トリガーがリリースされるのを防いでいます。...
- Page 80 最終チェック すべてのネジ棒に注油します。ネジ棒にほこりが付着するのを防 ぐために、「ドライ」PTFEベースの潤滑剤※または同様のものを 軸に注油する 使用することをお勧めします。(※含まれていません) 注意: 定期的にネジ棒を清掃するとともに、必要に応じて再潤滑 する必要があります。 ・テーブルとそれに取り付けられたものが、ケーブルに引っ掛からずに自由に動くことができますか。 ケーブル配線を ・Z軸とスピンドルモーターを接続するケーブルがZ軸とX軸の動きに制限されずに自由に動けますか。 チェックする ・24V電源ケーブルとUSBケーブルのコントロールボードとの接続に無理はないですか。 このスイッチは通常時閉(NC)です。 電源をオンにする前にボタンを矢印の方向に回して、飛び出させ 緊急停止ボタン ておきます。 参考電圧 ステッピングモーターに流れる電流は事前に設定されており、調整は不要です。...
- Page 81 用語集 用語 彫刻材料を固定できるスロット付きのアルミニウムベースで、 Y軸で動きます。 テーブル ストック 彫刻材料をテーブルに固定します。 ルーターが理解するコマンドの言語であるG-Codeは、特定の目的で使用できます。 G-Code コマンドまたは何かを作成するための命令のファイル(通常は.nc)に結合されます。 ステッピング シングルステップまたはマイクロステップで回転するモーターです。非常に少ない量を正確に動かすこ モーター とができるため、軸を駆動するために使用されます。 スピンドルモーターのツールホルダーはER11タイプです。 ER11 コレット コレットはビットを固定するツールであり、ER11の下部にあるナットを締めて、ビットを固定します。 ホーミングサ ステッピングモーターを回転させて、すべての軸のリミットスイッチを探して、「ホーム」位置を定義 イクル します。 作業の開始位置の座標です。各Gコードファイルは原点を参考して作業を行います。多くの場合、原点 原点 は彫刻材料の左、前、上(X/Y/Z)に位置します。 ジョグコマンドは単一軸上で移動するようにマシンに指示します。普通は、スピンドルを作業の開始位 ジョギング 置に配置し、もしくは、他の所に移動するために使用されます。...
-
Page 82: 第四部 ソフトウエアの設定方法
第四部 - ソフ トウ ェア設定 SainSmartオンラインリソースセンターにアクセスし、CNC用のドライバーとソフトウェアをインストールしましょう。 https://docs.sainsmart.com/3018-prover 付属のMicro SD カードにもドライバーとソフトウェアがあります。 第五部 - オフラインコントロールを使用する https://docs.sainsmart.com/3018-prover-offline... -
Page 83: 第六部 トラブルシューティング
第六部 - ト ラブルシ ューティ ン マシンが順調に動作することを期待しています。もし、問題があったら、次の解決策を参照ください。 現 象 チェック USBケーブルが正しく挿入されているか。USBドライバーが正しくインストール Candleのコンソール・ウィンドウに されているか。正しいCOMポートとボーレート115200がCandleに設定されているか。 シリアルポートエラーメッセージが オフラインコントローラーが接続されているか。 表示される。 コントロールボードの電源スイッチがオンになっているか。 Candleはルーターと通信できるが、 24V外部電源が正しく接続されているか。 動かない。 ルーターがCandleにまったく応答 緊急停止ボタンはリリースされているか。 しない。 ステッピングモーターの配線は正しいか。 軸が動かない。 ステッピングモーターは正しいコントロールボードポートに接続されているか。 間違った軸が動く。 リミットスイッチケーブルの接続は正しいか。 リミットスイッチが機能しない。 スピンドルモーターケーブルの接続は正しいか。 スピンドルモーターが動かない。 スピンドルモーターは動くが、LEDが スピンドルモーターケーブルの赤線はスピンドルモーターのM +に、黒線はM-に 点灯しない。 接続されているか。 リミットスイッチのLEDが点灯している。 軸の端にスピンドルが近すぎていないか。 ホーミングサイクルが失敗する。 リミットスイッチの接続と配線は正しいか。 Z-Probeとビット間は導通(電)できているか。 Z-プローブが失敗する。 Z-Probeとコントロールボードとの接続は正しいか。 Zプローブを動作した後、ビットの先端が... - Page 84 Copyright © 2022 by SainSmart 著作権 © 2022 SainSmart All rights reserved. This manual or any portion thereof may not be reproduced or used in any manner whatsoever without the written permission of the publisher, except for the use of brief quotations embodied in critical reviews and certain other noncommercial uses permitted by copyright law.
- Page 85 Genmitsu Desktop CNC & Laser www.sainsmart.com support@sainsmart.com Vastmind LLC, 5892 Losee Rd Ste. 132, N. Las Vegas, NV 89081...
Need help?
Do you have a question about the 3018-PROVer and is the answer not in the manual?
Questions and answers